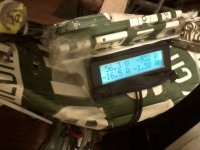
2WD Semi-Recumbent Recycled-Parts Cargo eBike: "CrazyBike2"

No kickstand, at least not yet. Even the heaviest-duty one I managed to build before didnt' hold up very long under the loads I put this thing thru, breaking at the hinge point. :( It's also a lot harder to deal with a kickstand than just to lean it on the pods, especially if on a bad day I'm trying to stand with a cane and hold the bike up and try to put the stand down all at the same time. ;)


I've considered a few ways of making one that might work out better, and could even be used as a built-in workstand, including taking the legs off a walker and putting htem on the corners of the pods, so that I could push the little spring-buttons on the legs and latch them into the right heights to hold the wheel off the ground for working on it, or else just hold the bike upright for cargo loading. Somehting like the one Li-ghtcycle built on his bike (dont' have a link to the thread, though).

Problem with it is that to use it I'd almost certainly have to get down and sit on the ground beside the bike to push the spring-buttons and hold the bike at the same time, as I am not always stable enough to do that while trying to stand bent over. As the ground is often either very hot or messy (oil, sticky stuff, etc) where I must park, it is not very desirable...of course I could carry a little mat to sit on while I do it, but that's one more thing to always carry around and set up, that I don't really wanna do. I might, anyway, eventually.


Anyhow, I probably wouldn't do that on this version, anyway, just cuz I am trying to avoid doing any more work on it, and save that time/effort/parts for the new one, which is in design stage over here:
http://www.endless-sphere.com/forums/viewtopic.php?f=28&t=31255&p=889806#p889806


As for antproofing it, well, as long as I keep the boxes clean it'll be fine. Just ahve to remember to check them everytime I carry any foodstuffs in them. (I already try not to park where there are ants, but sometimes you don't know till after you've made enough vibrations/etc to cause them to come out of the pavement cracks, as there are no other obvious signs of their presence).


The best antproofing would be full weatherproofing, but that would require fully sealing up the boxes, including getting locks back on them to keep the lids fully closed. More work than I want to do on this version. (I actually *had* them fully sealed up except for the hinge area, with thick clear packing tape over all the joints inside and out, and on the styrofoam insulation, etc., but that tape has degraded over the several months since installation, and has holes in it and places it's peeled away as the heat destroyed the adhesive. I could jsut redo that, but would rather save that work for hte new version).


The speedo problem returned a couple of days ago when i hit a pothole I didn't see in a puddle (leakage from broken sprinklers on someone's lawn). Didn't hurt anything else, but took a while to get it to reliably read speed again. Is very very very picky about perfect alignment of magnet and reed. :(


Also, problem about increased Wh/mile wasn't the tire inflation, as I never got around to airing them up--but it decreased when the weather changed and became cooler, and less windy. Now today it is back up again, as are the winds. Mostly it is crosswinds that seem to cause the problem, actually even more than headwinds. I assume it si because of hte plastic covering the frame, but I dont' really know. If it werent' so much work to put on in hte first place, I'd take the plastic off to find out.
 
Oh, also, while on ht eway to work the other day, a 'bent rider crossed the driveway I was about to exit, with one car between me and him, so I couldn't clearly see the whole bike. But it was longer than CrazyBike2, and was a narrow delta trike. I doubt it was even as wide as CB2 is. I couldn't tell if it was a leaning type or not, but at that length without leaning, I imagine it'd be tough to turn at any speed, even though it was USS and lower seat height than CB2 by a little bit. Couldn't tell, though, cuz he was going straight the whole time I could see him (not very long).

Looked homebuilt, spraypainted in silver, but I don't know for sure. Never seen another like it.

Would've liked to talk to the rider, but he was long gone by the time the car and then hte other cross-traffic was out of the way. :(
 
So as I went across the street to work after the wifi session yesterday, the speedo started acting crazy and failed again. After work I messed around with it for a while, before heading home, but it was just not staying working for more than a few dozen feet at a time. Gave up till today.

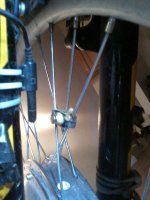
Today before heading out to the stores for groceries, etc., I unfastened the entire sensor and magnet setup, and moved it farther up the fork leg so the magnet can be fastened to the *outer* part of the spoke cross, which puts it farther from the leg but makes it a little easier to make the right size "spacer" for the sensor, to keep them the right distance apart (nearly touching but not quite, maybe 1mm?) and at the right angle (doesnt' work if it's perfectly parallel, gets frequent spurious multi-hundred-MPH readings).

Spacer is only foam right now, and only taped to the leg, till I see how it works out, and then I'll make a wood block or something easy to trim/shape, and attach that to the fork leg to hold the sensor. Probably will use gorilla glue to hold sensor to block and block to fork leg, cuz zip ties just disintegrate within weeks at best from the UV here, and tape does the same thing. Then vibration and fork movement on bumps/holes knocks the sensor loose, sometimes actually off the fork into the spokes. Have had to repair the wires a number of times becuase of that sort of thing. :roll:

So far it's been fine for about 8 miles of riding today, before I stopped for a wifi break.


I wish I still had some of those solar-charged batteries off the dog collars (all were destroyed in the fire AFAIK, cuz they would've been inside one of hte metal project boxes in hte bedroom for such stuff, and I never saw any of those after the fire), because if I did I'd build a remote speedo sensor transmitter with no wires to get broken/hungup, etc., like I used to use on my old PDA/VeloAce speedo setup I used before I got my first CycleAnalyst. Doesnt' take much to build it, but I don't wanna have ot remember to change or charge batteries, so those little solar-charged ones would've been perfect. :/ (yeah, I could build one of those, too, but I'm not sure I have the stuff to do it with anymore, and it'd be one more part I'd have to design and debug before it was reliable, most likely).


Anyway, just a little thought about the speedo subject.
 
Yesterday on the way to work the speedo failed completely, and the little fiddling I have done with it hasnt' even gotten a response from it at all, so I gotta check the reed sensor with a continuity meter and a magnet and make sure it's still working at all. If it's not, I have another one off of a dead bike speedo that I think I even know where it is. :lol:

Then I gotta make that mount I was talking about above, to fix this issue "once and for all" (yeah, right).


Ideally I'd just hook up to the hall sensor in the wheel, but I have already had one experience with a failure (wiring short? Still don't relaly know exactly what caused it) in that setup on the CAv3 that fried both teh hall in the motor *and* the CA itself, and since this CAv2.23 is my only other one, I don't wanna risk that sort of thing happening again. I'd want to build some sort of protection circuit that could buffer the signals and prevent one from damaging the other, should a failure happen, or a wiring short occur somewhere.
 
I decided instead of making a different mount for hte fork to just glue more magnets to the spoke-clamp-magnet. They stick pretty well even without the glue, as a stack of little discs off old namebadges, but I gorilla-glued them just in case, cuz potholes and whatnot around here are bad enough they could still knock them off otherwise.
0513142342-00.jpg


Now the stack is strong enough field to easily reach quite a distance, and trigger a sensor.

I used a different sensor, still a reed, but it's off an old bike computer I don't have anymore, and this one still has the riser/slots to ziptie it to the fork, unlike the one off the CA (which has been thru a lot by now, and repaired in many ways).

So far, for the last day and a half, it's worked just fine with no issues.

0513142342-01.jpg


I created myself a NEW unrelated issue though: I was hooking up the trailer to use it to haul a bunch of super-cheap clearance dogfood home from work, and grabbed the tailight housing when I slipped, and I heard a crack. :(

Now my taillight/brakelight doesn't work right, cuz the lefthand mounting post for it broke off, and I figured "oh, I'll just use a longer screw and run it thru the old post right into the housing's plastic". That would've been fine, except that the circuit board for hte LEDs inside apparently runs ALL THE WAY INTO THE TINY LITTLE CORNER where the post is, and the screw must've punctured the PCB and broke some traces. So now only part of the LEDs work on tail, and none of htem on brake. :roll:


When I get home from my wifi/dogfood/etc run today, I'll have to take the unit apart and fix it. That means cutting hte housing open cuz it's glued or ultrasonically welded together. Oh, well. I always wanted to see how it was put together inside, anyway. :lol:
 
Wheel speed sensor is working flawlessly so far.

Tailight, however, is fried. :(

Turns out that it's constructed inside with a little PCB (which I missed witht eh screw, thankfully) that does the current-limiting to dim it for taillight and brighten it for braking. But the LEDs are spotwelded to steel (or tin?) strips, several in parallel on each strip, with a few strips in series.

So what happened is the screw went right thru the plate of the bottom end of the very first one in the string, at the top of the voltage chain/current path. The screw's mounting point is the frame of the bike, which is ground. So I basically shorted across all the rest of them, taking them out of the voltage drop loop, so the entire lighting voltage was placed across a single parallel row of LEDs, which burned out.

One of them didn't totally burn out but is really dim, and obviously damaged. :(

It also did damage the electronics PCB, too, because it will now no longer get anywhere near as bright for the rest of the LEDs, for tail or brake mode, as it should. I can probably fix *that* part, but have to investigate how it was supposed to work and then figure out what to fix.

I can also replace the burned out LEDs, but not until I find mine (assuming they survived the fire, which they probably didnt, because I am pretty sure they were in a project box in the bedroom that burned, including the stuff off the old DayGlo Avenger's original handmade lighting that used this type of LED).

I could also order new LEDs, but it is probably cheaper to order a whole new LED taillight off ebay or amazon or something. :(


For now, I've pulled the LED taillight unit off of DayGlo Avenger to replace this one with on CrazyBike2, until I have time and materials to deal with my screw up (haha) on this one.

I meant ot post pics of it but I apparently forgot to take them yet. :(
 
I still forgot the pics of the tailight. :(

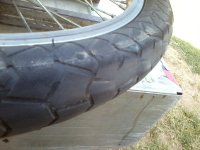
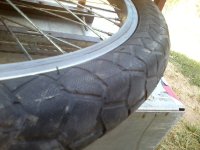
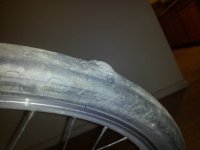
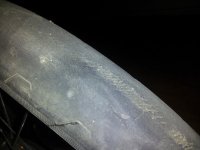
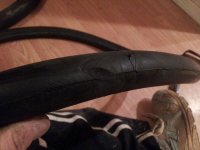
But I did remember to take some of the odd wear pattern on the rear Maxxis Ringworm tire. I've been making sure to keep it at about 50-55PSI, which is as hard as I can make it wihtout making my ride unacceptably hard, wihtout any other rear "suspension" and the weight on this bike.

Worn area (there are several aorund the tire like it), note that it is only on the *left* side of the tire, not the right. Could be caused by the crowning of the roads, vs the tilt of the bike? Less wear on the downslope side of the tire?
0529141625-00.jpg


More normal wear area:
0529141625-01.jpg


There's also a pic of the broken spoke; I don't know for sure when it happened but I can guess, since i sort of recall the rear end feeling a little different after hitting a pothole making a corner in traffic much faster than I would normally do so cuz I was afraid I might get run over by the impatient truck behind me. The wheel is a 44-spoke BMX type, and has been thru a lot so far without breaking anything, though it's been steadily losing it's trueness a little here and there with such impacts, since i put it on there last year while at the apartment, after the HSR3548 wheel began coming apart again. it's certainly lasted longer than any other wheel I've ever used on there, vs the amount of abuse it's gotten, probably because it *is* a 44-spoke wheel, more than anything else, I'd guess.
0529141634-00.jpg


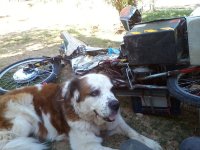
And Tiny, being bored waiting for me to take the pics of the bike, get it inside the house, and get her some ice cubes to fix the meltiness.

0529141627-00.jpg
 
amberwolf said:
I still forgot the pics of the tailight. :(

But I did remember to take some of the odd wear pattern on the rear Maxxis Ringworm tire. I've been making sure to keep it at about 50-55PSI, which is as hard as I can make it wihtout making my ride unacceptably hard, wihtout any other rear "suspension" and the weight on this bike.

Worn area (there are several aorund the tire like it), note that it is only on the *left* side of the tire, not the right. Could be caused by the crowning of the roads, vs the tilt of the bike? Less wear on the downslope side of the tire?

Those are some good thoughts. If one pod is consistently loaded heavier than the other, that seems possible, or it could be from the crown of the road, which never occurred to me as possibly causing trouble. However, on a tire with flat tread profile those things seem like they could matter more.
 
I also like that picture of Tiny.

A thought occurred to me about the tire wear that probably isn't really what is going on, but I was reminded of an interesting problem that a bike of mine had way back in the early eighties. I had a 27" ten speed by Huffy which had a strange alignment that was off somehow. If I tried to ride no hands, I had to lean way to the left, I seem to recall, to keep the bike going straight. I don't recall the tires wearing unevenly, but I don't remember thinking of looking at them closely to check that either. I maybe could still check it it hadn't gotten stolen. :(

Maybe the frame had a bit of twist in it from being welded crookedly so that the wheels weren't in the same plane. It's like they were skewed or something, but not in a way that just made the bike ride at a sideways angle, but that made it always want to try to be turning.
 
Yeah, Tiny was very relaxed in that, just happy I was home I think.

As for wheels being misaligned/skewed, I'd call that a virtual certainty. :lol: I never did anything special to make sure things were aligned when I built it, and it's almost certainly only gotten worse from there with frame being twisted by chaindrive torque destructions, crashes, modifications, repairs, etc. :lol:


In other news, night before last saw the end of the front "General" tire:

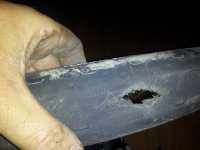
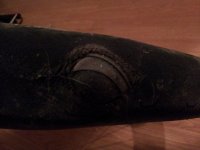
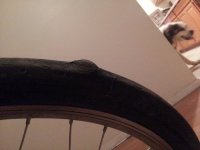
The actual hole in the tire:
20140605_225123.jpg


I was on my way home from work, just approaching the light as it turned green at the south end of Metrocenter, which is a 3-laner going south, none of which goes straight thru--one right-turn-only, and two left-turn-only. Somoene in the far lefthand lane changed their mind as I was approaching the otherwise-empty center (also lefthand turn) lane at just under 20MPH, and a texting-while-driving idiot had just passed me while not even looking up, headed for hte then-unoccupied rightturn lane at probably 40+MPH.

Well, by the time he got there the car that had changed from far lefthand lane was already halfway into the righthand lane, but not moving very fast yet, and the texting-driver just slammed into the right front quarter and spun him around into the center left turn lane, right in front of me.

I managed to skid straight to a stop between the front tire and my shoes flat on the ground, a couple of feet before reaching the mess. After my adrenaline faded a bit and my heart wasn't pounding anymore, I and several others were waved thru the intersection by someone else.

As I rode home, I could feel a thump-thump-thump on the front wheel, but couldn't tell what it was; when I stopped just around the corner and down the street from the intersection I didn't see anything wrong with it, till I got home.


Then, once in the house, I could see this:

With flash:
20140605_220304.jpg

20140605_220317.jpg


No flash, makes some of it easier to see:
20140605_220402.jpg

20140605_220428.jpg


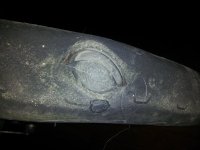
The already-badly-worn tire had ripped thru during the skid-to-a-stop, and the tube had also been gouged by that skid. Thankfully it's a really thick (like ~4 or 5mm) tube, or it'd've burst and I would not have been able to stop as fast and would've probably skidded right into the wreck. :(


Another worn out area of tread similar to what the holed area probably looked like before the skid-to-a-stop:
20140605_224736.jpg


As it was, the skid (thankfully) pushed the slick tireliner strip off to one side, or THAT would've also made me skid faster, as it doesnt' ahve any grab, unlike the tire and tube.


The tube's gouge:
20140605_225217.jpg


Being as thick as it is, I figure it's still good to use, just not as thick in that one spot anymore. Between it and the tireliner and the tire, it ought to still be fine, at least for as long as I will be riding the bike till tthe replacement is done--I hope.


I spent the next 2-3 hours dealing with the problem. Part of it was spent just looking for my replacement tires, and didn't find any of the non-knobby ones except those already on bikes. :( (I did find them the next day, in the closet of the computer room where I'd totally forgotten I'd put them, but I don't wanna deal with it again until I have to)


So I ended up pulling off one of the armadillo-Infinity tires Ohzee sent me that I'd put onto Delta Tripper, as the best compromise between already-worn, grippiness, and tread design, out of what I had available at that moment. I'm sure the ones I was really after are in a shed somewhere, but I don't know where and coudlnt' find them in the dark with a flashlight.

The tire on the non-motor wheel is already pretty worn, so I chose the one off the motor instead, which meant having to undo the wrench-torque-arms and get the motor wheel off the trike, which is a PITA and took almost an hour by itself, including getting the now tireless wheel back on there so I wouldn't forget how I'd put it on and the wrenches were setup, in case I need to use it.


Then I had to put CrazyBike2 up on blocks (which I keep forgetting to get pics of) and get the front motor wheel off of it to change the tire out. That was almost another hour, not including resting a while between stages, or waiting for my hands to stop being numb (which happens randomly these days, and can make it hard to do things).


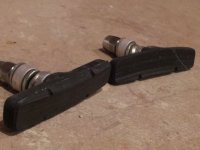
While I had the wheel off anyway, I swapped out the old worn-out brake pads, which were getting down to the last bit of pad, and I'd been putting off dealing with for at least a month now. Now I'm using "Sinz" red/black pads, which are the closest thing to KoolStop Salmon I could get at the bike shops I was able to visit back during the remodels early last year or end of year before last when I had been looking for new pads. Dunno how close they are, but at the shops that had them and not KoolStop, they all said that they were just as good.

old pads:
20140605_233856.jpg

After installing them, putting the wheel back on, and adjusting the pads/etc., I now have braking back, but it's not quite as good as with the pads I had before (I forget what brand they were, if I even knew). So I'm still playing with adjustments to get the braking back the way it had been, without rubbing on the rim. (there will be some rubbing no matter what, because at this point the front rim is out of true beyond the point at which the spokes can be adjusted to fix it).


I wanted to try fixing that rim issue too, by swapping out the whole 9C rotor/magnet ring/rim for the BionX rim and Amped Bikes rotor/magnet ring from Ohzee, but I didn't know where it was at the time, only finding it hte next day along with those tires in the closet. Not gonna do it now cuz that's a lot of work and time I don't wnat to redo/use up till I have to.
 
Whew, close call with that skid!

I might add a bit of extra information about that frame that was misaligned on my stolen bike. It was probably a low quantity production model and they hadn't refined the process well enough. Like yours!
 
The new tire doens't have quite hte same grip as the old one, so it slips more on startup from stops, when there's any dust or sand or debris at the intersection (which being a desert is pretty common, even in the middle of the city). Same thing on corners. I guess that's why I didn't use these tires on here in the first place, and had bought that "General" tire instead. :/ Well, it's nto that big a deal so I'll live with it till I can get the new bike built, if that happens before htis one wears out.


Last night on the way home from wifi after work (got off early because of a scheduling mixup), it was just after sunset, and I almost ran over a couple of dangerous bits of debris on the road that I couldn't see from far enough away because of lighting and insufficient headlight, and I finally decided to do something about the problem, since I had a couple "extra" hours to try.


My first thought was to try out the Sylvania H2-something-or-other automotive Halogen bulbs I'd gotten at Goodwill for $2 for hte purpose a few months ago. But when I plugged one into the socket for my older Sylvania halogen automotive headlight off that old Ford LTD, it took so much more current that even though it did light up significantly brighter, it dimmed all the other lighting on the bike by more than half, and the turn signals just flicker instead of flashing, and caused voltage to sag down below 10V (from the usual 10.9 it sits at loaded, vs the 12.1V the DC-DC puts out), cuz the DC-DC can't handle that much current. :( Basically same problem as using the original headlight on high-beam, where it parallels the two filaments, except that the new bulb is brighter under the same conditions.


So...I was going to dig out that Xbox PSU I'd wanted to convert into a DC-DC but I couldn't find it quickly, and I didn't wanna spend all my time just looking for it, when I'd still have to reverse-engineer it's input section to figure out a way to make it work, too. :(

I had a couple of 16V 3A and 5A Sony laptop PSUs, but neither will start from the ~53V the traction pack was at, so they won't work for the purpose. Same with a few others, including a 20V 6A PSU from some ancient noname laptop.

So instead I dug around and found a cheapie SMPS 12V "4A" wallwart, and that did work, starting up fine at as low as 49VDC input. So I thought I'd set it up to run the headlight by itself, and leave the old DC-DC to run the rest of the lights...but it wont' start with a load on it, and if I switch the headlight on after it's started, it shuts off. :(

Since unloaded it puts out the same 12.1V the DC-DC does, I went ahead and just directly paralleled them, at the tie-in point where all the lighting comes together for 12V input, which is probably a foot or so of wire from each PSU. No smoke, voltage nominal is 12.1V even loaded without the headlight on. So far, so good.

Switch on headlight, voltage dips to 10.4V and PSU's LED dims but doesnt' go out, then the PSU kicks on fully a second or so later and goe sup to 11.9V, and the headlight brightens to almost twice as bright as it was with just the original DC-DC. :)


Ok, now I'm happier. Total lighting power consumption is now 73W or so instead of ~31W, but I can live with that for brighter lights if I have to. For now I just took the casing top off of the new PSU so it can cool better inside the "fairing" of the bke, and ziptied it to the top of the ammocan battery case/ breaker/switch.


For grins, I tried the newer Sylvania H2 bulb again, but it draws so much current that it still dims all the other lighting just as bad as before, even after the second PSU kicks on, and the turn signals still just flicker instead of flashing. So I'll need to use the Sorenson to check what the required current is for those bulbs, and figure out a solution for them before I can use them on the bike. :(


If I had a high-enough voltage traction pack (~125V, IIRC) then I could use some much higher current output 12V DC-DCs I have out of old networking equipment, but they won't even start below that voltage as they are intended to operate right off the rectified DC from 110-220VAC, AFAIK. They can also be directly paralled, as that's how they're used on the networking stuff, and they'r eno bigger than the smaller capacity DC-DC I'm already using (same company, I think). I'd just need a bigger heatsink to bolt them to.


However, at that point, with all this weight, I might be better off just running a separate lighting battery again. I'd rather get the Xbox PSU working if that would be enough current, but I won't know that till I check the bulbs out on the Sorenson. Havent' done that yet cuz I still gotta wire up the new style plug to the Sorenson to plug into the outlet I have here.
 
Based on that night's test ride and then my ride home from work last night, I'd say that the headlight is about twice as bright now, with just hte small voltage/current increase.

But it's still nowhere near enough. :( Am gonna have to work on the bigger PSU, and probably for now go ahead and use the separate battery for lighting again. (headlight, at least).

I could use 4s NMC (EIG) but that's definitely more than the turn signals and other LED lighting is meant to take, with ~16V+ fully charged. 3s isn't quite enough, as it's only ~12V+ fully charged, and drains down relatively quickly to 10-11V, with a load.

I don't have any LiFePO4 cells to use as 4s, which would be a lot closer to the desired output, except for some big Thundersky 60Ah cells...four of THOSE is bigger than my whole 14s 20Ah EIG traction battery in ammocan.... Don't need THAT much power for lighting. :lol:

So most likely I'm going to put just the headlight on the battery, making it 4s, and then use the existing DC-DC 12V setup for the LED lighting (tail/brake/turn/downlights).


When considering all the power requirements, I also keep forgetting about the horn, which is such a current hog that it's not very loud on the battery (3s, anyway), and only clicks quietly on the DC-DC. I don't remember if I ever even tested it's current requirements. I'll test it out on the 4s headlight battery when I set that up, I guess.

I *have* tested out hte air compressor on 4s, and it runs too hot; I'm afraid the motor will be damaged if I have to use it on that...so I'll leave the 3s tap on the battery just in case I need the compressor, because it doesnt' work on the DC-DC setup any more than the horn does, but it does work on 3s from the battery better than the horn.


If I'm lucky I'll have time to do this stuff when I get home tonight (been out all day so far fixing a friend's computer and stuff, probably won't be home till 7 or 8pm at earliest..presently borrowing his wifi while he does some other things before we fix more stuff).
 
First, apologies for the spacing of words belwo: the spacebar has developed a problem on the laptop, andhas to be pressed just right to work. Of course this happened while I'm out and about insteadof at home soI don't have my stuff to fix it with here, and it slows meway wya down to fix the spacings ortodeliberately press the bar, so apologies for any missing spaces. :(

Didn't get to the lighting stuff till Sunday, and that only after dealing with another destroyed rear wheel. :(

This time it wasn't spokes, or rim, which are the usual failures.

It wasn't even a destroyed axle, which has hapened once a long time ago on another more normal bike.


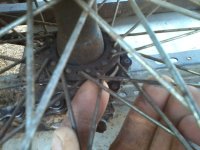
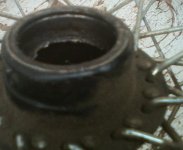
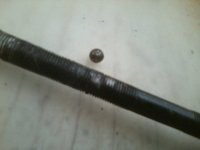
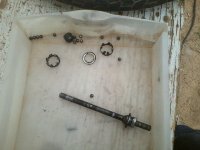
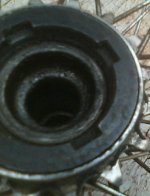
No, this time it was a bearing cup in the left side of the hub itself.
0615141040-05.jpg


AFAICT, it just suddenly cracked all the way around it (probably was cracking slowly but actual failure was sudden), along the line of pressure from the bearings, and then the cup shot inward and then the hub was ridingon the bearing cage instead of bearings, crushing it against the axle, then ridingon the rest of the cup's ragged edge cutting into the axle, until I could get the other mile and a half home at about 11-12MPH.
View attachment 4


Actual failurehappened just past the right turn from Metro Parkway onto 29th Ave, where there are two potholes. One the size of your hands cupped together, and another the size of a large salad bowl (about 4-5 times the size of the other). I always try to make the turn between the two, andusually do, but sometimes I get the edge of one or the other if there are cars behind me and I have to hurry in the turn instead of slowing for it. This time I hit the small one pretty square on, and while nothing broke right then, it did about 20 feet south of the turn, with a BANG !!!!!!!!!!

Sounded like a small gunshot, didn't know what it was then, and couldn't stop there so continued up until I could get into the center turn lane, then across the northbound lanes into the parking lot east of there, perhaps 1/8 of a mile. Wheel was feeling wobbly all the wya, and I wondered ifI'dbroken the frame again.


Not enough light to tell what happened, but I could see the wheel wobbled, like in this videobelow:
[youtube]W_dqEWbJVN0[/youtube]


I thought perhaps one or both ends of hte axle was broken inside the hub, butsincethe wheel was holding the bike up still, and I was so far from home I didn'tthink I couldwalk the bike that far, after a day's workat my dayjob, and it waslate at night in an area I don't trust (near where I was mugged about 11 years ago), I decided to riskriding it home. That workedout well enough, just staying slow, avoiding even thetiniest bumps ifI could.


Waited till the next day to bother with it, cuz I was too tired.
0615141040-01.jpg
0615141040-02.jpg
0615141040-00.jpg


Oh, and it doesntappear to be wear thruthe cup; it seems to be just as thick at the cracked area as it should be. The drive side cup is fine, AFAICS.
0615141040-03.jpg

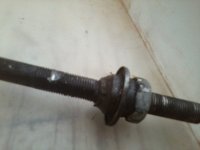
I assumed it wasjust the axle at first, which would've been an easy fix, but hwen I took the wheel off and found the bearing cup broken....well, I can't fix that without unlacing the wheel and relacingit with a different hub. Since this is a 44-spoke wheel, that means I can't fix it at all wihtout buying a replacement--any spare bits I have around here are 36 hole, maybe 32 hole, . but no 44s. So...for now this wheel goes in the spare parts pile. :(


Well, since I had to replace the whole wheel anyway, I decided to finish grinding off the spoke tips on the HSR3548 wheel in the ex-Zero rim, and movethe tire and tube over to that (since i don't yet have a Pirelli ML75 and tube to put on there), and make the bike a 2WD again. If nothing elseit will let me test out the motor's hall repair.


I also decided to leave the Grin 12FET on the front 9C, and put one of the 18FET Methods controllers on the HSR3548...but I coudln't get either one to work;it appears something is wrong with the 5V on both. But the old Ecrazyman 12FET from Bikefanatic worked fine with it, and actually works with color-to-color phase and hall wire matching! Couldn't get easier than that. :lol: Phase wires are uber short on it, though, so I had to mount iton the outside ofthe cargo pod, just abovethe rail. Power wires are alosshort, butthose I had an extension already made for something else (the trike, I think).


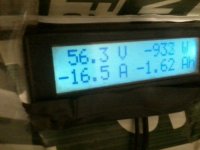
So then it was on to testing, with a friend that came over for chatting about bike stuff there to watch (and also to test ride it for fun). With the A123 pack power both motors, it gets about 4.5 seconds to 20MPH, from zero. With the RCLiPo pack doingit, it's about 4 seconds, a bit more. On either pack , voltage sags downto about 48V doingthat (from ~54 on the A123, and ~56 on the RCLiPo).

Then I decided to swap the A123 pack off and put the EIG NMC pack back on there, and parallel it with the RCLiPo pack (which I can't do with the A123 cuz they're differnet voltages), and that bringsit downto about 3.5-4 seconds or so (just under 4, at worst). Voltage sag this way is only downto ~53V, from ~56.


I think the peak KW is around 2300-2400W, at the battery. Peak regen is way higher with bothmotors, over 500W, nearly 600W at one point, usingonly regento slow down form ~20MPH. Might be higher once I run the packs down some. With justthe one motor, the front 9C, regenwas around 250-300W peak, IIRC.


Regen is tiedtogetheron them, with the left front brake lever (old scooter lever with switch for brakelight) triggering regen. Was gonna make them separate but decided not to for now, since I'dhave to add a switch somewhere oranother brakelever.


Left throttle is the rear, and right is the front. So for accelerationI can hit both, and for cruising the 9C seemed more efficientbefore, though that was when it was on the 6FET so maybe nowit wouldn'tbe any different--but the 9C *is* easierto control--the HSR doesn't respond hardly at all with just a little throttle but it slams on with any morethan that (was the same on the Grin controller as wellas on the Ecrazyman). So for now I'm using hte 9C for cruise and HSR addedin only for staring up from a stop.

I don't know whathte top speedis. On my street I ttried once justaccelerating untilI reached a point I had to brake to stopforthe intersectionin time, andreached 24MPH whilestill accelerating my acceleration. So it serves it'spurpose, which is ot allow me to acceleratereally quicklyto getoutof the way of bad drivers that want to be wherever I am, when slowing or stopping or moving to a different lane/etc won't work to preventcollision. Secondarily it also gives a lot morepower forhauling, and tertiarily it gives me a complete backup motor/controller....


WhileI was wiring up the controller, cuz I had the "fairing" open anyway, I cut the headlight offthe DC-DC 12V output and added a connector on a long cable to it that instead can go to the 16V (or12V) battery I carry around for use with the laptop (which used to just be the lighting battery for the bike, anyway). Nowthe light is MANY times as bright as it was, at 16V, even on single-beam. On highbeam (both filaments) it is just aboutenough to light up the road even with most other car headlights facing me in traffic, whereas before I coudln't really see the road well enough beauseof the glareoftheir headlights.


Rightnow, as I was typing this, some guys at a table in frontof me were discussing CrazyBike2, talkingabout itbeing all "hotrodded", and that it lookslike ithas four batteries (there are 4 boxes on it, but only oneofthose is actually a battery, though they don't knowthat). They sounded like they couldn't figure out where the motor is,though--they didn't realize they're in the wheels, I guess? Because they didn't seem interested in it other than yet another thing to laugh at, sneer at, etc., I didn't bother introducing myself and correcting anything they thoughtabout it. It might have changed their minds, but probably not.
 
Well, I'd forgotten what it felt like to have this kind of acceleration, and nowthat I am getting used to how much and how long to use the left throttle, I'm not rocketing up past my speed goal and having to coast back down to it every time. :lol:

Though I wish I could USE the speed I have:

--in traffic on main roads it'd probably make me a little safer cuz fewer cars would scrape around me by inches...the secondary reason I avoid main roads wherever it's practical (main reason is that the right lane/edge of those roads is almost always heavily damaged by the cars and trucks that travel them, and leave ridges and holes that destroy my wheels and frames).

--and it'd be more fun. ;)

I haven't yet broken the radially-spoked 20" HSR3548 wheel, but it will happen, and probably sooner rather than later, given the road conditions along my daily work commute, not even counting the worse ones on my grocery/etc routes. I should probably order up new spokes for the wheel, so they'll be ready when I do break it, but...I'd rather put money and/or work into the new bike.

I just haven't been able to get myself to do the work on it that I need to; most especially making the final decisions on exactly WHAT I will build. :( Between the summer heat, work, and lack of sleep, I am having trouble with motivation. :/
 
HAvent' actually *broken* the 20" wheel yet, but I definitely untrued it yesterday, hitting a completely invisible pothole while riding home from work late last night. Even with my now-bright-enough headlight, I didn't see even a dip in the road, but when I hit it with the front wheel I felt it a little, then the back wheel (smaller with no suspension and probably 2/3-3/4 of the weight on it), THAT was more than just feeling it--it bounced me in the suspended-mesh seat!

I stopped, checked the wheel for broken spokes, but didn't see any. However, it definitely changed something because it's got a little side-to-side wobble it didnt' have before. :(

It also did in my headlight connectors to the wattmeter, inside the cargo pod, which were kind of hacked-on anyway (having just spliced the ~14G ex-power-cord wire onto the ~20G wire stubs I'd already had crimped into the old re-used Andersons, when I did the whole changeover a few days ago). They'd probalby been ready to break at the contact's back end already, cuz they were stiff with solder up to that point (my mistake), but this final bump probalby threw the wattmeter around (it just lays on top of the battery, inside my laptop bag in the cargo pod) and pulled on the joints enough to break the negative nearly loose.

So a few feet down the road from the bump, once I got going again, the headlight went out. :roll:

I stopped to fix that (mind you, it was still at least 94F out there, at almost 11pm, with nary a breeze to be found) and ended up just folding hte end of the wire over and stuffing it into the battery anderson, which worked well enough for the ride home...but in the process I did in the positive one too, and had to do that to both of htem. :/

I was so tired when I got home, got Tiny fed, groceries put away, and work clothes changed, and batteries hooked up to recharge, that I didn't remember to check tension/etc at the time, and forgot about the whole thing....till I went to plug the headlight back in, and...whoops.

I don'[t know where my andersons are yet (if I ever found htem after the fire, I've since forgotten all about it), so I used wire cutters and pried open the crimped anderson contacts off the old wires, which took about 30-40 minutes cuz my hands don't work right and they're not meant to be undone (my crimps were VERY solid, too), then recrimped the thicker wire from the headlight into htem and fixed that end so i could plug securely back into the battery/wattmeter.

I *still* didn't remember about the wheel, though, till I left the house a little more than an hour ago, (about an hour *after* I'd planned to) and felt the untrueness on the road...but then I was already out in the 106F heat, didn't wanna sit there and deal with it, and didn't wanna go back ot the house and take it inside, or delay my trip any more than it already had been.

So we'll see about that part when I get back.


FWIW, the headlight uses about 0.5-0.6Ah for my trip to work; I only have it on normal brightness for that. On my way home, which is in the dark, I have it on highbeam, and it takes about 1.1-1.2Ah, for the same ~2.2-2.3 miles back. Depends a fair bit on whether I have to sit at any lights or not, exactly how much power is used--add about 0.1-0.2Ah for every light I have to wait at, depending on whether it's day (dim) or night (bright).


One thing I will say about the wide rim--it makes the tire fatter, so it holds more air and seems to make a better ride; it's most definitely the fattest smal diameter tire I've ever ridden on, for any of my bikes. I don't know for sure but it might be about the same volume of air in it as a typical 26" tire; I'd have to do a displacement test with water to find out for sure. Probably never happen. ;)
 
It's been very humid, usually cloudy, but not rainy while I've been out riding, so far this "monsoon season", which started on 7-3-14 with a good rainstorm, and only an occasional sprinkle since then. So no test of bike performance in rain, as it is presently.


Wheel still not broken yet, but have been working on that with all the bumps and potholes around here. :roll:

Have been testing with both motors together, and each alone. Wh/mile is a little more wiht both, about 29-32. With just the front, it's 26-30, and with just the rear it's a little lower, 25-30. (that's for days and trips with no noticeable wind, which is most nighttime trips and some of the daytime trips).

Acceleration time is much faster with both motors, about 3.5 seconds or so from 0-20MPH. It's closer to 5-6 seconds with only the front, and just a little less with just the rear.

Rear seems quieter from the rider's point of view, but I had a friend ride past me with each one, and the rear is MUCH louder during acceleration, and about the same during cruise. Some of the volume of the rear is probably altered by the big metal boxes on either side of it, though I don't know if they make it quieter by routing the sound up and to the rear, or make it louder by vibration (since they are styrofoam-lined, the latter shouldn't be that big a deal).

Front shock is wearing out quickly now--it gets stuck in the "up" position after hitting bumps and stuff sometimes, and doesn't release until I stop and rock the bike back and forth while holding the front brake. :( I have another identical fork I will probably have to change over to, cuz ti's a rough ride without that suspension. Harder on the wheel, bike, and me.


Several of the LEDs on the white downlighting are starting to come loose from their electrical connections; I've fixed others in the past but these appear to be different ones. Will have to resolder them.


Headlight works so much better with the higher voltage on the battery pack, vs the DC-DC. With it on high-beam (both filaments) I have been able to see and avoid many more little things on the road in twilight and at night now, probably even saved breaking the wheel a couple of times from unexpected new potholes in the road edge when forced over by traffic. It gets pretty hot, though (can't keep a hand on it), and uses a lot of power. Typically 3-4Ah minimum on any particular work commute, which is only about 10 minutes riding each way including sitting at lights, I'd guess.


I found some of the hgiher power LEDs I'd meant to make headlights from before, and experimented with them on the big Sorenson for voltage and current, but will need to build a current-limiting driver of some type to use them on the bike. The ones I think are most likely to work are the large-surface-area multichip ones from the "dead" spotlights that Texaspyro had sent me a few years ago, which take 30-40V+ input, and something between 1-2A max. Will need a way to focus them; have to go back thru this thread and see what I'd come up with previously when thinking about this, and see if I still have any of the things I was going to use.
 
I think that is good about the LEDs to try to make a light.
 
Haven't done any more with the LED yet. I did get the Icecube57-modded server supply setup in series with the Sorenson, and it does work, it's isolated properly and everything... but it doesn't output it's final steady voltage until it has a load on it, so in order to use it for batteyr charging I will have to start it up with a load first, then set up the voltage on the Sorenson to make the total series voltage correct, and then hook up whatever battery is to be charged. Most likely this will end up making me go find one of my big heatsinked resistors to hook across the output of the server supply with a relay-switch, so it can be started with that as a load and then turn off the load after a few seconds, before I hook up the battery.

But it does work to charge up the EIG pack, for instance, at the 58.4V I've been using for it's 14s, at 10A. That's only 0.5C, so I will probably try charging at 1C (20A) later, after I've discharged the pack quite a ways (like on today's ride when I expect to use about half of it).

It's never been charged at anythign higher htan 5A until now, so I'm probably going to open up the ammocan and monitor the cell voltages during charge, just for curiosity. They've always been within 0.1-0.2V of each other at any SOC or charge or discharge rate so far, so we'll see how they are at 20A charge rate. :)


Some conclusions from today's ride so far, about hte front vs rear motor:

At lower speeds, 10-15MPH, the rear motor is notably more efficient than the front, most likely because of the wheel size vs the motor winding. It takes from 50-100W less for the rear motor to maintain speed in that range, over an average of several miles, along the canal path where I don't have to stop or slow for more than a mile at a time. It's not perfectly level, but between road underpasses it's pretty close most of the way.

There was also a variable headwind of a few MPH, so it's probably affected my conclusion some--but the difference in power usage was pretty consistent between the two: 200-300W for the rear motor, and 250-400W for hte front motor (lower end for ~10MPH end of speed range, and higher end of W range for ~15MPH end of speed range).

I'm not sure what the winding differnece is between the two motors, though: front is a 26" 9C 2806, and hte rear is a 20" Crystalyte HSR3548. So I don't know what their "efficient" range should be for each one, at that wheel size.


I have also been trying some more experiments of riding my work commutes exclusively wiht hte rear vs front, and there's little difference between them if I am accelerating with only the same motor I ride wiht. Maybe a wh/mile or two better with the rear motor vs front.

If I acclerate with both motors but hten use only one once I'm at speed, there's more of a difference between them, but still not a lot.

Given the windiness we've had, it's not a certain thing, of course, as it affects teh wh/mile greatly.

Either way, it's still somewhere in the general 25-30Wh/mile range for either one, for my commute with many stops. It's better when id on't have to do many stops, as low as 21-22wh/mile if I can get down to only one stop a mile or less, which isn't possible on my owrk commute or most of my regular trips due to routing and traffic controls. Really only easily possible on the Arizona Canal path that runs from Metrocenter up towards Arrowhead, for several miles, since there are underpasses for each road it crosses, with more than a mile between each of those cuz it's diagonally across the major roads (southeast to northwest).


My trip today includes some on that path, but only at 10-15MPH, as I'm in no particular hurry to get anywhere and wanted to test slower speeds vs each motor. The rest has been on major roads or half-mile roads, where it's safer to stay up at 20MPH so relative speeds between me and cars passing me are at minimum possible, and also makes more of htem less agressive in their driving around me, as they seem to perceive less of an impedance to their path (even when I am not in it) when I am going just that 5MPH faster.


I forgot if I already posted this (didn't see it in above posts), but I found the 10 Thundersky 60Ah cells in a shed, and started some testing on them using the big Sorenson and some lights and heater elements as loads (would like to test them on the bike on-road but have to first fix up one of the controllers to run on a voltage that low, or to run on one much higher by seriesing them with one of my other packs--would rather do it with just the TS cells to avoid having to determine which set of cells cuases any particular behavior).

I noted down some stuff about their starting voltages and whatnot, but I forgot to bring it or make a textfile of it before leaving. :( Have to remember to do that. I do remember that all of them were above 3.2V just sitting there, when i dug them out after more than a year of sitting out there in the shed since the fire, and I can't remember how long before that since I had last tested them out, and hooked them up into a 10s pack.


I'd still like to use these on a pusher trailer with those brushed gearboxed powerchair motors and the Curtis golfcart controller. :) Or even on a trike (not Delta Tripper; something lower to the ground and probably longer).
 
The Crystalyte HSR3548 cover-screw problem has returned. I guess it probably started days ago but I didn't notice until on the way to work yesterday, when suddenly the back wheel started to feel like either the axle/nut was loose or the spokes were breaking, just before I reached work. I couldn't pull over and stop due to traffic and the way the lanes are setup right htere, so I had to wait till I was in the parking lot at work to look, and found all but one of the screws on the leftside cover were simply GONE.

The last one was still tight, but only one screw holding the cover on is a little scary.

The right side is missing several screws, but the rest are evenly spaced around it and still very tight, and I can't remember if I simply dind't have enough screws to go around when this happened last time, or what.


Anyway, I couldn't do much about the problem till I got home, other than take one screw out of the right side and put it on hte left opposite the one still there, just in case.

When I got home I was too tired to do anything about it, so this morning I dug thru my screw bins I've gotten out of the shed so far, and found *just enough* screws with the right size and thread pitch, that are also long enough to go all the way in, to fill out the left side including hte orignal single remaining screw, and moved the other one back to the right side.

Now, the thing that worries me is that ALL of the screws were secured with Blue Loctite previously, because of the original problem, after I'd done the hall sensor repair. Unfortunatley I couldnt' TEST that security until now, cuz I hadn't been able to mount the motor back on the bike till a short while back. (I think I did test it before, right after getting the Blue Loctite to fix the issue, but I don't remember how long it ran or under what conditions/temperatures/etc).


So...Blue Loctite is worthless for this situation, for whatever reason.
I suspect temperatures and vibration, since it's hot outside (>100F air temps almost all the time it's sitting in the direct sun 5-6 days a week at work, although the motor covers are shaded by the seat back and the cargo pods for most of the day), and the motor itself gets pretty warm from all the stop/start in traffic and the regen braking during my commute. Then while it's nice and hot during the to-work commute at midday, when it also probably gets direct sun on the motor itself from nearly overhead, all the vibrations and bumps on the road, in addition to the motor's internal vibrations from acceleration and braking, may be working the screws loose.

It is ALSO possible that the screws don't actually fit the threads quite perfectly, cuz I have no idea how they tap the threads into the rotor ring, or if they use the right tap size. Could be the screws are a hair too small for the holes, so they can move around in there if the cover itself is flexed somehow by road conditions or accell/regen. Just speculation.


Anyway, I don't have any lock washers that will help, because all hte screwholes are countersunk for beveled-edge screws, and that leaves little or nothing for the washers to grip, since the heads of the replacement screws are all regular non-beveled on their undersides, and not wide enough to overlap enough of the flat cover surface to work. So I put more loctite in there and we'll see how it behaves.

I got a coupon for Winco in the mail today, and since I ddin't get hardly anything while there on my Saturday trip cuz I needed space for stuff before and after, I had to come back anyway, and started another roundtrip for shopping/testing this afternoon, once it got too hot to do much of anything at home, and Tiny decided it was naptime anyway.

I rode around for about 8 miles so far, on the way here, and because of traffic and a bunch of car wrecks blocking my usual paths (other than the smooth canal path which I chose not to take so I could test the wheel on roads), it actually took about two hours in the midday/afternoon sun to get here, 59th & Bell (I think I said 51st & thunderbird before, but I always make that mistake when thinking about it, for some reason). Shoud've been a very short trip, maybe 30-45 minutes, if I'd taken the canal path it almost goes right here. :roll:

So I stopped at TacoBell since I coudn't find anythign cheaper up here with wifi, and I was really overheated and exhausted. First I checked the cover, though, and no screws are even a little loose yet, whcih is a good sign.


In other news, I did the fast-charging test on the EIG NMC cell pack, and took pics of the setup, but can't upload them cuz I lost the cable from phone to PC again. :roll: I'm sure it's at the house somewhere, but I forgot to bring it.

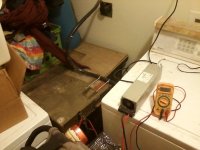
Charging setup has the Sorenson DCS55-55 as the "postive" end, an d the Dell (?) server supply setup as the "bottom" 12V (50A+) source, in a series connection. Because I didn't want to cut any wires on anything, or unsolder and resolder or recrimp connectors and stuff, cuz it was really hot in the house at the time, and very muggy due to rain off and on, I ended up just clamping some other ringtype connections together with nut and bolt to make some Anderson SB50 connections with existing 8-10gauge wires on them, to jumper up the series setup to get it to the bike's PP45 charge port with wires that wouldn't get hot at 20A or so.


The first attempt I did used existing long stuff I'd made just for the trike to extend things for the lighting pack/etc, and that was like 12-14gauge on the PP45s, and got smelly-plastic hot at even just 10A. :roll: So figuring that was a bad idea, I did the above instead.


Of course, that meant the connecting cable to the bike would only be a couple feet long, and since the power cord to the 220V dryer outlet from the Sorensone is only another couple feet or less, I had to maneuver CrazyBike2 thru the house to get the backend into the utility room doorway...which it completely fills, and I had to climb over it to get in and out of the room to hook it up and set things up. :roll:

If I had realized how much work that would all have been, I would've just unbolted the NMC pack off the bike and carried it in there, but at the time I started I thought it would be easy and jus tpark the bike in the back room *near* the door...But I also wanted to test charging thru the CA for monitoring, and the bike wiring, etc.


Next time, I think I am going to take the long 220V cable I attached to the welder and remove it from the welder, add a normal twistlock outlet to the end of it (which I should have somewhere), and use the twistlock plug I originally had on the Sorenson to plug into that, so I can use the Sorenson at least 10-15 feet OUTSIDE the utility room, which means I could even do the charging outside next to the carport gate if I felt like it and weather permitted.


So...at the discharge level it was at (about 7.5Ah down out of 30, because I forgot until later that it was paralleled with the 10Ah RC LiPo pack inside the bike frame :lol: :oops: ) I only got about 16-17A peak current for charging, so not quite 1C charge rate. That lasted for a short time, maybe 20 minutes or so, and hten it began reltatively quickly dropping down in current. I think it only took about an hour total to completely recharge to zero currnet, but I kept dozing off in the heat trying to watch it so I don't know exactly. It probably took less time.


Once I get a longer set of cables for everything made up, so I don't have to exhaust mysel fjust getting hte bike to the charger :lol: then I will retry this test with JUST the NMC pack, to see how it takes a fast charge from relatively deep discharge.


It's not liek I realy *need* this setup, since at my typical dishcarge levels of ~2-3Ah or so, it doesn't uusally even draw the full 5A that the ebike type charger can put out. But it'll be nice to do the tests, jsut to see, and to have the ability to fast charge from actually empty, for mulitple long trips during a day if I ever need to do that like I used to wish I could.
 
FINALLY got the pics off the phone of hte charging using the Sorenson/server PSUs in series:
0713140037-00.jpg


0713140036-01.jpg


0713140036-00.jpg


0713140037-01.jpg


0713140039-00.jpg


No other news on the bike itself, other than that I havent' broken anything new yet. (except a whole bunch of zipties have started breaking, probably from the weather lately).
 
On my way home from Winco and posting the above, in twilight-ish conditions, I had another of those idiots that wasn't paying attention and almost ran me over when I had to brake for someone else slowing down in front of me; they finally braked before hitting me, but at that point I'd already gunned my throttles to try to accelerate out of their way (to the left of the car braking in front of me).


So, in a probably pointless effort to make it MORE obvious that I'm braking, I added more lights on the back. :lol:

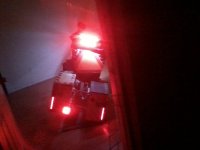
0725142148-00.jpg

Previously at Goodwill, I'd found a pair of red-LED "sticks", waterresistant if not proof, that run on 12V that appear to be intended to mount to cars as additional lighting, but hadn't decided where to mount htem. I'd planned to use them as tail/brake/turn signals, but I only wired them up for now as tail/brake, as I ran into an issue with adding the turn signal part. I mounted them vertically along the bottom outer rear edges of the cargo pods, riveting them on since screws/nuts tend to vibrate loose on these things. These sticks have the LEDs angled slightly to one side, so they're mounted so the LEDs point a little "outward" from directly to the rear, giving me a little side-lighting as well.


In the center bottom is one of those Harbor Fright tow-hitch covers with LEDs in it, intended to make an additional brake light, and it is very bright. I put it on the trailer hitch as a cap, pretty much as it's intended, except in my case it's held on by a torx screw thru the top into the hitch tube. It's also wired as tail/brake light.


To make them do both, I simply added a diode (cathode toward lights) and resistor in series from lighting +12V rail to all of them, to make a dimmer tail light, and hten wired directly to them from the brake +12V signal, both wires coming from the trailer lighting connector at the back of the seat.


The problem I ran into with the turn signals, which were to also be done with a diode/resistor setup to prevent one side's turn signal from turning on the other side's signal, etc., was that for some reason if I use *any* resistor, regardless of size (wattage) or resistance (up to ~700ohm at which point I can't see any light anymore), then as the turn signal for one side brightens that side's light, it *also* brightens the other side a little bit (perhaps a quarter as bright as the side it's supposed to be doing).

The way this is set up is that there is a diode (cathode toward the turn signal) from the turn signal itself to each of the individual lights, for the front and rear amber lights and the rear red lights. Then there is a dimming resistor from lighting +12V to the anode of the diodes (cathode toward the turn signal) to each of the amber lights in front, and the red lights in rear. There isn't any always-on connection at all to the amber lights in rear, because I don't want those on except as turn signals.

If I move the dimming resistor from the common side and put individual ones to each of the signals, maybe this won't be a problem, but I couldn't find more than one of any of hte resistors I could use for this, and I didn't test with different resistors on each light, as I ran out of energy and time, and couldn't concentrate or hold things anymore, and still had to put the bike back together (covers/etc) to ride to work the next day.

I *did* try using just a series of diodes in place of the resistor, to drop the lighting +12V voltage, and THAT works (or would if I used enough diodes, probably a dozen or so in series), but I didn't have enough higher-wattage diodes, and the couple of small ones I tried in there got so hot I couldn't even touch them, so I figured that would be a bad idea to leave enclosed in electrical tape in the wiring harness. ;)

Of course, I could also probably use a separate inverter (lighting supply V+) for the "always on" marker light voltage, 9V or so instead of 12V, and that might work, too, but I don't yet know if I have a 9V unit that will run on DC down to at least 44-48V. Will take some testing to find out.
Another way is to do what I did with my DayGlo Avenger turn signals/markers/etc., and use individual transistors (with their own dropping resistors) to switch things on and off. I don't knwo where the transistors actually *are* at the moment, somewhere in one of the sheds, but I still have bags and bags of them AFAIK, unless that stuff was in the project boxes in teh bedroom that burned (probably not).

I could *also* use separate LEDs inside the front signals to do the marker lighting, I suppose, but unless I take white LEDs out of some HF flashlights I've got around the house, I don't have anything else handy that will fit in there with the other ones already present. (I do have more of what I used on DGA, and hte original DGA units, somewhere in a shed, most likely, but again I don't know where).


I've wanted to have the front turn signals be marker lights as well, for some time, but have never gotten around to it. Hopefully now I will finish it, since I've started it. ;)


I havent' gotten any further on the LED headlight ideas previously discussed, but I did take one of the 48V Fusin motor kit taillights (which use white LEDs inside a red cover for whatever weird reason), pull the red cover off of it, and ziptie it just above my car headlight inisde the "fairing". It's pretty bright, as a light for others to see *me* by, but it is too diffuse to be an actual headlight for me to see by, even on a completely dark bike/canal path with all my other lights off. So for now it's wired in to the input of the 12V lighting DC-DC, past the switch I can use to turn all the lighting off (while charging the bike, for instance). That means it is on any time the rest of the bike's lighting is on (though I do still have a separate switch past that point for the white downlighting, to be able to turn that off and run just normal head/tail/brake/turn lighting).

Main use for this light is for places that are well enough lit that I don't need my car headlight, when it would blind oncoming traffic on paths, etc., or when I just want to save power but still need something for others to see me by (as if they couldn't see the rest of the bike's lights/downlighting/etc :lol:).
 
I finally found a wallwart that will run off my bike pack (instead of the 115VAC it's intended to) that can output 14.4VDC at ~4.5A, at Goodwill, for a couple bucks. It was for a Rayovac device of some sort, dunno what.

I spent a few hours (mostly cuz of my hands not always working right, sometimes becuase my brain wasn't working right) unwiring the old pair of DC-DC 12V stuff I'd had on the bike (one recently added to try to improve headlight performance, to little result, ending up with me keeping the headlight on battery separate from this), and wiring this one in their place.


Now the tail/brake lights are almost twice as bright!


However, since my aquarium lights are only meant to run on 12V, and I don't want to damage them, I added a little TO-220 7812 regulator between them and the new DC-DC. It's mounted to a small alumnum heatsink block out of the same dead electronics (I think it was a UPS) it came out of, though it wasn't mounted to that originally. It gets too hot to touch without the heatsink, though it's rpetty danged warm even with it.


I also found a 7808 8VDC regulator on another bit of electronics, and was going to put that on the 9V(AC) turn signal lights, but I didn't get that far before I decided my hands and brain werent' gonna work well enough to finish that part that day. I'm not sure it'll work anyway, as it might nto be able to provide enough current even with a big heatsink. So I left them on the 14.5VDC and they are a lot brighter, but since they are only intermittently used and only on 50% of the time even when they are used, they should be ok on that until I can deal with the issue later.

(hopefully I will be able to also add the marker-light functionality, too, when I do that, probalby with a totally separate lower-voltage DC-DC to provide the power for it to solve my previous issue with it).


While I was at it, I took out a couple dozen feet of assorted wiring that didn't go to anything anymore :lol: and replaced a few spliced-up wires with continuous stuff, just as general maintenance.

I also fixed the horn connections to the battery, which I'd started working on back when I put the other 12V DC-DC in there. So now hte horn works again, too (and is quite loud on the 16V battery). I tried it on the 14.4V DC-DC but it doesnt' have anywhere near enough current ability to do more than click loudly. :/ So it stays on the batteyr just like the car headlight.


I've gotta redo the screws that hold the rear lighting assembly to the rear seat crossbar, though, cuz it's beginning to rattle around on bumps, and the screwholes are bent up too large from the wiggling to tighten now. I'll have to dril all the way thru the bar and use bolt&nut instead, with some loctite and lockwashers of some type.


Speaking of loctite--the new screws in the hubmotor cover don't appear to be working their way loose yet, but I keep checking them at each end of every ride, just in case.


I wish it wasn't so hot outside, or that my big A/C unit hadn't been stolen, so I could use it on one of the sheds to cool it down and work on building the new bike. Even at night, it's not usually cooling down any more than 90F by dawn now, except if it rains like a couple days ago (very rare). And I can't do the metalwork on the bike late at night or it'd bother all the neighborhood.


Ah, well, maybe next month it'll get cool enough to do it.
 
THe pop rivets I used to attach the vertical light tubes on the rear of the cargo pods are not holding very well. I will have to cut some washers to a shape/size that will fit into the little mounting slot on each end, and use those under some new rivets' expansion part, which should fix the problem.

It'd also have worked to put the rivets in from the outside but due to the narrow slot in the tubes there's no way to get the riveter tool into them that way, and if i use a spacer over the rivet then it's "nail" is too short for the riveter to grab. :(


One thing though: with more and brighter rear lights, less cars are following me close at night so far, and they brake quicker when I brake for the traffic lights and signs (and cars in front of me). :) So they are doing what I put them on there for.


I've also had more poeple want to talk ot me about it, especially at night. Most of them are pedestrians, but some are car drivers, and a few are bicyclists, and one gas scooter rider (a modern Honda) that I've seen pass me looking at the bike more than a few times in the past.

The first night I had those lights added, there was a van that pulled into the parking lot with me when I pulled in there to check a rattle (that turned out ot be the older lighting bar on the back of the seat), to talk to me about the bike. I don't think he was interested in riding/driving anything different than what he has, but he still wanted to know about it.

Most of the rest have been when I was already stopped somewhere (like when out for wifi), some of them already there in the place when I arrived and probalby saw me pull up and park, and some who came in to talk after I parked.

Right now there are a couple of poeple sitting at the barstool-bar along the window the bike is parked next to, trying to figure out various things about it. Most of their theories are very wrong, but it's interesting listening to them. :)
 
Back
Top