E-S Stealth Electric Bike Owners

stritzky said:
Hi SamM Given the choice between the Bomber or the Fighter. I vent with the Bomber, and haven't regretted that choice.

But last night i developed a annoying squicing sound from the rear suspension. I remember there was a user on this forum that had the same issue some time back. But i cant seem to find the post / thread. Does anybody have any experience with this issue ?

Can you tell if anything is leaking out of your shock?
 
Squicing - I had this on the rear shock. You have to remove it and open up the bushings that sits in the eyelets in there you will find rubber o rings. Clean everything and lube. This will get you a squicing-free bomber for another year.
Also I noticed a wear inside the bushings because they went dry for a long time, so this is eating the metal. I recommend all doing the above.
DNM-Shock-bushings.png
 
Allex said:
Squicing - I had this on the rear shock. You have to remove it and open up the bushings that sits in the eyelets in there you will find rubber o rings. Clean everything and lube. This will get you a squicing-free bomber for another year.
Also I noticed a wear inside the bushings because they went dry for a long time, so this is eating the metal. I recommend all doing the above.
DNM-Shock-bushings.png


@ TV. No there are no leaks.
@ Alex. And yes the sound seams to com from the top shock eyelet. And it dissapeard after i sprayed some WD40 on it.
 
Don't use WD40 on rubber, it dreys them out!!! Big no-no. Take that apart and either use lithium grease made for a bicycle/rubber, plumbing grease, CV grease or any grease made for O rings (any auto parts store will have this!) and thank me in a year from now.

Tom
 
litespeed said:
Don't use WD40 on rubber, it dreys them out!!! Big no-no. Take that apart and either use lithium grease made for a bicycle/rubber, plumbing grease, CV grease or any grease made for O rings (any auto parts store will have this!) and thank me in a year from now.

Tom
I know, Silicone Grease is excellent for this purpose. But WD40 was just to see if the bushings was the problem. But thanks for the help :)
 
Allex said:
Squicing - I had this on the rear shock. You have to remove it and open up the bushings that sits in the eyelets in there you will find rubber o rings. Clean everything and lube. This will get you a squicing-free bomber for another year.
Also I noticed a wear inside the bushings because they went dry for a long time, so this is eating the metal. I recommend all doing the above.
DNM-Shock-bushings.png

Allex, what I have been doing is using my Maxima synthetic chain lube, every once in a while I just squirt a dab on between the grommet spacer and inside shock mounts on the swingarm and frame, as well as on the swing arm pivot, then I use my air compressor and blow that stuff into all the crevices. Wipe of the excess with a paper towel, good to go. Maxima Synthetic chain lube is Oring safe and works well when wet and muddy. This isn't a replacement for removing the shock and putting some grease on the spacer grommets, just a way to maintain the spacer and rubber grommets between shock removal and services.
 
Many thanks to everyone for all the advice. I believe that I will try to purchase the Fighter today. If that doesn't happen, I will be ordering a new Bomber in October. Either way, I am fine with whatever happens.

I will post pictures later today!

SamM
 
Various bike shops have been changing my rear tire on my Bomber. I'm usually there to watch all of the steps but I'm about to start changing my own tires with some steel tire irons that I ordered (most bike shops offer the plastic ones that eventually break). I know all of the steps regarding the cables (I have my Hal connector taped with electrical tape to protect from water spray), cut all the zip ties, unscrew the big nuts and the torque plates and then angle the wheel to the left to slide off the chain. When I put back the wheel I know the method with the Loctite (blue version). Now, what is the best way to put on a new tire with the tube on the rim? I want to avoid pinch flats and make sure the tube is sitting on the rim (a lot of bike shops don't get that part right). There was a spray that they used to make sure the tire bead would sit just right, should I use soap with water? I kind of want to make sure I don't spray too much water because I have a tape job at the moment to protect the innertube from getting punctured from my cracked rim. I won't be receiving my new rim Rix sent me for a couple more days but my current tire is nearly bald andI just received a single Halo Contra tire. I want to get really good at changing tires so that on the side of the road it will be like clockwork (I have had 8 flats very far from my end destinations). I was also able to score two 24 inch x 2.75 bike tubes from a bike store trying to get rid of them which completes my travel emergency kit.
 
Today, I became the proud owner of Stealth Fighter #110. Here are a few pictures. The bike is in good shape but needs some tlc. I hope to bring her back to her former glory. It has a 26" front wheel laced to a Hadley hub. I may buy a new 26" Duro Razor Back to go up front. I'll be removing the spacer from the fork neck and raising the forks up where they need to be. New handlebars, a longer seat post and a rear shock will soon be in the works. I think the handlebars could be bent.

The first order of business is to clean the bike. After that, I'll be reading the owners manual and familiarizing myself with the bike, it's components and the charging system.

SamM
 

Attachments

  • image.jpg
    image.jpg
    129.3 KB · Views: 2,040
SamM said:
Today, I became the proud owner of Stealth Fighter #110. My pictures are too big to upload.

SamM

Congratulations the fighter is great bike and you can upgrade to have a rear cluster if you really need to pedal at full speed!

I am sure you will enjoy the bike! - please post a picture.

Hugh
 
Some of the parts may be sold off. Haven't decided yet which way to go yet. I got all the original takeoff parts with it. The bike will need a new seat post. This one has been cut and is too short for me. I have another one that could work. The original forks, front wheel and brakes came with it, along with several tires. The bike has Shimano Saint brakes on it now. Any ideas if these brakes are good or not. They seemed alright during my test ride.

SamM
 
SamM said:
Some of the parts may be sold off. Haven't decided yet which way to go yet. I got all the original takeoff parts with it. The bike will need a new seat post. This one has been cut and is too short for me. I have another one that could work. The original forks, front wheel and brakes came with it, along with several tires. The bike has Shimano Saint brakes on it now. Any ideas if these brakes are good or not. They seemed alright during my test ride.

SamM

Congratulation SamM If you are gonna change out the seat post. I would highly recommend the RockShock Reverb dropper seat post. The Stealth Bikes (especially the Bomber) Have a really high ground clearance. So if i were to have the seat up in the correct riding position, i would be unable to reach the ground with my feet. And that is extremely Annoying and dangerous if you are gonna ride it in traffic.
 
Keep this in mind. When the seat is too high, it puts tremendous leverage on the seat sub frame. Breakage is common. Bicycle geometry doesn't apply to motor bicycles, because you don't pedal a motor bicycle the way you pedal a regular bicycle. The seat really doesn't need to be any higher than necessary to just keep from hitting your knees into your elbows when pedaling.
 
With the seat in it's current position, I can't even petal it. Well, I can but it causes me to scream like a little girl. My left knee ligaments were destroyed in a motorcycle crash last year and I only have around 115 to 120 degrees of movement. Which is great considering what happened. The meniscus was also torn pretty badly. It's a miracle that I can even walk. The PCL was not repaired and still deflects about 3 degrees. They didn't repair the PCL due to the lack of time. My knee surgery last September was 5 hours long. It was too risky to keep my under the extra 2 hours to repair it. The movement in my knee is coming back but the seat will need to go higher for now.

SamM
 
SamM said:
With the seat in it's current position, I can't even petal it. Well, I can but it causes me to scream like a little girl. My left knee ligaments were destroyed in a motorcycle crash last year and I only have around 115 to 120 degrees of movement. Which is great considering what happened. The meniscus was also torn pretty badly. It's a miracle that I can even walk. The PCL was not repaired and still deflects about 3 degrees. They didn't repair the PCL due to the lack of time. My knee surgery last September was 5 hours long. It was too risky to keep my under the extra 2 hours to repair it. The movement in my knee is coming back but the seat will need to go higher for now.

SamM

I con understand that. I have a few old injures myself. The good news is Stealth's are so powerful, you won't need to pedal any more than you want to.
 
SamM said:
Today, I became the proud owner of Stealth Fighter #110. Here are a few pictures. The bike is in good shape but needs some tlc. I hope to bring her back to her former glory. It has a 26" front wheel laced to a Hadley hub. I may buy a new 26" Duro Razor Back to go up front. I'll be removing the spacer from the fork neck and raising the forks up where they need to be. New handlebars, a longer seat post and a rear shock will soon be in the works. I think the handlebars could be bent.

The first order of business is to clean the bike. After that, I'll be reading the owners manual and familiarizing myself with the bike, it's components and the charging system.

SamM

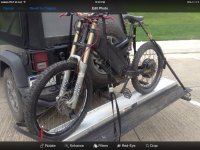
Congrats and welcome to the club, if you have any battery issues, I got a brand new Fighter battery with 31 cycles on it I can sell you for cheap. Your Fighter looks great with the 26 up front and 24 on the rear. Looks like whoever had your bike before got it set up nice with the Forks and coponents. How do you like that hitch hauler? Think about getting one for my truck, so I don't have to lift the Fighter into the bed, which is tall.

Rick
 
Rix,
I might be interested in that battery. I'll let you know.

The bike is nice but needs cleaned up and some attention. I may sell the forks this Winter and upgrade the bike with Marzocchi 888 fork and a new rear shock. Any ideas what is available for the rear? It needs handlebars too and I may redo the brakes.

The hitch hauler is great but needs cutdown.

SamM
 
proper159 said:
Now, what is the best way to put on a new tire with the tube on the rim? I want to avoid pinch flats and make sure the tube is sitting on the rim (a lot of bike shops don't get that part right). There was a spray that they used to make sure the tire bead would sit just right, should I use soap with water? I kind of want to make sure I don't spray too much water because I have a tape job at the moment to protect the innertube from getting punctured from my cracked rim.

I've changed maybe a 100 dirt bike tires. MTBs have no rim lock so it's a lot easier. Some dirtbike tires are easy, some are mongrels.

To lube the whole tube and tire bead use talc (baby) powder. You lube the tube if your old tubes are coming out with wear marks on the sides from rubbing on the tire inner wall. Problem is that talc in inviting the bead to slip on the rim.

To temporarily lube just the bead for fitment, use Windex. Windex is great because it lubricates the rubber when wet, but dries up totally and leaves the rubber a little tacky so your bead then sticks nicely to the rim. Best if you can wait 30 mins before inflating with Windex, so it can dry up more. Don't use windex on the tube.

If you are careful you could put powder on the tube and sparingly put windex on the tire bead.

For a MTB tire you should only need the tire irons to start and end the process. Do all other tire fitting with your hands. The main trick is ensuring both beads are fully pulled up into the rim well, while trying the lift a bead over the rim edge on the opposite side. Then the tire can shift the way you need it to be. The other trick is the lube used, and the design of the tire irons.

Removal: Pull one bead off. Remove valve stem cap. Remove valve stem to deflate tube. Remove tube completely. Pull tire off.

Installing: Inflate tube so it's just holding its shape. Insert tube into tire while it is off the wheel. Match tire designed rotation direction with wheel direction. Put the disc side of the wheel into the tire, so that you can later complete fitment with the wheel flat on the ground with disc up to avoid bending the disc. Hold wheel in one hand and tire (with tube) in the other. Pull the tube out of the tire a little so you can fit the stem through the rim, and install the stem cap or nut. Now push the rim edge into the tire just beside the valve. The tube should now be back inside the tire. Starting there, pull the rest of that bead over the rim. Then do the other side. Tire irons only needed for the last bit of each bead. Air inflation should seat the bead fully. Then reduce pressure to normal ride pressure.
 
Emmett said:
I've changed maybe a 100 dirt bike tires. MTBs have no rim lock so it's a lot easier. Some dirtbike tires are easy, some are mongrels.

Thanks for putting in the time to write this. I'll try the talc and windex next time for sure. I was told to use a little WD40 today and it worked like a champ. I don't want to do this on a regular basis but it was amazing how the bead lined up as I pumped the tire. I've seen bike shops really struggle with that last part. I got some great tire irons that are specific for Downhill Rims, turns out I don't really need the steel Park Tool levers. Using your foot to put pressure on the tire while the wheel is flat also helped with the last part really well.

Another tip that worked was unscrewing the adapter on my standing bike pump and leaving this connected to the tube, ensures that the tube stays deflated.

What took forever was cutting the electrical tape around my Hal Connector. I taped it up to protect it from shorting during rain storms. I have to re solder the connector with that waterproof adapter mentioned a few months ago.

The tricky part was also lining up my wheel with the right tension on my chain. My bomber was leaning against the wall (didn’t have a bucket to place under the Vboxx to elevate) but I found it a lot easier to line up the wheel to the middle of my rear shock and then tighten the torque plates to exactly where the perfect chain tension was established while keeping some pressyre on the wheel with the inside of my leg. At this point the axel doesn't move as much and the weight of the bike keeps the wheel from sliding forward. Then I place the Loctite blue and wait 1 minute for it to thicken on my axel and then tighten the bolts (prevents loosened nuts when you regen a lot). Got the wheel aligned in 3 minutes which was a lot faster than when I've had the bike elevated.

Awesome ride back home tonight on a Razorback, cornering was way better than the Halo Contra, maybe because the rubber is harder. I still have a Contra on the front which works well with the Razorback although I had to super glue a piece on the contra after riding through some broken glass. Felt amazing to regen like crazy knowing I have a bit more life with the Razorback.
 
proper159 said:
My bomber was leaning against the wall (didn’t have a bucket to place under the Vboxx to elevate)

I usually flip the bike especially after a flat on a trail somewhere miles away. It's also easier to adjust chain tension & alignment flipped.
 
remf said:
proper159 said:
My bomber was leaning against the wall (didn’t have a bucket to place under the Vboxx to elevate)

I usually flip the bike especially after a flat on a trail somewhere miles away. It's also easier to adjust chain tension & alignment flipped.
I was going to do that but didn't have enough work space area where I was. But I'll definitely do that when I'm in the trails.
 
So far I've never had to use any lube to deal with a bicycle tire. Usually I just snap my fingers and the tire jumps off the rim at my command. For more difficult bicycle tires I have little 4" long plastic tire irons that everyone sells at bicycle shops. Those are better to use than metal tire irons, especially if you don't have a lot of experience.

For motorcycle tires I have a set of tire irons that are only about 6" long that came in the tool kit of my 1974 Norton Commando. You also will need a bead breaker of some sort for motorcycle tires. Check on youtube to see what others are using. I bought one at a motorcycle shop. I prefer to use dish washing liquid as tire lube. A solution of about 50/50 works well. Slob it around the bead with a paper towel or rag.

The trick to removing difficult motorcycle tires is getting the tire bead on the opposite side of the tire from the tire irons, down into the center tunnel of the rim. Use a lot of lube. Gigantic long tire irons are a bad idea for the inexperienced, because they give you too much leverage and make it too easy to pinch your tube.

Right before attempting to put the last side of the tire on, fill the tube with air, and then remove the valve core, and let the air out. That helps with not pinching the tube. As you work the tire irons around the tire, make sure to get the opposite side down into the rim tunnel. Remember to lube the tire.

The lube also makes it easy to seat the bead. After it dries the lube effect will disappear.
 
Back
Top