Adrian's E-vanti (First E-Bike Build)

adrian_sm

1 MW
Joined
Feb 22, 2009
Messages
2,429
Location
Melbourne, Australia
After seeing a few friends ebikes I got the bug and had to build one for myself. So after chatting to a few people, and hearing some of their war stories, I took the plunge and order my parts.

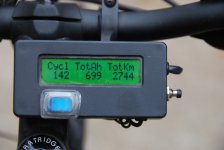
Decided on a Crystalyte 408 rear hub, 35A controller, 48V/10Ah Headway LiFePo4 batteries, half twist throttle and a Cycle Analyst so I know what is happening.

The bike is a hard tail Avanti Montari. I have been riding it as a commuter for quite some time, but wanted to get to work a bit quicker and not quite so sweaty. It is about 18kms one way, so I might need to charge up at work depending on how lazy I am in pedalling. The ride is a nice mix of flats, gentle hills and a couple of hills that hurt to get up if I haven't riden for a while.

Anyway, I finally got my hands on the batteries yesterday after a long wait, so I set to work seeing if it would all run. Unfortunately it was a holiday today, meaning shops aren't open so I had to improvise the way I mounted the batteries and controller. But at least it gave me some design feedback for the final mounting.

Wheel dropped in nicely. Had to adjust my rear v-brakes to accomodate the new wider rim.

Next was the throttle which I thought would be simple, but had a bit of trouble, the rapid fire shifters seemed to get in the way. Finally managed to space them apart enough to get clearence for shifting, but not ideal. I must be missing something here, there has got to be a better way.

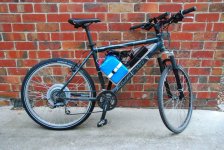
Next was the hard part, the batteries. I was pretty keen to get the battery weight down low so decided to try and fit them in the frame triangle. The battery pack is about 130mm wide, so just narrow enough not to get in the way of my legs or pedals. Hadn't really considered where to put the controller, but ended up trying it in the frame as well. The vague plan was to create a aluminium sheet metal shelf that the baterries and controller get strapped down to. Then I would fabricate some protective sheets for the sides, in case I drop the bike on it's side. Finally adding some sort of weather proof cover over the top.

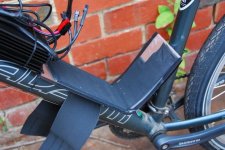
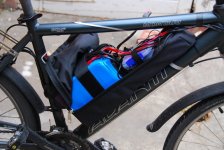
But for now, I just hacked together what ever I could find laying around in the shed to get the thing running. So I cut up an old plastic storage box in place of the ally sheet. Used some ply board to add some support and spread the loads. Then proceeded to cable tie everything to the frame.

Tucked all the wires roughly away to make sure they don't escape, took a photo incase it all blows up on it's maiden voyage, then took it for a spin.

Surprisingly all went well. Cruised up the hill on my street at ~23km/hr, came down doing about 43 km/hr.
I did notice some vibration during hard acceleration, from an unknown source. Actually come to think of it there was some vibration when I turned the motor over with the bike upside down in the shed. Maybe the wheel isn't well balanced.

I'll start trouble shooting tomorrow.

Can't wait to take it for a decent spin. Gotta love e-bikes.

Thanks to everyone on this forum for all their knowledge that I have been reading through while waiting for my parts. And a special thanks to Mark & John for helping me decide on the parts, and getting them all for me

Cheers, Adrian.

Here is a couple of photos, of my thrown together build.
DSC_4978-1.JPG
DSC_4973-1.JPG
 
Nice. That battery mount is giving me some ideas. Been having a hell of a time trying to build a custom triangle batt pack. I'm kinda surprised how small that Headway pack looks.
 
Damn if you signature is up to date my battery pack should look small to you. 72V 20Ah will be three times the size of my pack. Anywonder you are looking at a custom arrangement. Is there enough room to fit them in your frame? You might need to split them up into two packs.
 
Duct Tape Adrian.

Definitely needs some duct tape. Apart from that glaring omission it looks good.


Talk to you Tuesday about shifters. Now you know why I use Shimano combo ones with only a thumb trigger (you move the brake lever down to shift).
 
Kudos! I'm a sucker for super simple, clean BIKE-looking ebikes.
They are our best public ambassadors to get the general public stoked on the idea
of hybrid biking. Get there faster, smoother, and without sweating one's work clothes.

My bike is fierce! Just listen to its warning bell, ha ha.
http://www.youtube.com/watch?v=UwMZp2sAiEU
But your bike looks even more normal.
Doubtless, you are quite a bit more sane than me;
I imagine you'll be sticking to pavement and not deep water. :mrgreen:

More reports wanted as soon as possible. Beautiful work you do.
 
Mark_A_W said:
Duct Tape Adrian.

Definitely needs some duct tape. Apart from that glaring omission it looks good.
I must say your bike is a work of duct tape art. But.... It will be my mission to try and build this bike without it. I want to be able to extract the battery without too much effort.

Say no to duct tape.

Reid Welch said:
Kudos! I'm a sucker for super simple, clean BIKE-looking ebikes.

Thanks. It was my aim to keep it looking clean. Once I get the battery mounted properly it should look pretty slick. Assuming I can actually manufacture what I have in my head at the moment.

Reid Welch said:
More reports wanted as soon as possible. Beautiful work you do.

Took the bike for a few laps around the block, down to the shops, and over to a mates place.
Going well so far.

Made a few changes:
(1) Added a bit more cushioning for the battery, so it doesn't get bashed around as much until I get some decent foam.
(2) Cleaned up the wiring a bit

Things still to do:
(1) The temporary battery mount is a bit wide. I am pedelling like a cowboy at the moment. So need to get rid of any unneccesary width in the final configuration.
(2) Sounds like there is some movement in the spokes, so I will need to get the wheel tuned properly. Before I do some damage.
(3) Noticed a few creaks during pedaling that weren't there before the conversion. Need to find what is causing them.
(4) Obviously make a proper sheet metal bracket to support the batteries and controller. Got some nice wide elastic straps to secure the batteries in places but still allow removal.
(5) Make some bash plates to protect the sides off the batteries
(6) Finally a nice weather proof cover for the batteries. Will probably buy a cheap cooler bag, if I can find one that looks all right and is big anough to cover the batteries and some of the cabling.

I have now let a few people try it out, and everyone has come off saying "Wow", "I want one".

This things rocks.

Adrian
 
Hey Guys,

I have been keeping a log of the stats for my first 20 odd trips on the bike, mainly to and from work.

Thought you might be interested. Also included typical times for car, and riding before electrifying the bike.

Trip to and from Work:
~ 18 km by MTB non electric, as keeping off the roads, and on bike tracks more
Avg travel time: 45 mins
Quick day 42 mins
Slow Lazy Day 55 mins

~ 15 km by roads on ebike
Avg travel time on eBike: 28 mins
Fastest trip to work: 26 mins
Slowest 33 mins (this was first ride with me taking it easy)

~13.5 km by car
Avg travel time 25 mins
Slow Day 30-35 mins
Quick day 20 mins (coming in early before traffic builds up)


Bike Specs:
- Avanti hardtail MTB
- Crystalyte 408 brushless hub motor
- 48V 10Ah Battery LiFePo4
- 35A Crystalyte controller

Trip Stats:
Avg Avg Speed (GPS) includes traffic light times: 31 km/hr
Avg Avg Speed (Cycle Analyst) only while rolling: 33 km/hr
Max Avg Speed (GPS) includes traffic light times: 32.2 km/hr
Max Avg Speed (CA) only while rolling: 35.5 km/hr
Max Speed (going down a hill) 57.9 km/hr this is limited now as the motor starts acting as a generator
Typical cruising flat speed: 40-43 km/hr
Typical speed going up hills: 28-30 km/hr
Avg. Economy 11.7 Wh/km


Overall very happy. Getting to work a few minutes slower than the car, much quicker than riding without motor, and I am not still sweating when I jump out of the shower at work.

And I just found another way to get to work that should shave 1.5km off the trip, and get travel time down to about 25mins.
 
A great and encouraging report. Thank you!

You pedal assist, which is what regular ebikes are so adapted to doing.
Your efficiency with this direct drive motor and your terrain, etc, is great.

Has anyone done efficiency tests comparing geared v. direct drive motors run at their optimum speeds?
I bet that geared motors suffer considerable losses due to the planetary gearing.

Anyway: the project is looking GREAT. Much enjoying your reports.
Looking forward to the next installment.

Thanks,
R.
 
Got about 500 kms on the bike now, and been too busy riding to take photos.

But thought some people might be interested in a few pics so here goes.

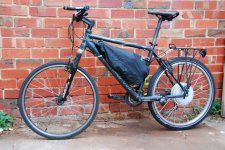
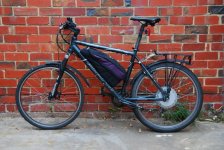
Here is my Avanti I have had for a while. Decided to get the batteries and controller tucked away in the frame, which helps with handling performance.
I have used a rain cover from my back pack to hide away the electronics, held in place by eleastic and velcro.
DSC_5495.JPG

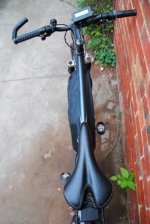
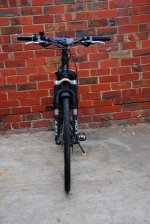
Here is a view from above. As you can see it is pretty narrow, doesn't interfere with my legs at all while pedalling. There is only about 5-10mm clearance to the cranks, so lucky I didn't get the Headway pack with screw-terminals it wouldn't have fitted.
DSC_5476.JPG

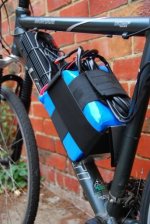
Taking the cover off you can now see where I have mounted the controller and battery.
View attachment 6
DSC_5483.JPG

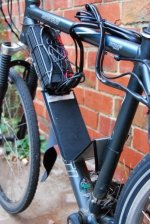
Essentailly got a bit of 1.2mm alluminium sheet. Trimmed it to size at work, and bent it in a couple of places to provide a little bracket for the battery. I mounted it to two bottle cage mounts on the tube from the crank to head stem using low profile head screws, and used one screw on the seat post tube, plus a cable tie. I have some ~10m thick EPDM foam to cushion the battery from the bracket. Currently using elastic straps to hold the battery down. Seems to work well enough.

DSC_5486.JPG
DSC_5487.JPG

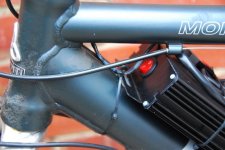
The controller is cable tied to the front of the bracket, to hold it flat, and cable tied again at the front.
This places the switch in a very handy location, even when the rain cover is on.
DSC_5489.JPG

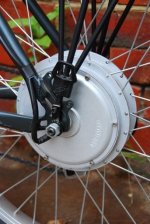
The Crystalyte 408 is in the back, with a torque arm on either side, unfortunately made to use the same screw holes as the new rear rack I have just installed.
Placed a bit of a loop in the wires coming out of the hub to hopefully avoid water draining down into the hub.
DSC_5490.JPG

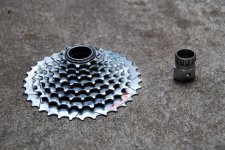
I have an 8-speed free-wheel on the right with 11 teeth on the smallest cog. Originally this was sapced out so I could use the big cog, but soon realised this was pointless, so took it off (with the help of a modified cassete ring socket turned down to fit.) This means the freewheel bites into more threads on the side cover of the hub which has apparently caused others issues, and no longer requires a space between axle shoulder and drop out.
DSC_5339.JPG

All in all a fairly painless build.

I might remake the bracket with a thicker guage plate, as during acceleration some motor vibrations seem to hit a resonance frequency in the plate, causing it to sing. Should make some bash plates for the side of the battery to protect it in case of a fall. Will proably make a better rain cover at some stage. But apart from that has been trouble free.

Only issue riding it was a flat on the rear tire 5 kms from home. Managed to ride over a 60mm (2.5 inch) screw pointing straight up off the road. It pierced straight through my Schwalbe Marathon Plus and both sides of the inner tube before hitting the rim and bending over. Had to call the support crew as I didn't have the tools on me to take the wheel off.

Have pumped the tyre upto 70psi, which is apparently less likely to puncture, but a pretty firm ride now...
 
That rain cover will flap around...noisy, and slow you down.

Duct tape will fix that :twisted:
 
Thanks again for recommending the "puncture proof" Schwalbes, Mark.

Appreciate it mate.
 
Quick update.

Lights
Now have lights running off the main battery pack. Using a DC to DC convertor that accepts upto 72V, and spits out 12V, 6V & 3.3V.
Running two Cree R2 headlights at 6V, and a cheap five LED blinky taillight off the 3.3V.

Weight
Finally found a set of scales:
Front wheel: 10.5kg
Back wheel: 18.8 kg

Giving a total of 29.3 kg.

Rain Protection
Got some cheap mudguards, and strapped them on. No longer get a skunk strip, or as much water off the front wheel in my face.

Distance
Upto about 900 kms now. Pretty much all going to and from work, with the occasional trip to the pool or day care for my 3 year old.

Overall Impressions
- Loving commuting by bike, when I do drive the car I feel like I am being wasteful lugging around 1 or 2 tonne along with me.
- Wouldn't mind trying a decent road bike to compare. As I have only riden mountain bikes in recent times.
- 40 km/hr seems like a nice flat cruising speed for me.
- Regen is a joke. I would much prefer to go faster down hills than charge my battery.
 
I changed the way I secure my battery and thought it might be worth updating here.

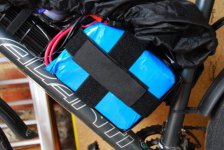
Previously I used wide elastic straps, with velcro ends. But I think on the bigger bumps the batteries were getting airborne. So I switched to using wide velcro straps instead. These don't extend under tension, and are much more secure.

Here is a little picture.
DSC_6213.JPG

I bought the velcro from here a local fabric type store.
http://www.spotlight.com.au/
 
Looking good. Some velcro is better then others, I'd be interested to see how yours holds up long term. Expensive stuff per metre? Do you remove the battery to charge?

Have you got a sandwich hidden under that rain cover? I see a bit of tupperware :lol:
 
Thanks. Velcro has been good so far. Can't remember it being too expensive, but it was the no name version.

I leave everything in place on the bike when charging. All I do is turn off the controller and plug in the charger, which is the red/black pair of Anderson you can see sitting on top of the battery. So I can't really comment on if the velcro is any good for someone wanting to pull thing in and out all the time.


:lol: Ah the tupperware. Forgot about that. I should really post about it. That is my bespoke DC-DC convertor enclosure. I have managed to get some lights running of the main pack. But rather than fork out cash for something robust and well designed, I thought I would have a crack at doing it all my self. So a $3 tupperware container is a nice snug fit for my $5 DC-DC converter. Add a few dealextreme Cree R2 LED torches, some handy work with a soldering iron, and a glue gun. Hey presto I can see the light.
 
Well after a few drama's with my hub motor falling apart, I am back on the road again.

I have now done about 1800 kms mainly commuting to and from work. Which lets me securely store the bike. But I would really like to be able park my bike somewhere less secure, lock it up, and not be worried about people playing with all the not very well covered electronics. So I have been thinking about something a bit more tamper proof to house the battery, controller, and DC-DC converter.

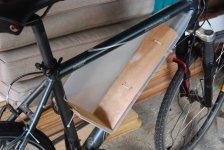
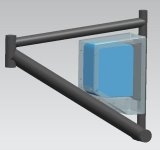
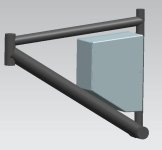
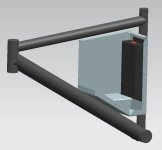
I toyed with ideas of fabricated sheet plastic enclosure, or custom bag over my current battery/contrller shelf, but I am tending towards a sheet metal structure at the moment. Something along the lines of this.
eBike v1a.jpg
eBike v1b.jpg
eBike v1c.jpg

Made from five parts. Will mount off existing bottle mount points, and possible an extra clamp at the top of the seat tube region. It will screw together with M4 button heads, into nutserts. The is a little shelf to support the battery which will have closed cell foam on all side to make for a snug fit. The DC-DC converter will sit under the little shelf. The controller will bolt on to the back vertical wall. I will probably add a key switch for the controller on the back face near the top of the seat tube. The batteries anderson charger connectors will pop out someone down near the bottom of the seat tube. I'll try to make it water proof, but will still include drain holes in the base.

Now I just have to see how much to get the parts laser cut.... and anodized black. :D
 
Looks like a good plan.

Any thoughts on either heatskinking the controller if it's inside the box or otherwise, mounting it outside the box for some airflow?

I have my charger inside my box (bolted against the metal underside of the top of the box) but I think direct airflow is pretty hard to beat for keeping FETs happy.
 
voicecoils said:
Looks like a good plan.

Any thoughts on either heatskinking the controller if it's inside the box or otherwise, mounting it outside the box for some airflow?

I have my charger inside my box (bolted against the metal underside of the top of the box) but I think direct airflow is pretty hard to beat for keeping FETs happy.

I have pretty much ignored the issue of controller heat, apart from mounting it directly to the outside of the ally box. From the times I have check my controller after a ride, it never even feels warm. Granted it has been winter, and I haven't been climbing massive never-ending hills. But I really should check it properly before I lay down the cash to make the enclosure. I just got a cheap digital thermometer, so I will throw that on the bike and check.

The theory on having everything in the box, was mainly to keep it all clean, and stop people playing with it, if I am not around. Guess I could rotate the battery 90 degrees, and place the controller on the top of the box in the fresh air. Cable entries to the box will be an issue for water ingress though.... Or alternatively.... I could create some air vents in the box that all face down, and stop water splashes getting up, then put a fan inside to get some airflow..... Actually I could probably do without the fan, and rely on the speed of the bike to encourage air through.... Hmmmm... That might work.

Imagine air inlet on the front face at the bottom, a second skin surface just infront of the battery scoops the air up and over the top of the batter. The outlet would be at the bottom of the rear face below the controller, this could also be the exit point for hall and phase wires to the rear hub. Could be neat.

Adrian
 
Cash?

We can make it on the box folder at work. Get Eric to put inserts in it - downstairs has an Avdel tool.


You're talking to the king of foreigners here - I just made a pair of speakers on the modelshop mill (shhh, don't tell anyone ;) )


But, I keep telling you, duct tape works JUST FINE.
 
Okay time for an update on the bike. I thought I would improve my battery enclosure. First I was going to do s sheet metal job, but thought it would all look too boxy. Then I got inspired by a beautiful Cannondale conversion and was planning to go the full fiberglass box in the triangle, even bought the foam and started to shaping it. But with the width of my battery pack I could decide on a nice shape for it, so ended up doing something a bit different. Here are a few pics of how it all turned out.

So it isan old backpack reborn as an enclosure for the battery, controller, DC-DC converter and general wiring.
It still has the same sheet metal support I was previously using, but hopefully looks less like a garbage bag than before.
DSC_7925.JPG

Everything is still narrow enough to only brush my calves occasionally during pedaling.
View attachment 5DSC_7932.JPG

Here's a closer look with the hood up. It is all a nice snug fit. I made a nice cable exit out of the top of the back face of the bag for the phase, hall and rear blinky light wires. At the moment I have the throttle, CA and headlights wires just exiting the zip at the front, But I might clean this up.
DSC_7938.JPG

After a few stacks in the wet when I have locked up the front due to poor modulation of the brakes. I decided to put some Avid BB7 on the front, got a second set for the rear but they didn't fit.
View attachment 2

Also got some cheap mud guards and a rear rack with kiddy seat so I can take my three year old on the bike. First time I took him on he kept say "Slow down daddy." Now he says "Faster Daddy. The cars are catching us!" Kids are great.

Not sure if I mentioned it before but I have now got my dual Cree R2 headlights, and a blinky red rear light all hooked up to a DC-DC converter off the main pack. I also mounted a switch in the CA that switches on th e CA backlight, headlights and tail light at once. Here is a pic:
DSC_7934.JPG

Finally I also now have the CA throttle over-ride rigged up to limit amps to 25. This makes for a little less vibration during dead stop starts, and seems to have stopped the BMS from its occasionally tripping.

Have now racked up around 2800kms, and ride every day to work. Perhaps now that I can lock up the electronics a bit more securely, I'll start using it more where I have to lock it up in public.

Adrian
 
I like the bag, nice and discreet. Are all those kms on your headway pack?
 
Thanks.

Yep, all k's on the Headways mostly on my daily 15km each way commute, charging at both ends.

Only dramas I have had with the pack is a couple of times the BMS has shut things down, requiring a reboot. This has typically happened when taking off from a stop.

I should do a full discharge run and see how the capacity is holding up.
 
adrian_sm said:
I should do a full discharge run and see how the capacity is holding up.

That would be great, I think you might have the distance record so far on headways (unless someone could correct me), I'm on about 1200km so far.
 
I've done over 4000k's on my headway pack.
 
Back
Top