Amberwolf's Velcro Eclipse

amberwolf

Administrator
Staff member
Joined
Aug 17, 2009
Messages
40,777
Location
Phoenix, AZ, USA, Earth, Sol, Local Bubble, Orion
file.php


I decided I needed a spare fully functioning ebike, with all the various problems I am having lately, and the wierd hours at work where I sometimes have to close one night and open the next morning, barely allowing time for travel and sleep, much less eating, taking care of the dogs, and fixing things that break.

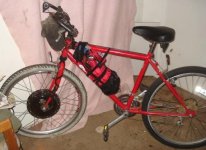
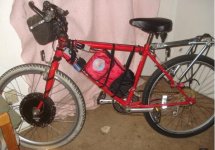
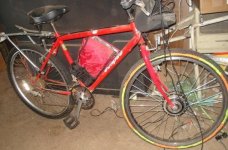
So for situations like that, I built The Velcro Eclipse:
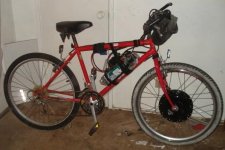
DSC03081.JPG
It's made from the light cromoly $8 Goodwill bike from here:
http://endless-sphere.com/forums/viewtopic.php?p=292407#p292407
file.php

The concept is that everything not bolted down is held on with velcro straps. ;) No cable ties. Most of the velcro is the double-sided cable-wrap style, from server cabinets, saved for me by a friend from some scrapped equpiment.


I just did VERY basic cleanup on, added a seat from a Freecycled bike (the one from a few months ago with "air free" tires), and changed the rotted rear tire out for one given to me off a Landrider. The "new" tire happens to be identical to the Kendas that came on the Columbia that my DayGlo Avenger started life as, one of which I'm still using on the Fusin hubmotor wheel. I don't have any more Slime Strips to put in it, though, so it's only got a thick tube and some chunky Slime sealant.

The motor on TVE is the 9C recently used on DayGlo Avenger:
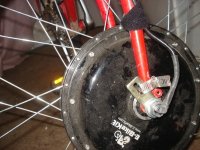
DSC03084.JPG
on the plain U-fork this bike has (no suspension at all). I dont' really have a "proper" torque arm, just the little one that came with it, so I am going to probably drop the current limit from the 16A I have it set to now (which actually ends up as 19A, in the Lyen 6FET); don't know what value yet.

The 6FET has just had a second "new" main cap put in it; see the DGA thread for details, but basicallly the Phoenix heat combined with my having to usually run at partial throttle or in current-limiting mode has been overheating the caps in teh controller and causing them to sizzle inside (boiling the electrolyte), after enough runtime.

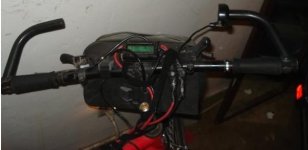
I put the WattsUP from AussieJester on the bars,
DSC03082.JPG
since all the electronics happen to be close enough to the front for the cables to reach.
View attachment 1

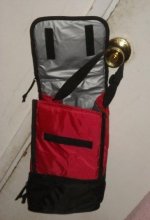
I had wanted to use this nice bag to hold the battery/etc:
DSC03086.JPG
but just as I was fitting the battery in there and deciding on placement, I realized I would have to always take the battery out to charge it, since it's a 36V 9Ah NiMH pack, which is gonna get toasty during charge, and letting it cool off faster afterward allows for more charge retention, and probably longer life. Charging in an insulated bag just seems like a really bad idea.

Since it would be very inconvenient to take it out and put it in every charge, I nixed the bag idea and just velcroed it to the down tube with the bottom end of it fitting (barely) in the water bottle holder. :)

The controller with endcaps removed for better airflow is velcroed to the battery, and wire bundle is all velcroed to itself and the battery and downtube.


I did a test run around the block a few times, and got about 17Wh/mile, no pedalling, riding 1/4-mile sections of 20MPH+ but mostly just above 15-16MPH. No speedo, but the sound the motor makes at that speed tells me when I've reached/passed it, and the full-throttle speed on a full charge is 21-23MPH, so I have a fair idea that's what the speeds were, and why I "chose" those speeds for the test.

I do not have regen setup yet, as I do not have an ebrake handle or switch setup on it (I did one for it on DGA on the brake cable noodle, but there is no noodle on these V-brakes, so have to come up with something else).


No lighting or anything else on this yet, but I will be adding a small tube rack (the one previously on the Sierra, I think in the DGA thread), and putting an LED motorcycle taillight/brakelight on the rear of the rack. A big LED flashlight plus my helmet light will have to do for a headlight for now, and I won't have turn signals for a while, as I do not yet have any others not in use (on DGA and CrazyBike2).


THis is not exactly a permanent build, so it's quite probable that parts of it will be moved to other bikes as needed. But I want to try to keep it as a spare ebike in one form or another, just in case, so as it mutates I'll update the thread with those changes. :)


For now, as a cheap spare bike, it works, and I've only spent about 3 hours on it. Most of that was in the basic maintenance of the Eclipse bike itself, to get it ready to be ridden. It's still not in great shape and needs to be fully overhauled, but it functions right now and that was my only goal.
 
Damn AW,
I never would have taken you for going conformist and owning a regular looking ebike. Just today I was missing having a 2nd ebike enough that I thought about a quick throw together with one of the dual suspension frames I've been saving for a shot at a leaning delta trike, so I may join in the conformity a bit myself. :mrgreen:
 
It's really easy to conform to the great 9c hubmotors. The heat this year is brutal, I'm suprised he doesn't have an ice chest full of cubes and a blower to force chilled air into the controller. It always amazes me that an ebike works at all in Phoenix, in June july or august.

I wouldn't worry too much about the torque arms, just keep the nuts tight, and the controller under 20 amps.
 
I guess this could be considered a "normal" ebike, at least for now. :) It does seem strange to have it around, since I don't even have any plain old regular bikes put together at the moment (although the Schwinn Sierra will be reassembled again and left that way, as it's a nice bike for a regular DF type even though it's really too tall for me--If I could shorten it without having to change the frame geometry and basically destroying it I would. Well, I could change down to 22"-23" wheels and it would then fit me ok, I guess, but the pedals might clip the ground. :lol:).


I sort of do have an "ice chest" in that on DGA I always carry a 2-liter bottle of water, frozen, and I've been packing the cargo pod on DGA so that ends up resting against the controller. Seems to help but it's not perfect, and it only cools the casing. So it stops the FETs from getting to hot but it does little for the caps, which is why I've twice blown some in the Lyen 6FET (and I think the caps I've used are not very good, but I am waiting to see what I can find before ordering good Panasonic ones, since shipping costs are ridiculous for something so small and light).

But it is very hot; at my house in the front (streetside) it's 111F right now, and it was 114F an hour ago, and a couple degrees cooler in the backyard with the trees and grass. On the road, riding, it'd probably be at least 10F hotter, and 20F+ hotter if I was in traffic. :(

I suppose if I put both NiMH packs on for 72V and used regen I'd probably have to worry more about the torque arms, eh? :lol:
 
Just to see what it'd end up looking like, I tried out the bag anyway. It's a little better than just the bare battery, but not much.
DSC03105.JPG
I'd need to modify the water bottle holder so that it would let the bag be placed on it's side rather than it's back, to make it really "work" in that frame.

While I was playing with it, I also put that basic rack on there. It's not a good rack but it is better than none, let me at least tie a minimal backpack to it; if I load up the pack I'd probably have to wear it to ride home.

For lighting, just a little red-gelled flashlight for the rear, hose clamped on to the join between seatstay and rack so it'll point straight backwards. My found-in-a-puddle solar-charged flashlight on the front for a headlight, just held on with velcro so I can take it off the bike with me; too tempting a theft target otherwise.

If I have to I can also carry a tiny amount of light stuff in that front handlebar bag, but upon close inspection it appears to be sun-damaged a bit, so I wouldn't trust it with heavier stuff, especially since this bike has no suspension at all.

Now I need to take it out for a test ride and see how it handles. Since I have to be at an all-store meeting at work tonight, I'll ride it to that to see how well it'll work as emergency work commute transportation. For now, I'll leave the bag on there, though since I have to take the battery out to charge it anyway, I'll take the bag off at the same time.

Hmm. A thought: If I bolt a metal plate on inside and outside of one side of the bag, with holes drilled in it for the water bottle mounting holes, I could then easily take the battery in and out of the bag for charging. I'd just need one velcro strap around the whole triangle to prevent lateral swaying of the battery, and one wrap of that same strap around the bag to secure the battery into the bag (since it is a lot bigger than the battery).

That wouldn't be nearly as inconvenient, and I could then have a kind of nice-looking, color-coordinated ebike, which I suppose I could also use for demo to potential customers. :)
 
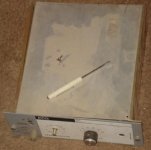
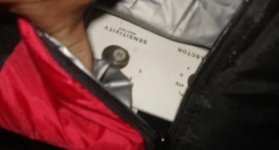
After I got home from the meeting at work, I had to check out the idea of the plate in the bag above. I recalled some aluminum ECG interface boxes and found I already had one right next to where the Velcro Eclipse has been "parked" the last couple days. Perhaps I had already seen it and been subconsciously pondering this because of that.
DSC03107.JPG
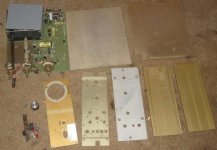
It just unscrews into a set of plates and stuff:
DSC03108.JPG
And by the wierdest coincidence, the knob holes from the front plates line up perfectly with the water bottle holes.
View attachment 7
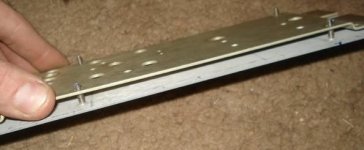
Those front plates have screws already embedded into the very front panel, which secure into the one behind it (with the rack tabs)
DSC03110.JPG
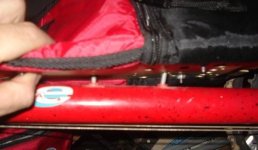
So I punctured the screws from the inside panel to the outside, and secured the two panels tightly together on either side of the material with the nuts.
View attachment 5
The water bottle screws were too short, so I used a couple of longer screws I keep as spares for my cargo pod sides from CrazyBike2,
DSC03112.JPG
with large washers under them to spread the force out over the inner plate some (the knob holes in it are larger than the screw heads).
DSC03113.JPG
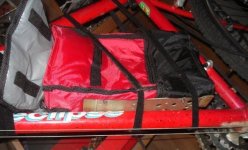
So the bag ends up like this, with nothing in it:
DSC03114.JPG
The bike looked like this with the controller separately bound to the frame (with velcro of course), and it's wires bundled up behind it.
View attachment 1
That's still kinda fugly, so to pretty it up I unbound the wires and just stuffed them into the top of the bag:
DSC03116.JPG

I suppose it is now the most "normal" bike I own, and most certainly the neatest. :) But other than pure transport for just me, it's not very useful, since I can't haul any cargo on it, besides a backpack of groceries or something reasonably light. Since it's supposed to be just a backup bike, I guess that's ok. :)


Oh, some numbers for power usage, since I used it for the work trip test. Comes out to about 13Wh/mile (or less)! Distances are estimated based on normal ones with DGA, and speeds estimated same way I did on the test trip. I don't have a speedo or odo on this bike yet. I pedalled about like I usually do with DGA, just enough to feel that I am, not enough to hurt.

To work:
43.4V start (not charged to full, didn't want battery hot when I put it in that thing).
Forgot to write Ah down. :(
28.5Wh
19.96Ap
670Wp
33.75Vm
41.2V resting
Estimating 2.2 miles, based on same path I always take.
Estmated 13Wh/mile

From work:
1.238Ah
38.4Wh
19.95Ap
669Wp
32.38Vm
38.5V resting
Estimating 3 miles, based on same path I always take.
Estimated 12.8Wh/mile
 
Further testing today with the new configuration, picking the bumpiest vibratiest parts of the lanes I could find to ride in, to see if it would shake the battery holder loose--nope, secure as if ti was bolted on....wait, it IS bolted on! :lol:

More numbers from today:

To work:
41.76V start
31.64Vm
1.081Ah
37.3Wh
668Wp
19.8Ap
38.56V rest
~2.2 miles
~16.95Wh/mile

Back home:
31.18Vm
1.298Ah
43.0Wh
639.9Wp
19.66Ap
38.45V rest
~3 miles
~14.33Wh/mile


I found that the bungee cord I usually use to wrap the backpack to the rack doesn't work well with this rack, as it is too "wiggly". But if I use the long velcro straps then it holds it perfectly, even under those vibratey parts of the road above. (I didn't test under big potholes because I don't want to destroy these wheels, with zero suspension).


An interesting find: I usually lay the backpack flat and tie it to the rack, if I don't have it in DGA's (or CB2's) cargo pod. But for my work trip I have a drinking vessel that doesn't seal on top completely, so I have to keep the bag upright. This made for apparently some partial aerodynamic improvements, oddly enough.

The bag is stuffed with it's tallest part (the strap side) pretty much right up against my backside. Then it slopes downward toward the rear wheel, and sloped inward toward the center of the "back" end of it. Sort of a rounded kind of lump behind me, when tied down tightly.

It felt "easier" than usual at faster speeds, so I tested this by taking the pack off and riding around at the fastest I can go motor only, watching the amps. I forgot to write down the actual numbers, but at top speed (a bit over 20MPH on DGA with the same motor/controller/battery/wheel), there were a few hundred less mA used to maintain that top speed. Same over a few runs down the same road in each direction to try to negate wind and slope, etc.

If this is a true effect and not my imagination, it is interesting that just doing this little bit could save that much power.

More later as I find time to test this apparent result more scientifically.
 
No more testing on the above effect yet, other than that it does still seem to be true, subjectively. Also, that if I tie the backpack flat to the rack it doesn't feel like it does anything, compared to vertically against the back of the seat/my lower back.


I swapped out the Shimano brake lever for the front (on the left side still since I have not really done much to the bike to customize it yet) for a two-wire e-brake lever from Ianmcnally's latest care package.
http://www.endless-sphere.com/forums/viewtopic.php?p=303752#p303752
This allowed me to test regen on this bike; since it is lighter it is slightly more effective on the flats than it is on DayGlo Avenger.

On hills, however, it is much more effective, since it remains in the higher speed range the whole time I'm going downhill (on some roads at the base of North Mountain today, as well as the usual canal-path road underpasses). It keeps the speed down to around (guessing, still no speedo) 8-10MPH, coasting down a fair slope (don't know what the actual slope % is, but it's one I couldn't pedal up by myself even on a regular plain bike, without going so slow that I'd fall over, and/or just hurting my knees too much).

I only had the WattsUP from AussieJester on there, hooked up to measure power usage, so I don't know what regen currents or Wh I got out of it. Power usage itself was about 106Wh, about 3.5Ah, over about seven miles, including the uphills (where I was at the current limit, about 19A) before the downhills. :) Mostly flat other than the half mile or so of uphills.

Works out to around 15Wh/mile, which is pretty good for flat-out full speed (20MPH+) for all of the canal path riding (half of the ride or so) and as much of the main street riding as I could, plus all the uphills where the motor was doing 99% of the work (but not going even 15MPH uphill even at full throttle).

I was going out to meet a friend with a truck to pickup a treadmill from Freecycle. Pics of that are posted in my newer cargo bike thread, as that's the most likely place the motor and some other parts will wind up. http://endless-sphere.com/forums/viewtopic.php?p=303915#p303915
 
TVE is being changed over to the Fusin geared motor kit that used to be on DayGlo Avenger, including it's LED light, and the 9C moved over to DGA, as I need the power more on DGA, and could do with the potential range extension the Fusin offers on the small battery TVE has, and will not likely need the power the 9C has on TVE very much (perhaps if I use it to pull one of the other trailers, but I may be adding pushers to those anyway).

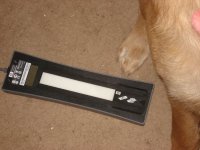
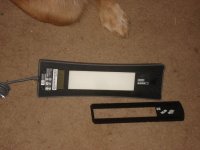
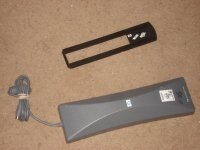
Regarding lighting: Today after work a couple of friends and I went to Goodwill, and found a cheap-enough CCFL scanner attachment, finally, to get for the visibility-to-others-headlight for The Velcro Eclipse. It is identical to the one I had on DayGlo Avenger back when I started adding the LED turn signals/marker lights, and that was a very good light. It drew a lot of comments from people about how bright and visible it was, at all forward angles (just about 180 degrees).
DSC03375.JPG
I'll be modifying it and adding a bar mount for it once I have the chance, and painting it up in red DayGlo (to match the basic theme of TVE's color), or I'll paint it black instead, to match the other bits of TVE (like the bars). I'd rather have the visiblity of DayGlo, but I am also trying to make TVE look fairly unified and "professional".
DSC03376.JPG
It's 12V, 575mA, and I have used the other one at up to 15V or so without problems (it is VERY bright at those voltages). Oriignally it came from an HP Scanjet 5500c or 5550c, and is HP p/n C9911A, in case anyone wants to do something similar for their own bikes. ;)
DSC03377.JPG
 
WHAT THE!?!#!@$?! No "cargo Pods" no fluro paint and prolly the most surprising NO cable ties hahaa...
Looks very much like a normal e-bike AW i am still in disbelief hehee

Good to see you made use of the WattsUP hope you can get the disk brakes
i sent over mounted up on one of your creations soon too, i dont trust
these v-brakes and with all the weight you often pull with the dog food
in the pods and the dogs in tow in a trailer i think disks would be a wise move buddy.,..

Look forward to seeing what you come up with next :)

KiM
 
Yeah, this bike is a "normal" bike. :lol: So I don't have any huge unnecessary contraptions on it, or junky bits hanging off. ;) It's basically just a backup in case my real (i.e. continuously-experimental) bikes are all broken and I have to get to work/etc. ;)

Of course instead of cable ties, it's all velcro. :lol:

It's also an experiment in how I can make a "demo" bike for potential customers to see how a fairly normal-looking bike with just a typical ebike kit installed might look, feel, perform, etc.

For my own sake and safety it'll still eventually have turn signals and other standard lighting, but nothing really for cargo beyond a normal-looking rack. I may paint the rack in dayglo red, or pink, for visibility (and because it looks out of place even more as a bare steel color).

If I had a dayglo pink backpack to use on the back when I need to carry stuff, it'd be nice. Haven't found one yet, though.


The disc brakes I'm working on putting onto the new FS cargo bike that's being worked on in the bolt-together semi-recumbent thread, and possibly on DayGlo Avenger if I can work out how to make a caliper mount for the aluminum rear dropout, and/or how to mount the disc on the 9C front hub (since I can just weld a caliper mount onto the steel fork). Then I'll also have them on the trike if I ever finish designing the dang thing and start building it. :roll:

I may also be able to mount a disc on the Fusin, bolted directly to the side cover, and weld a caliper mount to the steel fork here on TVE, but TVE as it stands doesnt' really need anything more than the v-brakes it has now. Well, I could use better pads, but these do work.
 
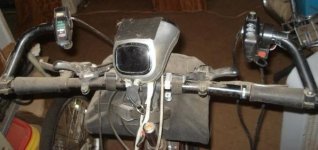
Started working on this again today, and found I have a little problem with mounting the light/keyswitch/battery meter:
View attachment 2
The little plastic clamps are too small to fit around the bars on TVE. :( I'll have to rig up a different solution, because I had hoped to just do it like this:
DSC03477.JPG
and use the EVG bar controls I got from GCinDC for throttle, switches, etc, up on the inner ends of the bar-ends, as they are more stylish than any others I have.

One thought is to take a handlebar stem and clamp it on the existing stem, then clamp the light unit to it's stem, but that may require taking off the bar bag, and it might also look pretty cheezy. Since part of the idea of this particular build is to try to make it look nice, I'd rather not.

So I will likely just come up with a mounting plate I can clamp there, with metal tabs screwed into it in a stack with the widest ones on top, to slide into the Fusin unit.

Alternately, I thought about bolting thru a hose clamp into the Fusin light unit, then clamping that to the bars. It'd be simpler and sturdier in that you couldn't just knock the light off by accident (whcih I have done a couple times with it's slide mounts on DGA).

On another note, the Fusin itself is a lot more "stealth" on here than the 9C:
DSC03478.JPG
I will probably change the tire, as I have a similar tread one without the DayGlo. I like the DayGlo, but I know others don't, and this bike is to try to get others to like the idea of the ebike first, then maybe I can get them to worry about visibility. ;)


Regarding the EVG bar controls, I will be modifying them some. For instance, the headlight switch at the top of the left control has a space above it for another one; if I remove that switch and it's filler panel I should have room for the Fusin's 3-speed rocker switch.

I think the throttle is a pot throttle, which may well still work for the Fusin (have to test), but it is spring-loaded the wrong direction for how I want to use it, and will require modification. If I can't modify it I'll use a regular grip throttle, but would rather not.

There's not really any easy way to use a thumb throttle except if I put it on the bar end there, as the throttle is in the way of the shifter and I can't work out an arrangement that doesnt' clash that I can still comfortably use. So in order for the thumb to work, it has to be "off" where the thumb can easily reach and rest on it from below, and then push it towards "on" easily. The EVG throttle works the opposite way. Easy to do with a regular thumb throttle by simply installing it the same way it'd go on regular bars but with the tab down instead of up. But the EVG tab rotates perpendicular to the bars instead of around them.
 
With the recent problems I caused myself on DGA's 9C setup, and the extended troubleshooting I am having to do to fix it,
http://www.endless-sphere.com/forums/viewtopic.php?p=322066#p322066
I decided to get this up and running ASAP, and thought I'd just do a quick setup for it, hacking the wiring and such together instead of making a neat setup for now.

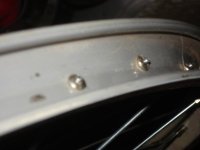
Turned out that because of the narrowing of the U fork up near my tire's widest part, that the bent rim causes it to rub on the fork itself. :( I don't have a narrower tire that also fits the rim properly, and cannot at this time fix the rim that's on it (have to design and build a fixture to flatten it again).

So I thought I'd give the rim Ianmcnally sent me a try, but that turned out not to be possible either. It is a decent doublewall rim, but has eyeletted holes for what appear to be 14g spokes, and the Fusin spokes are 12g. :( I don't have any 14g or smaller spokes that are also of a correct length to lace up the Fusin in it; they're all either way too long for even 3-cross or crazier lacings, or too short even for radial lacing.

I could drill out the eyelets and still use the Fusin spokes, but several of the nipples were damaged when I had to use pliers to turn them to retension the wheel enough to ride it home after I bent the rim in the first place. I'm not going to be able to tension the spokes those are on properly, and I don't have other 12g nipples, either.

I do have what appear to be 13g nipples and spokes, 2 sets, from Ianmcnally, and one 14g set (that I think was on this rim originally), but all are too short to even radial lace on the Fusin. I could probably use them to lace a 24" rim on there, though, which gives me the idea of putting the Fusin on CrazyBike2 as a front wheel drive at least until I get something else worked out. More on that here:
http://www.endless-sphere.com/forums/viewtopic.php?p=322999#p322999

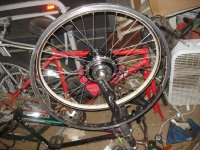
For now, I went ahead and completely unlaced the Fusin, to get a better idea of how bad the rim really is. I coudln't get a picture to work (can't get it to focus), but it is practically a finger width out of side-to-side true at the bent area near the valve hole, when I lay the rim by itself flat on the tile. :(

And that is *after* all the other unbending of it I already did. :shock:

Anyhow, looks like TVE is down as well as DGA, for now. I mean, as a motorized bike--I can still easily stick a regular front wheel on there and ride it, but what's the fun in that? :lol:
 
I can bring a pile of fusin stuff, including a new rim laced into a hub to the race. It's from the 48v one I cooked in the motor melt off.
 
I won't turn you down on that. :)

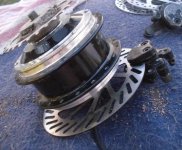
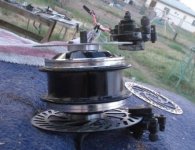
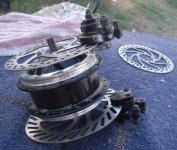
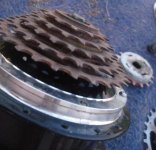
I did have a few interesting ideas while holding the little bare Fusin hub in my hands. Did you ever notice it has steel freewheel threading attach points? I didn't until last night. They're not very wide, maybe 3-4 threads...but they're steel, and threaded on both left and right sides of the hub. So I could thread on a single-gear freewheel, and possibly a disk brake adapter, and turn it into a rear wheel (for a narrow frame), if I only shift using the front rings for pedalling.

Well, I don't have to use a freewheel--I can use just a single chainring, on a thread-on disc-brake adapter for instance.

If I really need more threads, I could cut the whole flanged threaded end off a rear hub and bolt that onto the side cover of the Fusin, thru the spoke holes in the flange (drilling matching holes into the Fusin's side cover.

Alternately, I might be able to put a freewheel on so that the pedals drive one side of the motor case, and the motor case output drives the main bike drivetrain, so that I can pedal thru the motor case if I want/need to, or I can let the motor do the work and the pedals wouldn't be driven by the chain.

These are probably not ideas I can finish in time for the race, but they are ideas I will likely pursue at least in thought-experiment form. :)
 
For the moment, I wish to see if the Fusin will actually move CrazyBike2, so I took apart my attempt at lacing a QR front disc-brake hub into CB2's old 24" steel front rim (whcih failed as the spokes I tried are about 1 or 2mm too short for that in one lacing method, and several mm too long in another), and laced the Fusin into it instead, using some 14g spokes from Ianmcnally.

It almost worked. The spokes are not so long as to be unable to tension (they do that fine) but they poke out about 2mm out of the end of the nipples inside the rim, once I have it tensioned sufficiently to be musical. :(
DSC03531.JPG
I can probably fix that using washers under the spoke heads inside the rim, if I can find 36 or 72 of the same washer, that are small enough OD not to cause problems with the rim but large enough ID to *just* accommodate the nipple's spoke end.

It is a cheap steel rim, but it isn't bent yet, after having been on CB2 for a while (in use before I had the drivetrain problems). :)
DSC03532.JPG
I spun it up in the fork with the Fusin controller to verify it works before going any further with truing or looking for washers, and it definitely works but it also definitely needs truing. :) Can't tell in the pics, but can definitely see in motion. I didnt' do a video of it.

(copied this post to CB2's thread too)
http://www.endless-sphere.com/forums/viewtopic.php?p=323317#p323317
 
Further Fusin Fun in the CB2 thread:
http://www.endless-sphere.com/forums/viewtopic.php?p=323528#p323528
Dunno if it will even work, but hey....
 
Back
Top