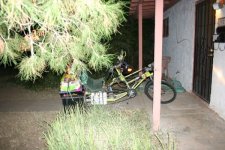
2WD Semi-Recumbent Recycled-Parts Cargo eBike: "CrazyBike2"

Oh, I forgot to mention that I don't think I like the tire itself; it's too skinny I think. Somethign makes the bike wiggle especially on bumpy roads, and I think it is the tire--it's only rated for 50PSI max, and that's about what I used in it, but it feels squishy when riding, adn kinda feels like when I've had other tires going flat, but it wasn't.

I could also feel the grain of the road thru the wheel, which I couldn't do with the 26" with any tire I can recall. It was annoying.


I don't think I can do anything about it yet, but Id' like to. Got a couple other tires to try. Was thinking about one of the Kenda Flames off the old trailer, but I peeked at one and found it's got a slash in it at the edge of tread/sidewall, probably from glass. Didn't check the other yet, got distracted by the dogs I think it was.
 
Ok, I dont' understand why or how, but the last coule times I reset the CA, it did NOT reset the peak amps from the previous usage with the 3-shunt methods controller; it did reset everything else it should, but not that. So taht's why it still read over 190A even with one of three shunts clipped. I reset it on that specific screen and it correctly did reset it all, then when I went to work today it got a peak of 90.3A, which is much closer to what I would have expected. Peak Watts i could see during accel was 3400W or so.

Also, it seems to correctly reset the peak amps now. dunno why it dind't before.
 
if that's the tires I gave you then I have to agree.. it's exactly why I did not like it..to damn skinny.. I don't care how puncture resistant it is
I like to have all that extra bounce the fat tires give me.

Glad to see that controller is working well for you sure is nice to have extra parts on hand for when shit inevitability breaks.

how's the weather out there going this the better part of the year when heat's not such a pain ? I am sure loving the cool nights
here in Ohio.. Just did a ride and it's high 40's out with a low of 34 tonight.. brrrrrr
 
ohzee said:
if that's the tires I gave you then I have to agree.. it's exactly why I did not like it..to damn skinny.. I don't care how puncture resistant it is. I like to have all that extra bounce the fat tires give me.
No, I really like the ones from you, but when I changed to the 20" wheel I couldn't use them on it so had to use one of the jogger-stroller tires instead, and its' nto exactly made for the load i am putting on it. ;)

Bigger tires would be even better, but even the ones from you are bigger than most of mine--they are basically the same in many respects as the Cheng Shin tires I had liked so very much that I have never been able to locate anything remotely similar to, but are worn out now (I wore holes in both, AFAICR).


Glad to see that controller is working well for you sure is nice to have extra parts on hand for when shit inevitability breaks.
Yes, although this one is now so overkill for the power being put thru it that it ought to last quite a while, and I still have the repaired 12FET from bikefanatic as a main backup, and a couple of others I would like to try to get working on it eventually.

Speaking of extra parts one stuff breaks...Once I either finish Loooooooongbike or otherwise take the 20" wheel off CrazyBIke2, I'll probably be using the 26" MXUS you'd sent me in there instead of the oriiginal wheel, because the rim on my 26" 9C is disintegrating, with some pretty obvious damage at the nipple holes over much of the rim. I need to get some pics in here (meant to do it today, but was so wiped out when i got home that after I did a couple hours yard work I sat down here and took a several-hour involuntary nap...and will probably have another soon). Most likely I will try oil-cooling it just to see how effective it might be, but I will have to work out how to put higher power thru it without saturating it like I probably was with the 9C before.

how's the weather out there going this the better part of the year when heat's not such a pain ? I am sure loving the cool nights here in Ohio.. Just did a ride and it's high 40's out with a low of 34 tonight.. brrrrrr

Oh, I would love to ahve some cold temperatures. Here it's still low to high 90s most days, cooling off to 70F or so before dawn. So, better than it could be but not cool enough. I didn't get hardly any of the outside work done that I wanted to do on my vacation last week because it was hotter than I felt like dealing with, and the mosquitos are terrible right now even in the daytime in shaded areas under the trees (which were otherwise fairly nice, if you dind't mind being eaten alive while you weren't melting, as long as there was a breeze).

It was just cool enough on my ride home the other night, on the 10-mile test trip, that I was able to wear that multi-flagged leather jacket from Goodwill for the first part of the ride. About 3 miles into the trip home, though, it suddenly got more than 10 degrees warmer and I had to take it off. I am not sure what causes the heat to be stored/released so differently at night around here in various areas, when they have essentially the same kinds of traffic, streets, buildings/etc., but it is often like that. I'd love to see a thermal image of the city for every hour past sunset, at least once a week for a year.


Hmm...that would be a very interesting addition to Google Maps or something. That plus a wind map for every hour of the day and night, pickable for any week throughout the year, would be pretty useful in planning pedestrian and pedalling trips, especially. The winds change at various times of day fairly regularly most of the year, because of the city generally being a different kind of heatsink and heat generator than the surrounding desert, plus the terrrain. It causes winds in certain areas of the city to reverse direction (like happens on coastal areas) somewhere past midday. How far past depends partly on the season, taking longer in winter than summer.
 
So far it's consistent about 90-ish amps peak now. Wh/mile for my work commute has dropped drastically from the 30-ish + I was getting before to 25.5Wh/mile, so it is definitely now more efficient with the smaller wheel plus the third shunt cut. Theoretically that could translate into about 15% improvement, if I did the math right (probably not), or about only 85% of previous power usage to do the same kind of ride under the same conditions as before.

That's a pretty big improvement!

Now I just need to fix up the height of the back end so I can turn normally. :)

And maybe change tires, but I guess until I have a problem with this one (flat, etc) I'll leave it alone.
 
amberwolf said:
I guess until I have a problem with this one (flat, etc) I'll leave it alone.

Knowing your history with wheels and tires, that should be in a couple of hours...
 
I'm honestly surprised that it hasnt' happened already.


today on the way to work, the "grindy" sound of motor startup reaappeared, and peak amsp are back to 192A. I suspect the shunt vibrated it's end back down and is touching the PCB a little, just enough to affect hte current limiting. I'll open it up and put an insulator in there so that won't happen and then se ewhat results I get.
 
I peeked inside the Methods 18FET controlelr and I don't see any way the shunt could've bent back down and touched; it's still well over 1/8" gap just like I left it, and even if i whack the controller case down against the fframe harder tahn it could get knocked by any potholes I've hit, it still doesn't move. I put the insulator in there anyway (a tentfold of clear plastic from some retail packaging of something).

So I don't know where the 192A is coming from--unless it's some instantaneous spike, it doesn't make sense.

While I had it open, I wired up a 3-speed switch to X1 and X2, a reverse switch to X3, and a speed limit switch to SL, as well as a programming header, and reverified that I'd connected up the BR to GND for enabling regen braking.

Tested each of the above, and the only one that does anything is the reverse--it reverses at what feels like full power for WOT, which is very scary. :lol: But at least I have reverse now, which is really nice when trying to get the bike in or out of the house, over the step/doorsill, especially when it's loaded up with stuff. It's really groany and grindy even without a load, though, in reverse, so I'm leery of actually using it.


I assume the X1/X2 fields in the controller are set to 100% (or whatever the default speed is, so there is no change from it). And the Speed Limit field must not be set, or is set to 100%. I had hoped at least one of these was set to something low, so I could set that switch before handing it over to people that want to try it out, until they got used to the power, then unlimit it.

I tried programming it, but while it responds as if it took, it doesn't cahnge anything. A re-read of the appropriate threads from 2008/9 indicates it was found that these MCUs appear to be programmed not to actually write the programmed values, only to respond to the programmer as if they did. Oh, well, I have other ways to do this.


I verified the CA connector is wired up correctly, and AFAICT it is the way I would want it with the exception it goes to the ebrake line instead of throttle; I'd rather have it scale the throttle. I guess I'll ahve to wire it one of the other ways.

I unplugged the CA from teh CA-SA shunt connector, and plugged it into the controller instead. Then I setup the CA for a 20MPH speed limit, and a 99A current limit, as well as a 56V LVC while I was at it.

A test run shows the speed limiting works after a fashion, but it overshoots a LOT, up to 25MPH while I'm holding WOT before it cuts throttle entirely, then it coasts down to about 17MPH before it kicks power back in, and then it holds 19.9-20.1MPH very well once it re-reaches that. If I lower throttle below 20MPH, then go back up to WOT, it does the same thing again, hunting for the right balance.

I haven't hit 99A yet, with Amax as 89.3A per the CA. However, I also haven't got the shunt calibrated in yet. According to the old threads on this controller, each shunt wire should be 3.4mOhms, so two in parallel ought to be 1.7mOhms. If I program that value in, though, I get peaks of 5-6KW, hundreds of amps, and regular riding at 20MPH says I'm using over 1KW, which I knwo is wrong (more like 450-500W at most; usually less).

So i played with various values, and the closest I have gotten to accurate so far is 2.8mOhm, which still reads more like 600W at 20MPH. I need to do the actual calibration of the internal shunt and find out what it really is.


Next up is playing iwth the various pads on Miguerillart's new controller to establish their functions and whether or nto it can do the things he needs it to (like regen). I'll be at least temporarily moving the switches over that I used on this controller, since they don't do what I want them to anyway. Then add a CA connector to it, and make sure it works as intended.
 
I have been having lots of bad days recently with the cooler weather and constant changes in pressure cuaisng havoc with my joints, plus those three bad teeth giving me grief again, making it tough to get much done besides laying in bed at the computer. Thus, I have accomplished none of the things I listed above, except an attempt at shunt calibration, more than a week ago but apparently forgot to post about it.

Good news is the weather seems to be stabilizing so maybe the pressure will stay close enough tot h e same for a while, and i can accomplish somethintg.


I didn't want to take the controller off the bike so I didn't use the big Sorenson, but only the little one that only does about 750mA or a bit more. I don't remember now what hte value came up as, but it seems to be a lot closer than my by-guess-and-gosh method got me. :lol: Still seems a little high-reading on current, though, vs the actual CA standalone shunt (which IIRC came calibrated as 1.030mOhm). Overall it shows I'm around 33-34Wh/mile with the controller's shunt, and 39-30Wh/mile with the CA-SA shunt. I guess that's within about 10%, so close enough for the moment.


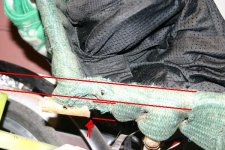
Posting today mostly because I broke the seat frame yesterday sometime, probably when pushing the bike into the house over the frontdoor sill, as I usually have to push on the top of the seat to help it up and over, from behind, as I don't fit in the doorway with it, and I can't pull it in, and I cant' ride it up over the sill because my weight is enough to keep it from being able to go over the sill without ending up with lots of burned rubber tire marks on the porch and sill (and once I almost hit the livingroom back wall because it went up and inside so suddenly I didn't let throttle off quickly enough, and it just slides on the lineoleum floor--no braking really possible).

IMG_6535.JPG

The red lines above the piece you can see is where it's supposed to be aligned with, the redlines below those are where it actually is. It appears to have broken along a place that had no holes or anything drilled in it, so I'm not sure why it broke there. Eitehr way I have to completely unlace the seat sling material to re-weld it. For now it's ok, as all the seat supports are on the part still connected together, and the left side isn't broken. (yet). But I do need to fix it.


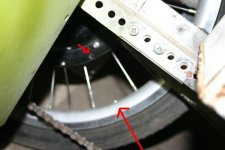
A worse problem happened a few days ago:
IMG_6536.JPG

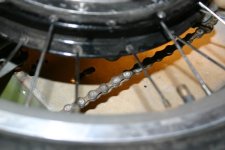
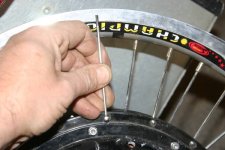
Between the red arrows you might notice something missing. The good thing is I didn't lose the spoke, but the bad thing is it's bent up because it got stuck in the derailer somehow as I was backing the bike into the warehouse room of the store I work at, and jammed up the works. It was appears that it was still hooked into the wheel via the hub flange, and maybe fell into the chain as I rolled the bike back, and hten was fed into the derailer as I continued going back, at which point everything jammed and it got bent.

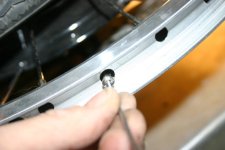
The nipple is probably inside the doublewall rim somewhere; I'll have to take the tire and tube and rim tape off and see if I can fish it out thru the valve hole. I don't hear it rattling around when the wheel spins, so it might be jammed somewhere in there.


Right after it happened I checked and almost all of the nipples were so loose I could turn them with two fingers. I have not fully retensioned/truied the wheel, but I tightned them all down a fair bit at the time, and rechecked them a couple of times when I could make my hands work to do it, and none seem to be looser yet. I should've known to retennsion them all to start with, but I got complacent I guess.


Anyhow, that's where things stand for the moment. Except the dogs are all bored:
 
Since the last post, there is more sunshine for Texaspyro:

That rear wheel problem came up again; after I retensioned it (well, sort of) in the above post, I have had so many hurty days for my teeth and hands (and other joints), among other distractions, that I didn't ever get back to fully tensioning and truing it. This was a serious mistake.

On my way to work a couple days or so ago (cant' remember exactly), the wheel almsot came apart while on the road. I pulled off in a parking lot halfway to work, and found that several spokes were completely out of the nipples, with the nipples rattling around inside the doublewall rim. One was entirely missing, one had a broken elbow, and the others were hanging loose ready to fall out of the spoke flange. Most of the other spokes had very loose nipples, quite a few partially unthreaded already. Took about 20 minutes to retighten the ones still on the wheel enough to let me ride it to work, and it still felt like I was gonna lose the wheel.

At lunch I tightened them all down more, and on the ride home it was a little better. Afraid to do it too tight cuz so many were missing (six of 36, all on the right side) that I thoguht the rim might get permanently bent to the left.

Once home from work I checkked and they seemed about the same, but I did nto have time before having to try to sleep some to fix the wheel the right way. Plus my teeth were throbbing, and my hands hurt from doing the tensioning earlier that day. So I had to ride it to work unrepaired the next day, too. The only good thing was that I found the missign spoke, in the front yard near my sidewalk. Guess taht wone fell out before I even got going to work. :roll:


This is how it's been:
View attachment 6


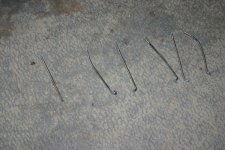
And these were what I had to work with.
IMG_6538.JPG


Today I finally had time (originally intended for Miguerillart's controller :( ) to fix the wheel, but it was not a great success. Two more spokes broke during tensioning--not even ones I was working on! They snapped at the threads, a few above the unthreaded area, while I was getting to the last bit of truing on the other side of the wheel. That leaves both the spoke *and* the nipple unusable, since I cant' get the threaded stub out of the nipple, either. :(
IMG_6542.JPG


I've emailed Grin/ebikes.ca to see if they have any broken 20" 9C wheels that have usable spokes they'd sell me, or to see how expensive a set of *good* spokes would be.

So for now the wheel is rideable, but seriously out of true both side to side and hop, because of the missing spokes. If I can't get replacements I'll try Karma's trick:
http://www.endless-sphere.com/forums/viewtopic.php?p=301135#p301135
(hmm...pic is missing?)
Basically using longer spokes off an old wheel, cut off the elbow, threaded them into the nipple, passed the other end thru the spoke flange, then u-turned it and twisted that around the spoke tightly with several wraps and then tensioned/etc with the nipple as normal.


The fixing of the wheel was a huge PITA, becuase first I spent way too long (hour? two? more? getting the nipples out of the rim--they wouldn't line up with even the large valve stem hole well enough to just fall out, except for some of them, so I had to fish them out with wire poked in thru the other nipple holes, and a spoke thru the valve hole, trying to catch the threads on them togehter enought o pull them out. Shaky hands don't help, which get worse when I'm frustrated.

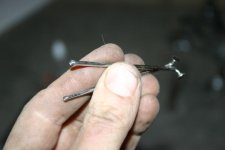
Then figuring out a way to get the nipples back INTO the rim in the right holes for them, that took too much time, utnil I finally thought of partly threading them onto the broken spoke, from the top end:
View attachment 4

then putting that in the hole and onto the threads of the spoke being isntalled, then holding the nipple in place with fingers while unthreading the broken spoke otu of it. Rinse and repeat 5 times for the 5 usable spokes.
IMG_6540.JPG


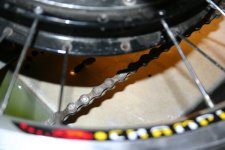
For now, I've left the missing spokes on opposite sides of the wheel, one at the valve stem side and two at the other side, where the rim join is. Sorry teh camera focused on the chain instead fo the rim; i forgot I had manual focus ability utnil i put it all away and sat down to type this up. :(
IMG_6543.JPG

IMG_6544.JPG


I also fixed (but forgot to get pics of) the seat, temprorarily, by hammering an old broomstick into the tubing to hold it together for now. I was going to weld a split piece of tube over it with taht in there to keep it lined up, but it started raining! Figures taht I'd wish for rain for weeks, then the one day I get to go outside to do some stuff and it actually does rain. :roll:

It's only intermittent, but every time I started to drag the welder out it would start sprinkling again, and getting heavier until I brought it back in. :(


Now it is naptime, cuz I'm wiped out. Then to start again on Miguerillart's controller.


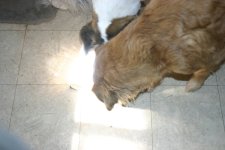
Oh, and sometime soon after the above post, Nana (biggest, white/brown above) decided to start fighting with Fred (smallest, black above) again, after so long of not doing it that I thought they were all over that. So now I have to keep them separated again, and shuffle them around whenever letting one outside and the other in, in any set of dogs as long as Nana and Fred are not in the same set. Fortunately nobody got punctured, including me, but there was some bruising, including me whacking my head hard enough on something whiel dragging them apart that I had a 2" wide 1/4" high lump in the middle of my forehead, and was dizzy and not thinking straight for a day or so, and pretty grumpy all week. I cant' remember exactly what day this happened, but sometime since the above post (as it has both Nana and Fred on the bed at the same time, which hasn't been possible since then), so within the last couple weeks.
 
Ahhh, now that's the Amberwolf we all know and love... it's hard to believe you went so long without a wheel disaster.
 
Havent' heard back from those I've asked about spare spokes for this wheel yet, so it's still in the same condition it was above--working, but seriously needs putting hte missing spokes in and retruing. However, other than it feeling like riding a washboard at certain speeds, it hasnt caused me any other grief yet.

It doesn't ride very well with cargo, though; feels side-to-side wobbly with significant weight over it, so on this unplanned dog-food pickup I had to ride home at less than 15MPH most of the way, and taking corners and turns at less than 8MPH; often slow enough to "duck walk" it around them with just enugh motor power to keep moving. :( Thankfully it was late, after most poeple were off teh roads, so little traffic to deal with or piss off because of my super slow speed. I also had to stay in the middle of the lane, as I couldn't risk any of the roadedge defects causing wheel problems with the extra ~90lbs of weight over it.

View attachment 3

CrazyBike2 loaded up 90lbs IMG_6552.JPG


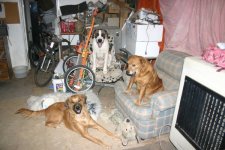
And the dogs where they all must stay as I bring the bike in each time I come home, so I don't squish anybody by accident. Loki always goes to his chair and stays, but Hachi wiggles around the room a while first, until I tell her to sit. Nana I must say "chair" for her to get in her chair, and even then sometimes must repeat it as she is so excited that she's shivering and can't resist jumping down and hopping around like a happy guinea pig. :lol: Once they're all settled, though, they will wait up to several minutes there while i get the bike in and unloaded/parked, and the front door shut.
Dog Groupshot Hachi Nana Loki IMG_6553.JPG


Nana finally all calmed down after dinner, on a previous night.
 
On my ride to work today, riding as usual in the right half of the rightmost traffic lane, I was about to pass a man (dressed as a gardener with gloves, jumpsuit, and extra-wide-sombrero-sized hat) walking in traffic's direction along the sidewalk to my right, when suddenly he slightly changed dirciton and walked right off the curb and continued walking parallel to it directly in my path. I was easily but barely able to swerve around him in time, becuase he did it exactly as my front wheel was less than a couple of feet from his position! I am not sure, but I think my right cargo pod may have brushed his pants leg. :shock:

The car right behind me also swerved, much farther and harder than I did, but took longer to do it--they still almost ran him over. But if that car had been where I was when he stepped off, he'd've been in an ambulance and not still walkign down that road....


Not evne a few hundred feet before this guy's stupid trick, there's a place where the concrete median is cut thru so you can cross Metro Parkway to get from Metrocenter's main parking lot area to the Castles and Coasters' parking lot area, and vice-versa, or turn onto or off of Metro Parkway itself from either of those. Each way (north and south) has a left turn lane, and there are two traffic lanes each way as well. Well, a car was in the southbound left turn lane, as if they were going to go into C&C's lot, but just after I passed that intersection, they continued straight thru it instead of turning, then suddenly squealed their tires and did a sharp U-turn, gunning their engine as if they were going to follow me in my lane and run me over, then just as suddenly (withotu getting anywhere near me) they did another U-turn and went back onto the southbound lanes and drove off...but nearly crashing into the other cars already in those lanes as well. I have no idea what they were trying to accomplish.


There were some other stupid-people-tricks too, but those were the memorable ones I wished I had the camera on the bike and helmet for. :roll: Most days are nowhere near this exciting.


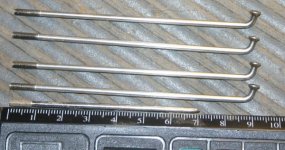
Alrighty, so I heard back from Justin about spokes for this 9C/20" wheel (he can get me a few; I just have to hope I don't break more when I retension/retrue the wheel once I install them), and as part of the response I thought I should verify their length. When I did, there was a huge difference between the 67mm he said they should be, and the around 90mm I got!

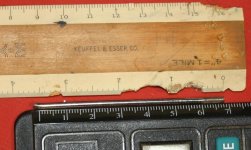
The problem turned out ot be the ruler I used, which I "assumed" was marked in inches, but turns out is not. I assumed it because it has markings on it that say 1" = 2 miles and 4" = 1 miles, but doesn't say anything on the actual ruler strip for what the divisions themselves really are. I kinda had a "feeling" there was something odd becuase the inches seemed smaller than they should, but didn't check it against any other measurements or rulers, figuring that it was just my brain pulling it's usual tricks on me, and that the ruler was fine, and my brain just messed up. So I measured it as almost exactly 3.5", and converted taht to get 91mm or so, which just about had to be wrong....

But no, it was really the ruler, and not my brain, this time! :lol:

Turns out the ruler is not even in any standard length demarcations; it is *almost* metric, but is slightly smaller than metric measurements, a hair smaller than a mm for those markings, and a noticeable bit smaller than a cm for those (compared to a couple of different rulers; one pictured below and another that is a very old stainless steel pocket drafting ruler, not in the picture).
ruler mixup 9c 20iinch radial spoke IMG_6578.JPG


At least the wheel is still holding up as well as possible, ocnsidering it's missing four (?) spokes. :|


You know what is really bad?

I've got this nagging feeling I messed myself up with this very same ruler once before, but I can't remember what it was it caused me a problem with.

This time, however, Loki tried to help me out, by chewing bits of it off as you can see in the picture--when I went to go try to recheck the measurements I couldn't find the ruler, and later stumbled (literally) across it when watching the dogs do their thing outside earlier tonight. I guess I left it on the floor when measuring the spoke remnant previously, and he probably found it and walked off with it. He does that sometimes, with the oddest things. I usually find them in the talus piles from his holes he likes to dig and lay in. :roll:


Loki is such a doofus:
DSC07046.JPG


In other news, I lost one of my two good bungee cords a few days back, maybe even a couple of weeks ago; can't remember exactly when. I had two straps on a box holding a bag of dogfood across the pods, both straps hooked under the bottom edge of the outer metal covers of the pods to keep it as tight as possible so it couldn't slide around or off, and to see if this mitigated any of hte wiggle I sometimes get with loads of certain weigths like that.

It didn't change the wiggle, but because of the extreme lowness of the pods becuase of the 20" wheel (insteado f 24" or 26"), almost every other time I make a sharp turn I scrape the bottom edge of the righthand pod on the pavement...and with the hooks of the bungees on that edge, especially at the rear edge, I think it cut thru the hook on one, at least enough to let it snap off and go flying. I didnt' see it happen, or hear or feel it, but when I got home there was only the cord that was hooked at the front edge of the bottom of the pods, not the one at the rear edge, and that's the only reason they could have come loose, given how tightly they fit.

I would have expected the cut-off end to stillb e stuck in the panel, but then I watched it as I manually dragged it on the pavement simulating a turn wit me off the bike, and I could see how it pries the bottom edge apart a little, which would let the bit left of the hook fall out of it if that's what happened.

I rode back on my route and found no sign of the bungee, but it could have flung itself off justa bout anywhere--it was a pretty dang good bungee!

So I need to dig out my old not-so-great bungees to keep another one or two on the bike, in case I have to carry stuff needing two of them or more.

I also think I ought ot make and install somthing like those rope anchor hooks for boats, along the cargo pods, so I can use the roll of paracord I have instead of bungees--it isnt' as quick to load up that way but it sure is more secure and tighter!

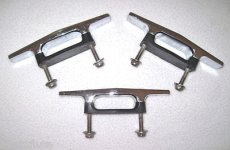
Something like these:
tiedowns.JPG

I have lots of handles from drawers and rackmount stuff and whatnot that should work, if I just get to digging them out, then finding or making some fender washers for inside the pods and then bolt them on.
 
Dang, that free rim and rotor is looking as expensive as a free dog now. Perhaps radial lace and big cargo are not meant to be. That was not a china cheap spoke job either, Ebikes Ca logo on the covers of that motor the rim came from.

Wheel isues like that, along with my bad back is why I went full suspension on my cargo bike.

I didn't realize you had 4 dogs somehow. I though 3 maybe. You got me beat. I got the new st bernard and just one bloodhound left from the pack o hounds.

Man, my shoulders and collarbones are singing the opera with the fronts too. I was hoping to have that go away this year, 4 years from the crash, but no.
 
dogman said:
Dang, that free rim and rotor is looking as expensive as a free dog now.
:lol: I'm real famiiar with how much "free" dogs cost! (especially ones pre-loaded with *more* free dogs!)

Perhaps radial lace and big cargo are not meant to be. That was not a china cheap spoke job either, Ebikes Ca logo on the covers of that motor the rim came from.
Wow...that's wierd, because it was not tensioned anywhere near enough to hold together (can't remember if it was fully trued or not); even my very basic tensioning without any real truing has held up better for longer. It's got to be one that they didn't actually do anything to relace or true, because I can't imagine that good spokes would break during tensioning others like these have, or that it would just "fall apart" like it did while riding it. The spoke breakages werent' from the cargo or weight, but snapping because (in one case) so many other spokes were no longer supporting the wheel that it was pushing up and down on the J-bend of that one, and in the other cases they snapped while tensioning other spokes.

Justin is sending a few to replace what's broken right now, and mr.electric may be sending some, too. (I'm sure I will break more of them either fixing it or riding it!)


That said, radial lacing is probably not the best way to do a wheel that needs to support this bike, but it's the only option at the moment. If I had the time I could make some "dome" adapters to fit in the rim's nipple holes to support the nipples, or maybe could modify some brake-pad mounting washers (you know the ones that come as a pair with dome on one side and concave on the other) to fit against the "aero" rim's inner wall, and elongate the hole itself a bit so I could lace 1x or even 2x with spokes from a different wheel. But this is a lot of work, and time, so it's not likely to happen anytime soon even though I'd like to try it.

I'd be more likely to have time to put a normal wheel on there (I have some 20" ones already in decent shape, I think, cheap but better than this one's present condition), and setup a chain drive to it using that big powerchair motor. :) But even that will take more time than I have ATM.


Wheel isues like that, along with my bad back is why I went full suspension on my cargo bike.
I've tried a few things for FS on this bike, but none of htem worked out yet. The main one I was sure would work didn't because I didn't think it thru on where the weight would push on the frame, and I crushed the "seatstay" of the rear frame (pics on the old blog), bending up the rear quite a bit and requiring tubing transplant to fix. :lol: Another one didnt' work because the shock was not designed for the way I was trying to use it or the weight put on the bike. I think the MC shock would work in that one, though.

Of other ideas, some might work fine but would require rebuilding the whole backend, and the ideas always came at times I couldn't do that for one reason or another. Now all I need is time to implement something.

I didn't realize you had 4 dogs somehow. I though 3 maybe. You got me beat. I got the new st bernard and just one bloodhound left from the pack o hounds.
Yeah, it was five until last year when Bonnie the border collie died (probably of complications of a probable stroke). I talk about Hachi and Nana a lot, and Fred and Loki not so much, so I can see how poeple might not notice how many there are. :)


Man, my shoulders and collarbones are singing the opera with the fronts too. I was hoping to have that go away this year, 4 years from the crash, but no.
My ankle still doesn't work like it used to, either, and it was only fractured, so I can seee how it might take even longer time for yours to heal up. :(


Oh, and that broomstick I used in the seat frame didn't hold up, so that's broken again too. Gonna have to do something about it before the whole back of the seat falls off. :lol:
 
Milestone 4500 rolled over on yesterday's ride home, and I didn't notice till today when resetting for the charge cycle; am at 4501 miles now (assuming I talllied up all the previous miles correctly when I last had to reset the odo; it could be higher).
 
amberwolf said:
I kinda had a "feeling" there was something odd becuase the inches seemed smaller than they should

It's called inchflation... very similar to the ounceflation that you see in packaging (like 8 ounces of product in a 16 ounce sized package)
 
Tell me about it! When I started at the place I'm at now, we had 44lb bags of some foods, that now come with 30lbs (at most). Others used to be 40lbs and now have 28lbs, some even only 22lbs!


(then there is the price inflation part where those same bags used to be say, $25 to $40, and are now $35 to $65! For what is barely more than half the amount of product, meaning prices have more than doubled on lots of things!)


And that's just the dog food, not even mentioning all the other stuff that's shrunk but gotten lots more expensive.


Groceries at the store for people have gone up so much in the last year or so that it is getting hard to even just barely get by. If I didn't spend time looking for super deals and travelling around (like tonight going to the "moving sale" for the American Foods out in the Mesa / Tempe area), I am not sure I could afford to eat properly all the time. If I had to use up gas in a car to do this kind of shopping, it would be too expensive to do at all.

Thankfully I have a number of people that help me out a little here and a little there, like the friends that took me down to AF tonight, who also gave me some stuff they didn't end up liking, and other stuff that was cleaned out at their workplace(s)--what they gave me is at least a couple of weeks' of stuff, depending on how I use it, and at AF I got for just over $30 what would last me most of a month or more, if it were used just by itself (but it is to be used with other stuff I already have so will last a lot longer than that).

But I used to often get by with $50 a month in groceries, seems like about 3-4 years back, even if I splurged a little on things (not counting what my sisters were "borrowing" (permanently) from my stuff). But nowadays even just bare essentials is getting upwards of $60-75 a month, even with deep sales and clearance stuff (which I also didn't used to *have* to do--sometiems I could buy at regular prices and still stay at around $50). Sometimes there aren't sales on things I need for a while, and I end up with $100 a month grocery spendings. (mind you, all these numbers are off the top of my head, guesstimates of the totals I spend rather than tallying up receipts to be sure).

I wish I had the time to keep all my receipts input into a spreadsheet to keep track of prices over time for the things I get. It would be interesting (if depressing) to see exactly what is costing me the most difference between what it used to and what it does now. As it is, I try to keep in mind what prices used to be and buy stuff only when it is as low or lower than that price, on sale or clearance, but it is difficult to find prices low enough to match that "rule" nowadays.


One good thing though: I am in hte process of becoming a dog trainer where I work, and that should eventually get me more money (probably not a lot more, but some, and maybe at least enough to make up for the differences in prices these days over what they used to be).
 
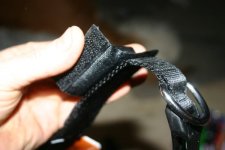
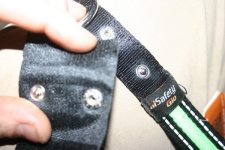
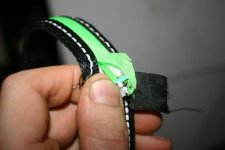
I chucked $1.57 at some clearance stuff today: Some "safety glo" collars for dogs, and some dayglo and reflective harnesses for dogs. I'm sure other stores also have these things on clearance, if anyone else is interested in repurposing them, too. AFAIK they are what is called "manager's choice" for the price, so they coudl be anywhere from a few dollars each down to practically nothing.

View attachment 6

View attachment 5

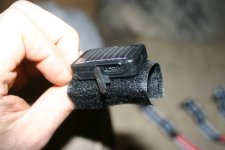
The collars are powered by little battery (li-co?) modules with both a micro USB port and a solar cell for recharging. These modules have a snap for + and - connection, which is a cleverish way to hook up low voltage low current stuff to "cloth", and then velcro flaps that wrap around to keep them on the collar.
IMG_6583.JPG

IMG_6584.JPG

IMG_6585.JPG

The actual light appears to be a single very bright LED mounted to a "giant fiber optic tube" of sorts, sheathed in reflective cloth on the back side and translucent cloth on the front side, making a fairly effective solid band of light.
View attachment 1

IMG_6587.JPG
I haven't opened one up yet, but there is electronics in the power pack itself that provides a power switch with Off, Blinking, and Steady On. It's supposed tob e water-resistant or water-proof (I forget which, but the USB port looks like the only real path for water ingress, so if you seal that up and only charge with solar, it'd probably be waterproof).

So this pack could also be used to power probably any LED or LED array, on a bicycle, for instance. Add snaps and velcro to whatever device it is, and you have an easily-removable solar-chargeable battery for your bike's blinkies. Supposedly it takes 6-8 hours to charge for a couple of hours of operation; I expect it is a seriously tiny battery.

There's also reflective strips sewn onto either side of the light strip, couple mm wide and as long as the strip, plus extensions down the rest of the collar.

Anyway, I'm considering mounting the lighting strip on my helmet, one on each side (as I already have plenty of front and rear lighting, but not much to the side). Probably use the orange ones, as they would be "road legal" lighting, as opposed to the red or green ones (though I like the idea of the green for it's visibility since it appears brighter). Not sure how to mount it yet, as I would like it to come off really easy in case of a skid/crash where the helment should skid on pavement, and not catch, but not just fall off while riding.


The green harnesses may contribute their hardware and clips and buckles to some bike bags, perhaps cargo bags or covers. The reflective "piping" on them is strips of reflective cloth that could be removed by ripping the seams out and then it could be attached to whatever I'd like to make more visible at night in headlights or whatever.
 
Some of them werent' charged, but they charged up ok plugged into USB on my PC overnight.

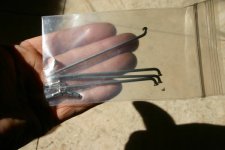
I received this from ebikes.ca today, though I don't have any time to do anythng with it yet (about to leave for work). The most important part is those four Sapim spokes, just now. Tomorrow or tonight I need to try installing the spokes before my wheel really falls apart, though. I expect I will break more spokes in the process of installing these, is the problem--there's just enough spokes to replace the one really-badly-bent-up one and the three missing (broken) ones. Mr-Electric is sending another handful of used original spokes at some point, and I am sure I will need those, too. :/

Can't see the box too well as the dogs swooped in to inspect it as soon as I lifted the camera up for hte pic. :roll:
Copy of IMG_6588.JPG

IMG_6593.JPG

IMG_6592.JPG

 
Well, that' didn't work out like it was supposed to. I finally got thru household stuff and whatnot, got the wheel off the bike, tire and tube off the wheel, got the new spokes out to install them, and found out they are just a bit too long:

IMG_6595.JPG

Ok, actually they are way too long. About two centimeters:
IMG_6594.JPG


This is certainly because of the wrong measurement I made at first, because of my screwed up assumption about that ruler I *thought* was marked in inches, before I made and sent the corrected measurement with a *correctly marked* ruler, so it's my own fault. But it does mean I'll have to wait till I get the ones from Mr.Electric before I can do the wheel repair.

So for now I just put it back together as it was, with a loss of a couple of hours out of my already-too-short day. Of course, even that is my own fault, because if I had checked the spoke length before I took the wheel off, I could've done something useful with that time instead. :oops: My day for stupid, I guess. :(


Anyway...couple of observations: The spokes from Justin appear to be thicker than the ones on the wheel, maybe a whole gauge thicker. Can't tell on camera, really, but I think I can see it holding them in my hand. However, the nipples from either old or new thread onto either one just fine, which is wierd. Maybe it's an optical illusion.

Also odd (and not an illusion) is that the nipples themselves are quite different in size. The ones from Justin fit a bit loosely in the smallest notch (15G) on my little crappy combo spoke wrench, while the originals fit fairly tightly in the 14G notch, and won't quite go into the 15G notch (and are loose in the 13G but can be turned and tightened in it a fair bit).
IMG_6596.JPG


The spokes from Justin, however, are 13G spokes (or at least, that's what they look like and what they were stated to be). Since the nipples fit on fine, this probably means that the actual G numbers on the wrench notches mean nothing as regards the spoke size, which confuses me but is par for the course.

Another lesson for me in making assumptions and taking things at face value, I guess.
 
Crossposted to the CA repair thread
http://www.endless-sphere.com/forums/viewtopic.php?p=676208#p676208

Having been too brain-dead to even solder wires to a controller here:
http://www.endless-sphere.com/forums/viewtopic.php?p=676199#p676199
and then also get so distracted I even burned dinner, I should have known better than to try to do anything else tonight, but no, I had to try to play with the new toy--the V3 CA.


After some hand, knuckle, elbow, forehead, and knee bangs and scrapes and dents, I managed to get the cranks off, and the old plain BB out (which was very difficult; the weather change to the cold pouring rain presently going on outside is making all my joints ache badly, so it's pretty hard to grip tools tightly enough). Then I cleaned out all the icky sandy grease out of the BB shell with ammonia and a brush, which was easy enough, but time-consuming.

I had a lot of trouble getting the Thun BB installed, though--it took another half hour or more to realize that despite the markings on the BB for "L" and "R", it couldn't possibly go in that way becuase the plastic caps are threaded the other direction from the BB shell on this bike. Maybe Magna welded the BB shell on backwards? I dunno. Anyway, so I installed the BB the only way it'll fit.

To install it's wiring, I had to take the plug off the cable, because the only holes in the BB are barely bigger than the wire. The only one I can actually use is the one in the bottom that's threaded for a screw that normally holds the plastic "brace" for shifter/brake cables, so that's how I ran teh cable out.
View attachment 7
There is a little break in the outer jacket of the cable, with some damaged insulation on the wires, so I cut some heatshrink to slide over it, but when I put it on there I couldn't get the BB in--too tight a fit. So I cut the heatshrink off, and ran teh cable thru, intending to slip a new piece thru the hole over the break in the wires' insulation (which happens to be right at the hole itself, where it could potentially touch the metal of the bike, which is at pack ground). But apparently I got distracted at some point and forgot to do that.... :(


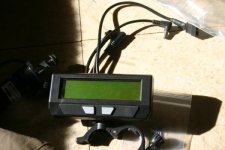
Then I clamped the CA to the steering extension stem tube, just below the stem clamp, so I could use both CAs at the same time and compare readings, etc., with teh old one as a standalone with speedo sensor, and the new one as a direct-plugin. It puts the new one a little lower than I'd like, but it was easier to clamp there than on the bars, as my bars are too thin for either CA's clamp to hold onto without adding something over them that's pretty thick, but the extension tube is just about right.
View attachment 5

The new CA's backlight is much dimmer than the old, and more yellow-orange where the old is white. I'm not sure if I like taht or not; I'll have to ride with it at night for a while to see if it's really bright enough, in traffic with headlights in my face.


I used the 6-wire DP extension cable to hook up the controller's known-working DP port (already tested with the other CA recently) to the new CA's DP port, and powered the bike up without problems, and the new CA also powered up fine, booted, and I went thru the screens and reset things to match this bike. Moved the throttle cable from the controller's input to the CA's input, and verified the CA sees it and reads it's voltages correctly.

That's actually a nice feature to be able to see the voltage and the little throttle indicator on the main screen going up and down-- would make troulbeshooting throttle issues a lot easier.

Voltage reading of the pack is a little differetn on the new CA, but it is just as likely something like voltage drop across connectors, or something int eh DP connector vs the shunt connector as anything else--it's only 0.03V. The Fluke DMM reads 66.0V at the back of the andersons into the controller, where the CA-SA reads 66.1V at the shunt between the pack andersons and the controller andersons, and the CA-DP reads 65.8V from the wires inside the controller.
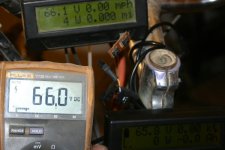
IMG_6603.JPG


However, there is quite a gap between the CA and the connectors for either the Thun BB sensor or the controller's throttle input, so I dug out the JST shells and pins that Bikefanatic sent me in the last care package, and made up an extension cable for the BB sensor (5-pin), and hooked it up, then powered on the bike again to make sure this cable worked before starting on the throttle extension.
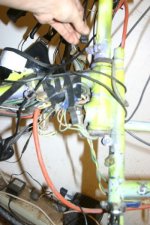
IMG_6600.JPG


This is where stuff really went sideways. :(

At first it seemed normal, but nothing was detected from the BB, moving it either direction, with or without a load (holding hte brake and pushing on a crank hard, for instance). Then the CA screen flickered, and it rebooted, tehn again, then it went blank and no backlight.

I switched the bike off and checked the plugs; it was definitely not a loose connnection. Since it all worked until I hooked up the BB sensor, I unplugged that, and tried again, to no avail. Hooked up throttle back to controlelr and verified it still worked. Disconnected CA from extension and hooked directly to controller, no change. Same thing hooking it to the shunt off teh older CA.

So I disconnected everything and opened it up, hoping for a broken wire inside, but as soon as I cracked the case I could smell that fried odor. :cry:

Most likely something at the sensor wires shorted to the bike frame, grounding out something inside the CA that isn't protected from such a fault, because I forgot to put that stupid heatshrink over the damaged-insulation wires on the BB sensor cable. :(

Nothng visible, so I checked input voltages with it hooked back to teh DP plug, and get pack voltage on the inptu wires like I should, and on the regulator transistor tab, but nothing at all on it's output. :( So at a minimum, that transistor is probably toast, but it might be worse--it could be fine but something else, like the MCU, could be fried and pulling power down to nothing at the output. With my luck, that's what's wrong.


Anyway, I stopped there, because I can't hold the meter leads steady enough and am afraid I'll end up breaking a part off the board or shorting between pack voltage and something else that cna't take it, and making it even worse.


So for now, I can sleep easy knowing I've murdered a CA V3 faster than probably anyone else in the whole beta program. :lol: :roll: :oops:


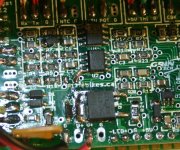
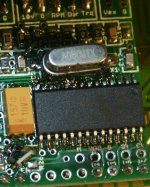
Some pics of the PCB inside the CA, in case anyone sees something fried that I missed, that might help me narrow down the problem and fix it. (assumign I even *can* fix it).
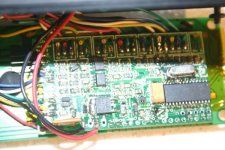
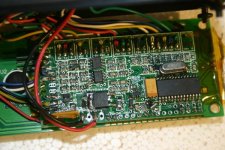
IMG_6604.JPG

IMG_6605.JPG

IMG_6606.JPG

IMG_6607.JPG


Crossposted to the CA Repair Thread.
 
amberwolf said:
...

Alrighty, so I heard back from Justin about spokes for this 9C/20" wheel (he can get me a few; I just have to hope I don't break more when I retension/retrue the wheel once I install them), and as part of the response I thought I should verify their length. When I did, there was a huge difference between the 67mm he said they should be, and the around 90mm I got!

The problem turned out ot be the ruler I used, which I "assumed" was marked in inches, but turns out is not. I assumed it because it has markings on it that say 1" = 2 miles and 4" = 1 miles, but doesn't say anything on the actual ruler strip for what the divisions themselves really are. I kinda had a "feeling" there was something odd becuase the inches seemed smaller than they should, but didn't check it against any other measurements or rulers, figuring that it was just my brain pulling it's usual tricks on me, and that the ruler was fine, and my brain just messed up. So I measured it as almost exactly 3.5", and converted taht to get 91mm or so, which just about had to be wrong....

But no, it was really the ruler, and not my brain, this time! :lol:

Turns out the ruler is not even in any standard length demarcations; it is *almost* metric, but is slightly smaller than metric measurements, a hair smaller than a mm for those markings, and a noticeable bit smaller than a cm for those (compared to a couple of different rulers; one pictured below and another that is a very old stainless steel pocket drafting ruler, not in the picture).

...

The scale (pictured earlier) is marked 4 inches to the mile, and the scale appears to be divided in thousands and hundreds of feet, so if you find 5280 on the scale it might be about four inches... :)

There are lots of engineering scales that are not inches or metric. K&E was a major manufacturer of Engineering scales and slide rules...
 
Back
Top