Some help with ebikes

kiliam

100 µW
Joined
Jun 6, 2019
Messages
7
Hello all

I just started in this electric bikes world so bear with me please.

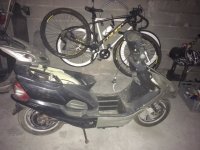
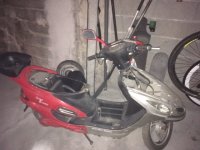
Me and a friend bought these two ebikes/escooters for dirt cheap, with no batteries and a spare motor. Some parts and plastics missing.
IMG_5672.JPG

IMG_5671.JPG

IMG_5670.JPG


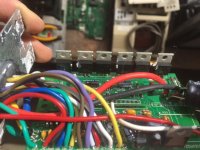
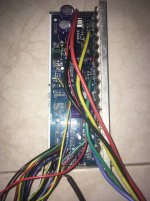
A pic of one controller

IMG_5674.JPG


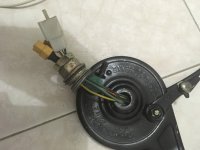
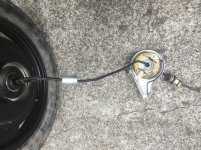
A pic of one motor, anyone recognise this kind of motor? They dont have any codes to search for. One of them is branded Fushida.
We started by opening the motors and shortening the cable to make shure the wires inside the cable wernt bad.
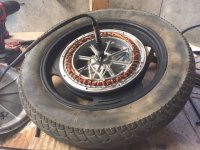
IMG_5681.JPG


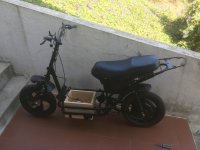
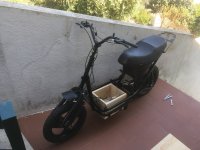
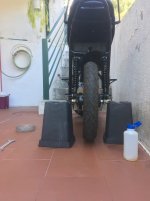
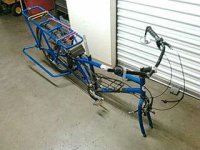
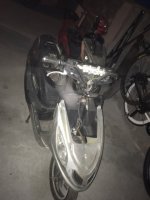
The bikes as they are now:
My friend already gave some paint to his. We want to keep them almost naked as they are now.
We think they are both 48v with 4 lead batteries. We want to make some batteries with 18650.
Anyone know these ebikes just looking at them, or anyone with a similar model?
From what we been researching these things dont go very fast, i just wanted maybe 40kmh or 45kmh, and with 20km or more of autonomy from home to work and back in good weather.
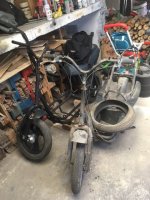
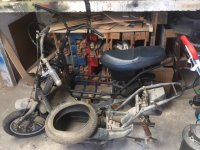
IMG_5699.JPG

IMG_5700.JPG

I been searching a lot about these ebikes but even to search the terms they are referred to are so different.
Ebike, scooter, moped, emoped. OMG

Any help appreciated. Thanks
 
I don't see any answerable questions in there, unfortunately. :(

There's lots of motors out there and they all look pretty much alike. No numbers/etc on them means no ID unless you can find a page from the vehicle manufacturer that says what brand/model the motor is (not very likely). A search on Fushida turns up nothing on a motor manufacturer, so that doesnt' help. Some ebike places come up but they just look like bicycles, not what you have.

There's lots of controllers out there, and again they all look pretty much alike. Most of the time no one has documented anythign about internal PCB numbers/etc on controllers, so except for very very common models, it's rare to find anything searching on those numbers/etc.

There's also lots of generic scooters out there that look pretty much alike; if you had lots and lots of time and patience you might be able to figure out what the more complete one was by matching *all* of the details about it to various google image searches of similar scooters.

What specifically do you need to know? A list of separated questions would be helpful.

What specifically do you need help with? A list of separated items would be helpful.
 
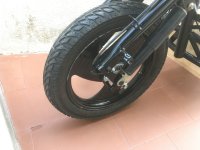
How are the roads you'll be riding on? I ask because the light weight tubing quality is suspect on those generic type bikes, which are built for quite low speed use in China. The tiny drum brakes on the front are very suspect too. You've got plenty of battery space, so look for cheap (just not lead) when it comes to batteries. You need to determine the Kv (the rpm/volt) of the motors, so you can decide on a voltage for the speed you want. They're probably up to the task you want, but that will be load and terrain dependent.

I've built some powerful and reliable transportation starting with nearly identical scooters, but to get there required batteries, new controllers, and frame reinforcement.
 
Hi guys

Sorry for not getting back to you sooner but i didnt spend much time with the bike until 2 weeks ago.

amberwolf: I now know that this world is very weird. Every scooter type i see have different parts and assemblies.

John in CR: I want to use it to comute to work, 8km in paved roads and 2 or 3 small hills. This scooter is for 48v and i will be using 63v. Just a little more speed so the brakes it has should be enough no?

Thanks to the holidays i have my bike almost complete.

Here are some pics:

IMG_6088.jpg

IMG_6089.jpg

IMG_6092.jpg

IMG_6090.jpg

View attachment 3

IMG_6091.jpg

IMG_6094.jpg

IMG_6100.jpg

I bought a cheap ebay controller and have a 15s4p battery for testing.
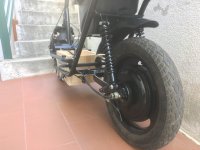
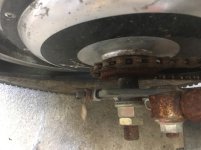
I am having a difficult time now with the rear axle/motor/drum brake.

I made some videos maybe its easier to see the parts:


[youtube]https://www.youtube.com/watch?v=uVdUoL9IPdA[/youtube]

[youtube]https://www.youtube.com/watch?v=ZG0T2TSBtDQ[/youtube]

[youtube]https://www.youtube.com/watch?v=_VGYCU90O7g[/youtube]


Basically if i tight the right side of the axle all ok.

Then i tight the left side too tight and the drum blocks the motor.
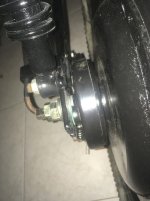
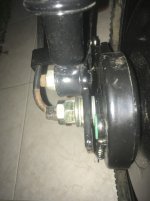
If i just tight the left side just enough to the drum stay loose (weird because then the motor is just well secured in one side) but then when i tight the drum arm to the part that secures the brake wire the drum stays slightly tilted and it rubs to the motor.

Am i missing some part in the assembly? What am i doing wrong?

Thanks :thumb:
 
It sounds like you're missing the spacer that goes in between the left side motor cover and the brake cover. It's usually a stubby cylinder, and then a nut on the outside of the brake cover so it holds together when out of the frame. It's easy to drop it off when the brake cover is off and not notice.
Sometimes there's a similar one for the outside, and if you swap them it rubs.
 
I can't answer your question specifically but if I were you I would ditch the drum and just use regen for the rear (variable with good controller) and get a bigger motor cuz that one looks a little wimpy for a scooter.

The front suspension looks great.
 
Fyi, that's actually a band brake, not a drum brake. You can also have the brake, and still have regen. The motor will be ok, esp since you have a spare. Just figure out the missing spacer... It will be fine.
 
Absolutely do not put your controller inside that wooden box. They need a cooling air flow, because a % of the energy going through a controller is lost to heat, at times as much as 5-10%. That's why their shells are aluminum will cooling fins all over. Insulating it inside a wooden box would quickly lead to a heat failure.

When mounting a controller exposed to wet conditions, orient it so wires enter the controller at the lowest point. Water follows cables like the channel of a river, but water doesn't flow uphill. Once sure the wiring is right, at a minimum, wrap all connectors tightly with a good layer of overlapping quality electrical tape using a continuous piece from wire over the connector to wire. With overlapping tape oriented like shingles on a roof it can be quite water resistant.

I prefer to hardwire my controllers with soldered connections and heat shrink when possible. Humidity can cause corrosion inside connectors, so I eliminate them from the equation. It's a bit more work, but obtaining absolute reliability is my goal.
 
Voltron said:
It sounds like you're missing the spacer that goes in between the left side motor cover and the brake cover. It's usually a stubby cylinder, and then a nut on the outside of the brake cover so it holds together when out of the frame. It's easy to drop it off when the brake cover is off and not notice.
Sometimes there's a similar one for the outside, and if you swap them it rubs.

I thinks there are parts missing since i bought it.
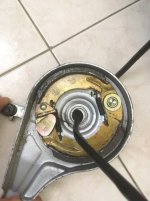
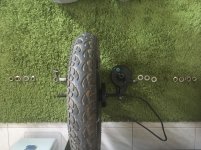
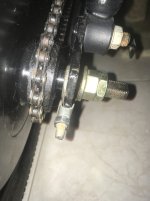
As you can see here i never removed the washers on the brake side because the hall sensors plug dont let the out, and after the brake plate there isnt any washer or spacer. On the other side there is a stubby cylinder like you say.
Even by what you are saying i tried yesterday to put a washer and then the brake and a nut, but when i tight it it blocks the brake against the motor.
Should't the drum rotate freely from the hub part?
IMG_6121.jpg


I saw this video [youtube]https://www.youtube.com/watch?v=qflshA-LMus[/youtube] and even if its a different wheel the concept should be the same no? the axle rotates free from the hub and from the motor.


flat tire said:
I can't answer your question specifically but if I were you I would ditch the drum and just use regen for the rear (variable with good controller) and get a bigger motor cuz that one looks a little wimpy for a scooter.

The front suspension looks great.
I tought of just removing the brake but its always another safety measure...
I dont know if my controller suports regen, i was hoping to mount everything and then test the controller functions with time.
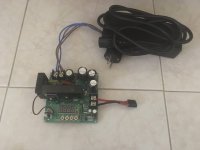
I am trying to rebuilt it on the cheap, so i just bought the cheapest controller on ebay:
IMG_6042.jpg

IMG_6111.jpg


Voltron said:
Fyi, that's actually a band brake, not a drum brake. You can also have the brake, and still have regen. The motor will be ok, esp since you have a spare. Just figure out the missing spacer... It will be fine.

I dont want to argue with you since you have a lot more years of ebikes than i do, but, this brake seems more like a drum brake from a car than a band brake. I searched band brake and the band tights the "bell" from the outside. In this brake 2 pads push the "bell" from the inside. I dont know if it makes any difference in assembly.
IMG_6122.jpg

John in CR said:
Absolutely do not put your controller inside that wooden box. They need a cooling air flow, because a % of the energy going through a controller is lost to heat, at times as much as 5-10%. That's why their shells are aluminum will cooling fins all over. Insulating it inside a wooden box would quickly lead to a heat failure.

When mounting a controller exposed to wet conditions, orient it so wires enter the controller at the lowest point. Water follows cables like the channel of a river, but water doesn't flow uphill. Once sure the wiring is right, at a minimum, wrap all connectors tightly with a good layer of overlapping quality electrical tape using a continuous piece from wire over the connector to wire. With overlapping tape oriented like shingles on a roof it can be quite water resistant.

I prefer to hardwire my controllers with soldered connections and heat shrink when possible. Humidity can cause corrosion inside connectors, so I eliminate them from the equation. It's a bit more work, but obtaining absolute reliability is my goal.

Dont worry, i come from a computer background, and heat is always a problem.
Screen Shot 2019-10-05 at 10.12.15.png
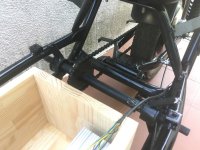
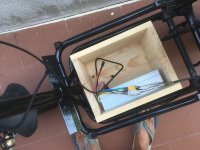
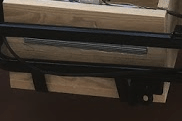
I made a hole on the box so that the controller stay flush with the outside wood and the fets side will catch moving air too cool it.
I havent tought of wet conditions since its not really moving yet ahahah. But i can use electronic varnish in some connectors and will try to hide the wires inside the frame where possible.

I will try to mess around with it today.
If i cant make maybe i will try without the brake just to test it, i really want to take a ride in it.
Really thank you for your help.
 
You're right...I thought from the outside cover it was the band type. But I do think your washers and nuts got moved around before. Usually the skinny nut that is on the outside is the one thats supposed to be against the brake plate, and the flared nut with the knurling is the axle nut. Maybe one or two of the washers had been on the inside as spacers along with the stubby cylinder to keep the cover from rubbing on the brake drum as it rotates with the wheel?
 
The skinny nut is meant to hold the assembly in place when the wheel is off the frame.
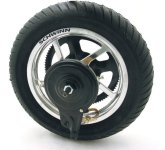
currie-12-1-2-x-3-0-complete-rear-wheel-assembly-with-drum-brake-for-schwinn-ezip-scooters-1.jpeg

When it's tight enough, it should be pressing the brake cover against the inside spacer, which then rides on the inner race of the bearing, and should move with the axle. If you get it to that point and it's rubbing, then either the spacer is too short, or overlapping onto the outer part of the bearing.
 
Your motor looks to be about 97% the same as mine... it started out in a scooter too. But yours has the better aluminum stator instead of the stamped steel one on mine.
dirt.jpg
:thumb:
 
Voltron let me just start with: you are AMAZING...


If you ever come to Portugal i will buy you a few drinks 8)

Voltron said:
You're right...I thought from the outside cover it was the band type. But I do think your washers and nuts got moved around before. Usually the skinny nut that is on the outside is the one thats supposed to be against the brake plate, and the flared nut with the knurling is the axle nut. Maybe one or two of the washers had been on the inside as spacers along with the stubby cylinder to keep the cover from rubbing on the brake drum as it rotates with the wheel?

You are so, so right. It was bad assembled since i got it.
This image is before i dismantled her a few months ago, as you can see the cylinder is not on the side of the brake:
IMG_5698.jpg

Voltron said:
The skinny nut is meant to hold the assembly in place when the wheel is off the frame.


When it's tight enough, it should be pressing the brake cover against the inside spacer, which then rides on the inner race of the bearing, and should move with the axle. If you get it to that point and it's rubbing, then either the spacer is too short, or overlapping onto the outer part of the bearing.

I dont have a nut for the inside. This is what i have:
I think the 2 nuts on the ends are for holding the other nuts.
IMG_6123.jpg

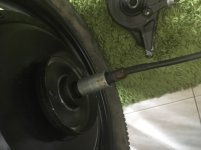
Then i changed the cylinder to the brake side like you said:
IMG_6124.jpg

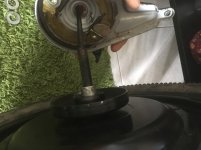
All inside and then comes the drum:
IMG_6125.jpg

The assembly in better light for anyone thats like me :lol: :
IMG_6126.jpg

After assembled right side from back:
IMG_6139.jpg

Drum:
IMG_6141.jpg

Brake side:
IMG_6143.jpg


Voltron said:
Your motor looks to be about 97% the same as mine... it started out in a scooter too. But yours has the better aluminum stator instead of the stamped steel one on mine.

:thumb:

Thats a lot of batteries :shock:
You modified the frame? Awesome!!!


I will go test her tomorrow thanks to you guys.

I cant thank you enough...
 
Glad it's working out.

And that's only 2/3 of the full pack! It's 3 modular units so I can run it lighter for short range.
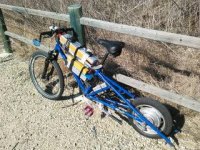
And the frame is surprisingly unmodified. It's a first generation Yuba Mundo cargo bike. The rack was bolted on on the early models instead of welded, so when taken off makes it look like a dragster 😉
mundo.jpg
I got it like this, from some guys abandoned front wheel motor project. That scooter motor and overvolting to 72v made it came alive!
 
And if it's working don't bother changing it until next time you take the wheel out.. . But you don't need another nut on the inside. In your last picture, where the two washers are between the frame and the brake cover, that's where the skinny nut you still have on the outside goes.
 
Hi again

That frame is very cool Voltron. How many kms can you make with 1/3 of your packs?
I have to go read your topics here.


I have to tell you what happened today just for some good laughs.

Since the bike was ready this morning I decided to go for a ride.
I went for coffe before and with my phone I saw I was going full speed at about 20kmh. Some bicicles even passed me.
But don't get me wrong. I was having a blast ahahah.
I ended up making some 3km and got home again.

Controller off and started looking for something wrong.
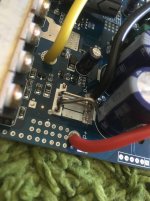
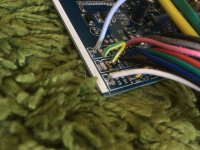
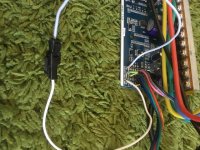
That green and yellow wire was a jumper I made because the motor was rotating correctly and that was for reverse that I don't need.
image.jpeg


Well you guessed it. I was going only in reverse.

When I disconnected it the motor spun backwards but much faster now, and the 3 switch speed selector wasn't working and now it changed speeds. Awesome.
I just connected the learning cable and the motor was going forward and with more speed. Time for another test ride.
image.jpeg


Well the speed with everything correctly is even a little faster than I need I think. Better.
I tried to go up a really steep hill around here and I saw Amps around 70.
That's a good way to kill quickly my small battery that don't have a bms.
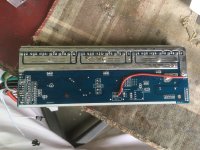
Took the controller off again and desoldered one of the 3 shunts the controller has to try and reduce the amps it draws.
I also changed the learning wires that I don't need soon to the X and DS pads. (On another topic here I saw it activates ebrake and regen)
image.jpeg

After that desoldered I went even upper on the hill I have closer.
On the same part of the hill than before I was going slower and pulling around 50A.
I think even this 50A are too much for my battery but it's rare I go there on bike it was just for testing.


One more thing. I tried ebrake and regen when I descended the hill nearby, by my meter i putted 1 volt to the battery when descending. Is that feasible? Or was the bat still recuperating voltage too? I was up there talking with a friend for a while so I think the battery rested enough before coming down.
I have to say, it's weird. I press brake and about 3 seconds later I feel the motor stopping the bike and its a very steep hill.
I have to read more about regen for sure.


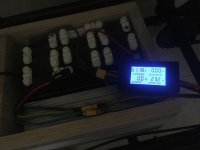
This is my battery and the eBay wattmeter I have.
image.jpeg


And this is my simple charger that I saw on another topic here too.
image.jpeg

Thanks endless sphere
 
That's part of why I run the big pack a lot, as it shares the amp load over a lot of low grade cells. I get about 30k a module, so full pack is 90k-ish
 
https://youtu.be/FQAOSU6-LgY

And that's 90k at this sort of light riding around.. 😋

The middle part of the ride is just a lot of hypnotic back and forth with serious speed bursts in the later part... The last 30 sec is a great look of my hometown. Come for a ride sometime!
 
Voltron said:
https://youtu.be/FQAOSU6-LgY

And that's 90k at this sort of light riding around.. 😋

The middle part of the ride is just a lot of hypnotic back and forth with serious speed bursts in the later part... The last 30 sec is a great look of my hometown. Come for a ride sometime!

And if you're building your own chargers, and resoldering shunts, then YOU'RE awesome :thumb:

That's part of why I run the big pack a lot, as it shares the amp load over a lot of low grade cells. I get about 30k a module, so full pack is 90k-ish

I wish I could build such a charger.
That is a step up dc dc from ebay. For starting out I think it's enough. And the Psu is is just 24v 5A and I'm charging at 61.5v 1.5A.

I saw it on this thread:
https://endless-sphere.com/forums/viewtopic.php?f=14&t=82731


About you battery, almost 100km would last me for a whole week to commute. I am sure I will have to get a bigger battery than what I have now.
Your bike is very cool and so is the area where you live. That view from the hill is awesome, it's near the sea right?

I will see how many km I can make today.
Maybe I can make a little video.
 
Yes, that's the ocean, with some islands in the distance.

Edit.. In commuter mode I just run one battery module which makes it a lot easier to move around when off the bike. But then I don't punch it drag racing cars away from lights to limit the amp draw, which is hard 😀
 
Back
Top