Stella 2T Conversion to 4kW

EmVeeTee

10 mW
Joined
Mar 15, 2021
Messages
27
Hello All

I have been posting on a different forum but my project seems more appropriate here, so I'm going to move that content here. I hope you enjoy watching this conversion project.

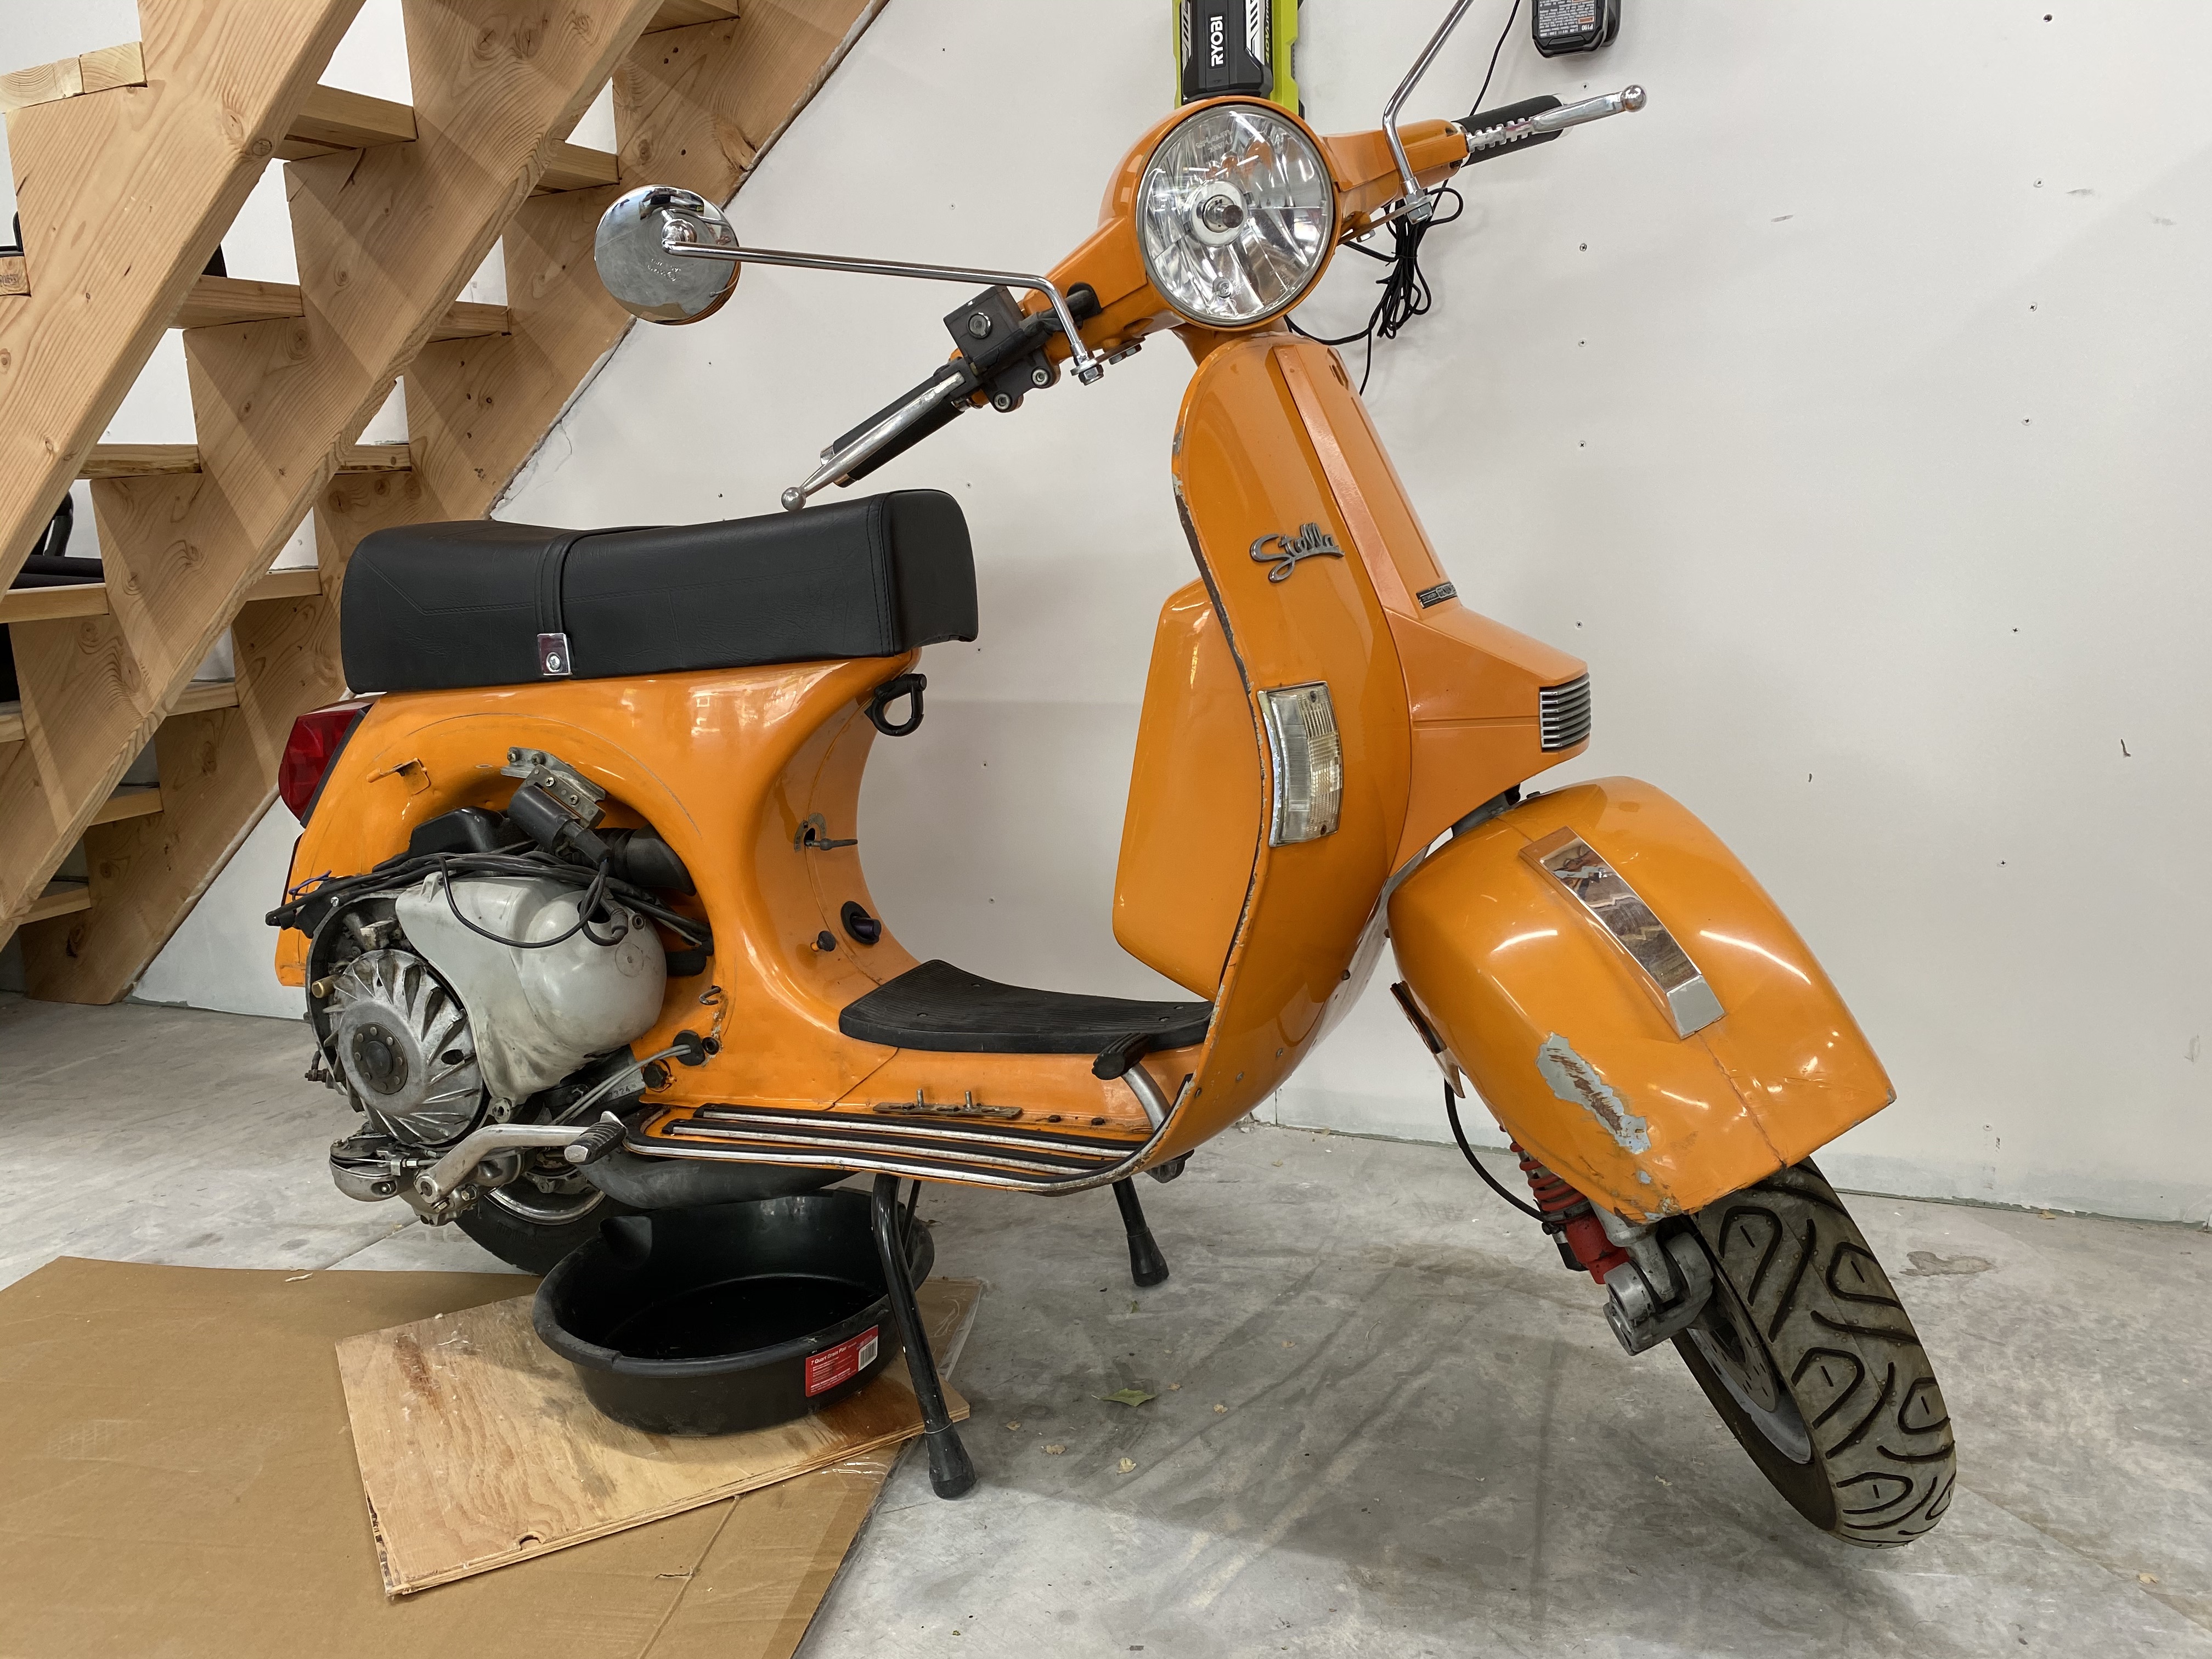
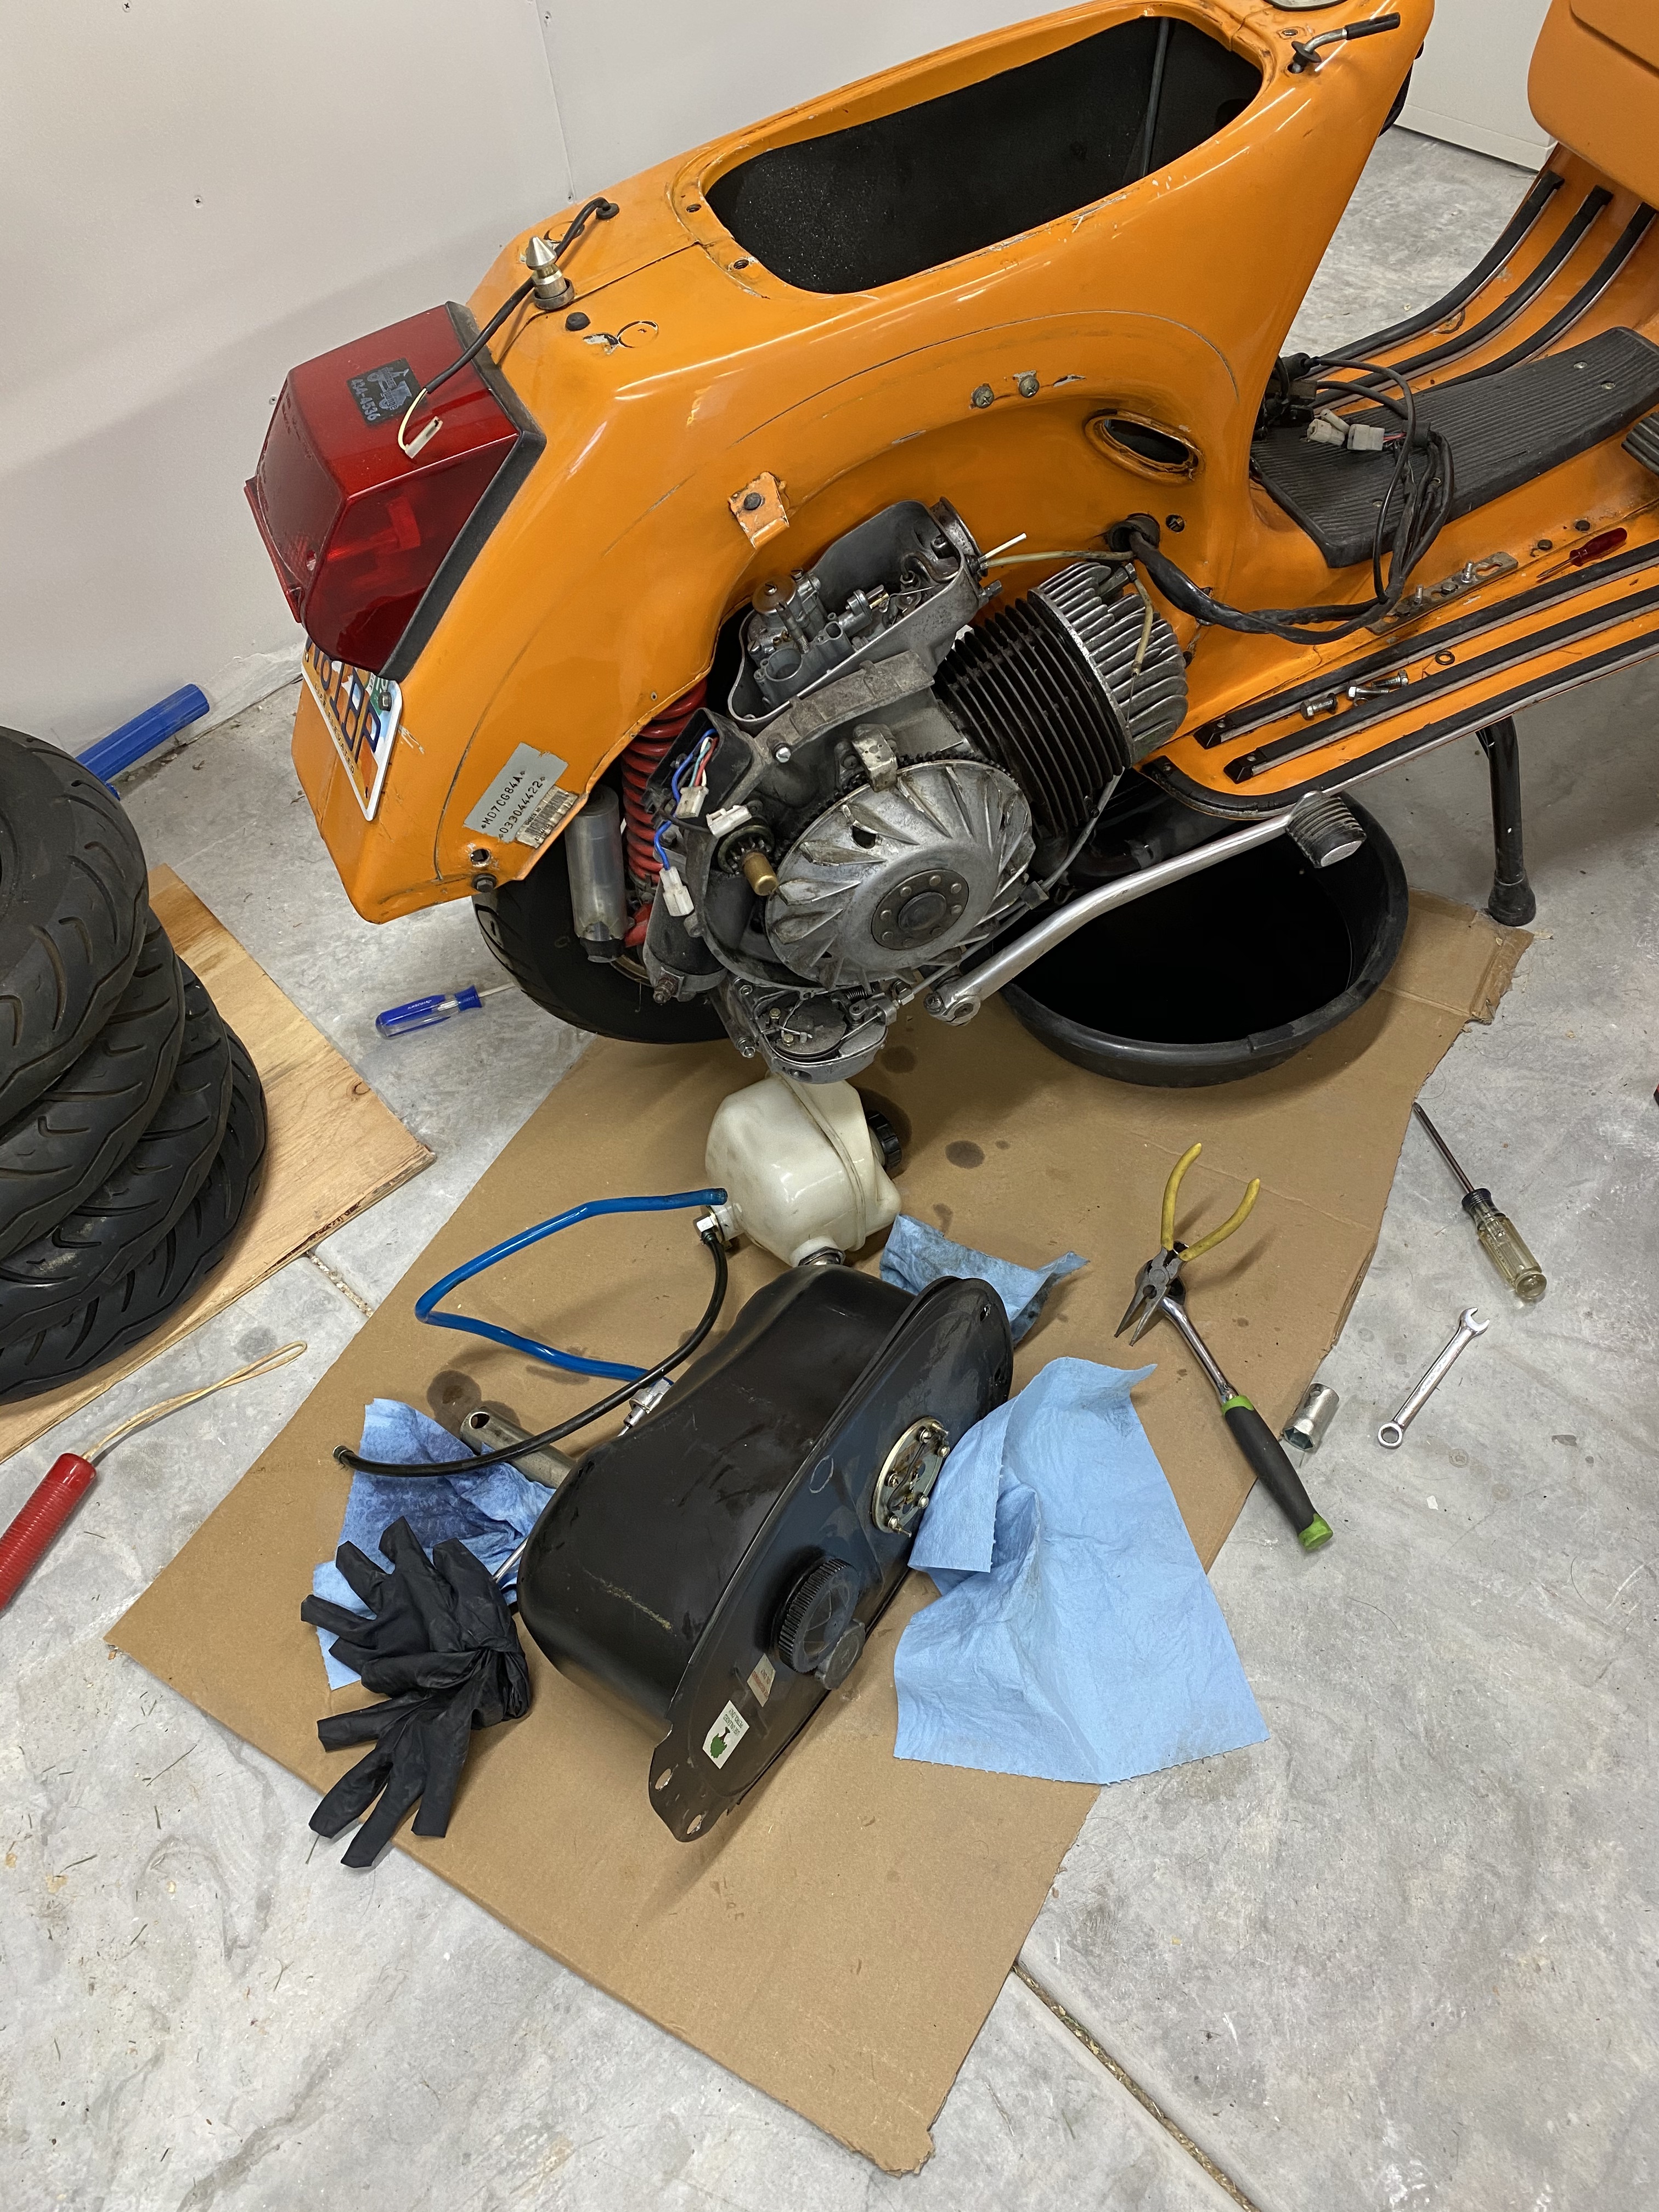
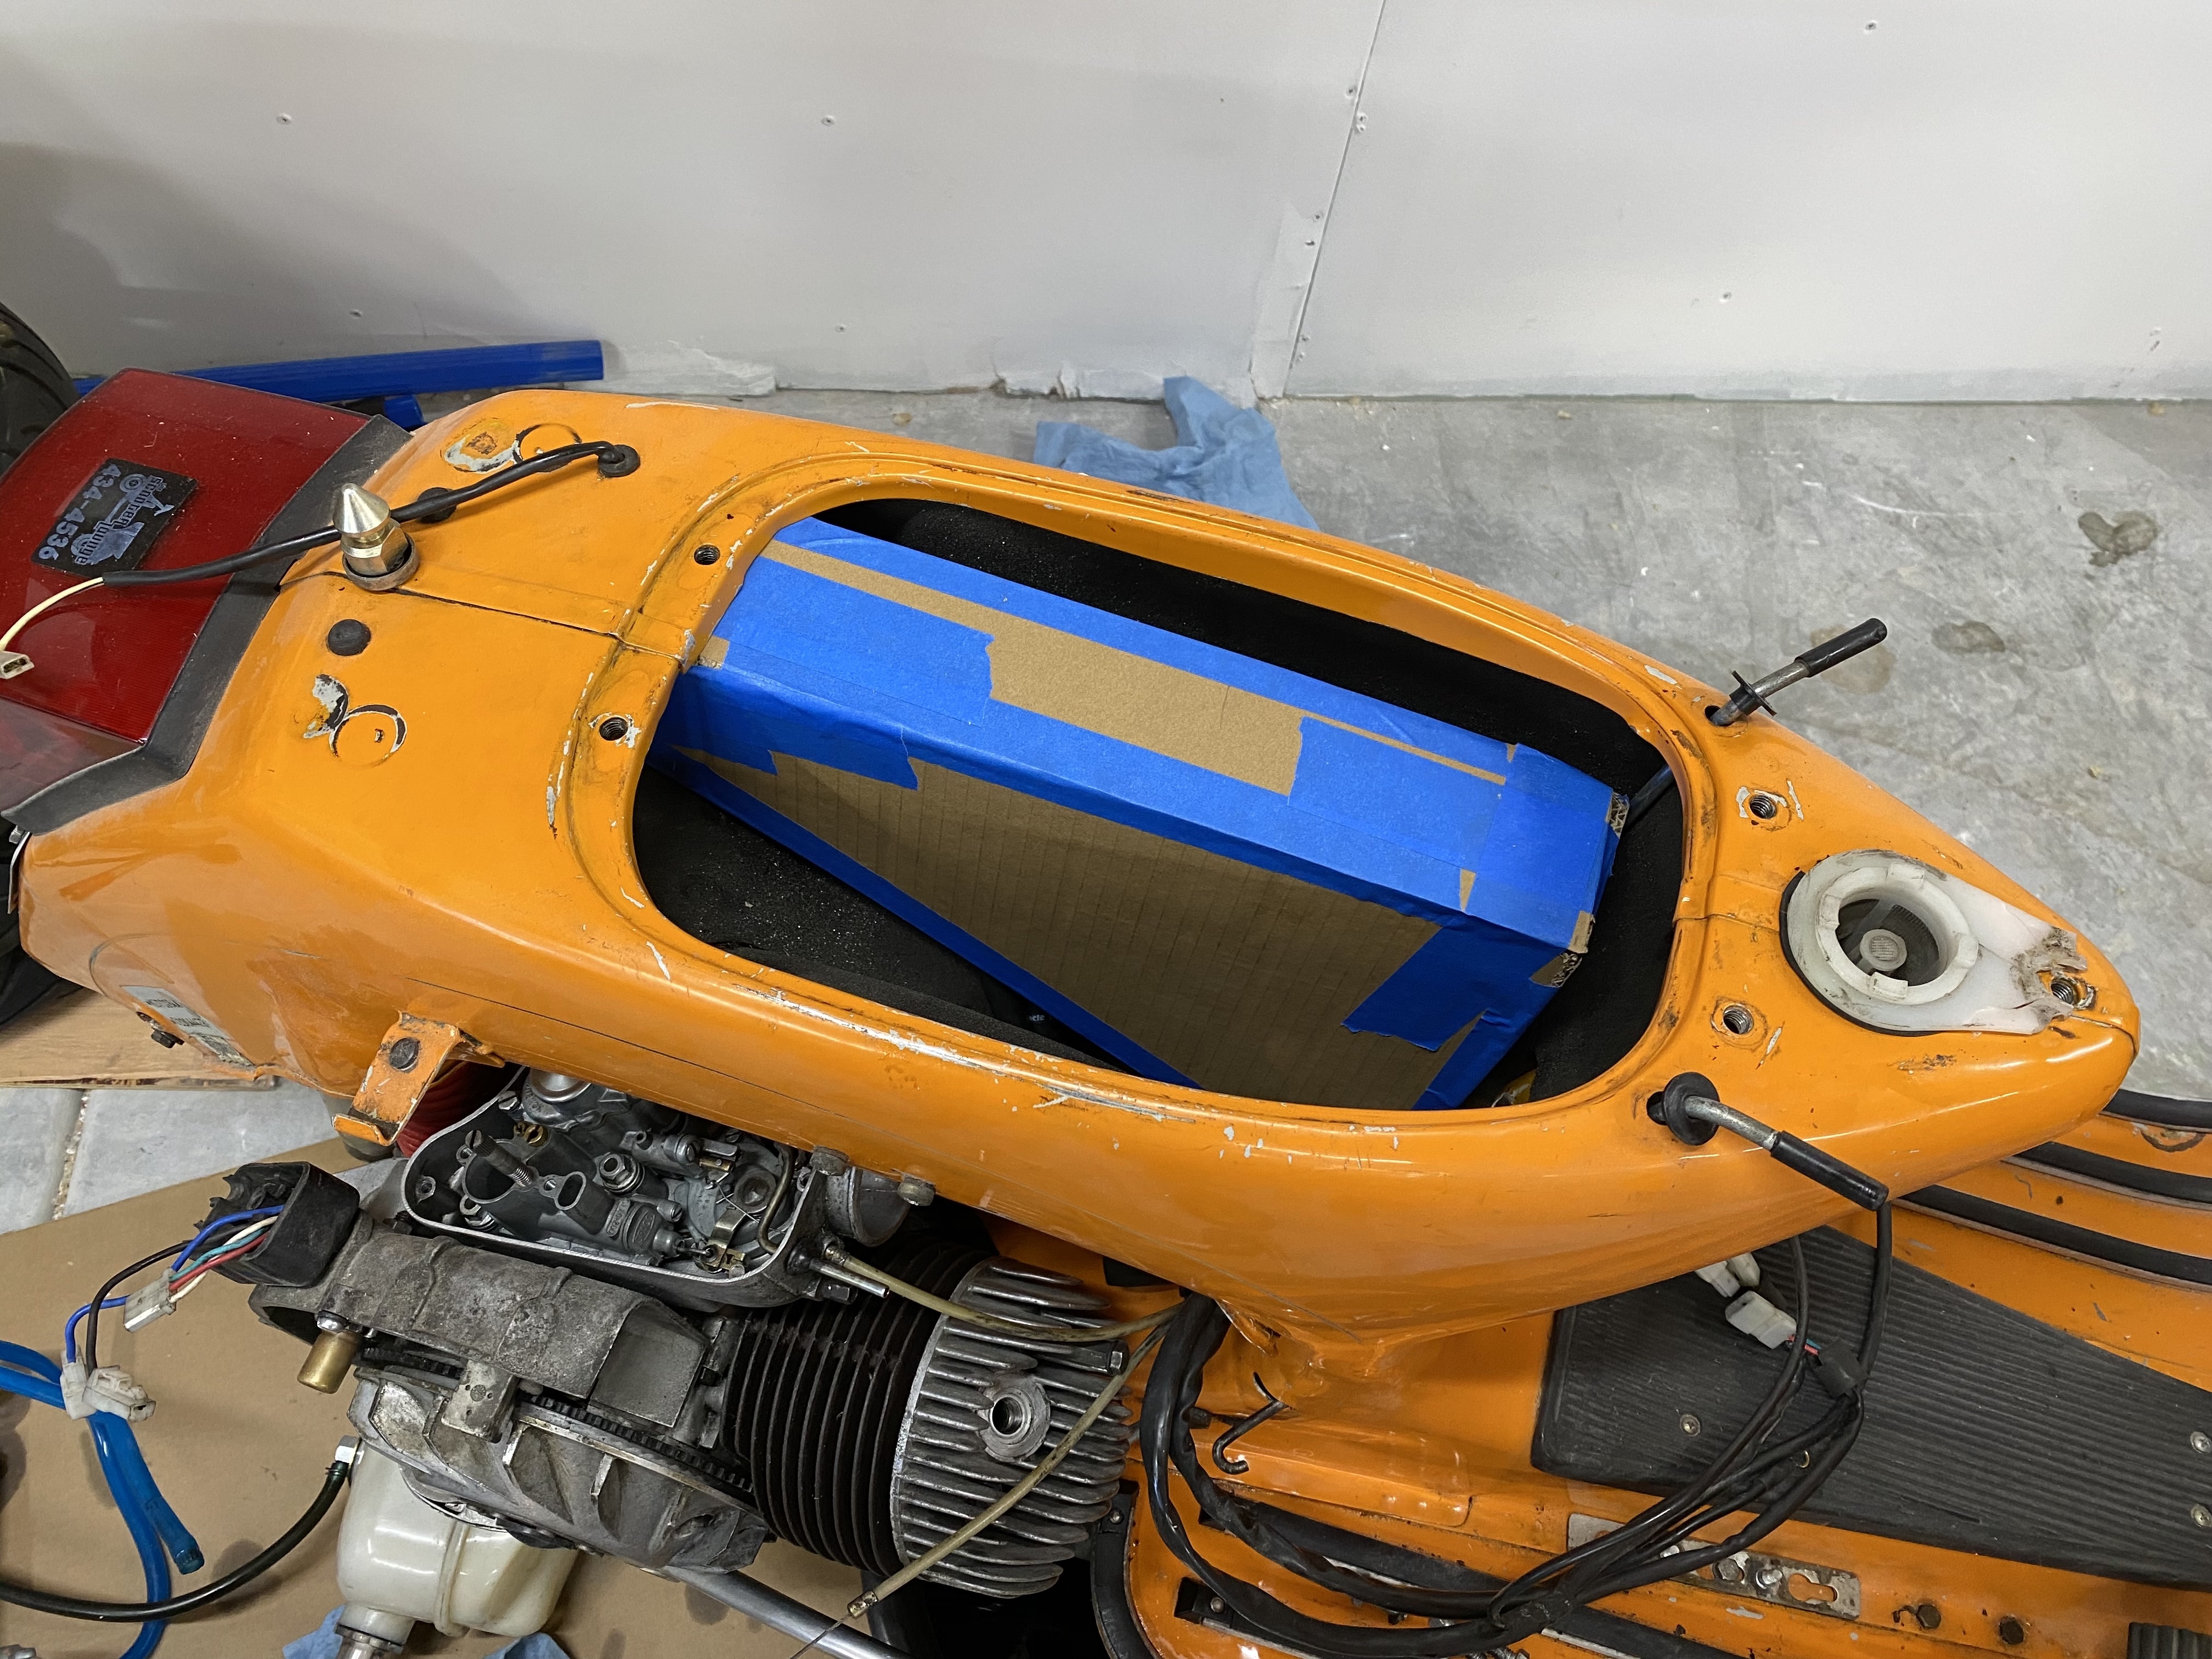
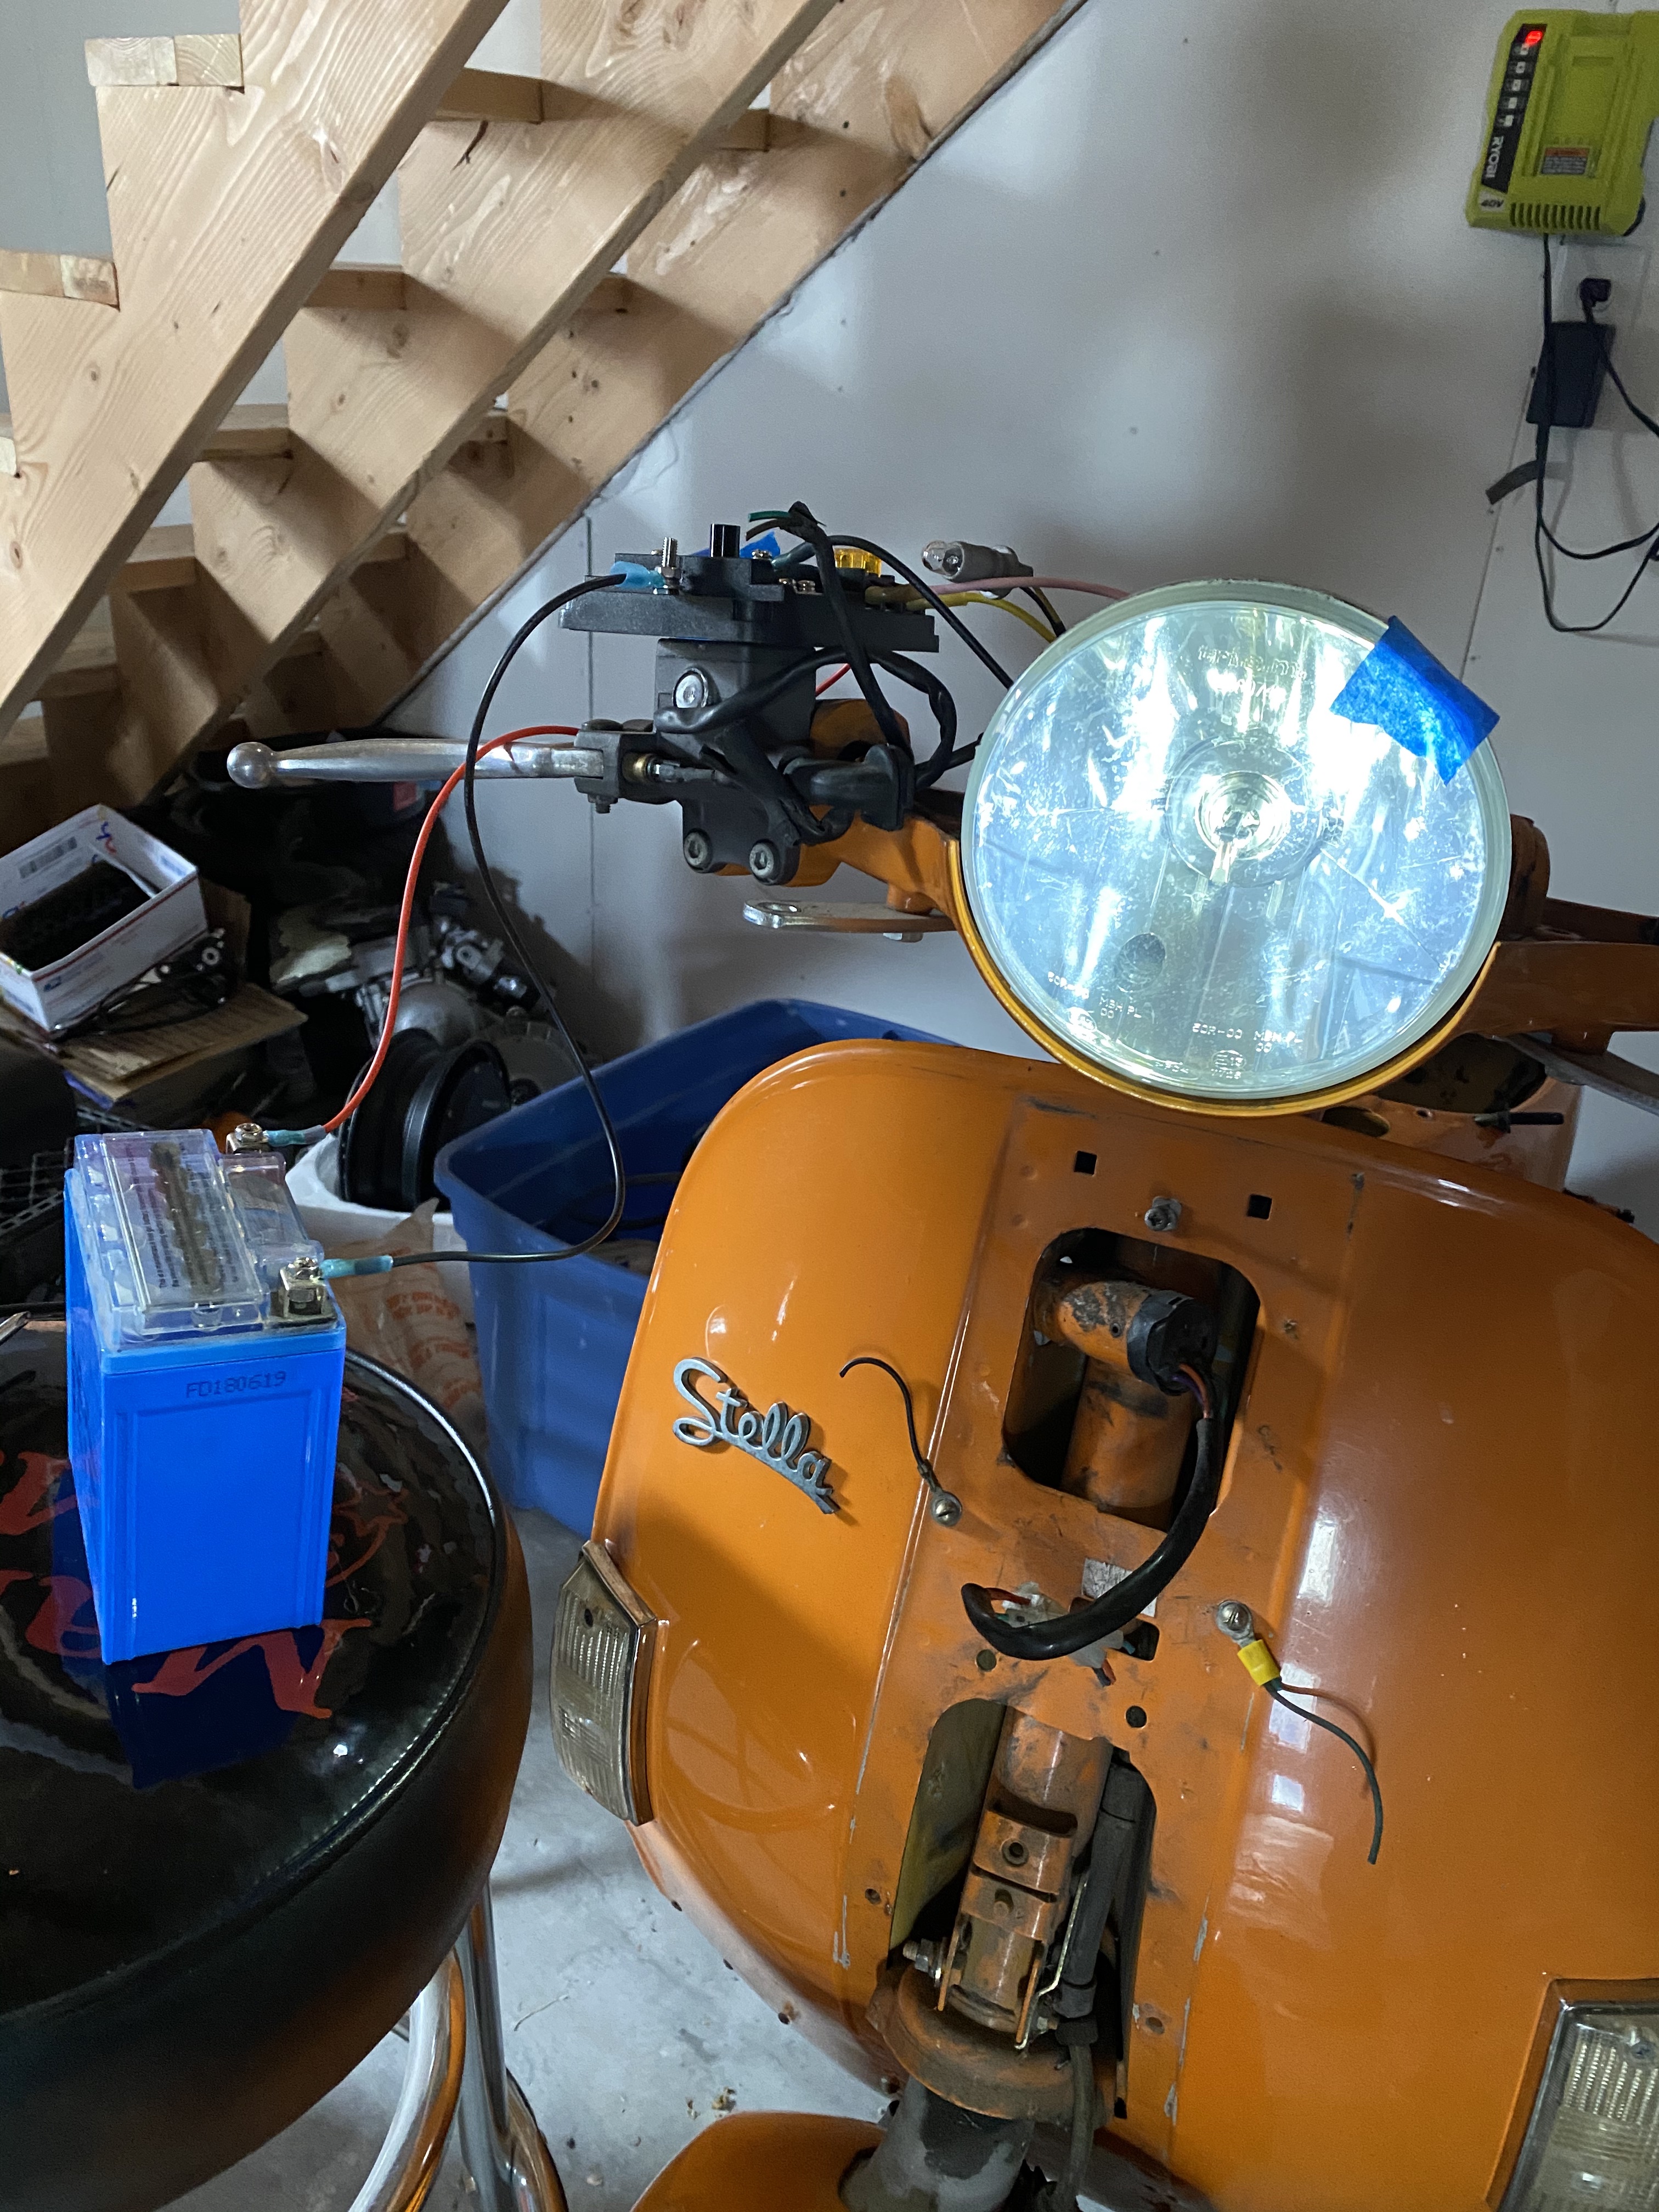
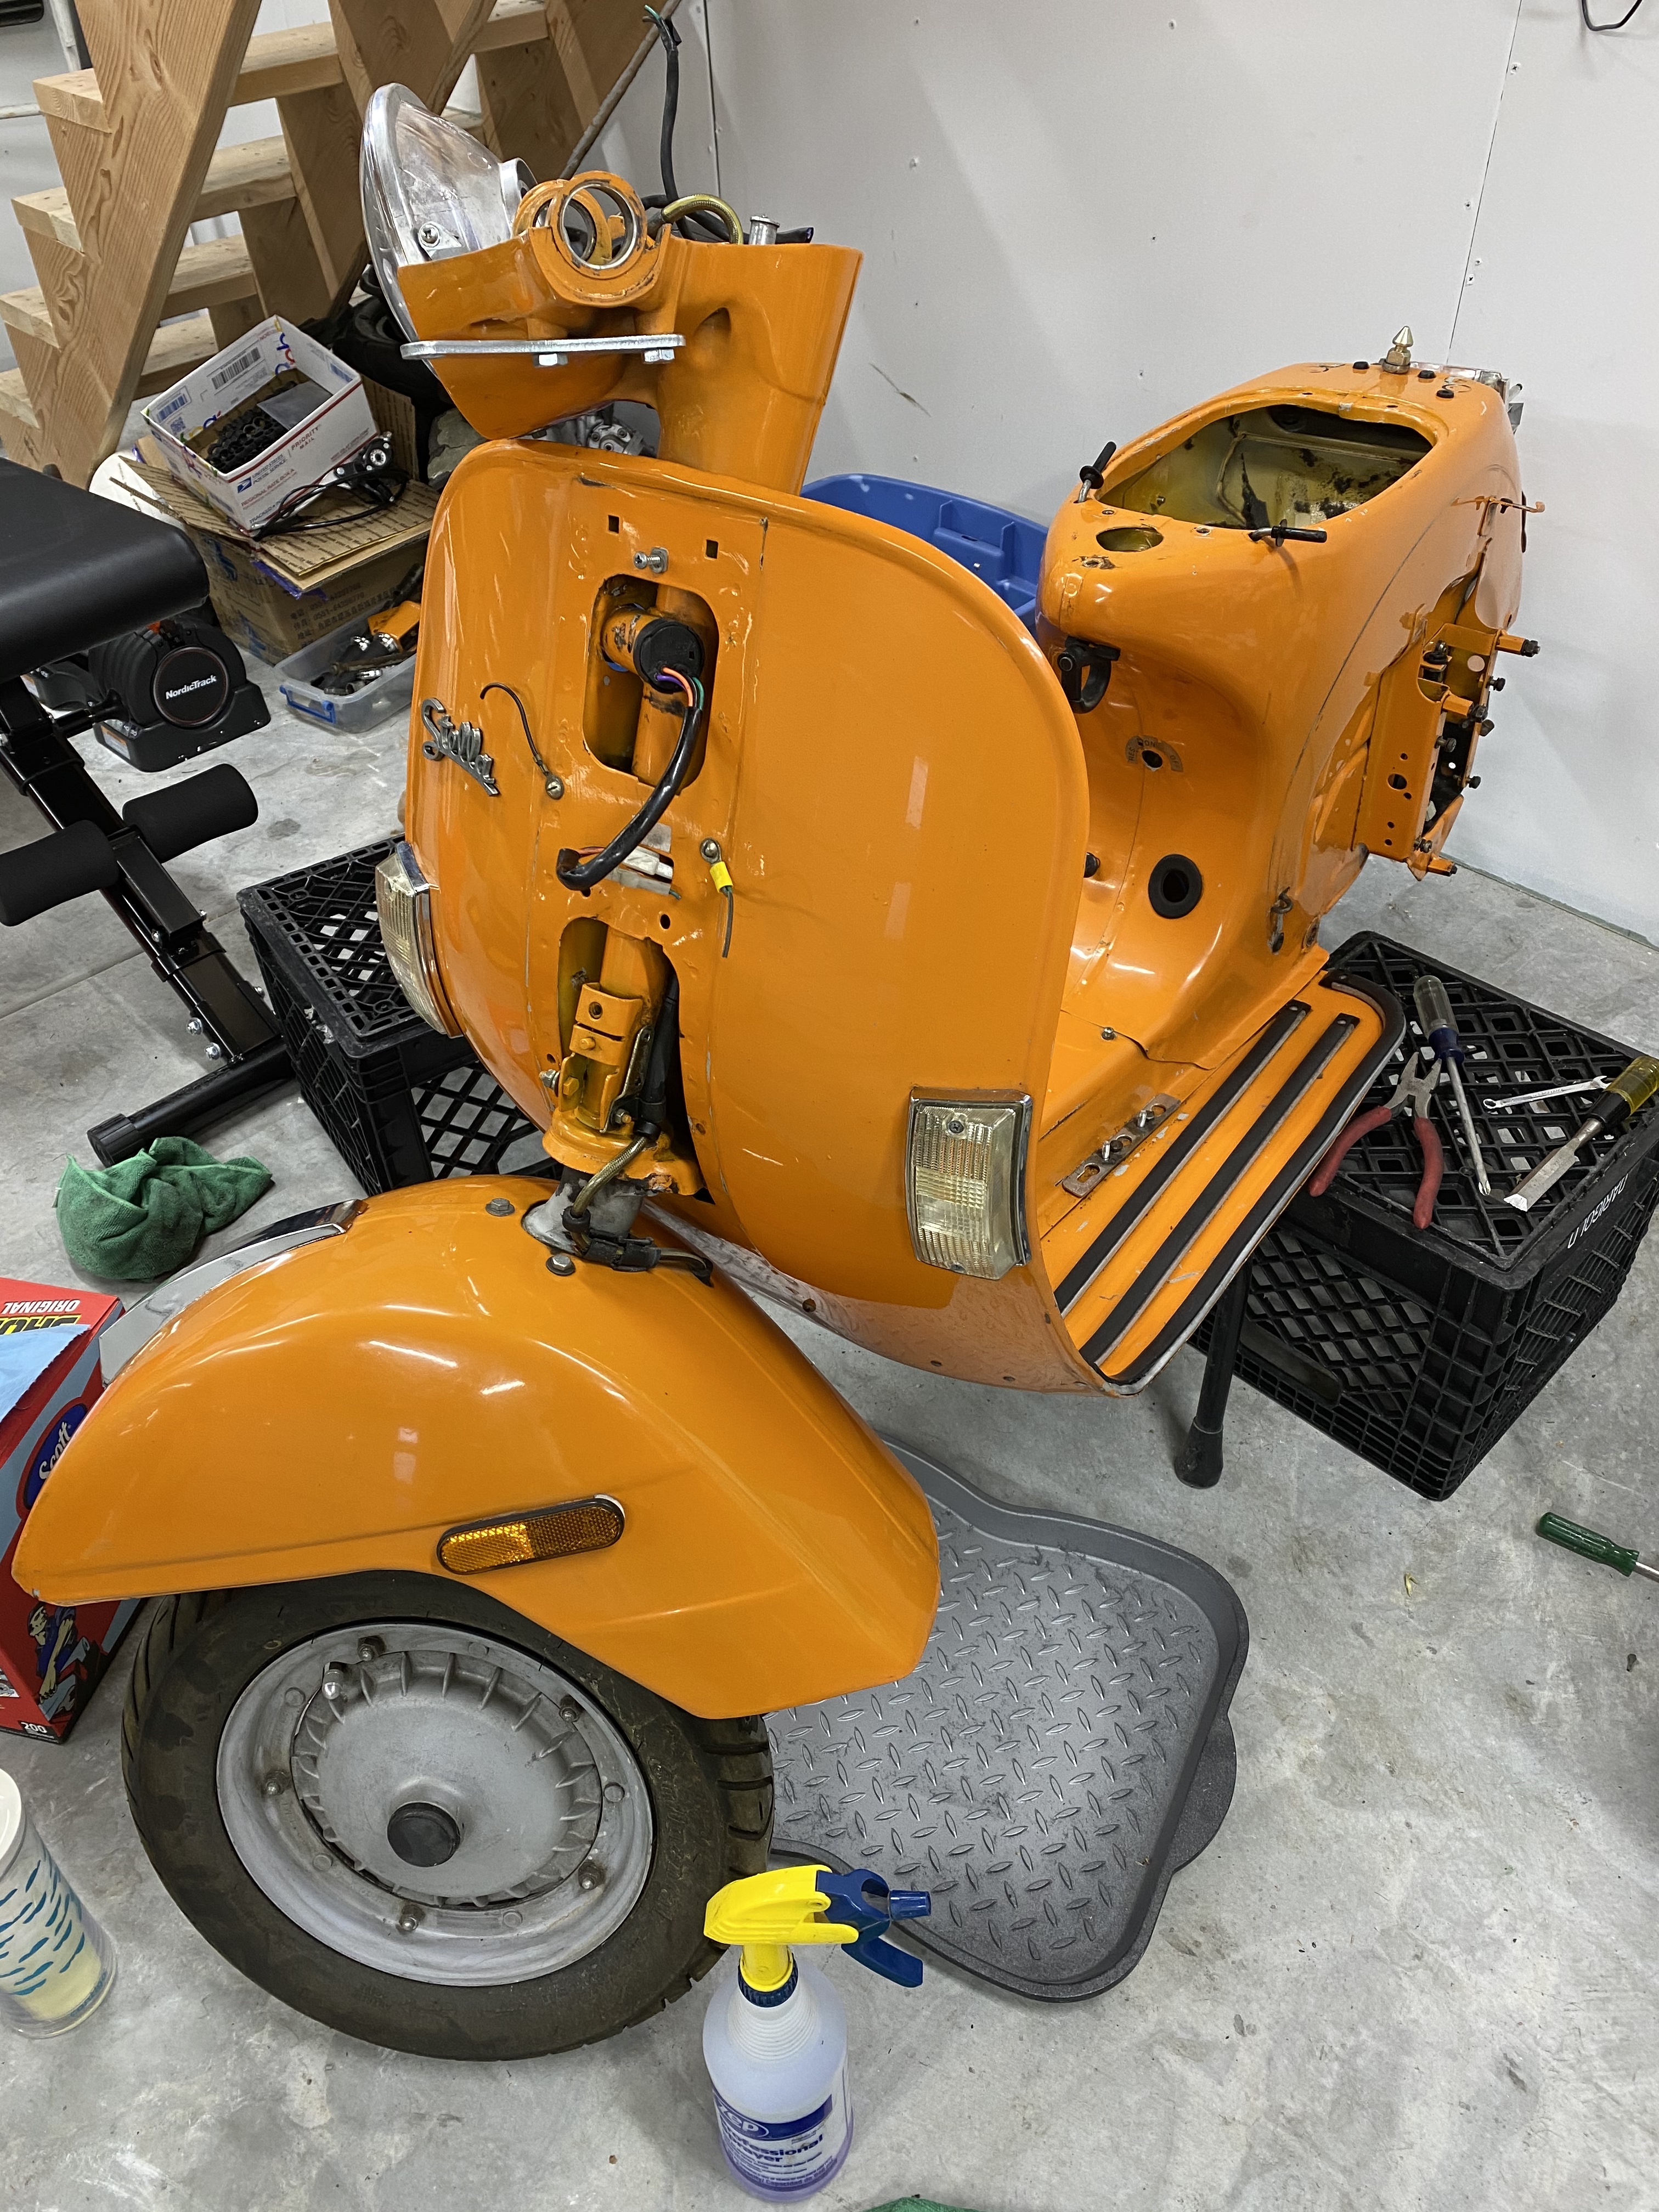
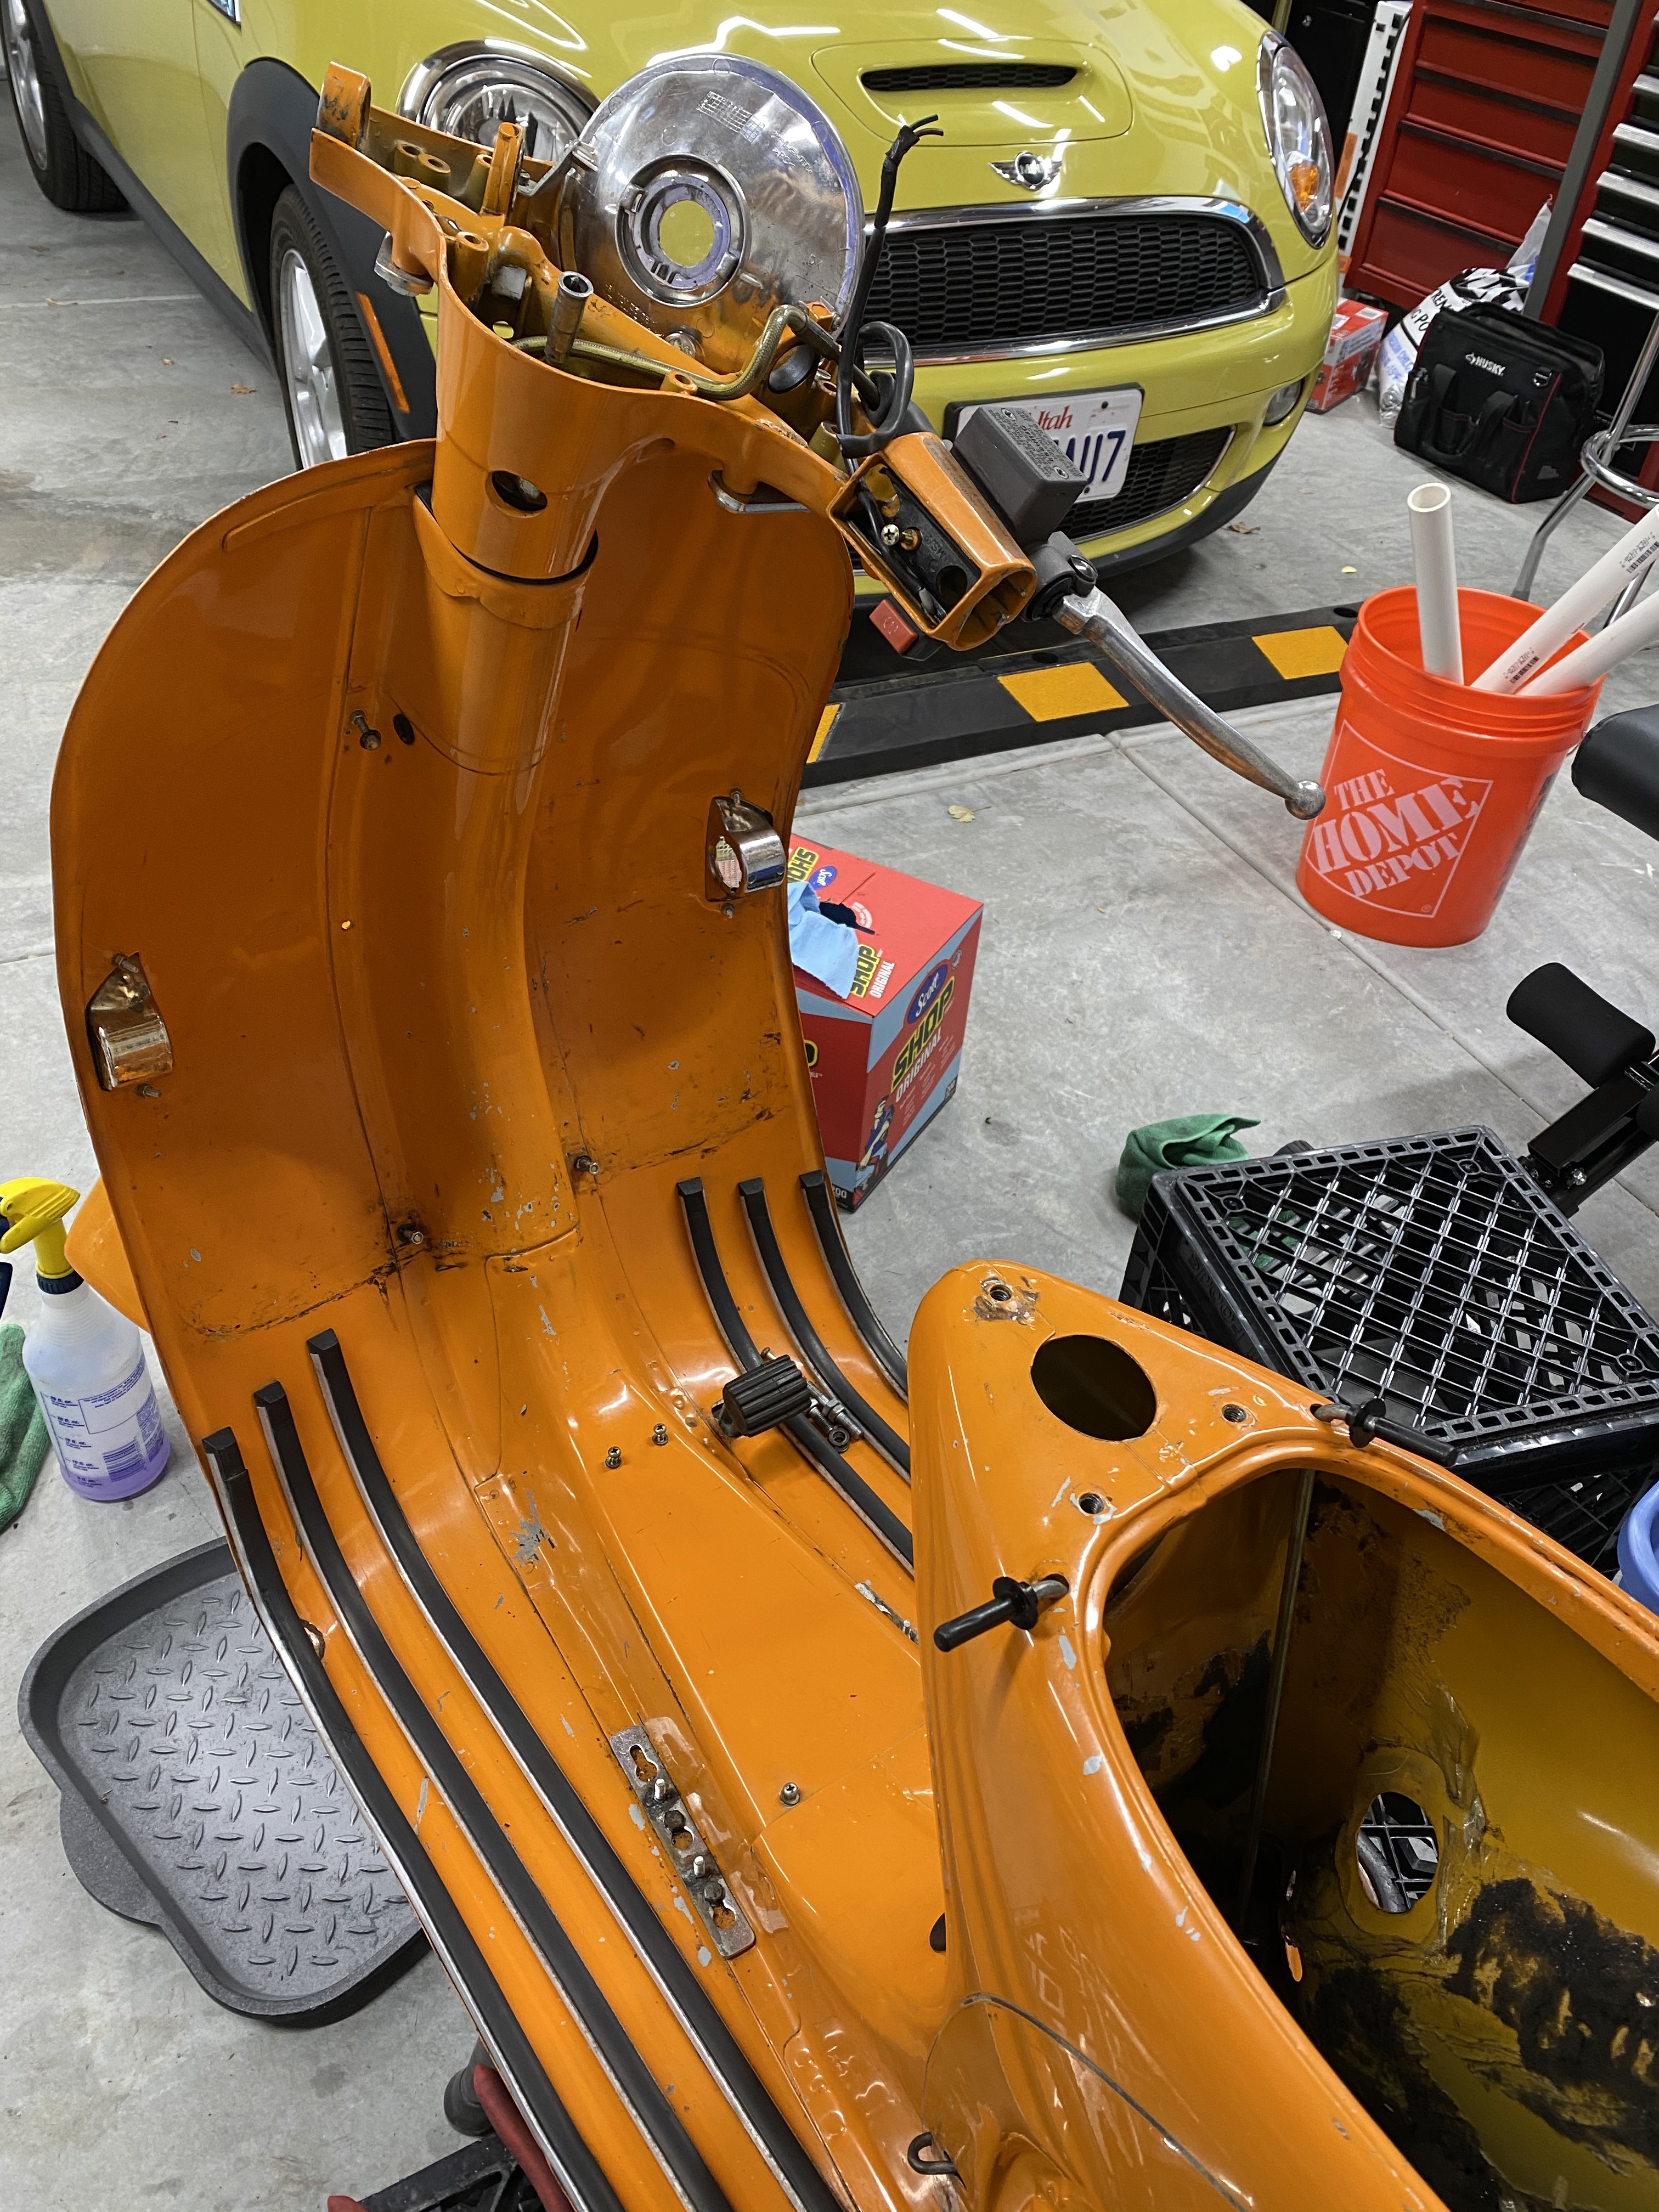
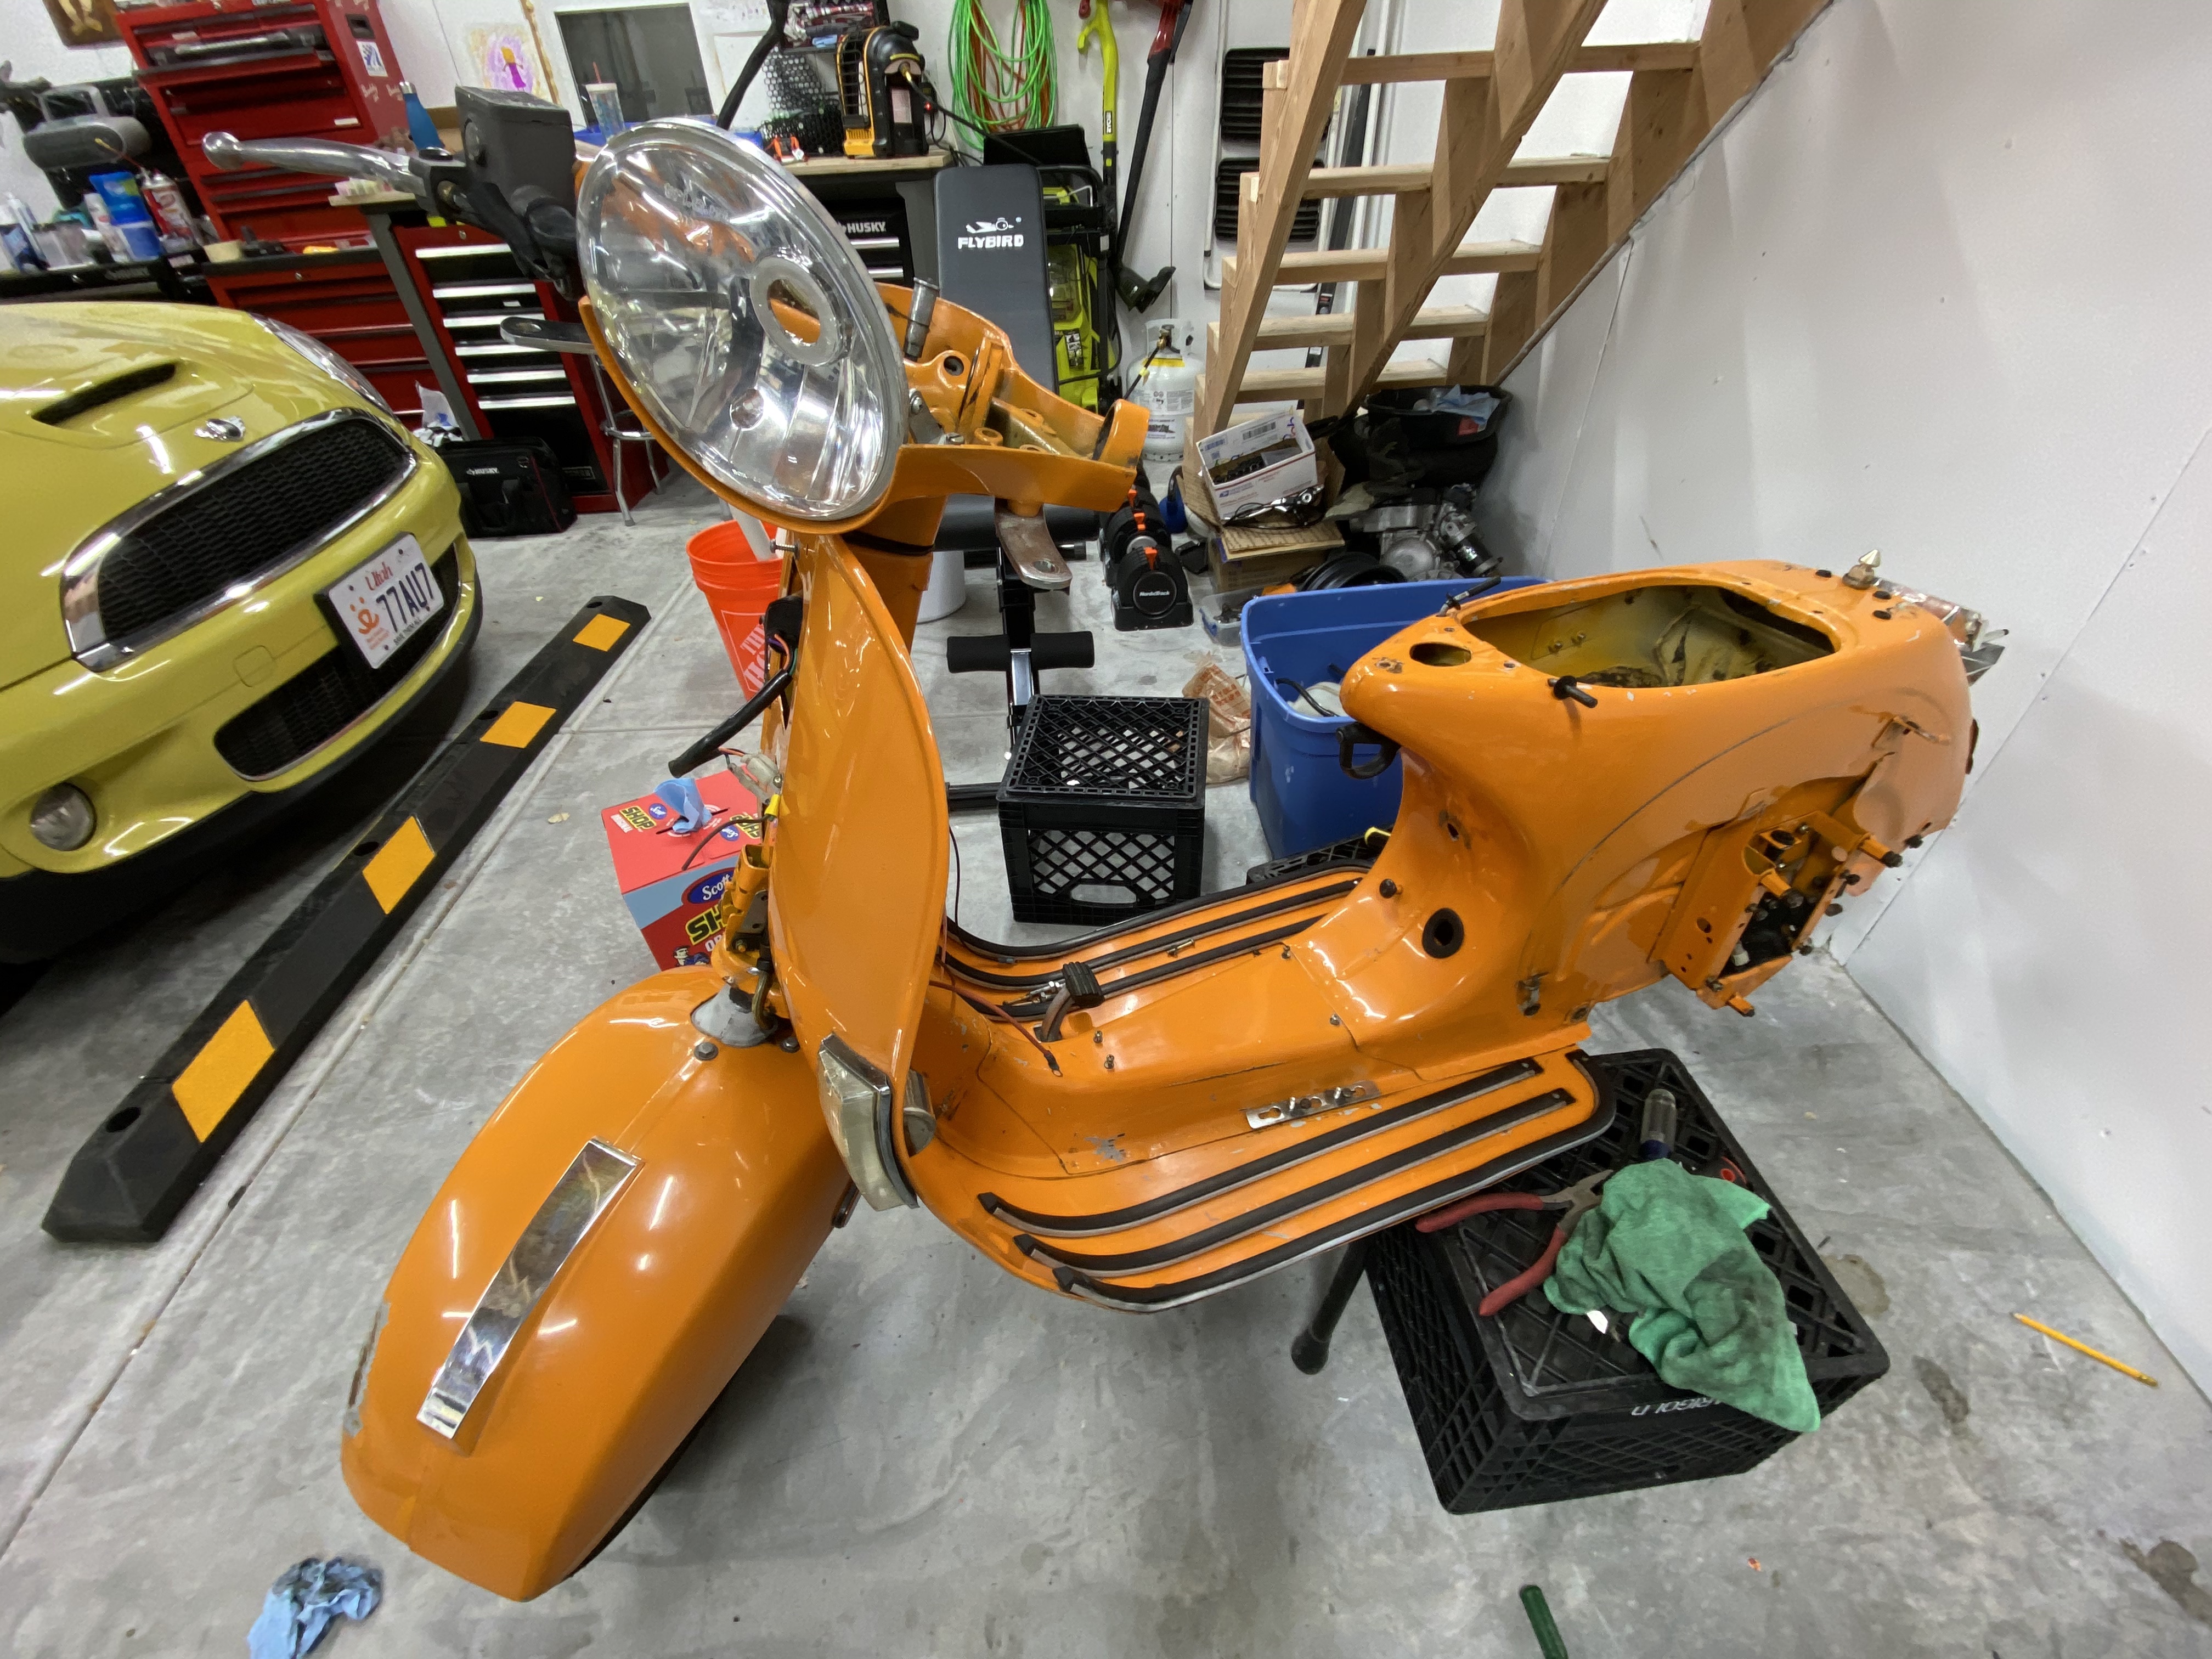
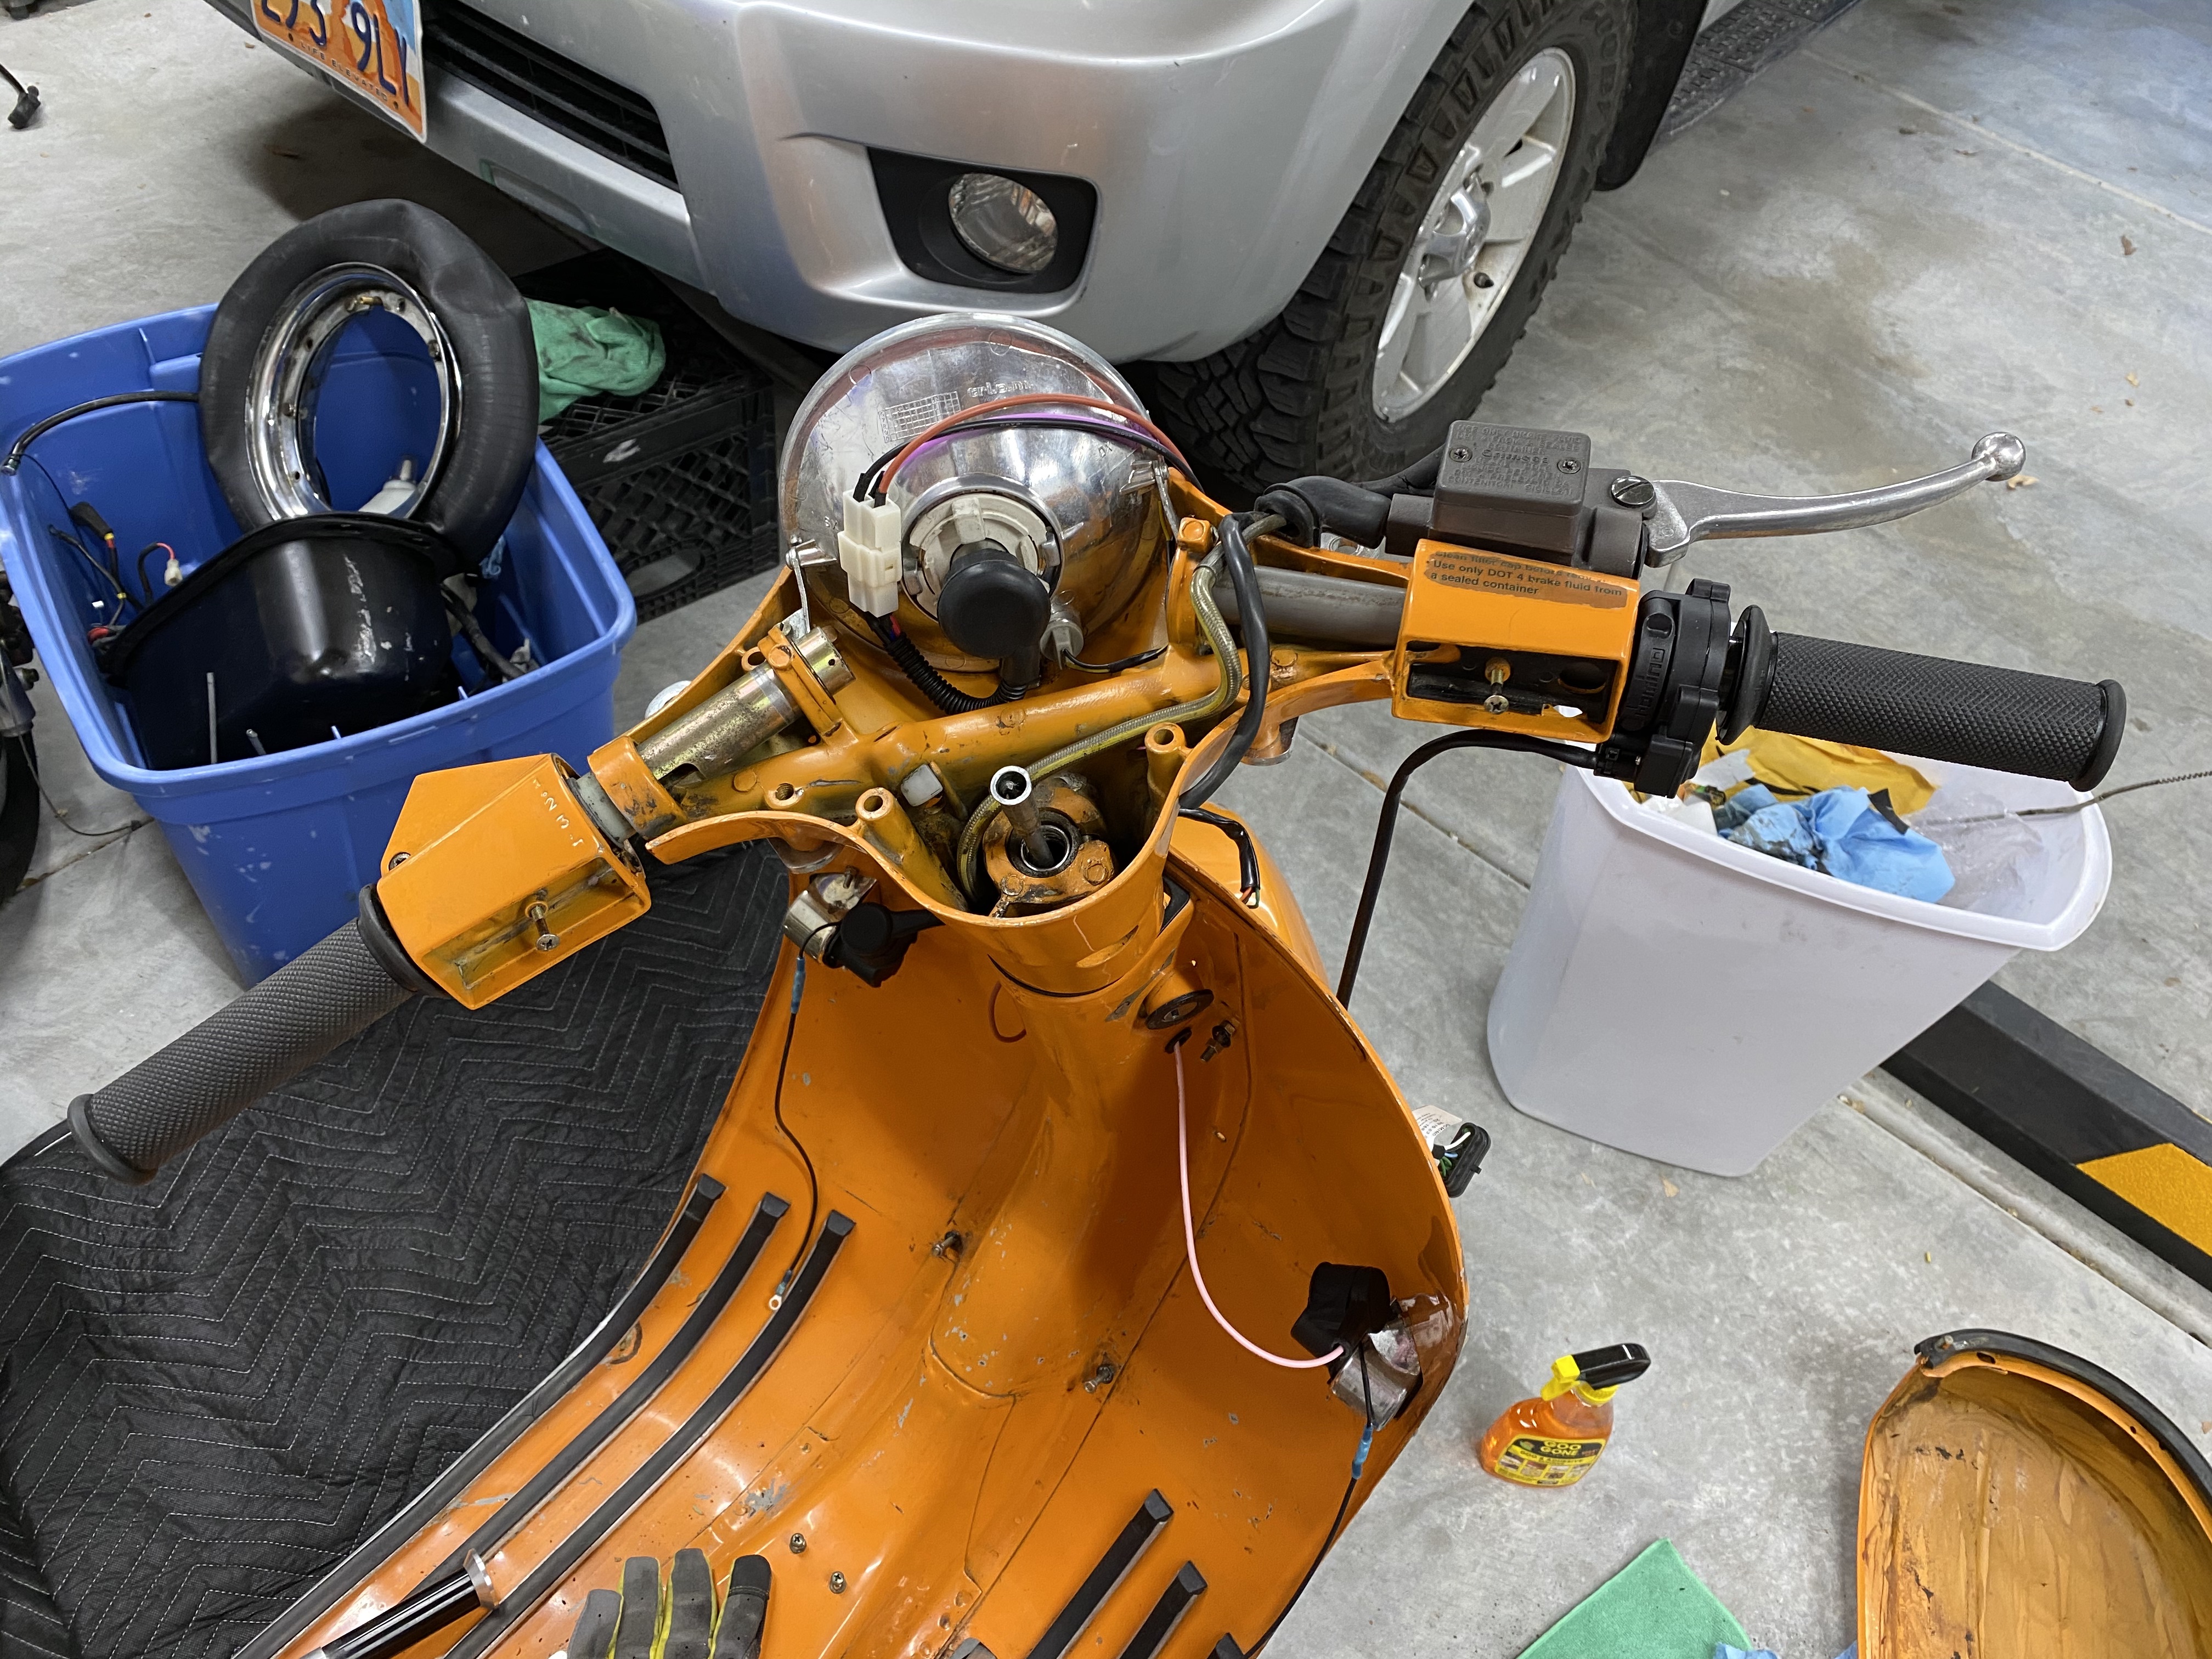
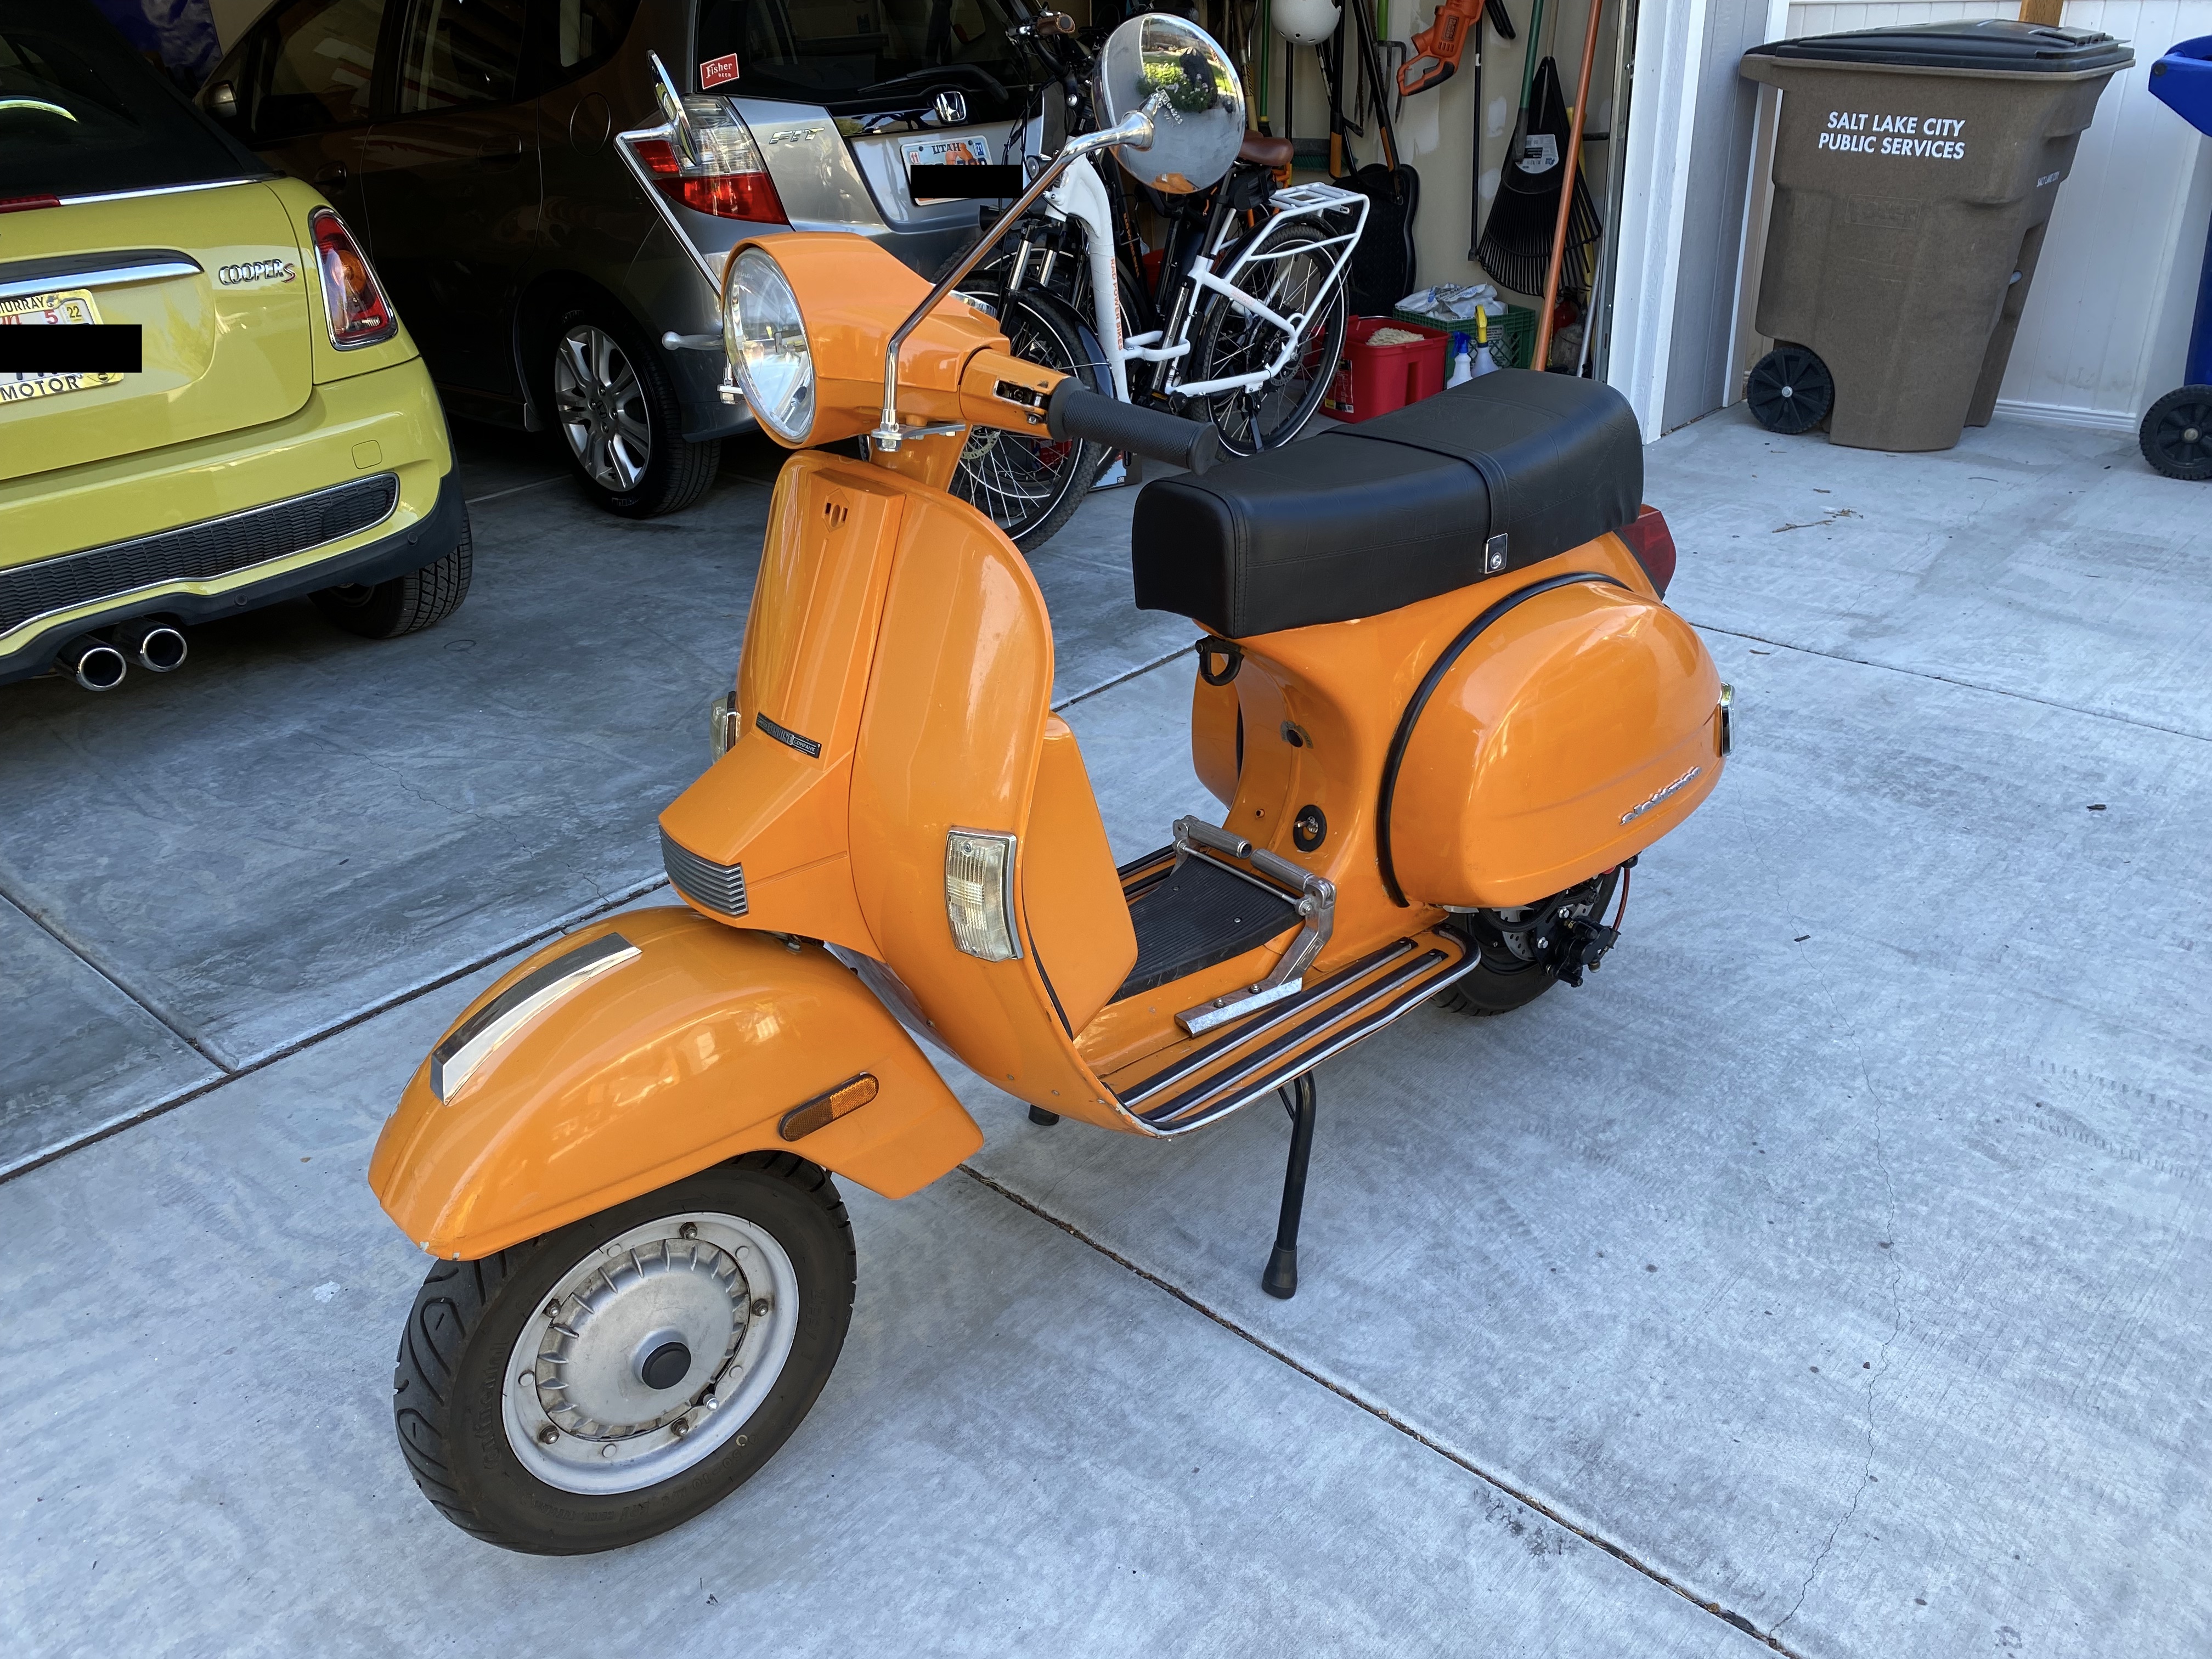
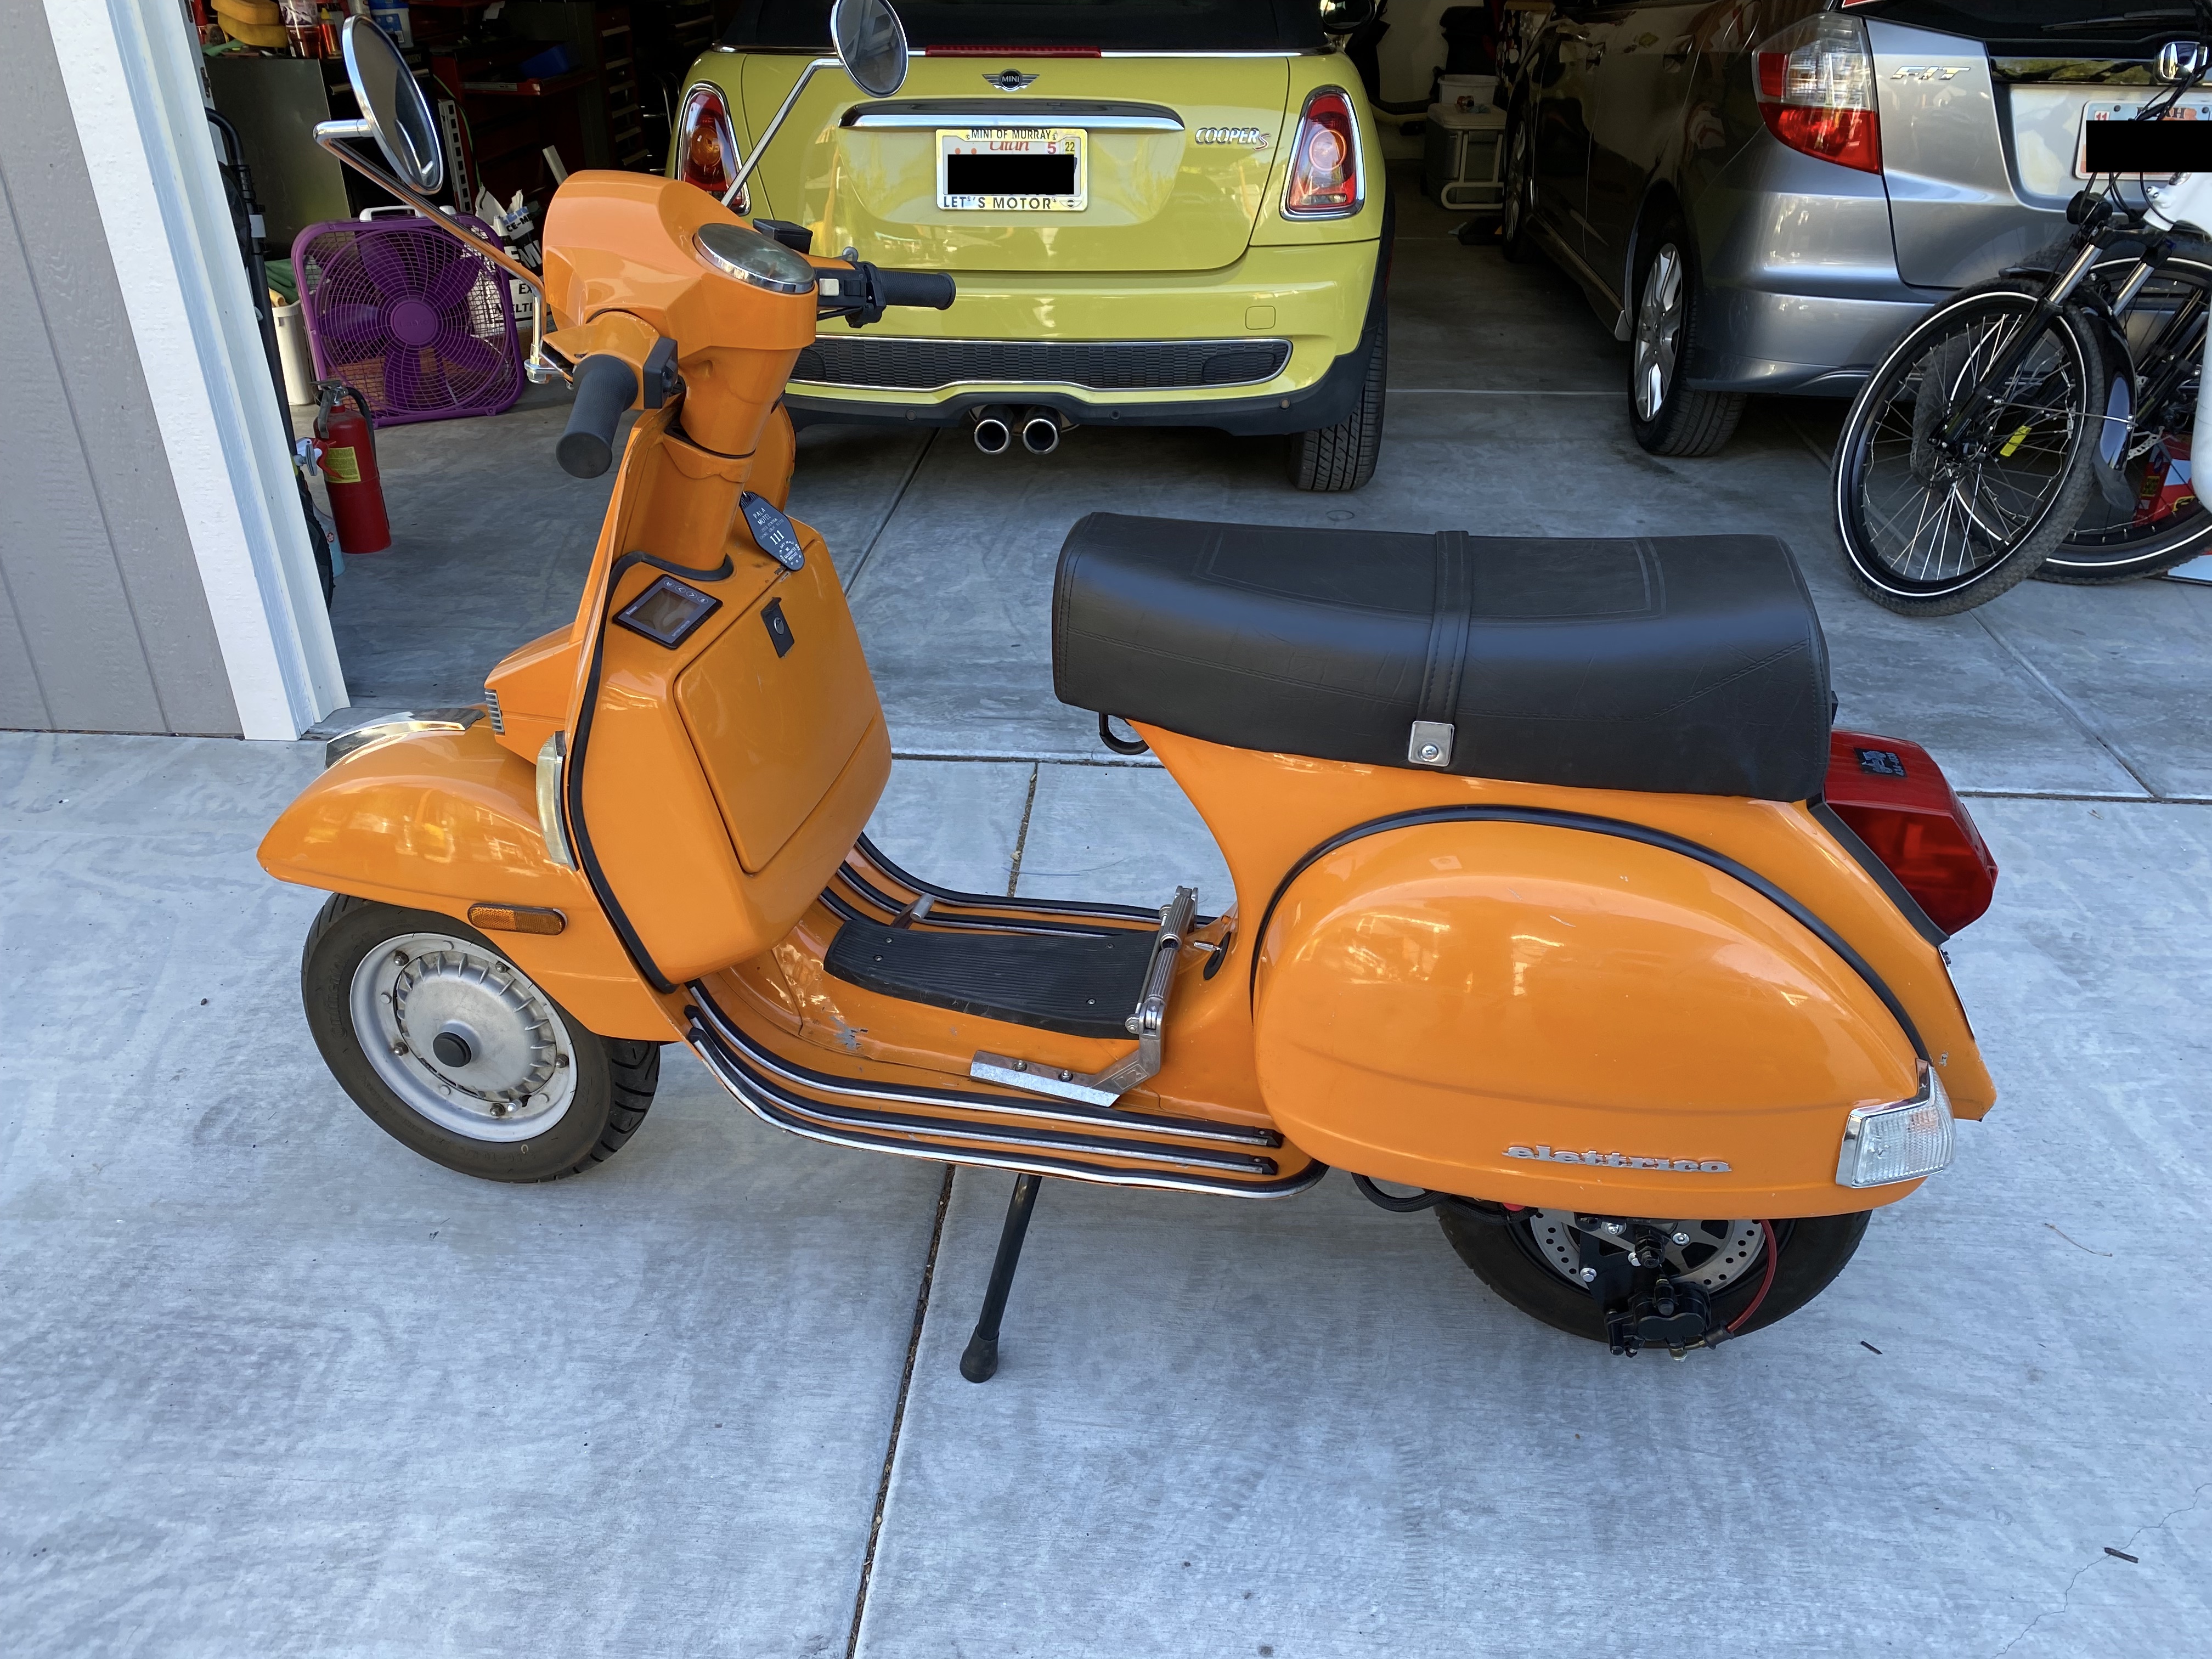
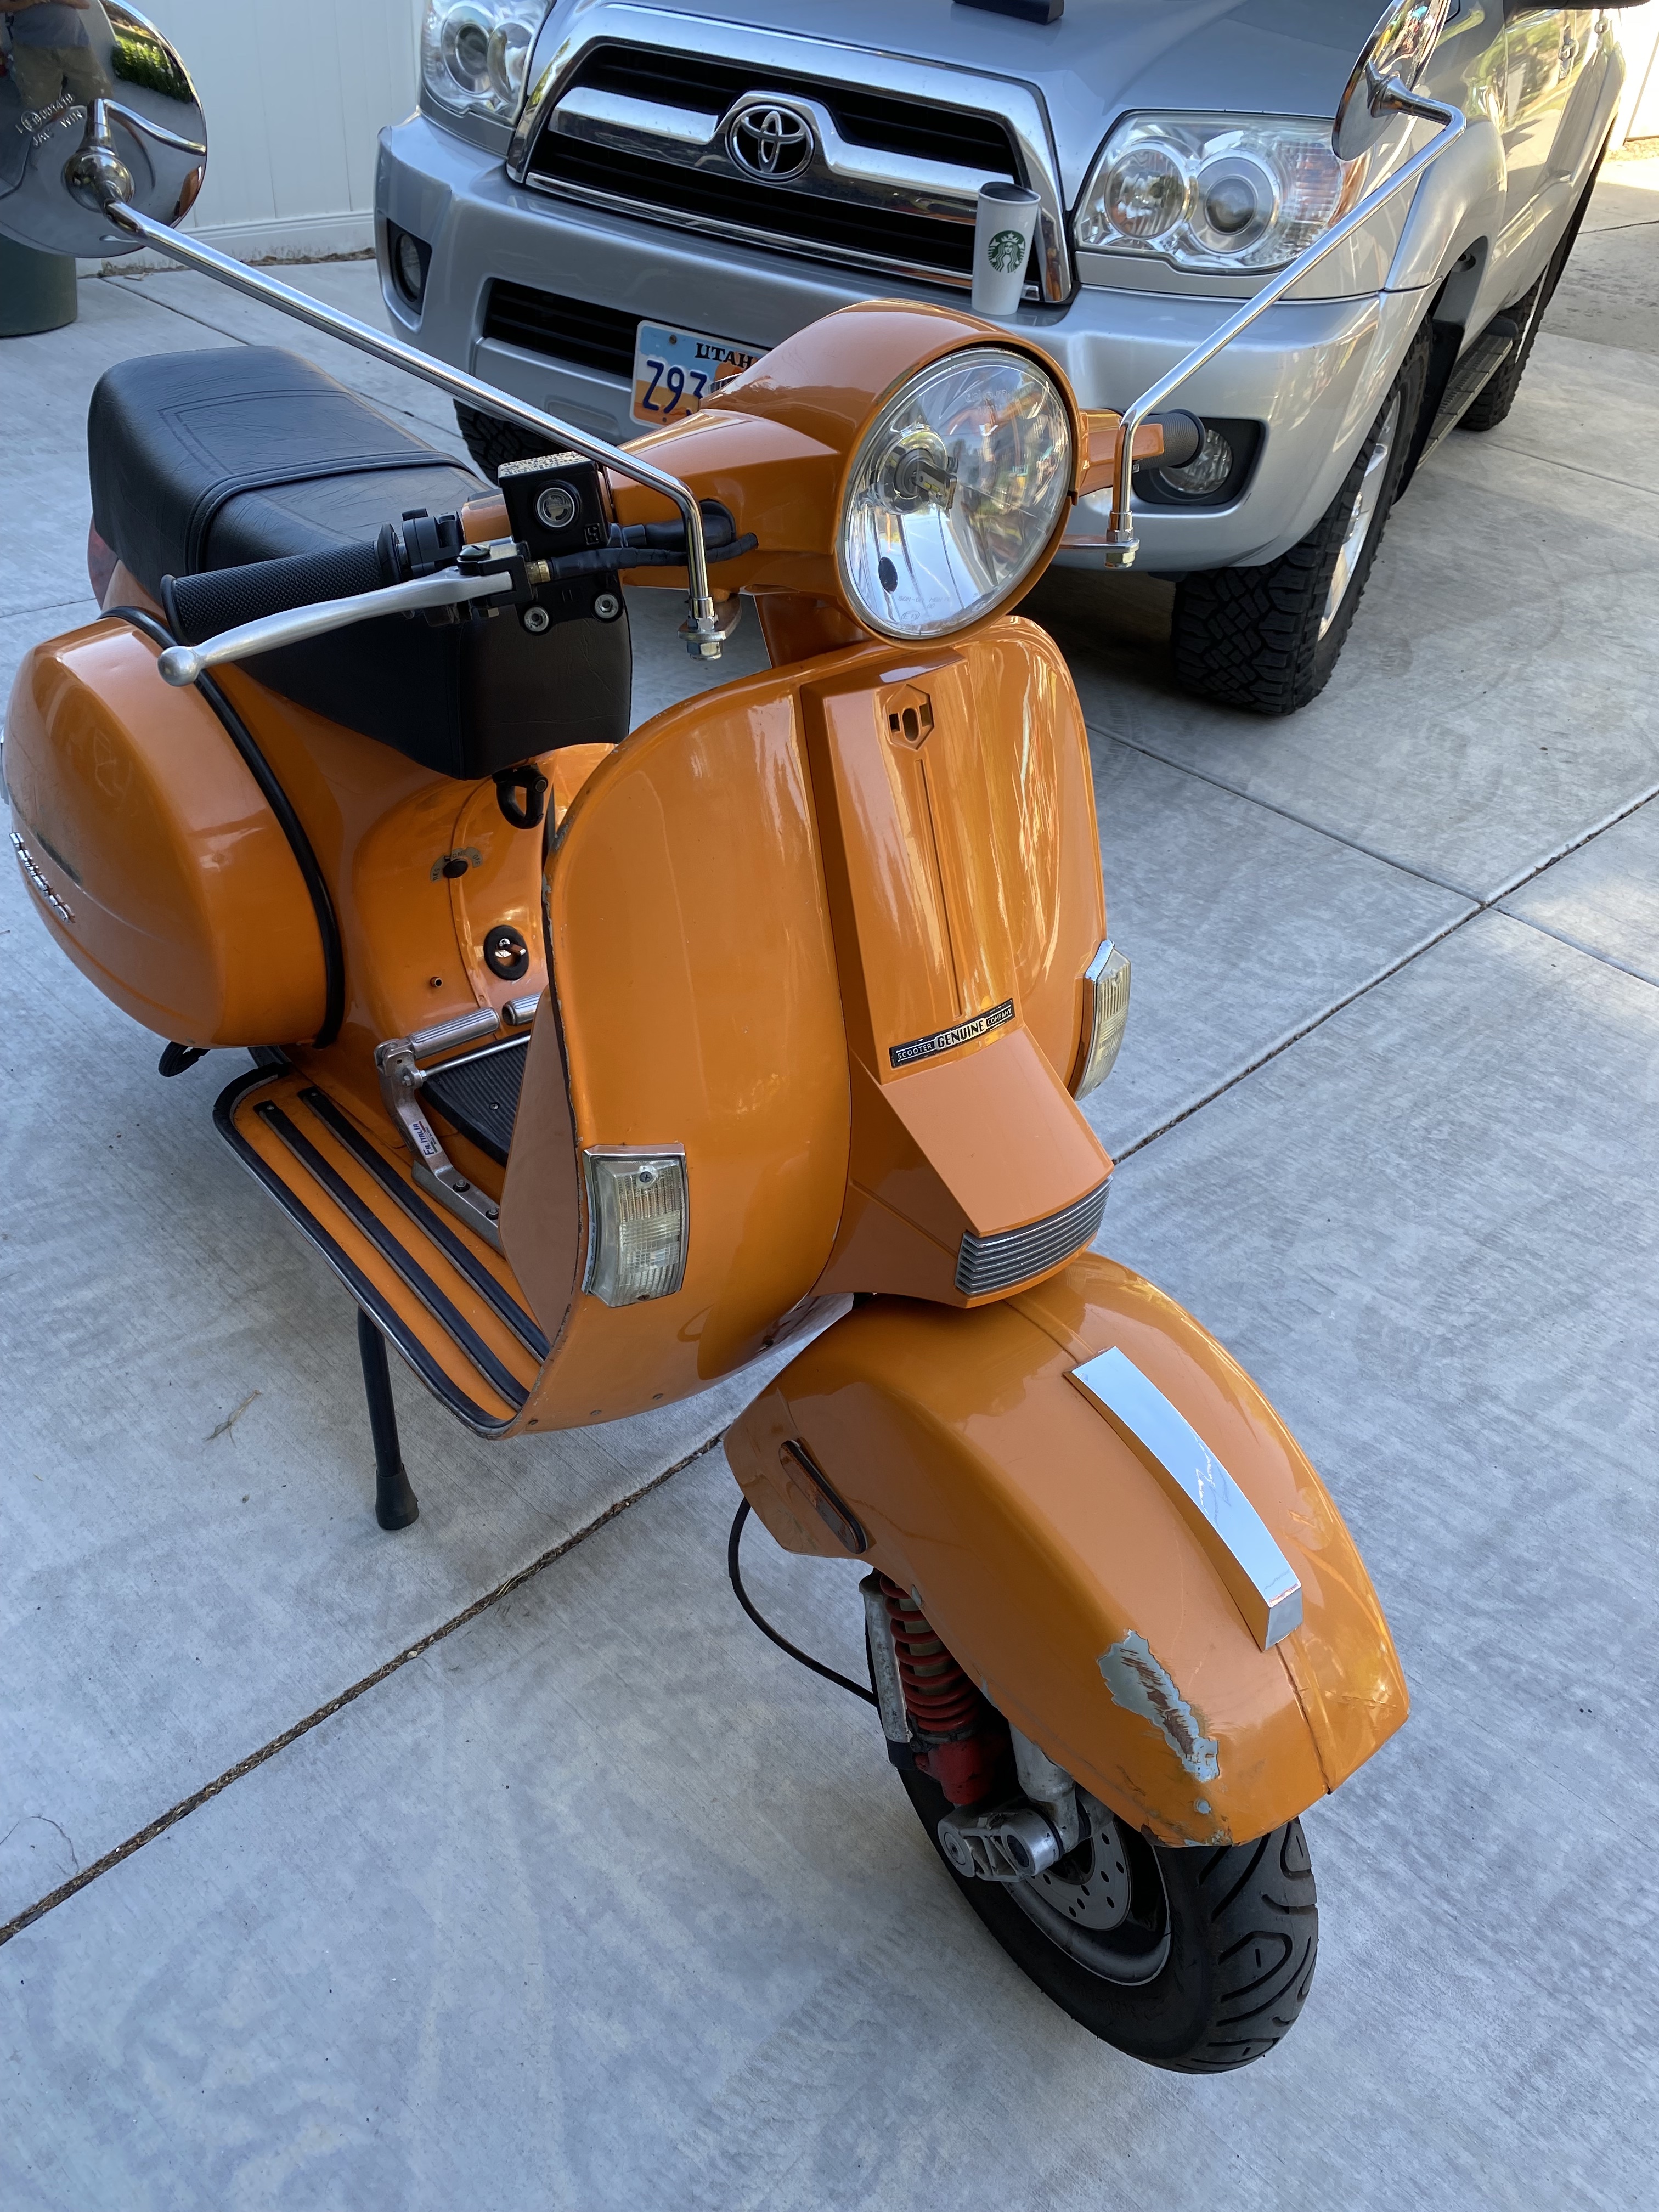
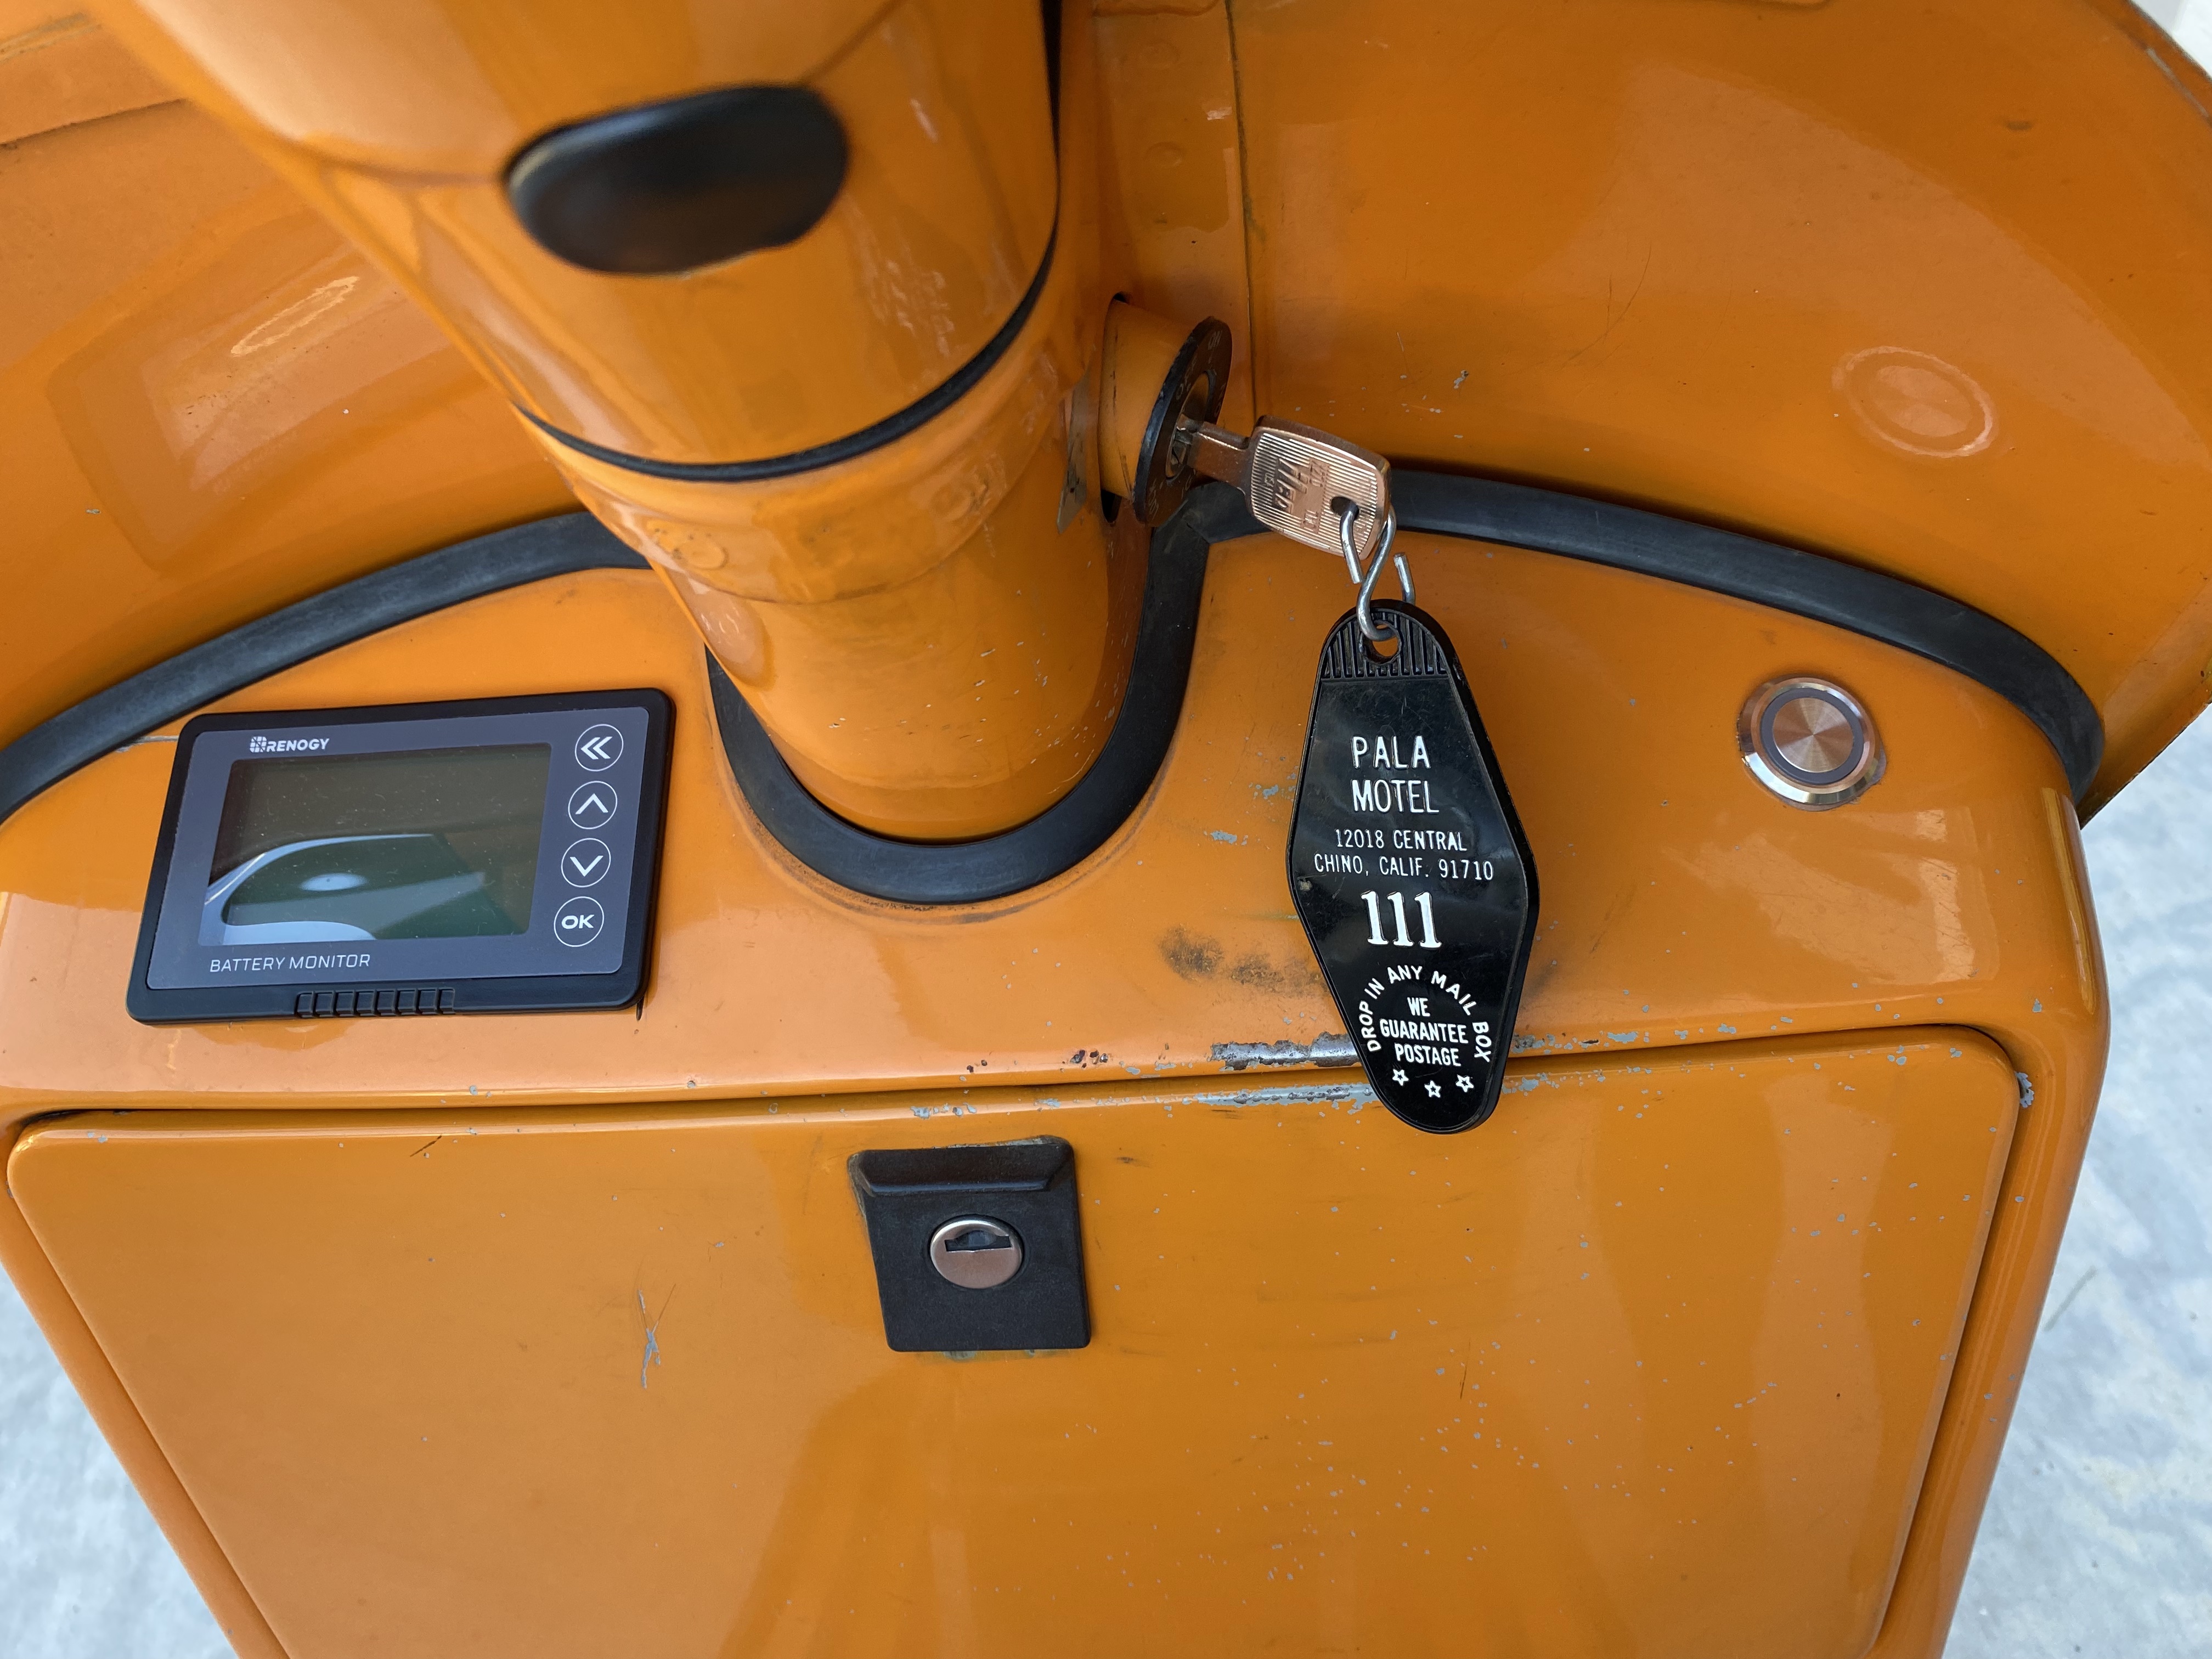
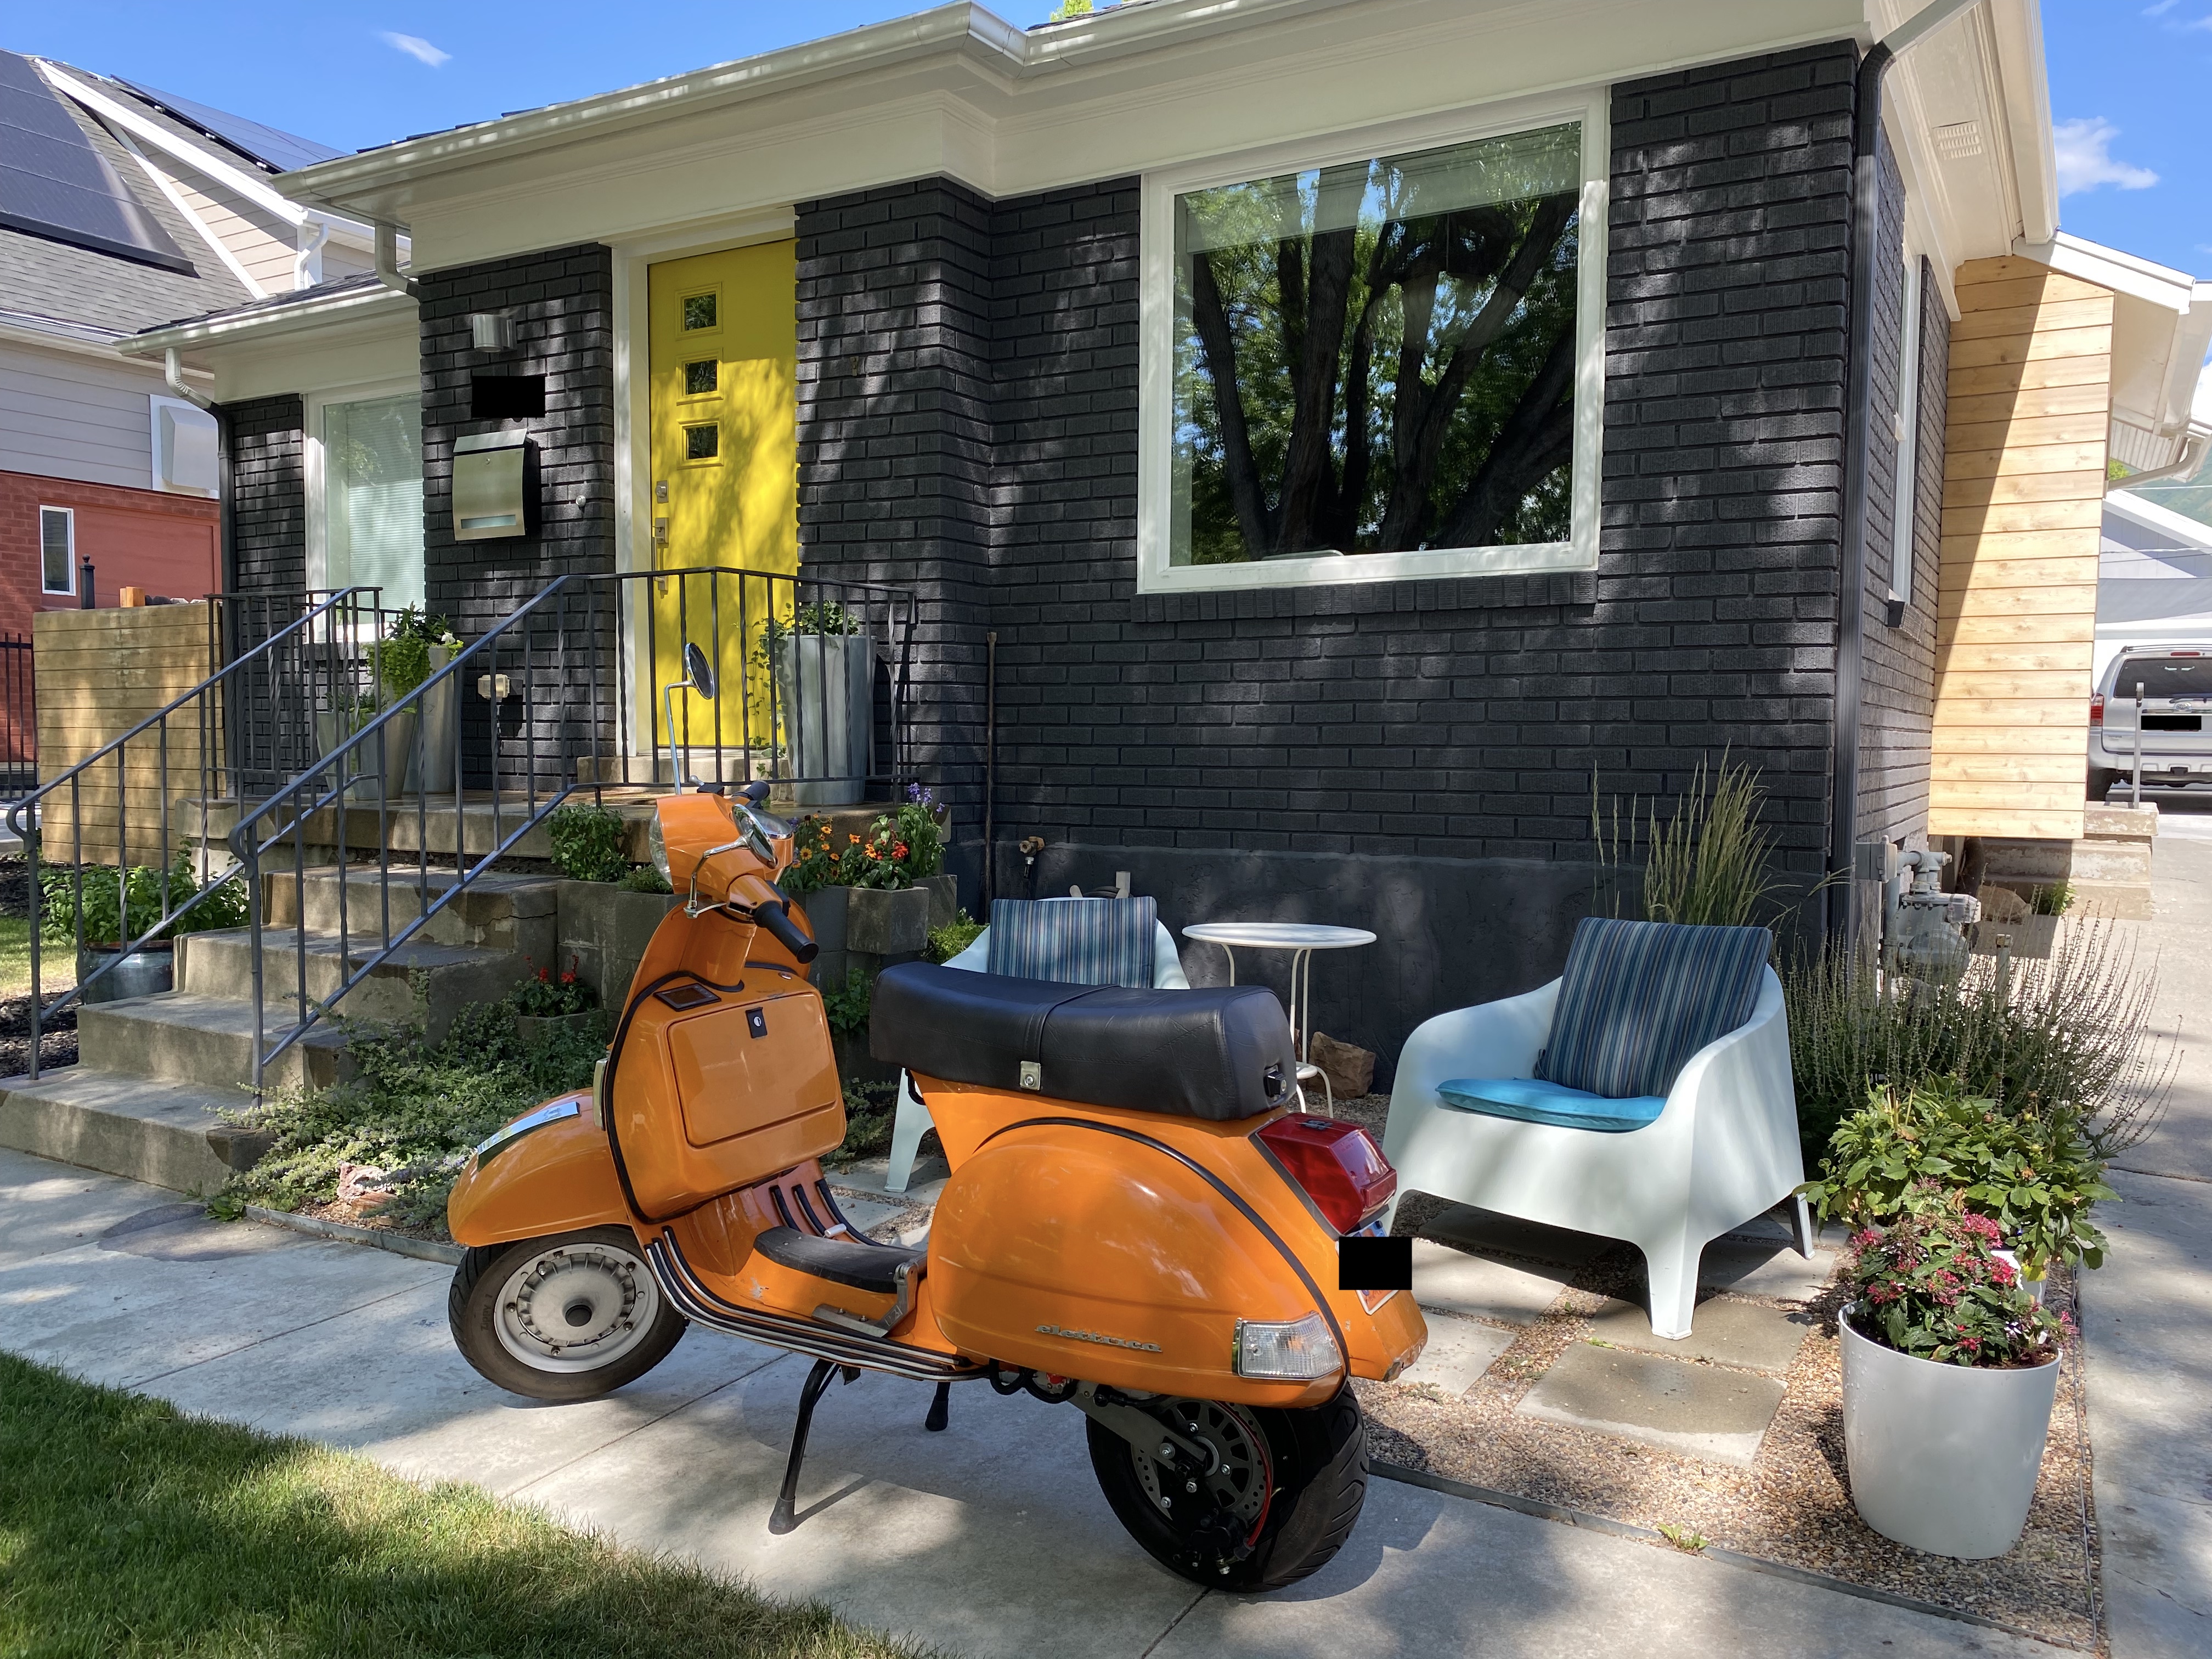
I have a 2003 Genuine Stella 2-stroke, which I purchased as a running project. The Stella is an updated version of the Vespa PX150/LML Star which is a design that goes back to the 70s. I rebuilt the ICE a few years ago and it ran fine except for the gearbox. I dropped the engine again and the project sat until late last year when I decided to swap in a hub motor.

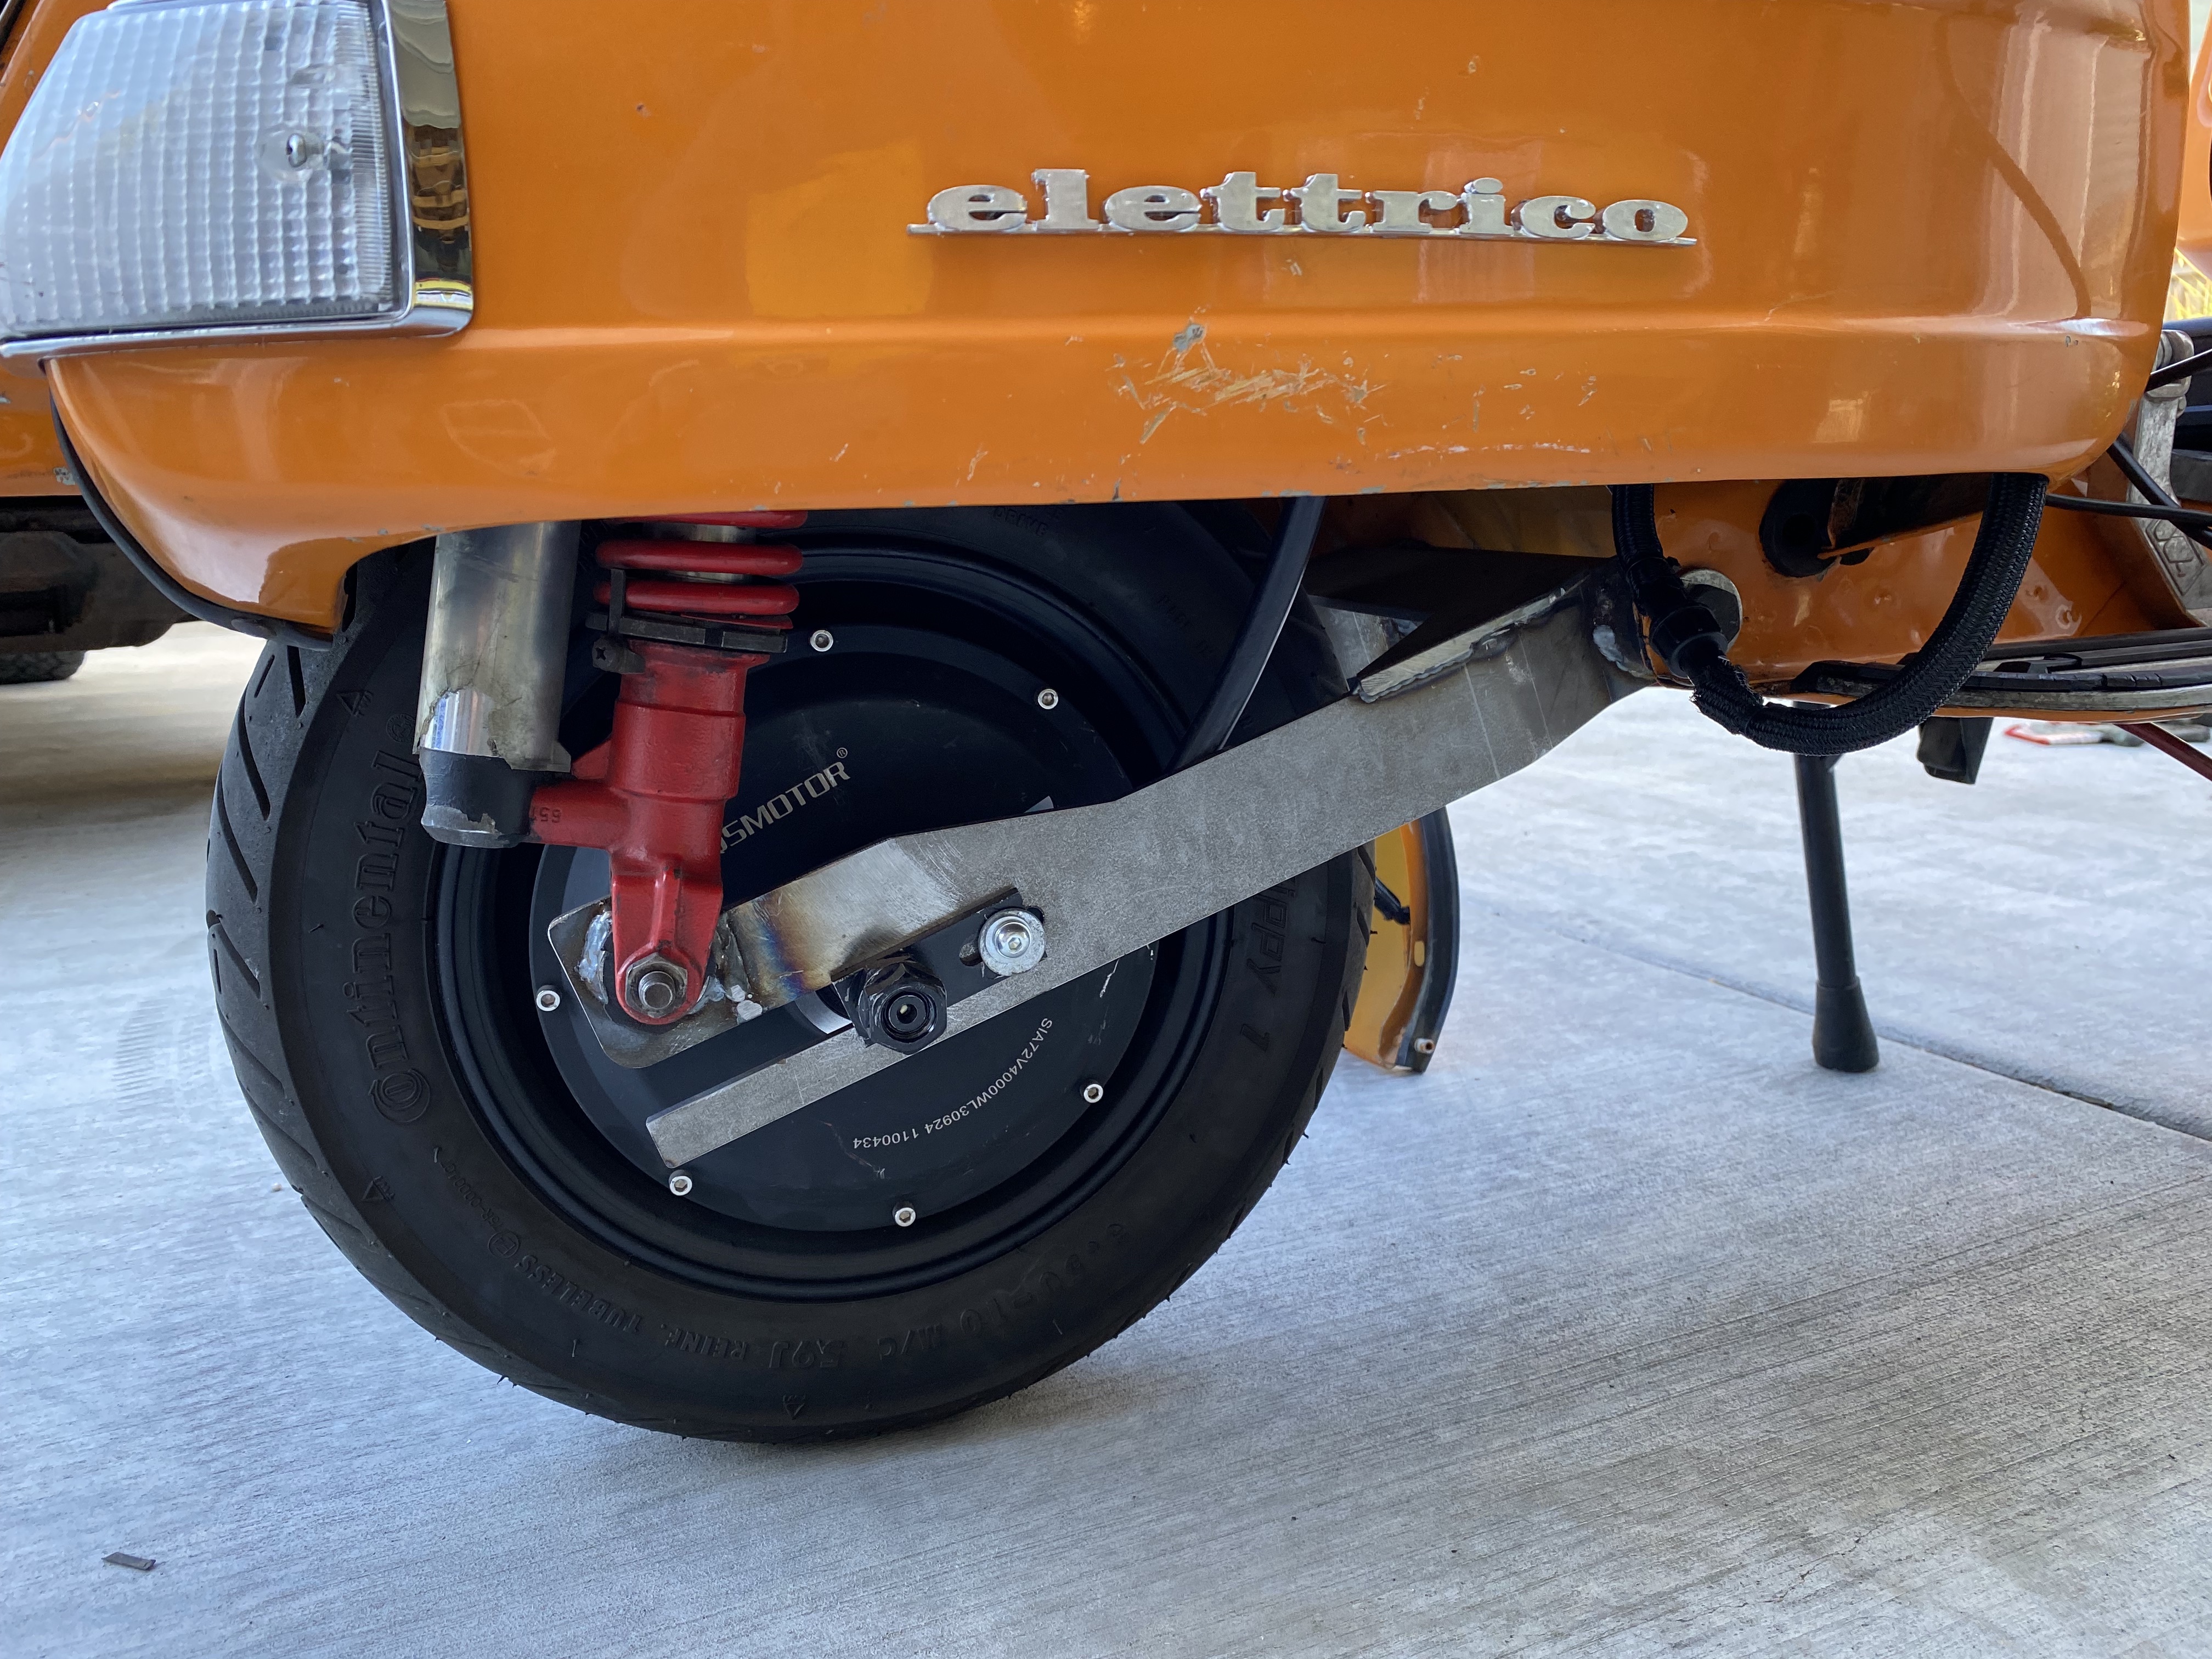
Here are the main components:
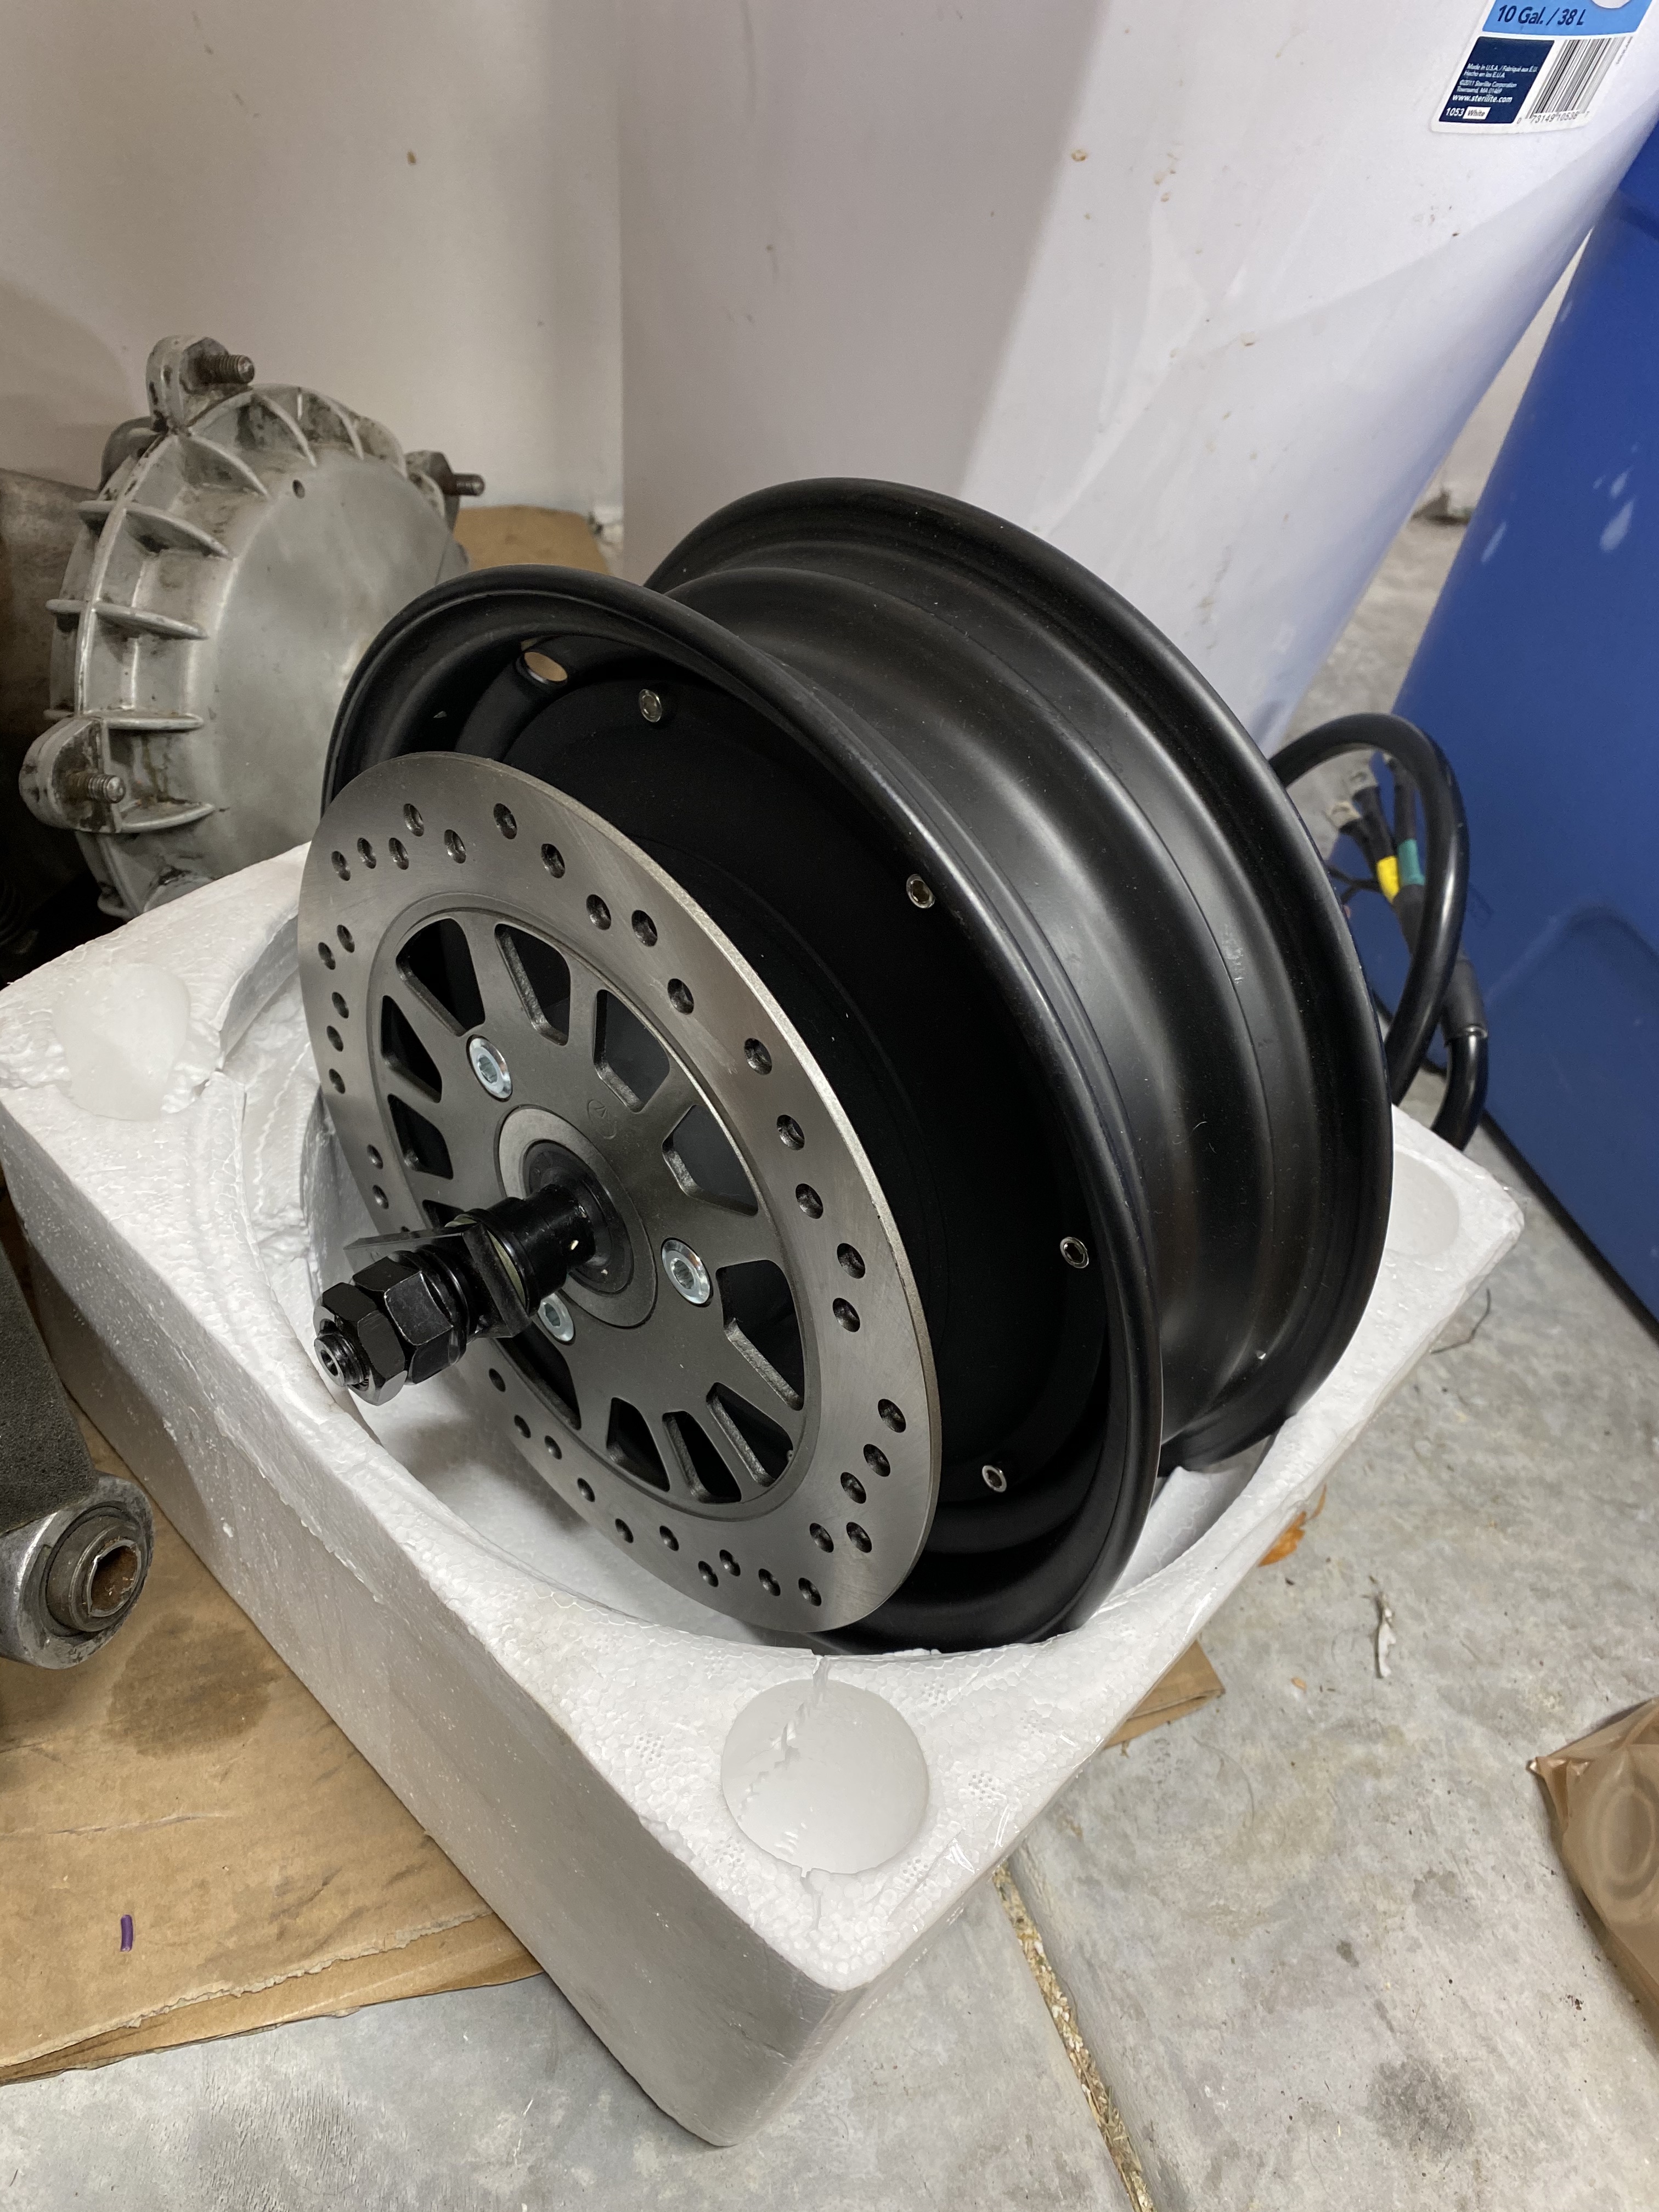
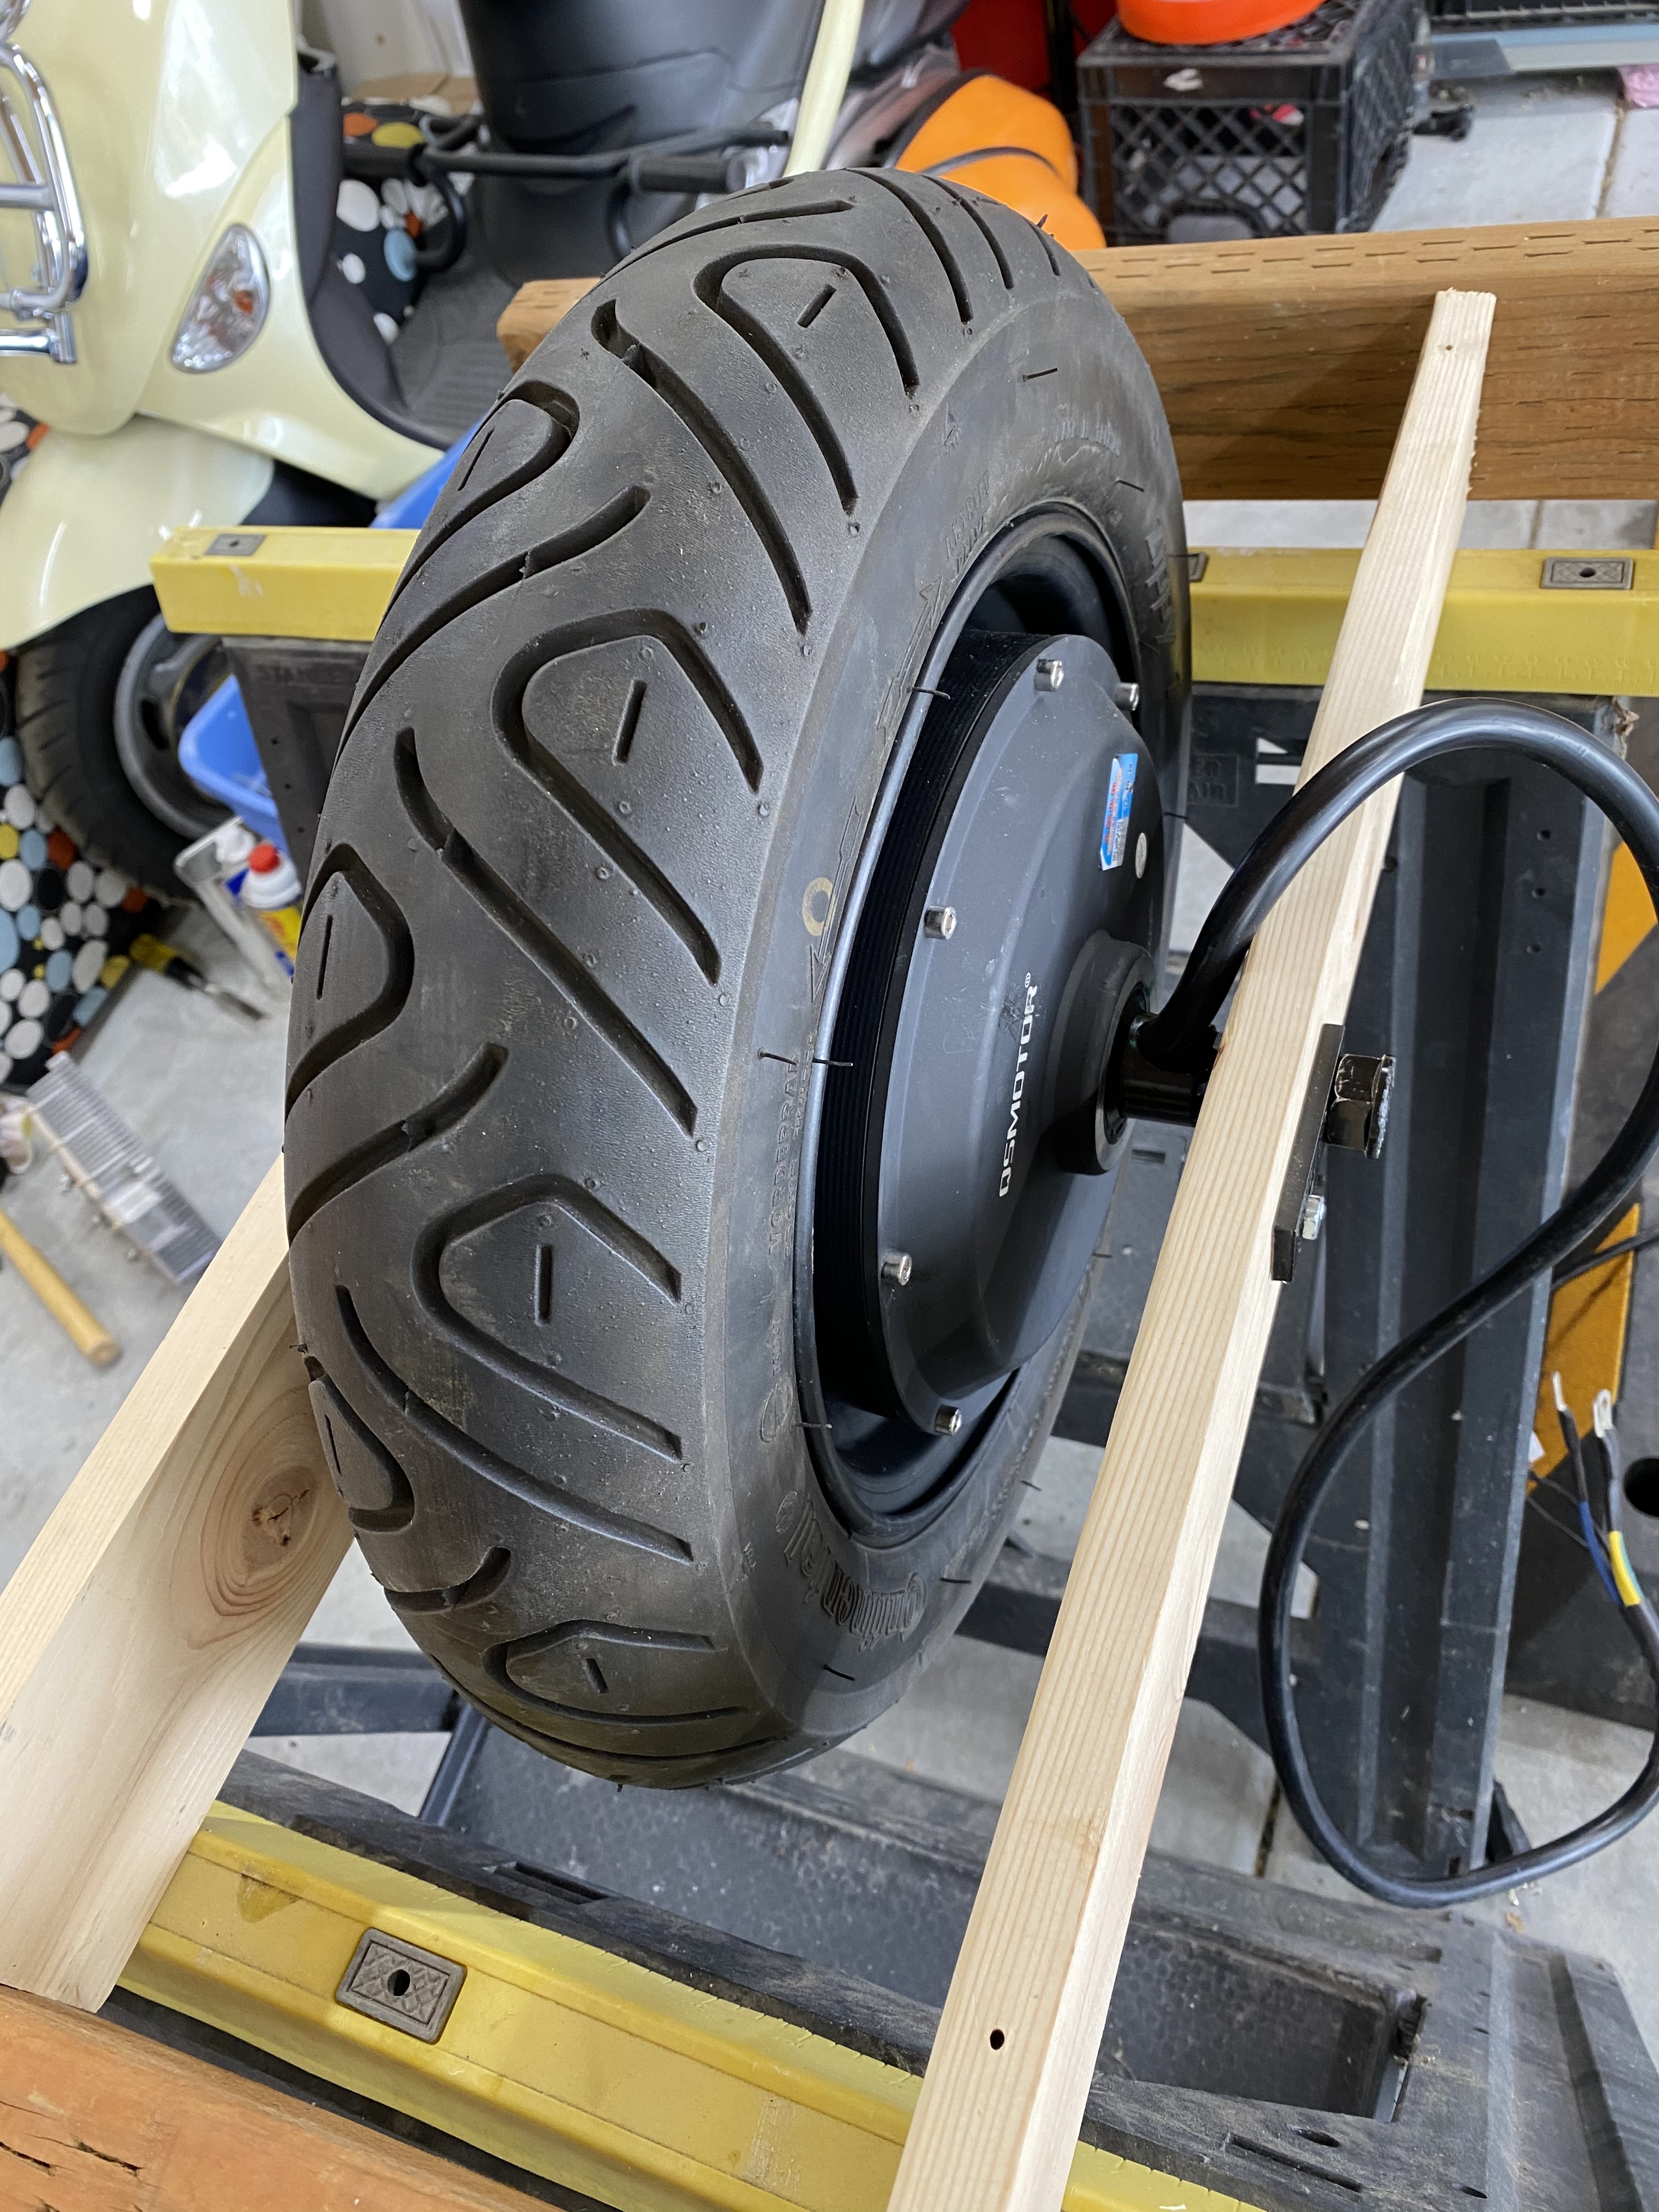
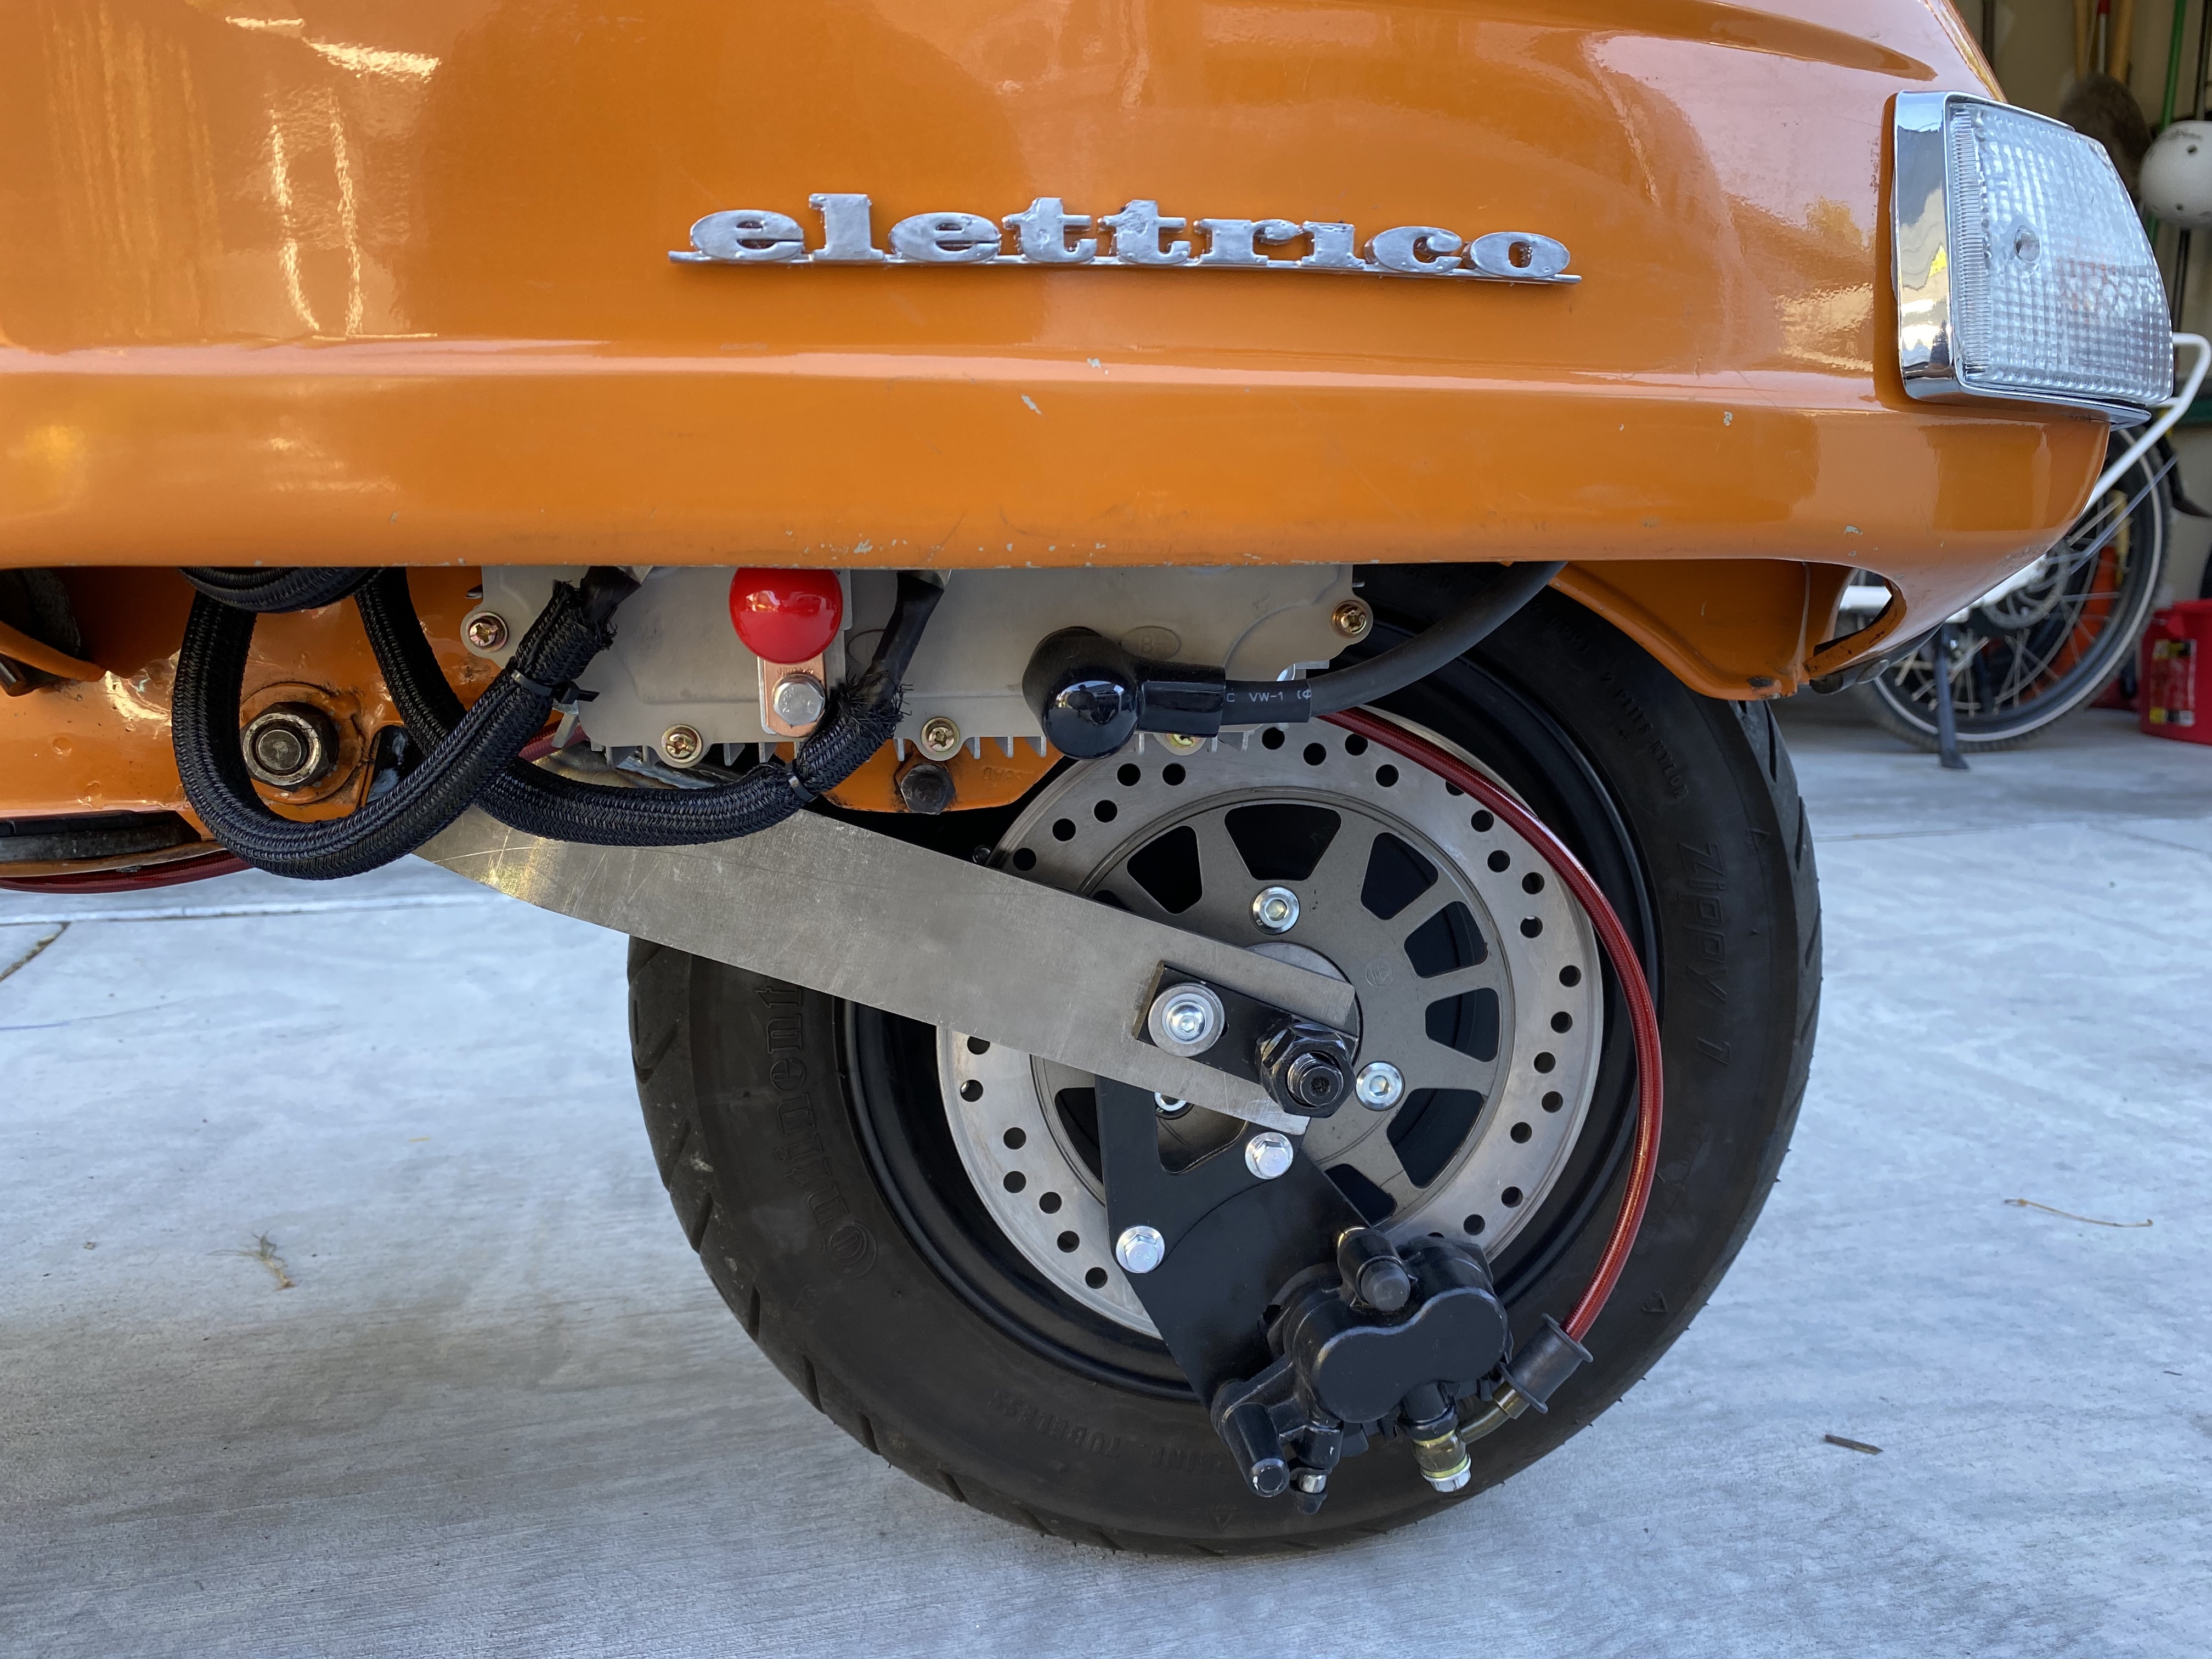
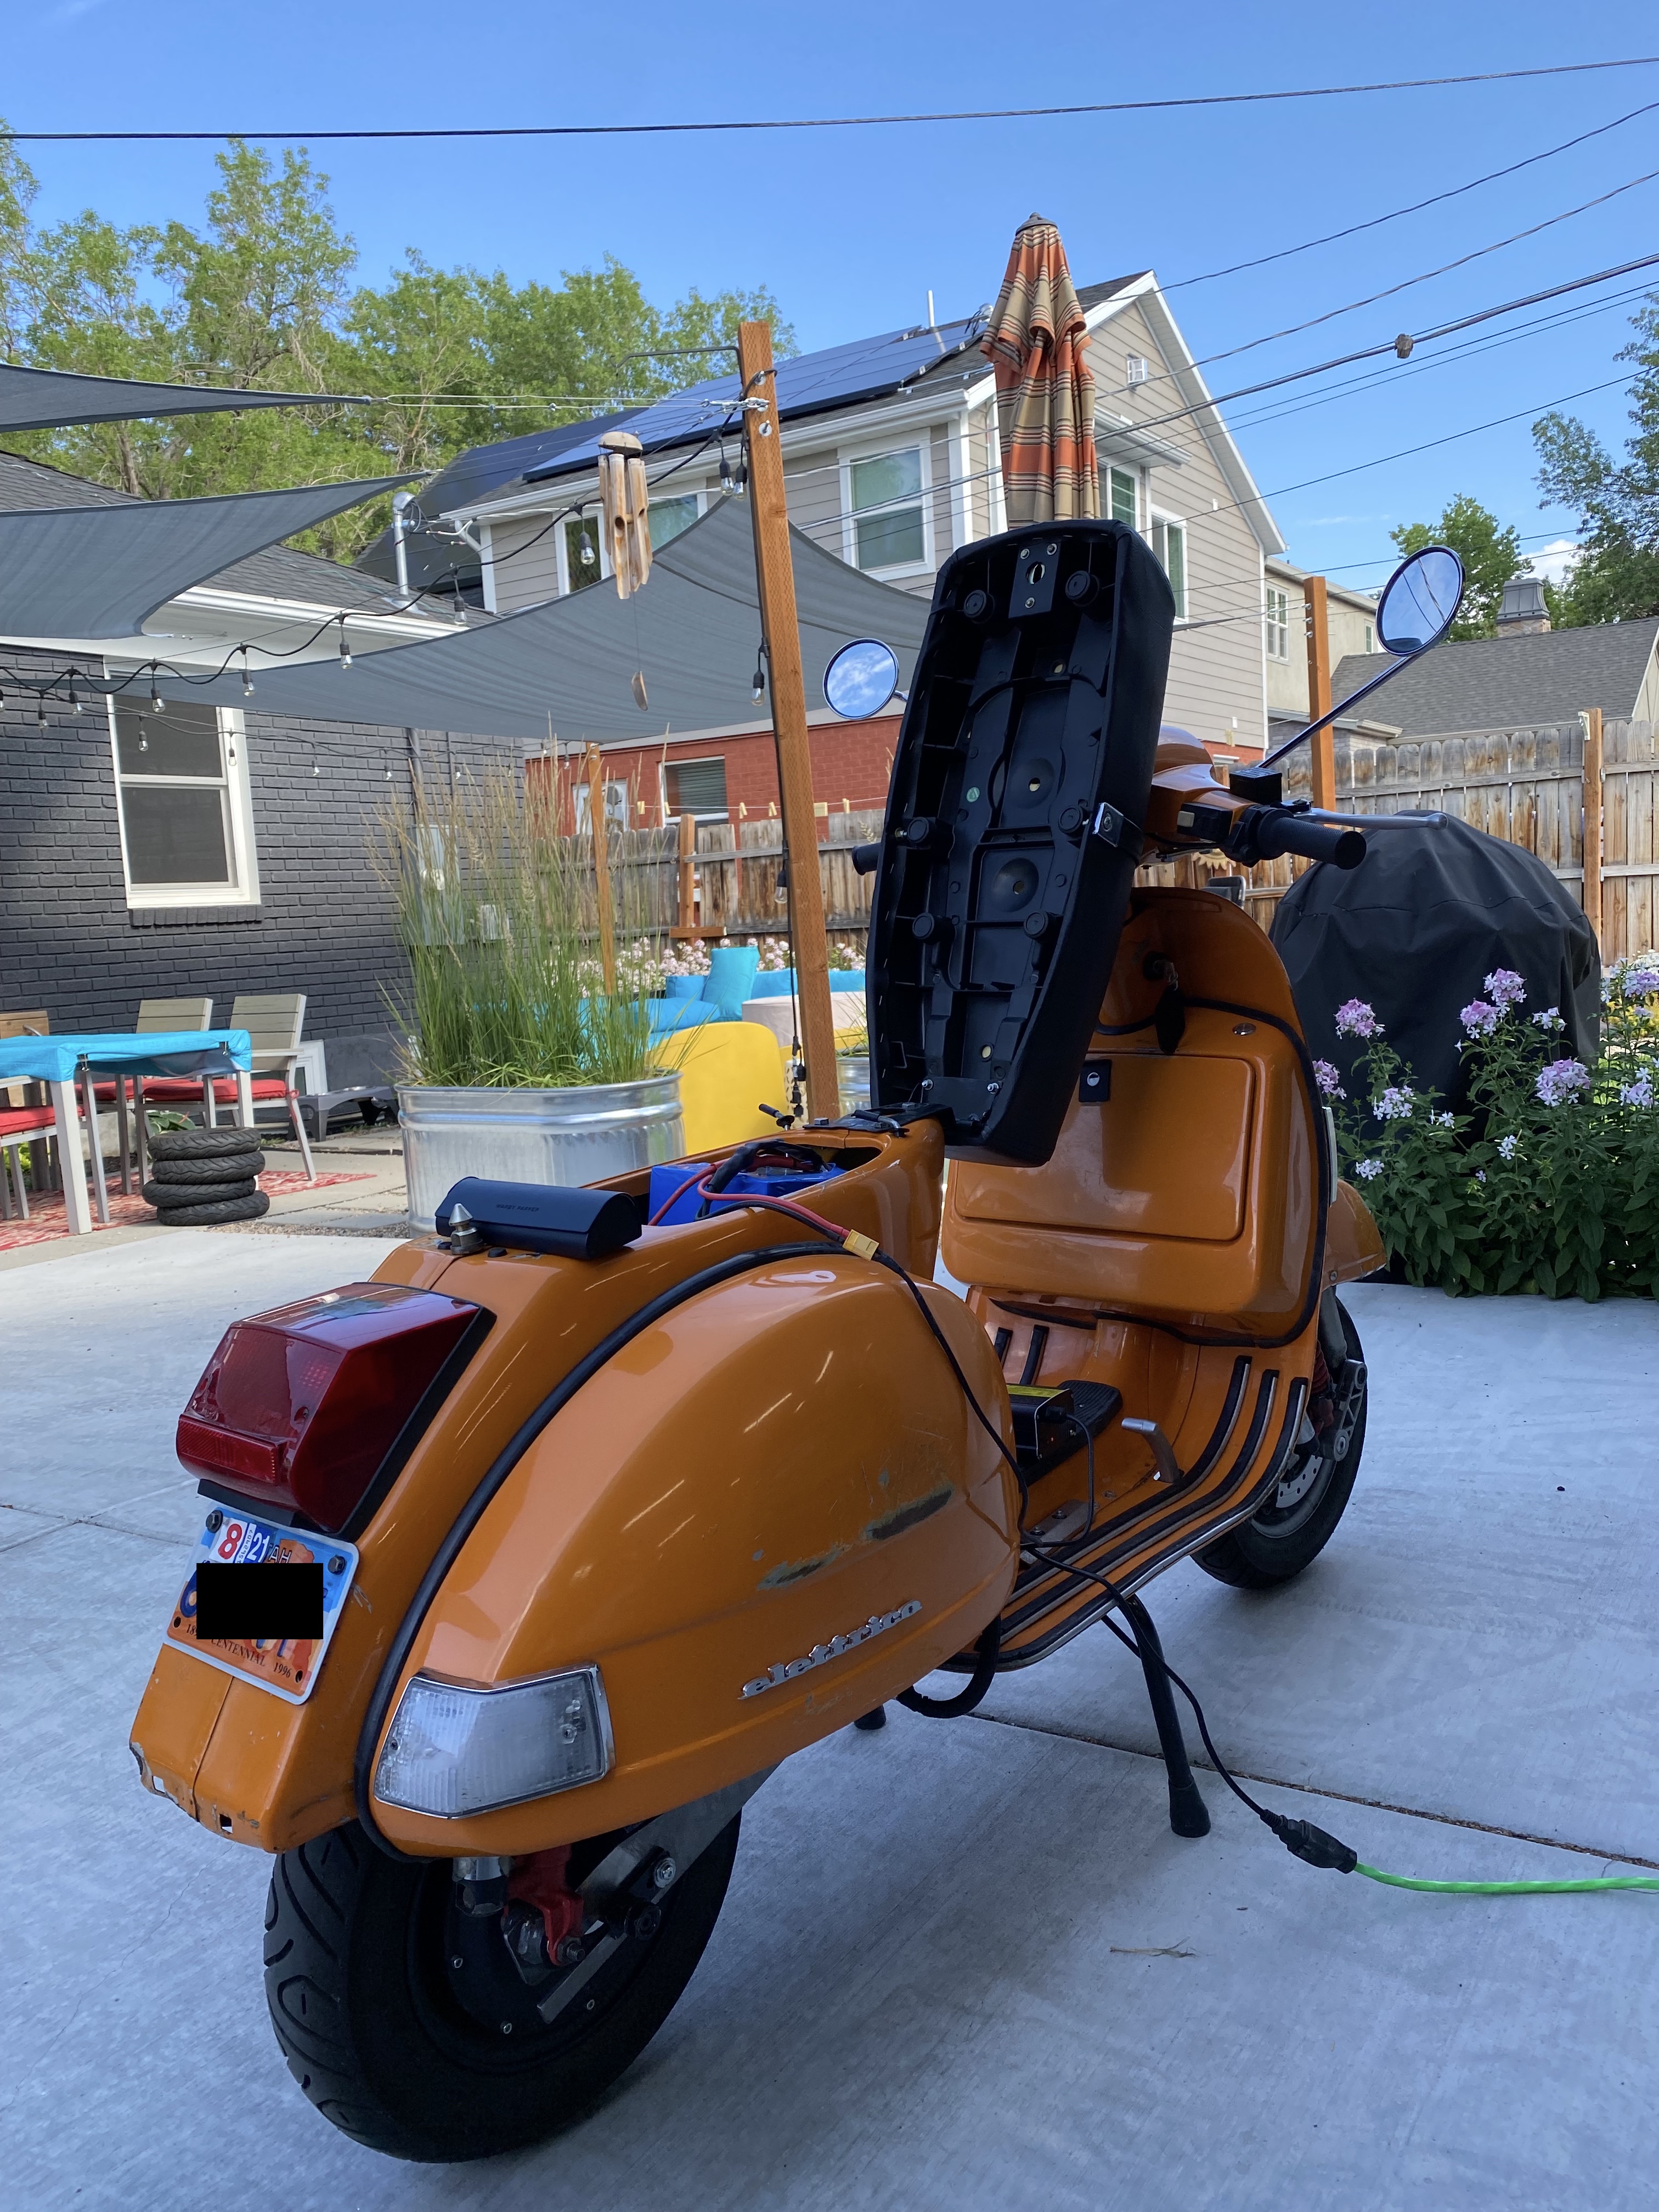
QS205 4000W V3 10inch Hub Motor
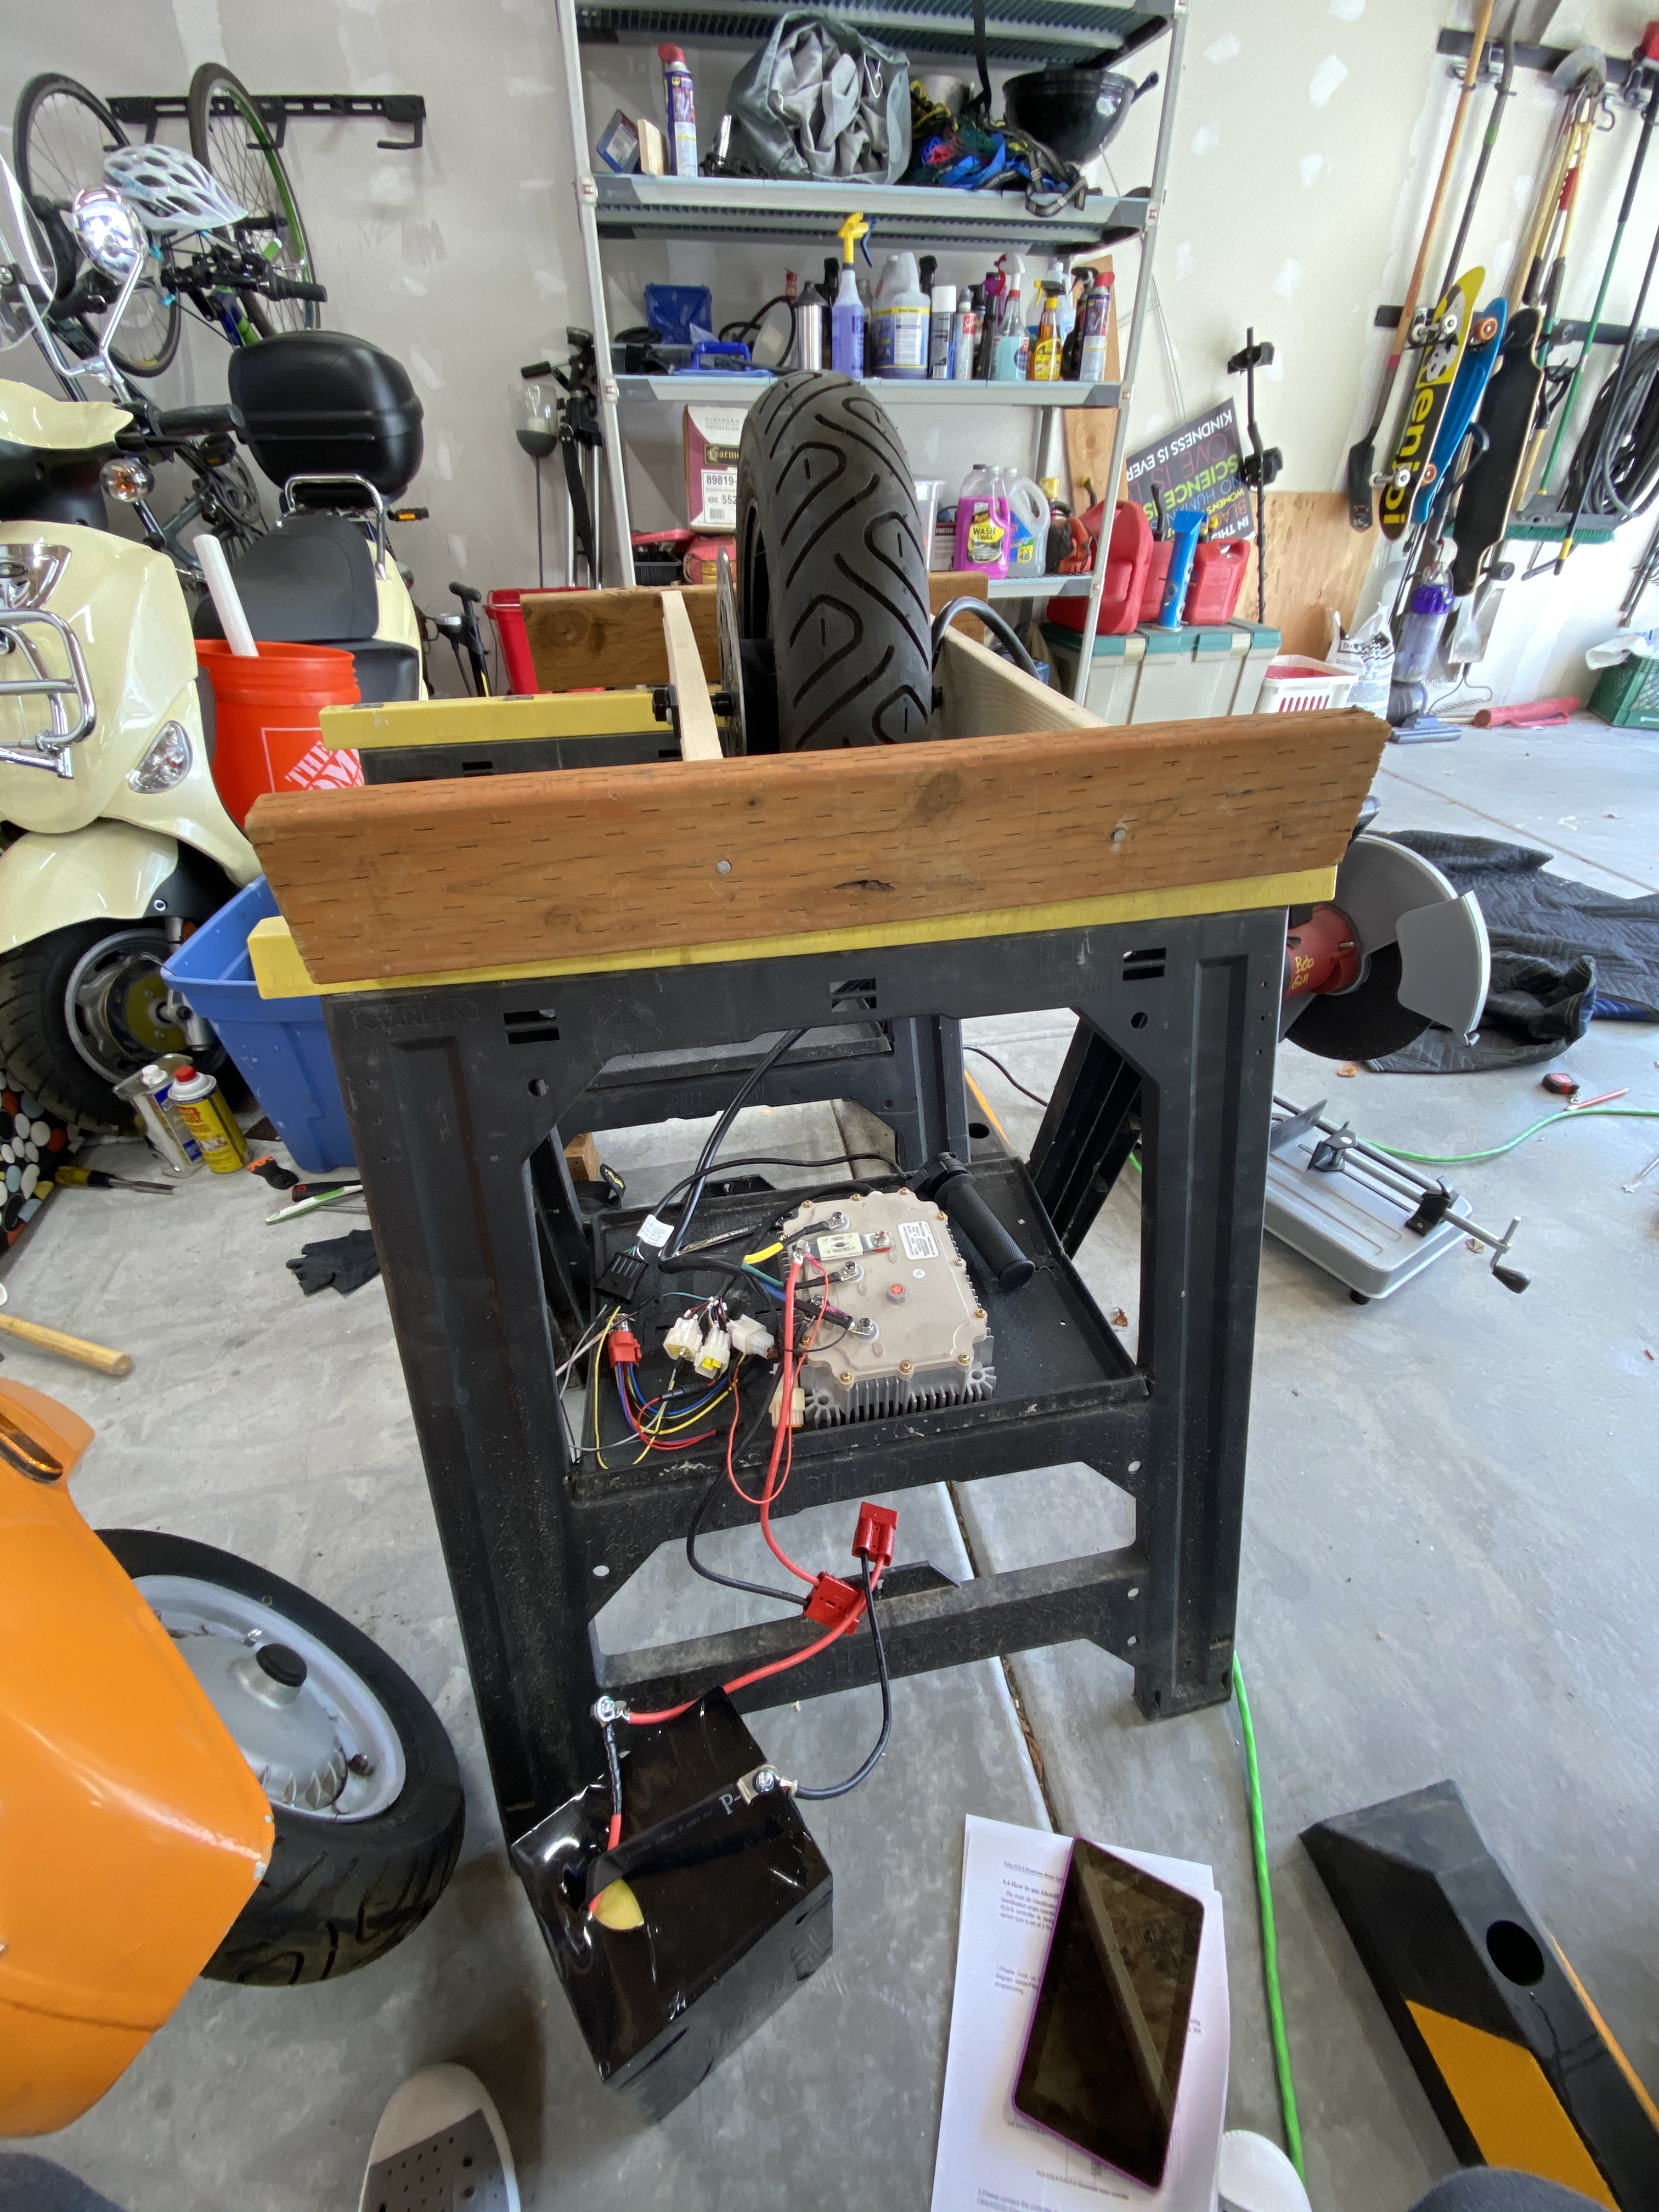
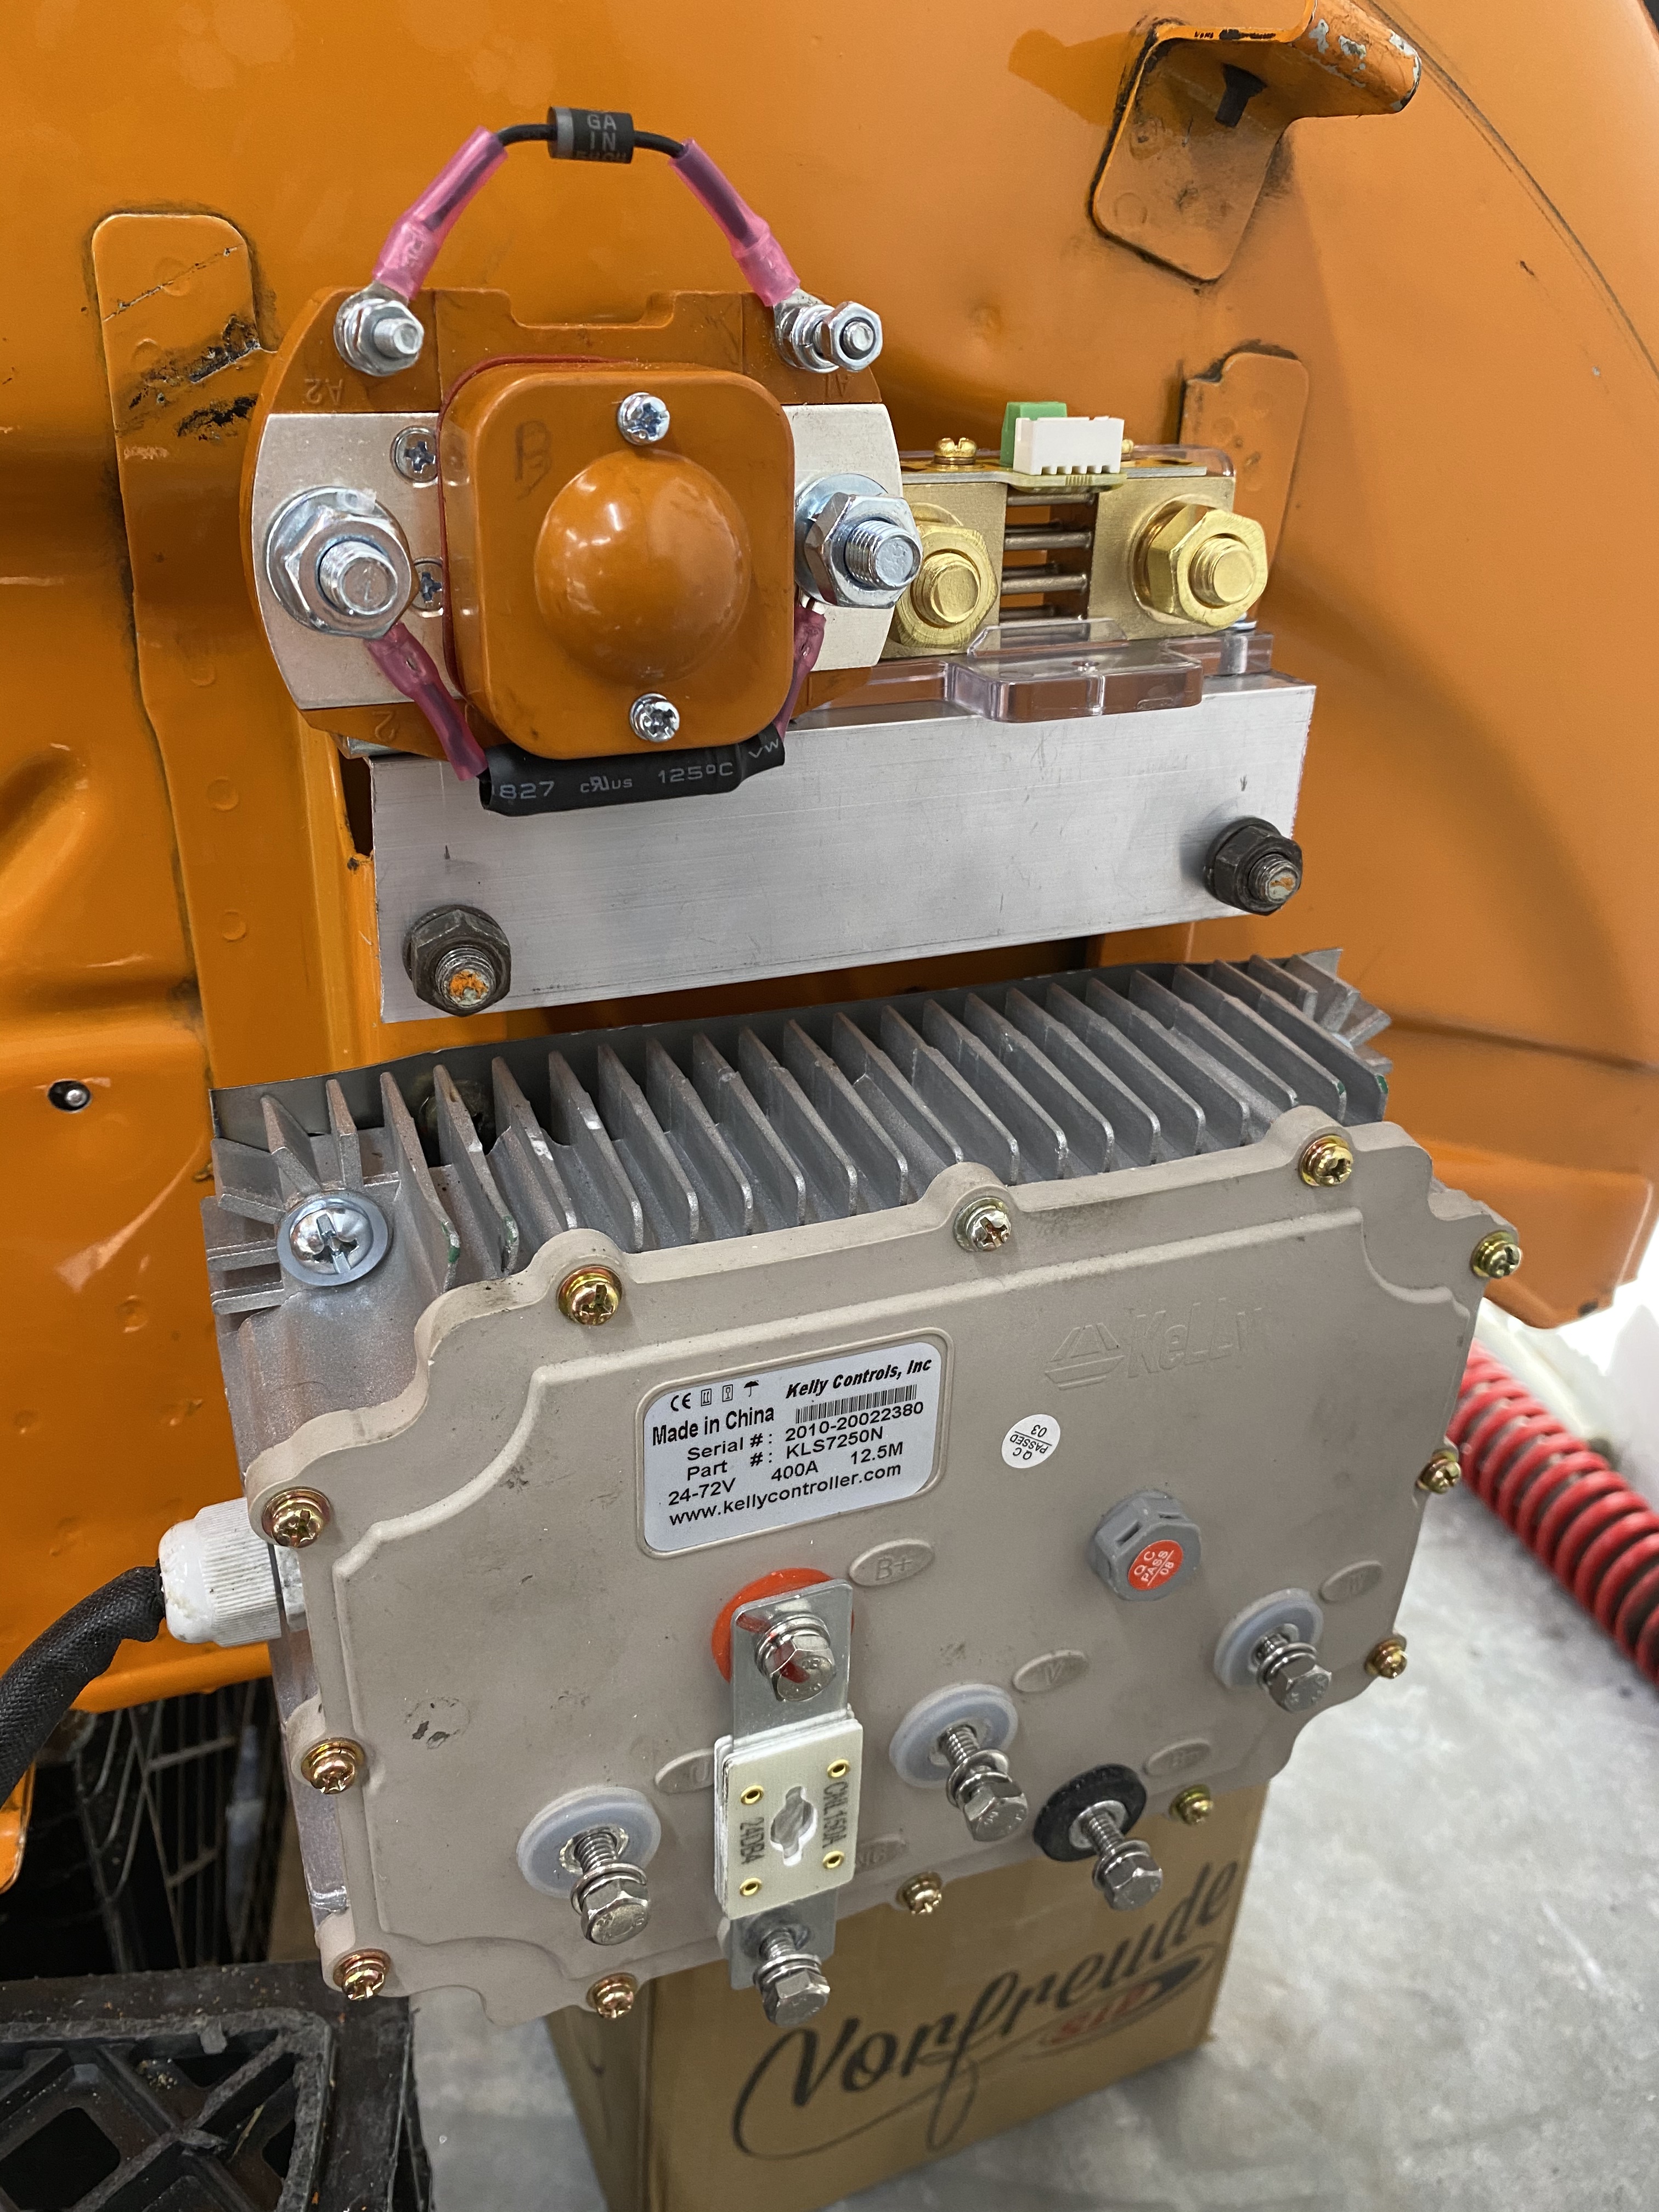
Kelly KLS-N Sealed Sinusoidal Wave Controller 72V, 380A
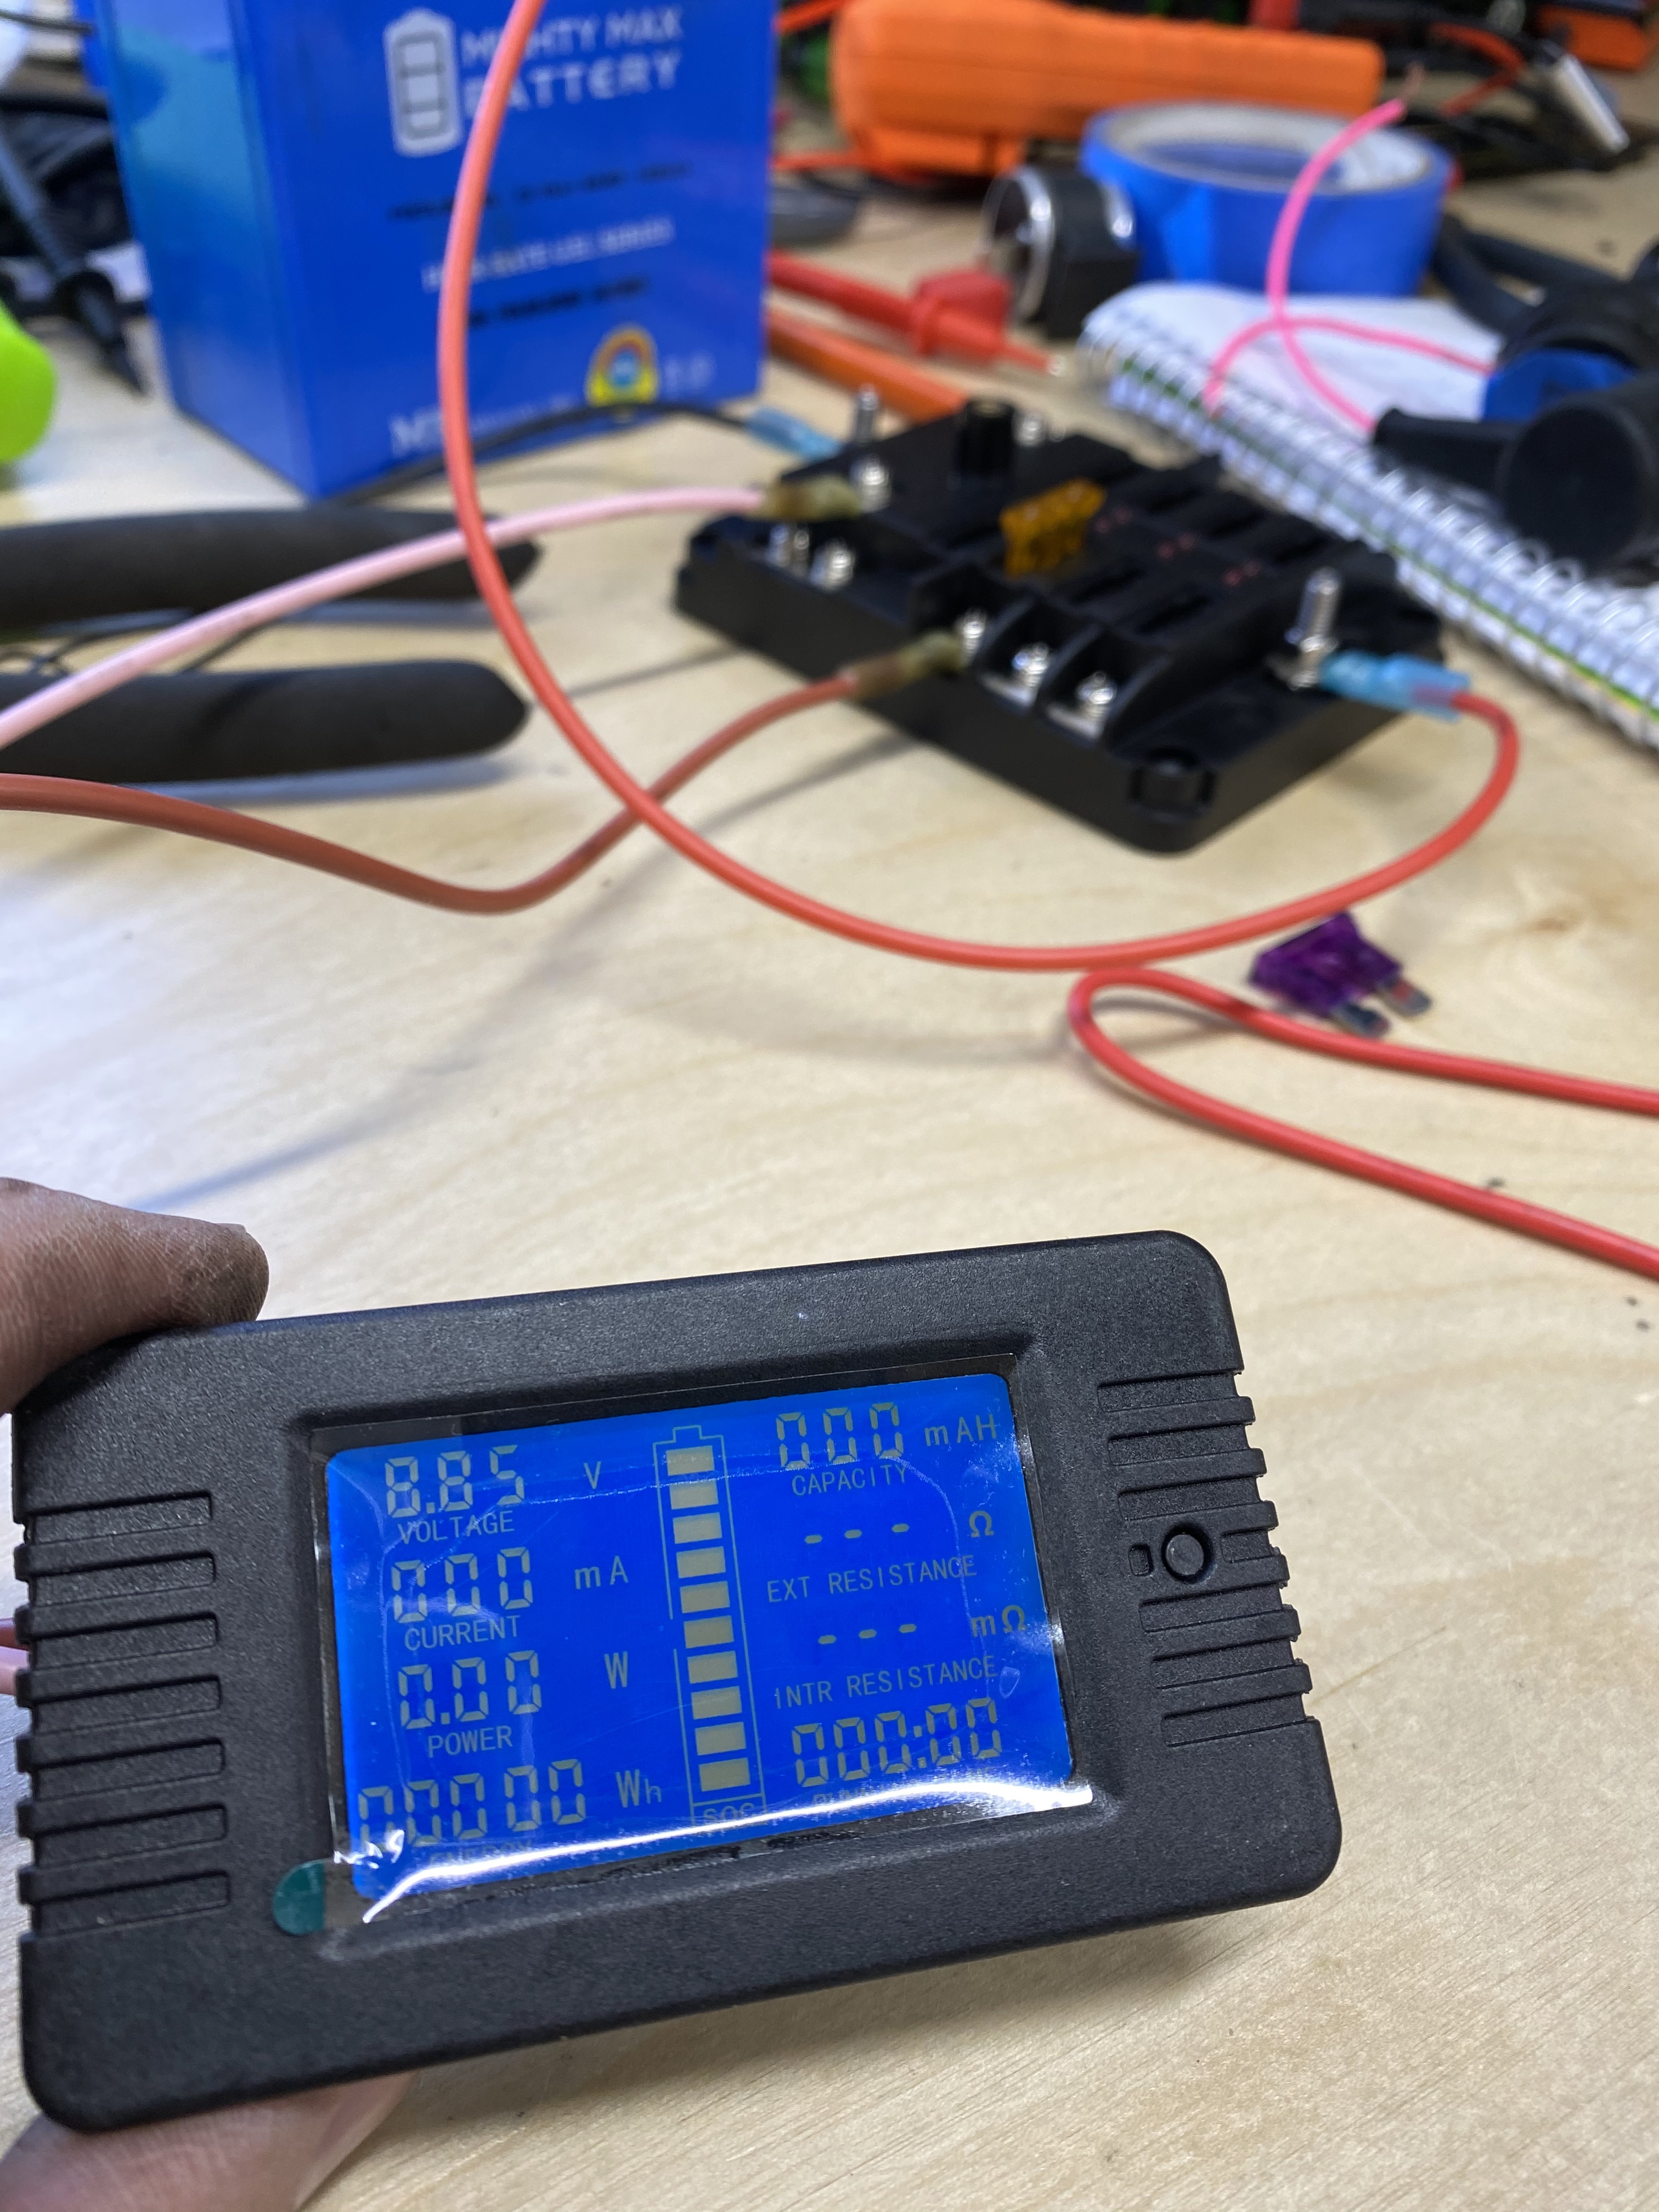
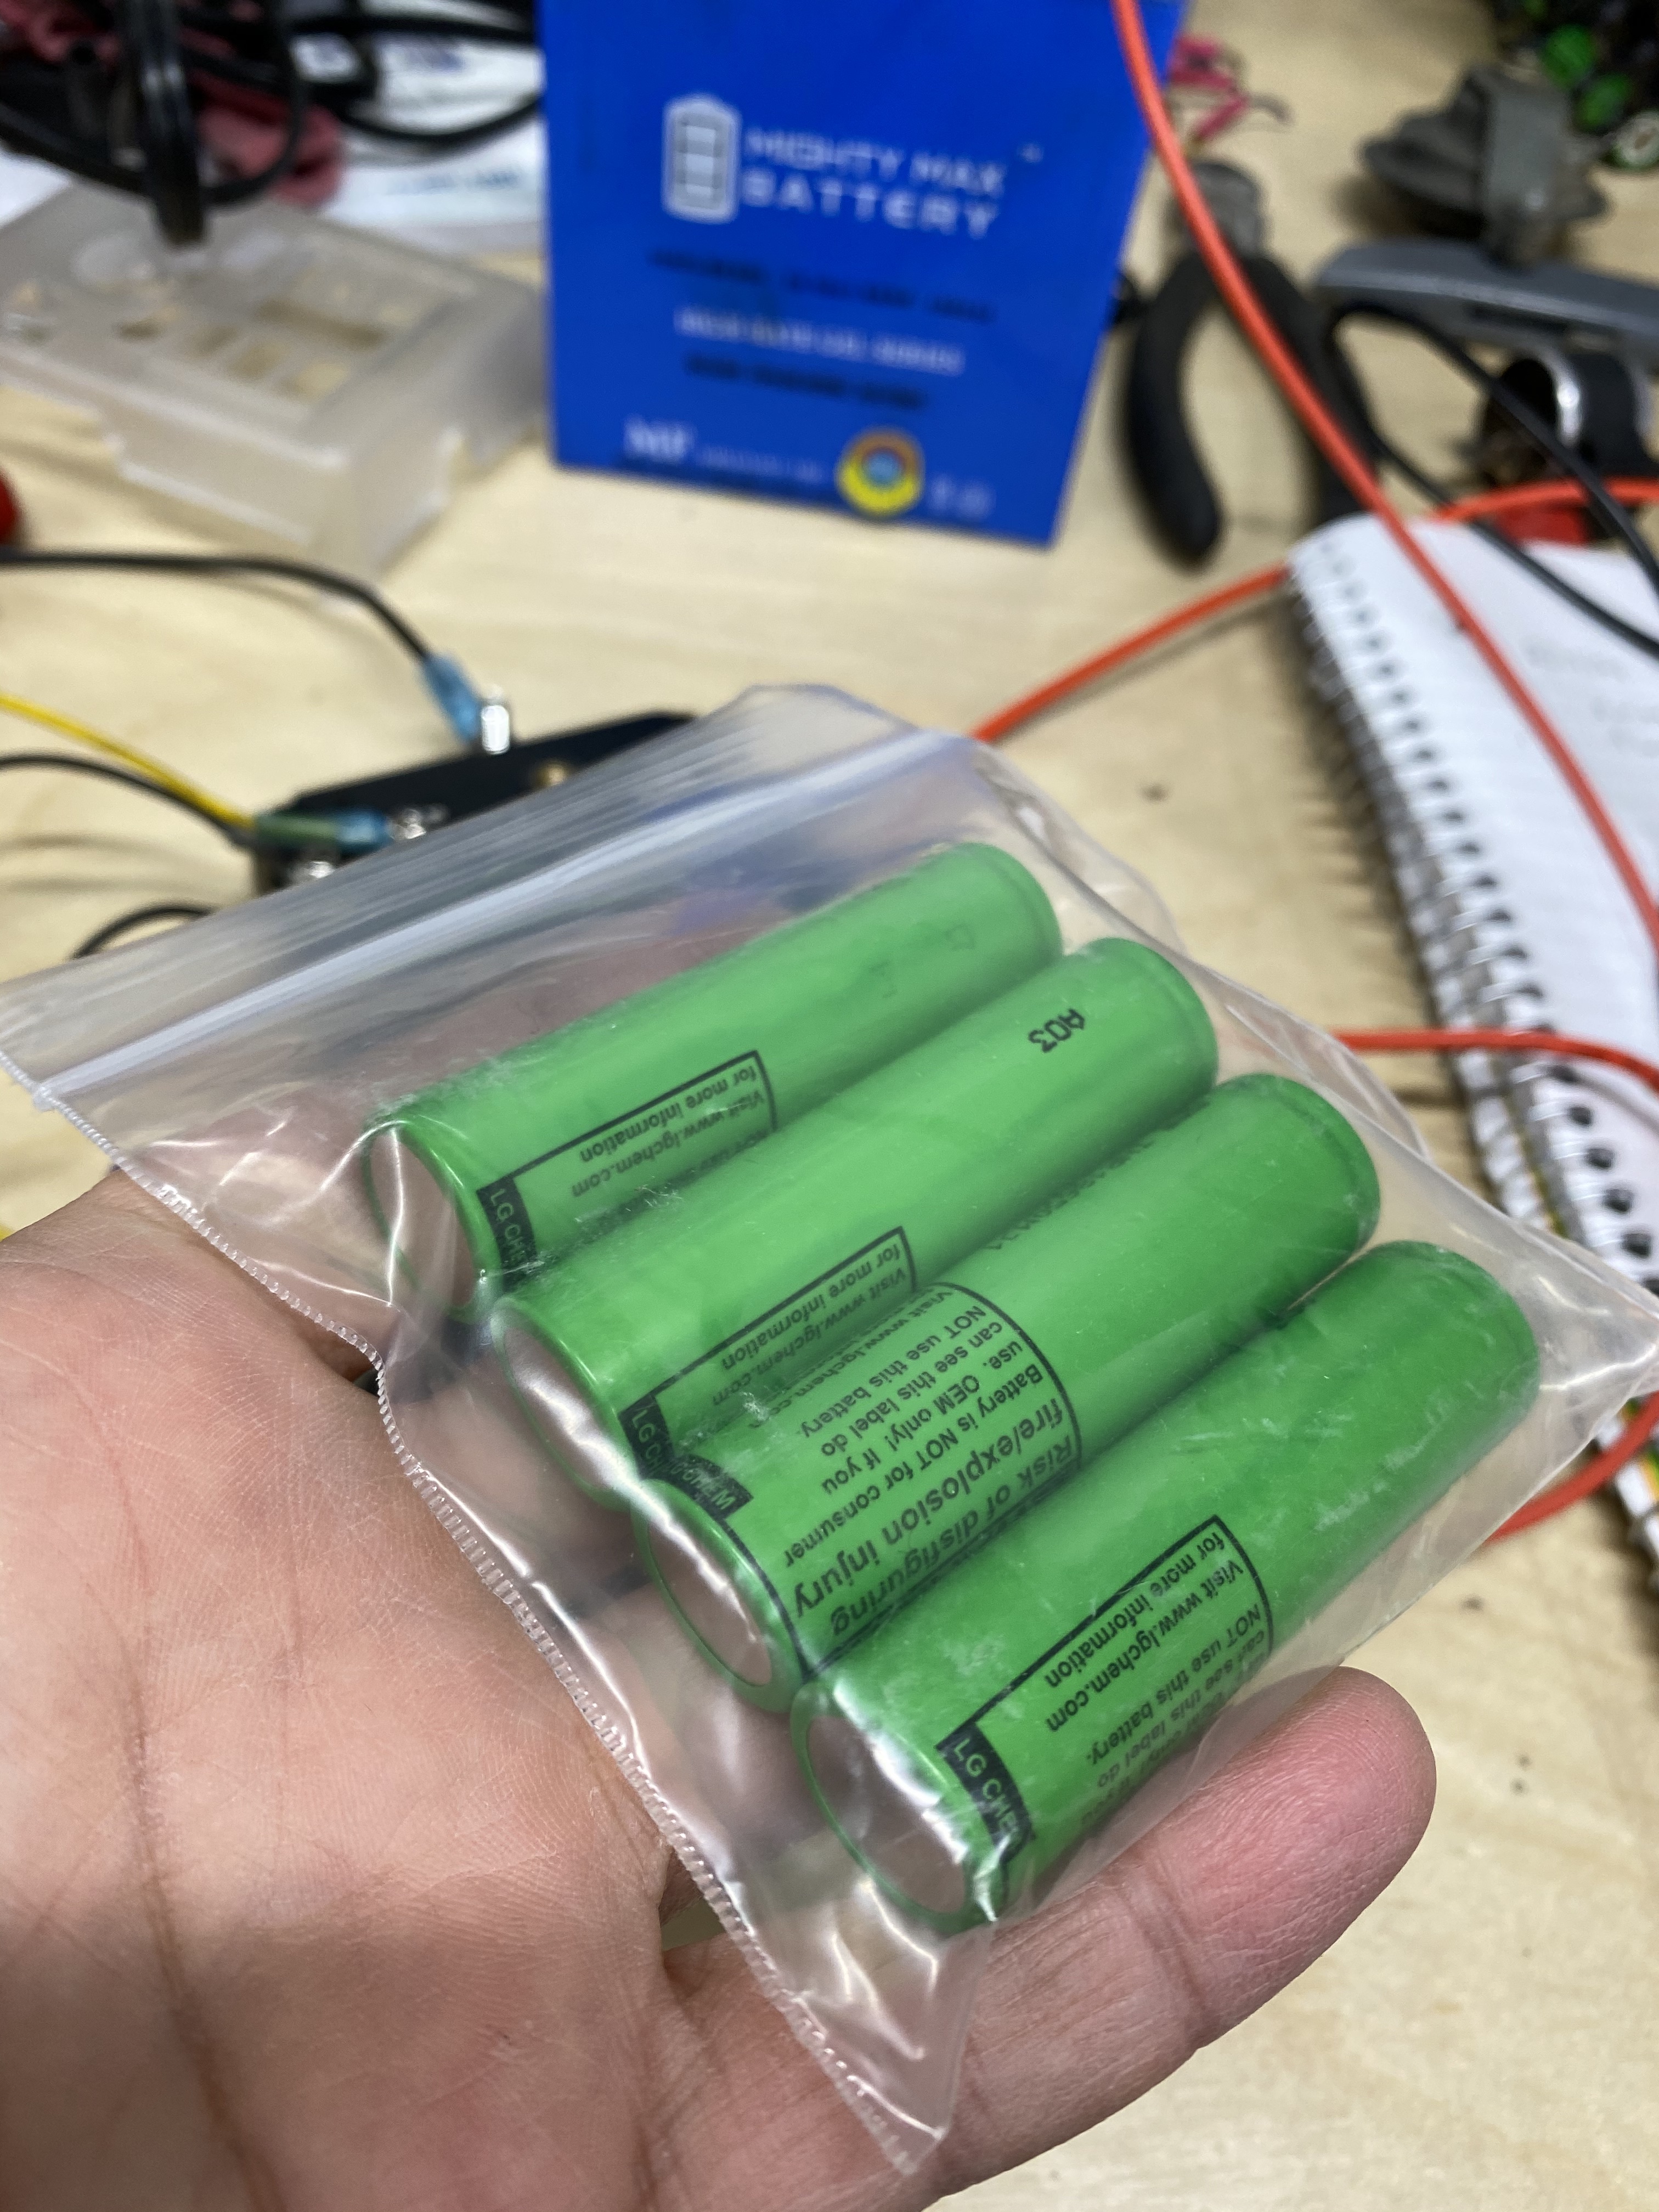
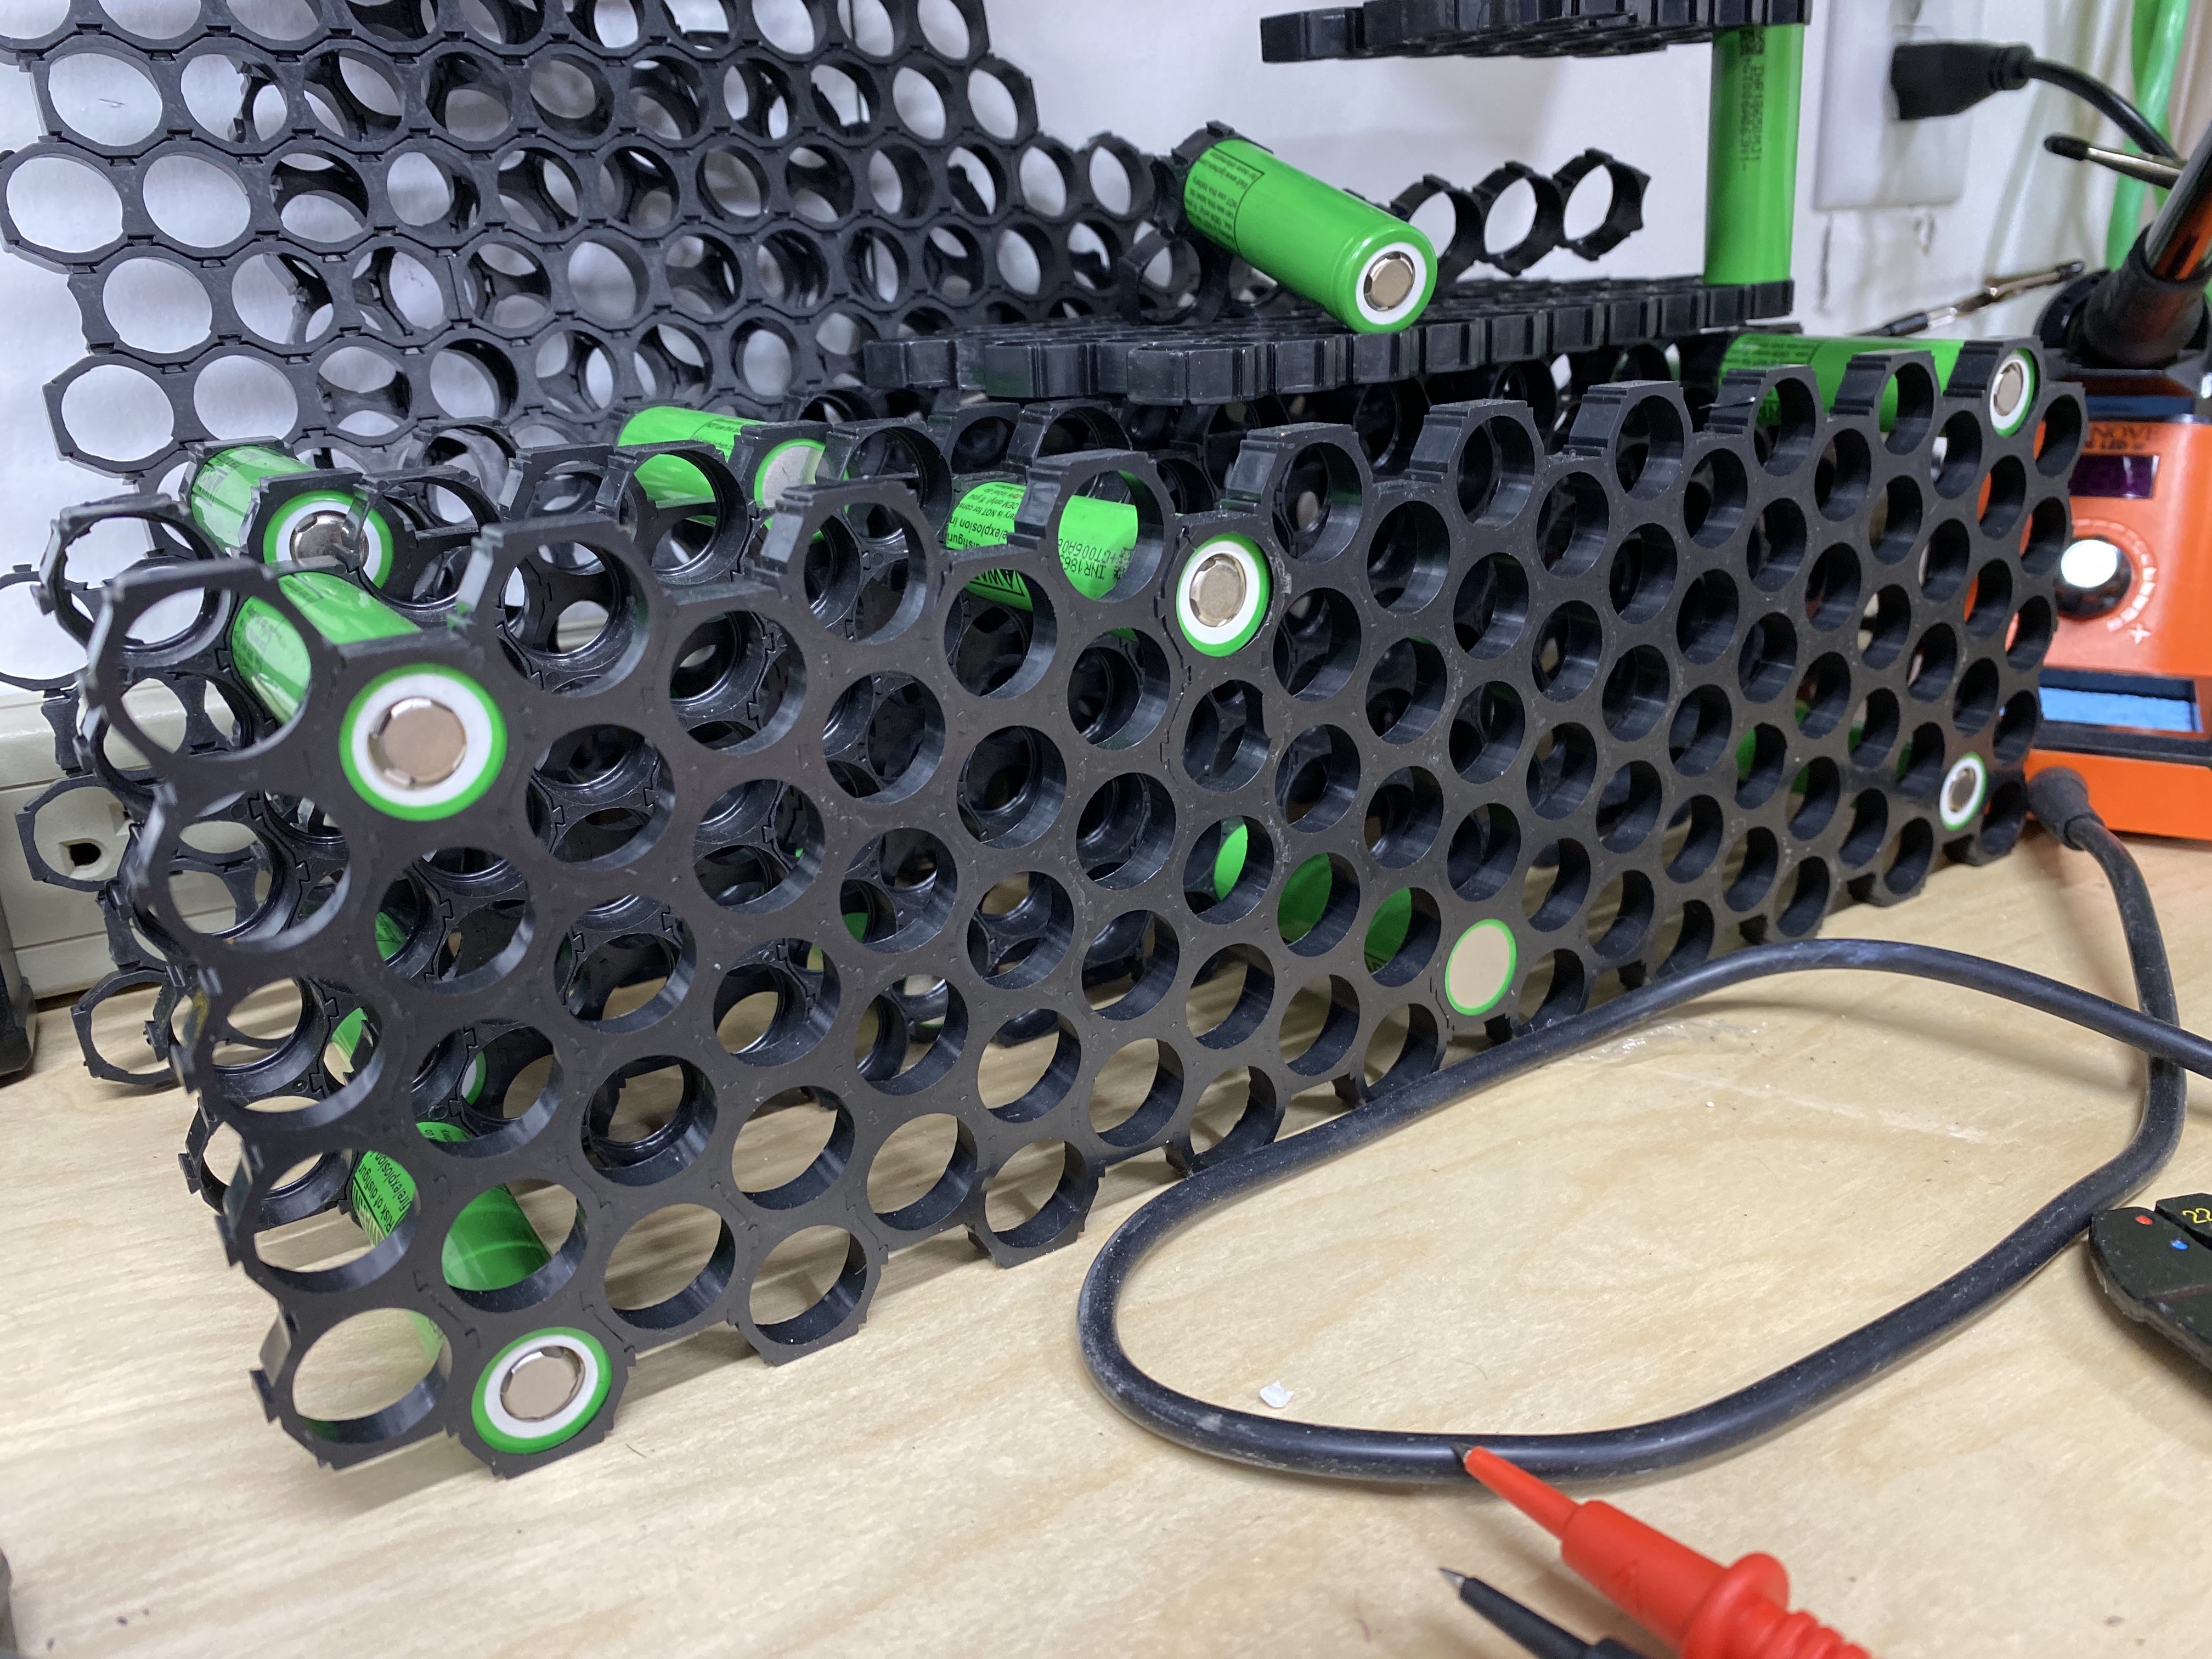
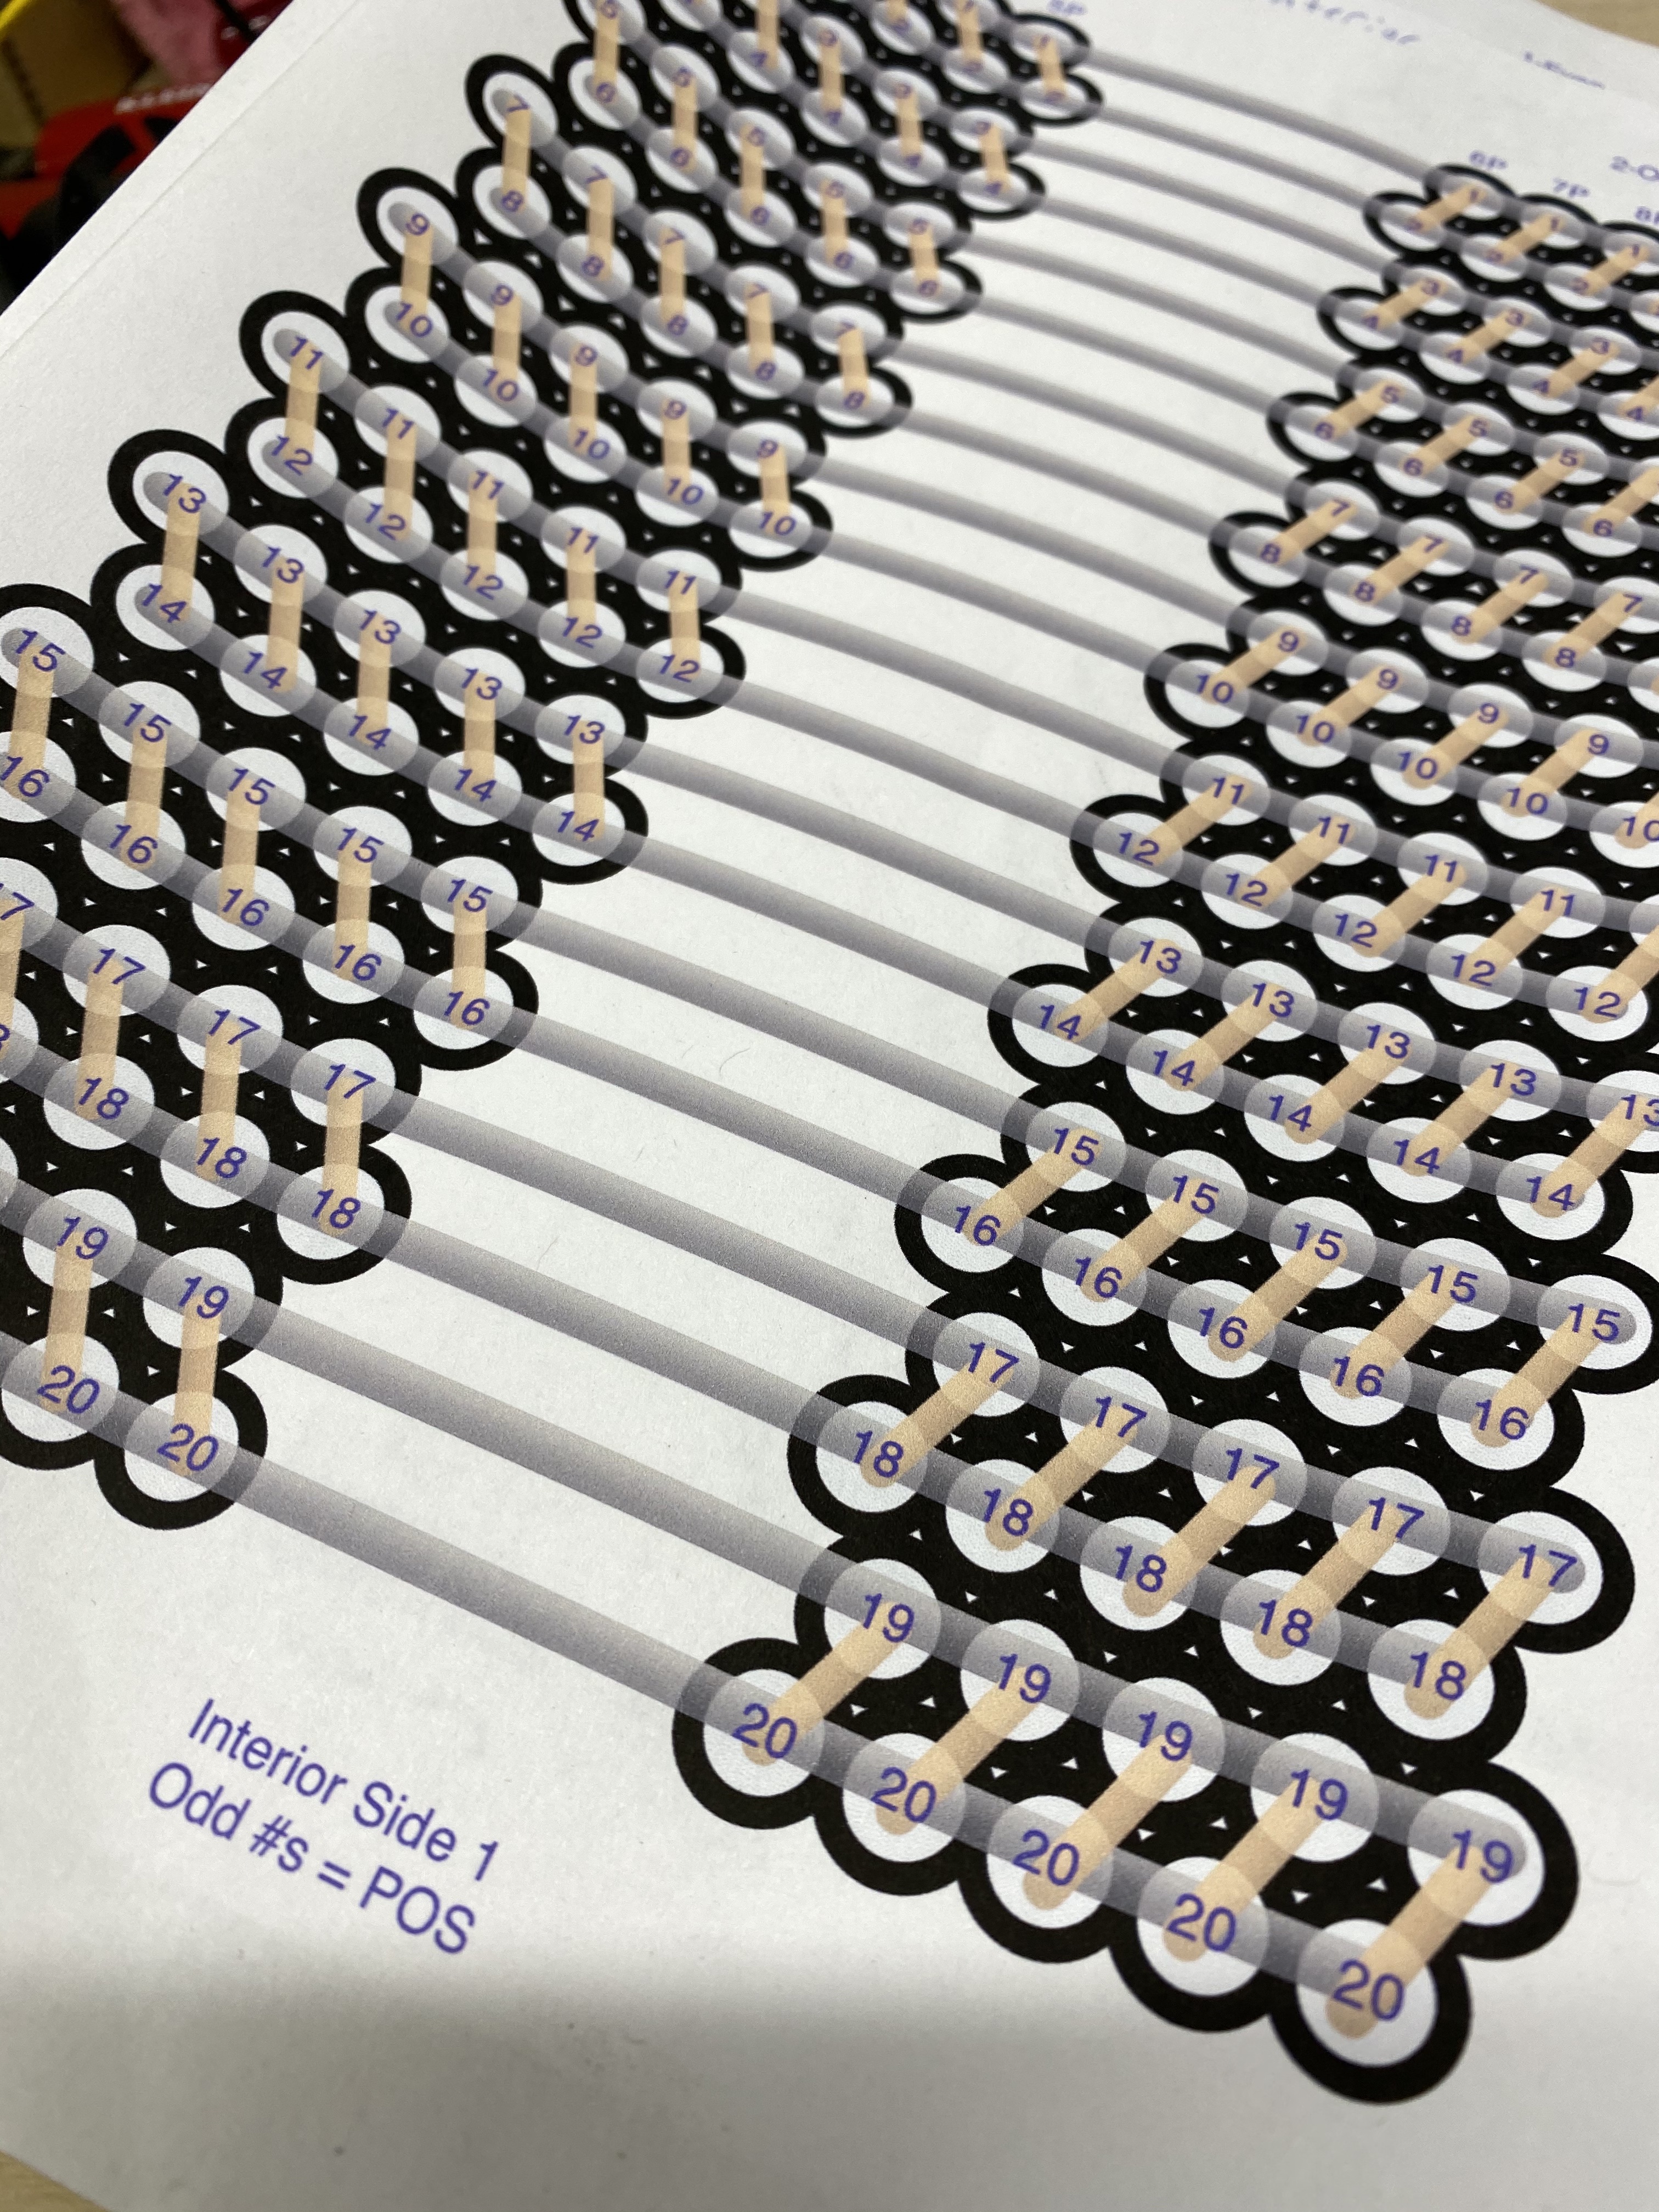
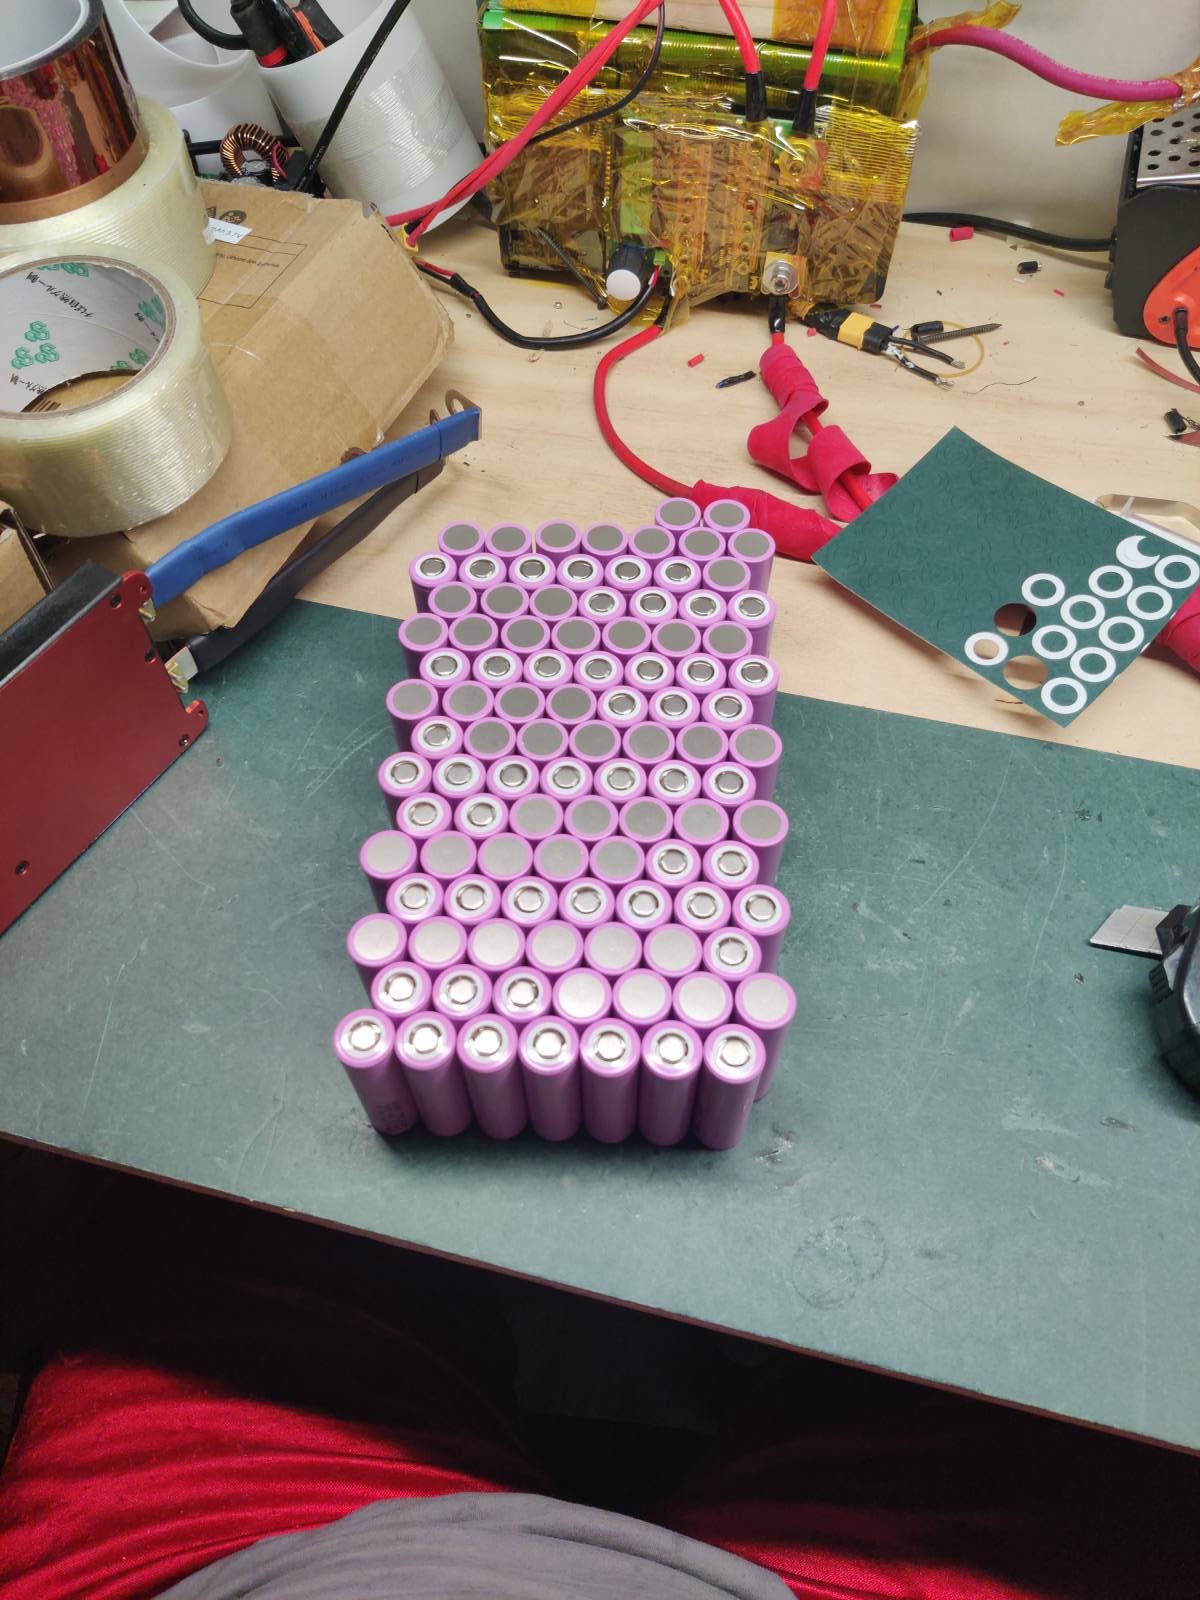
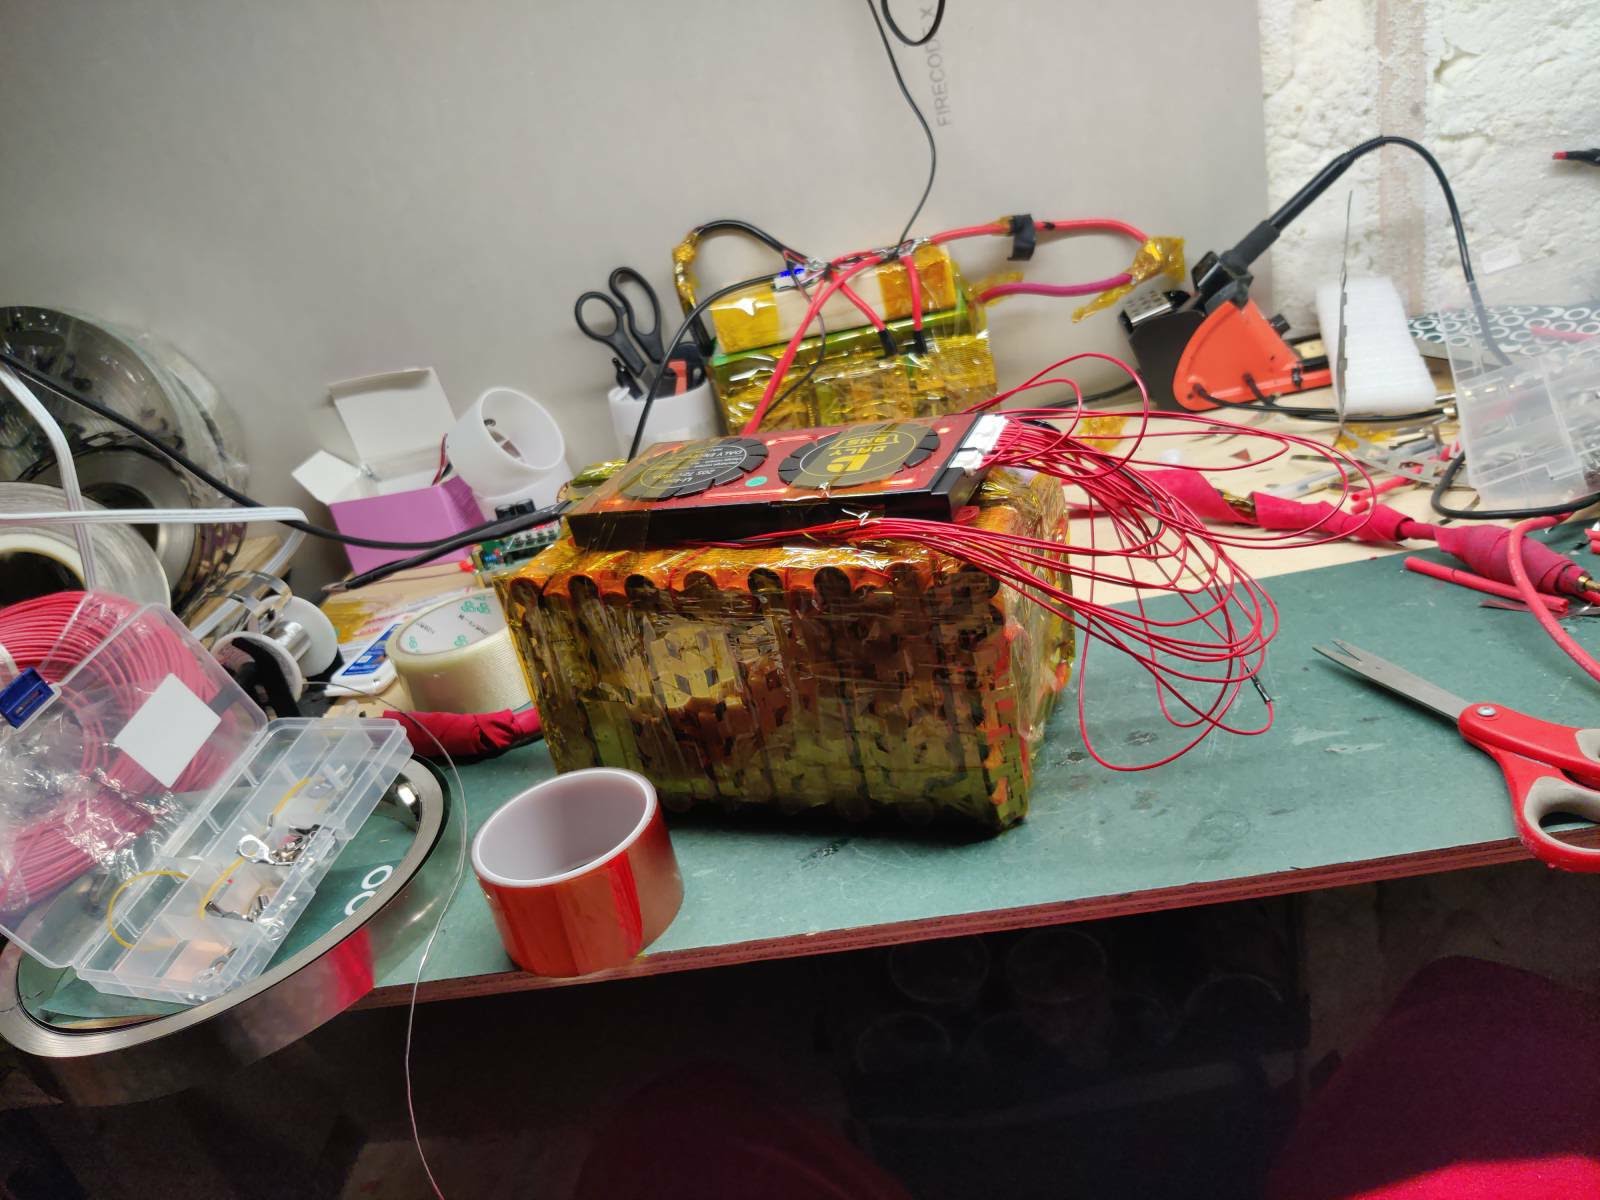
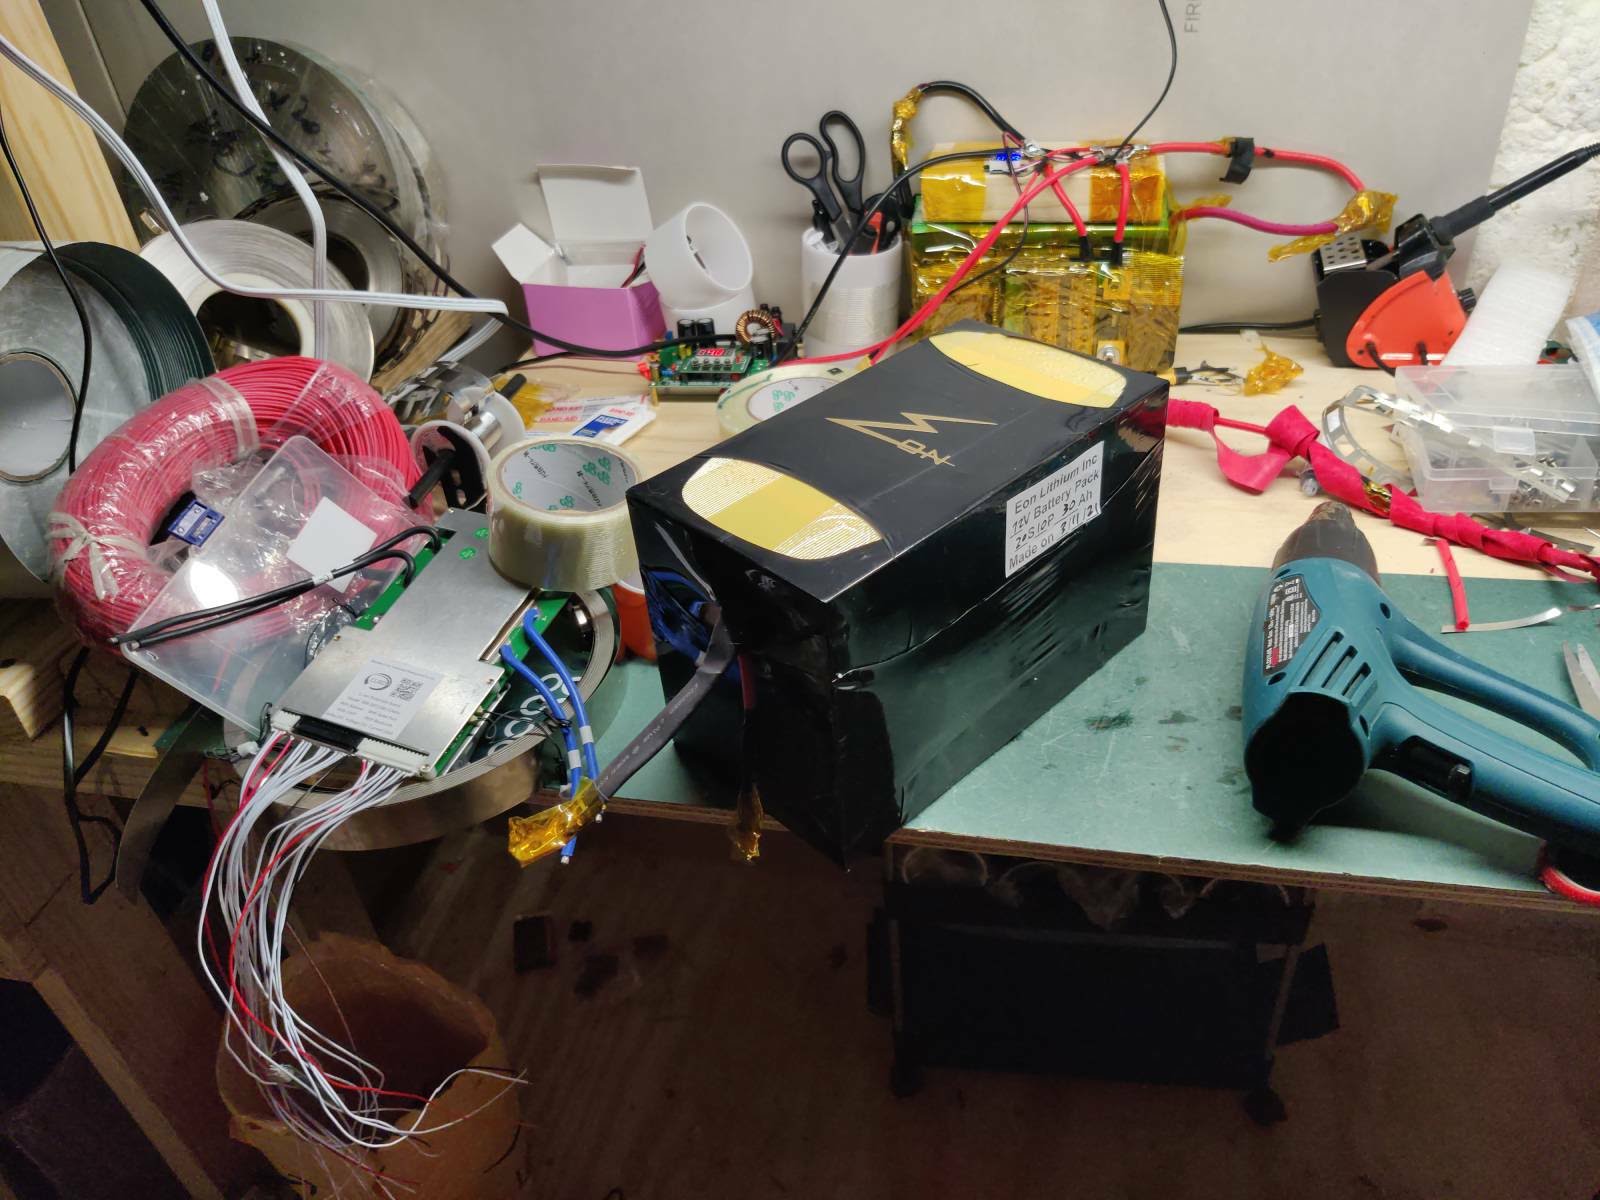
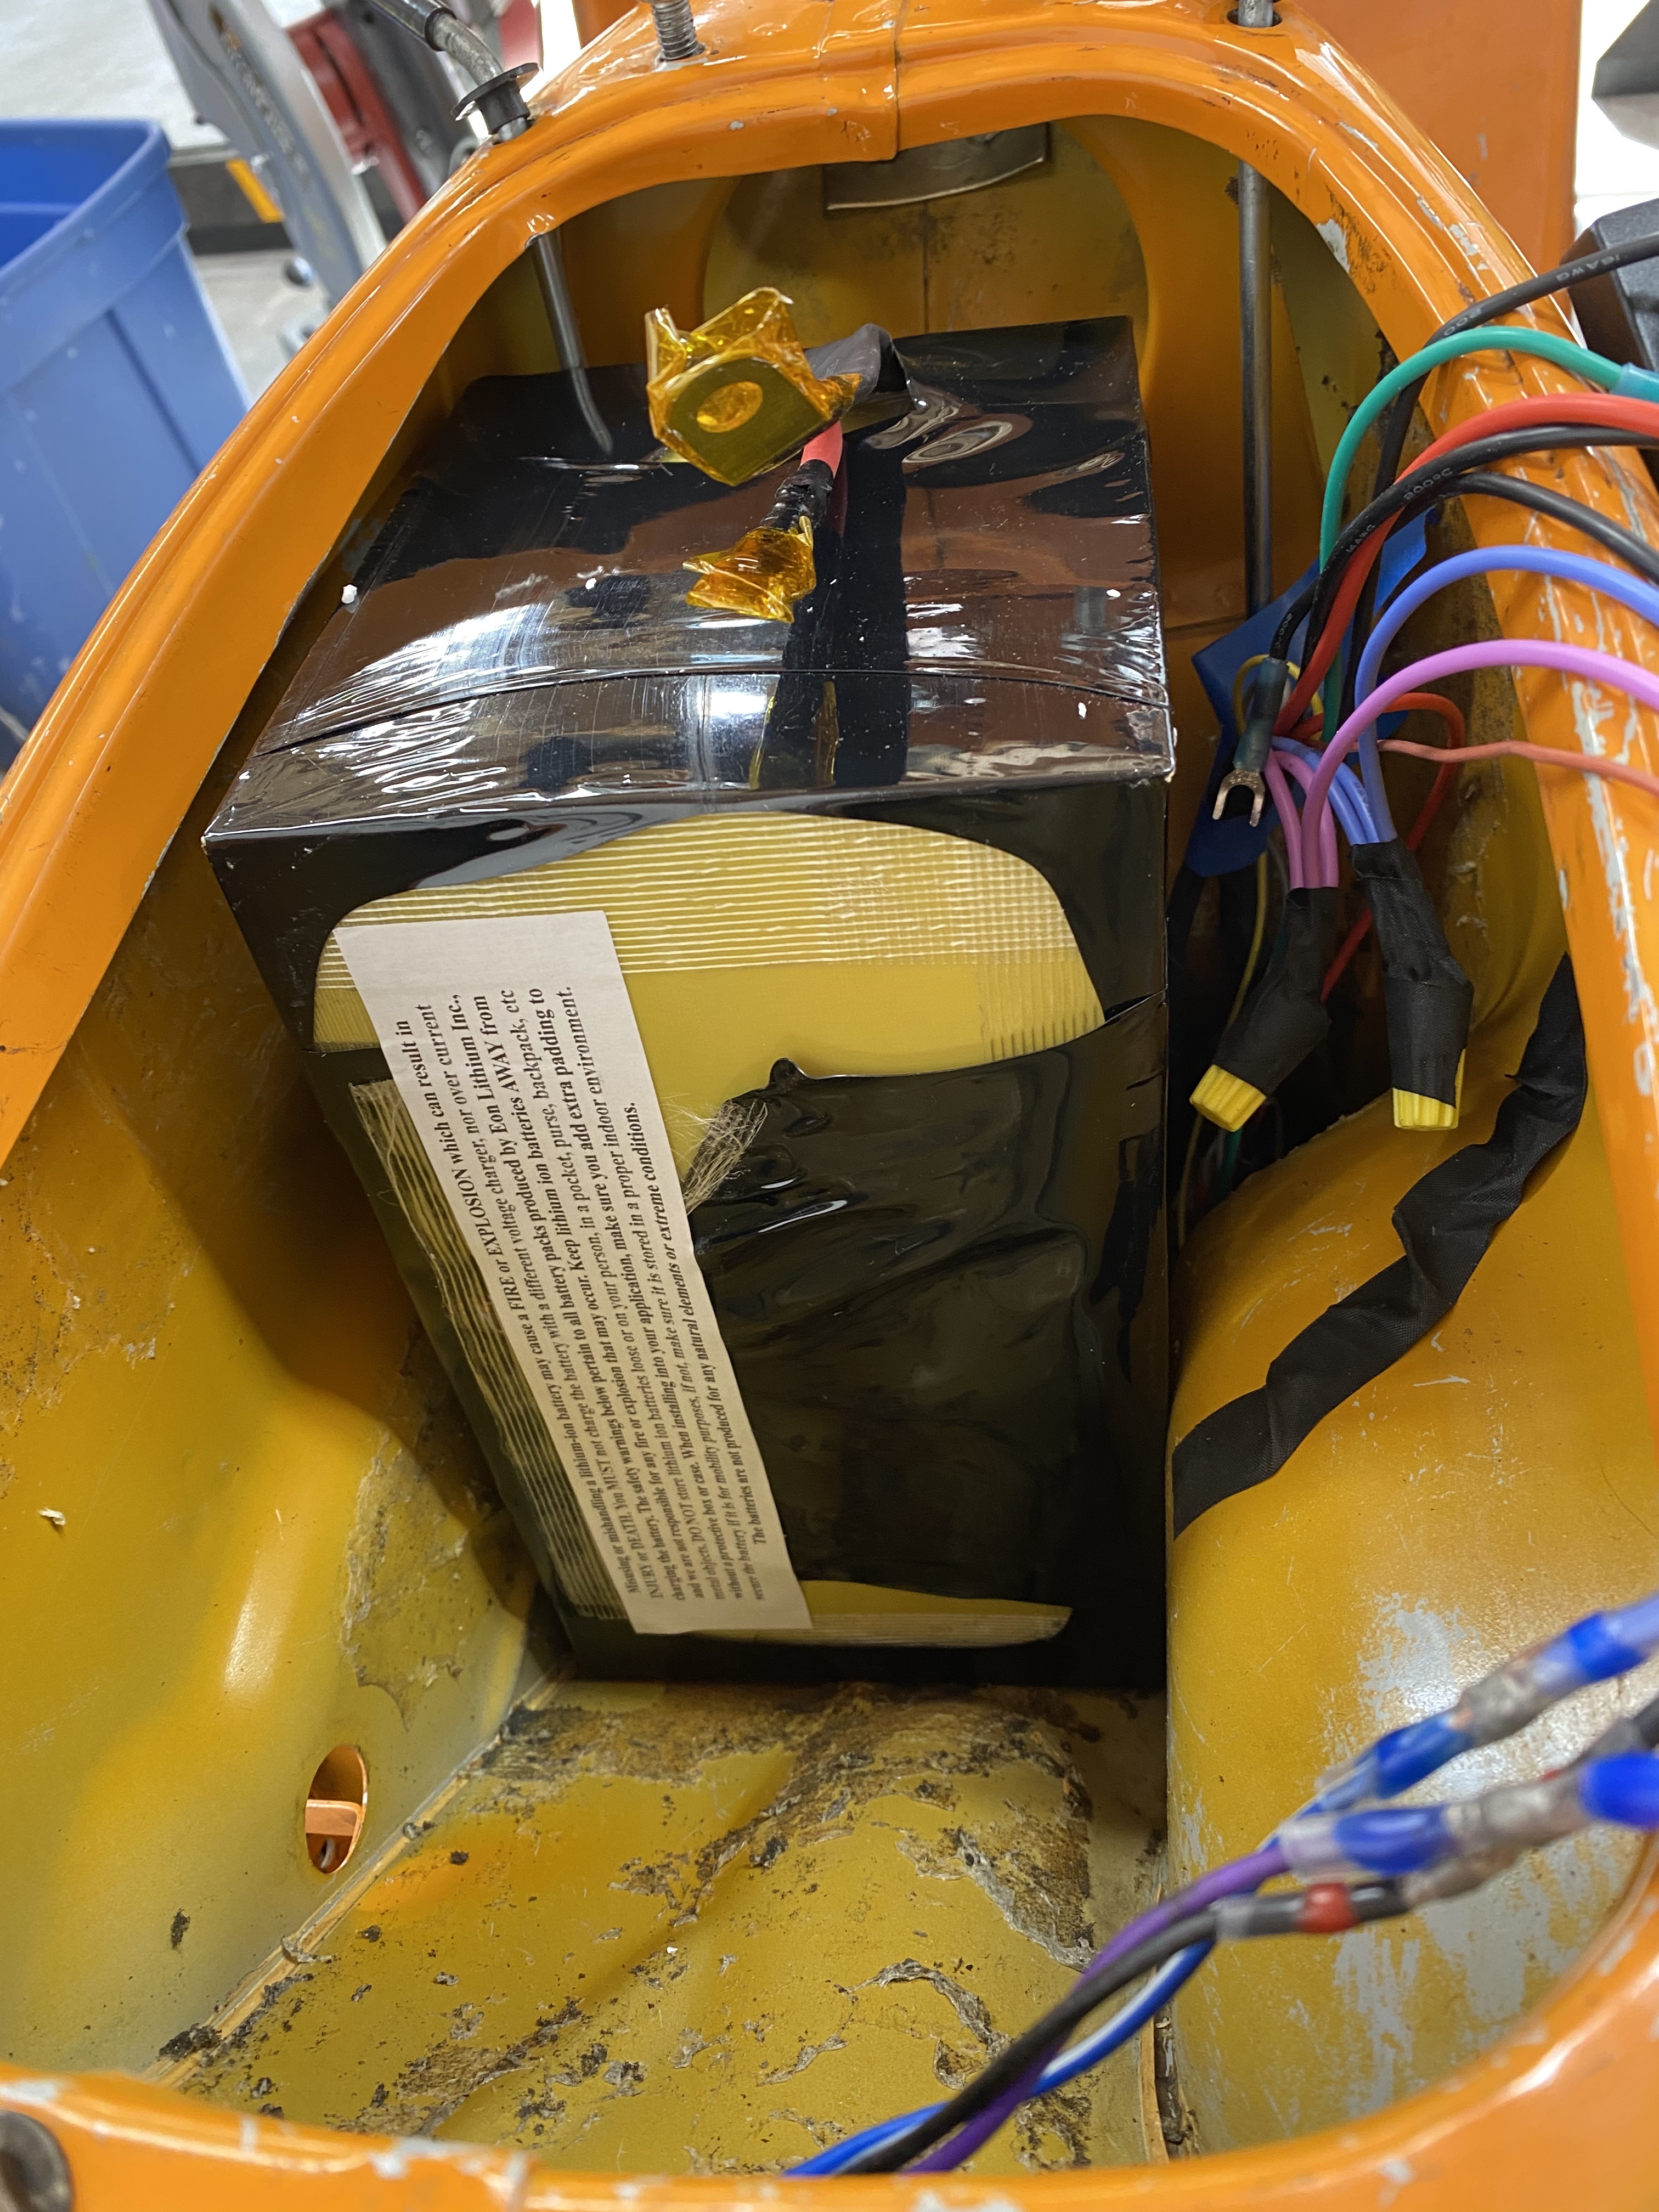
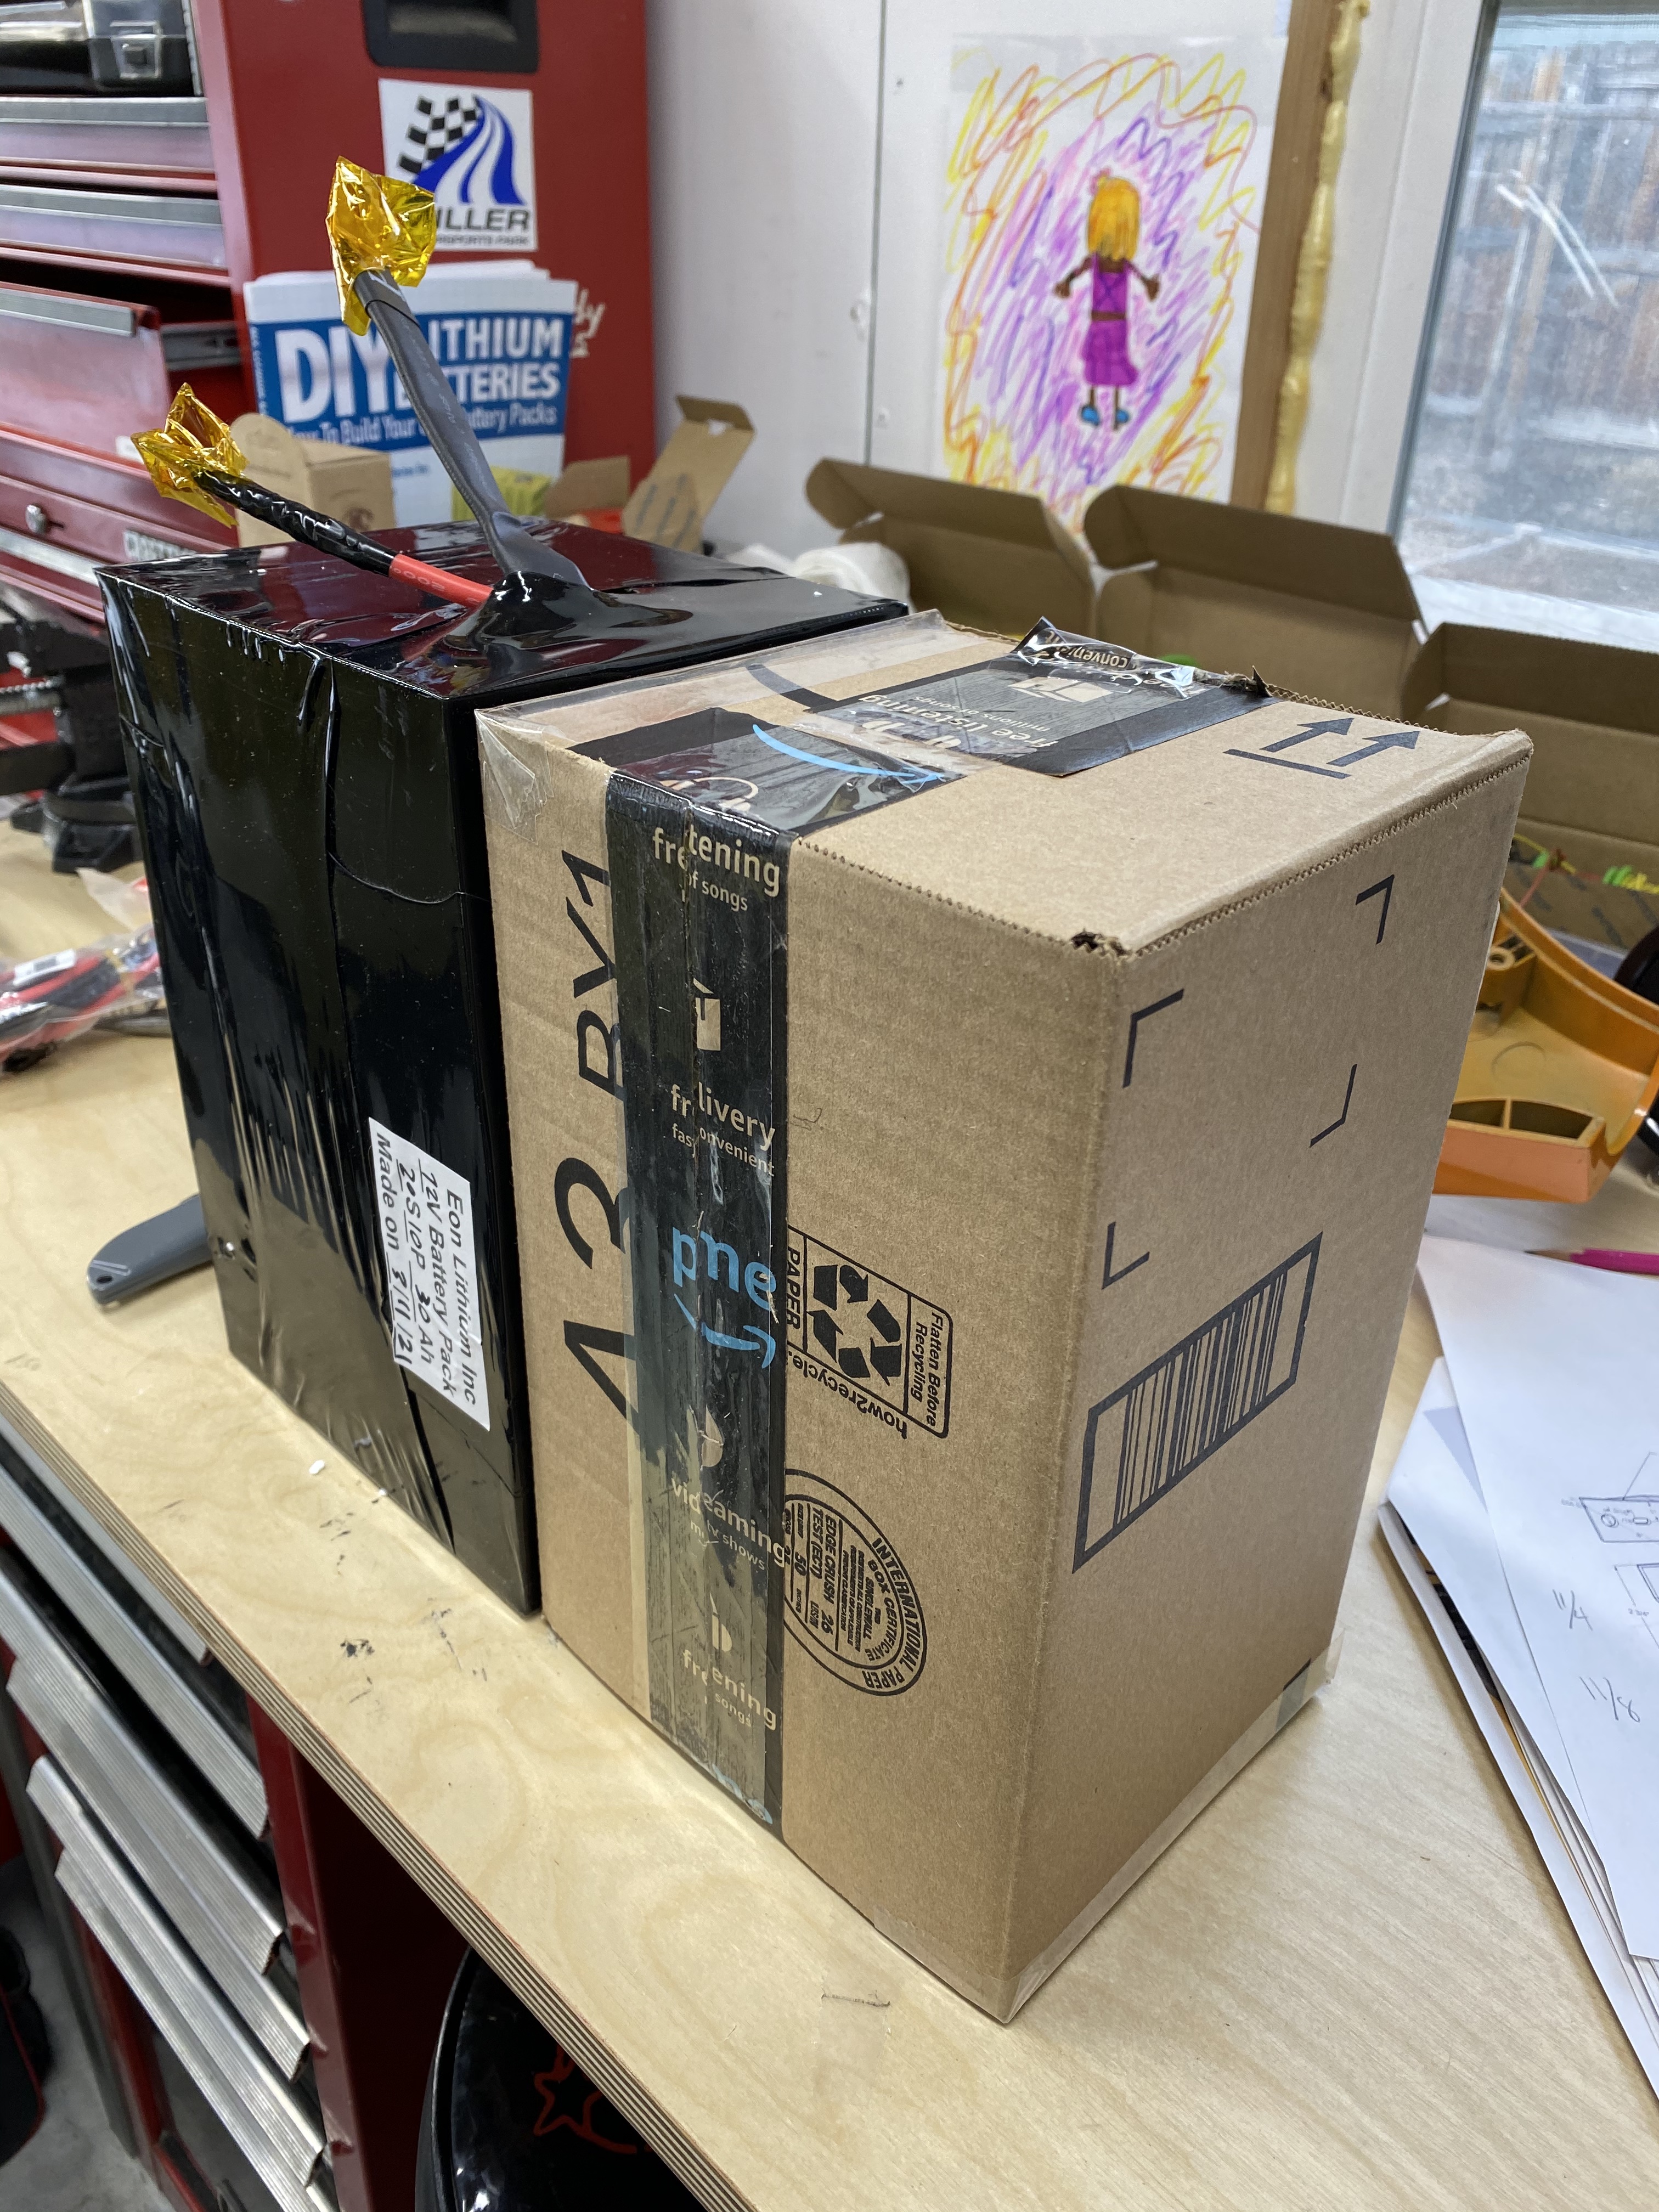
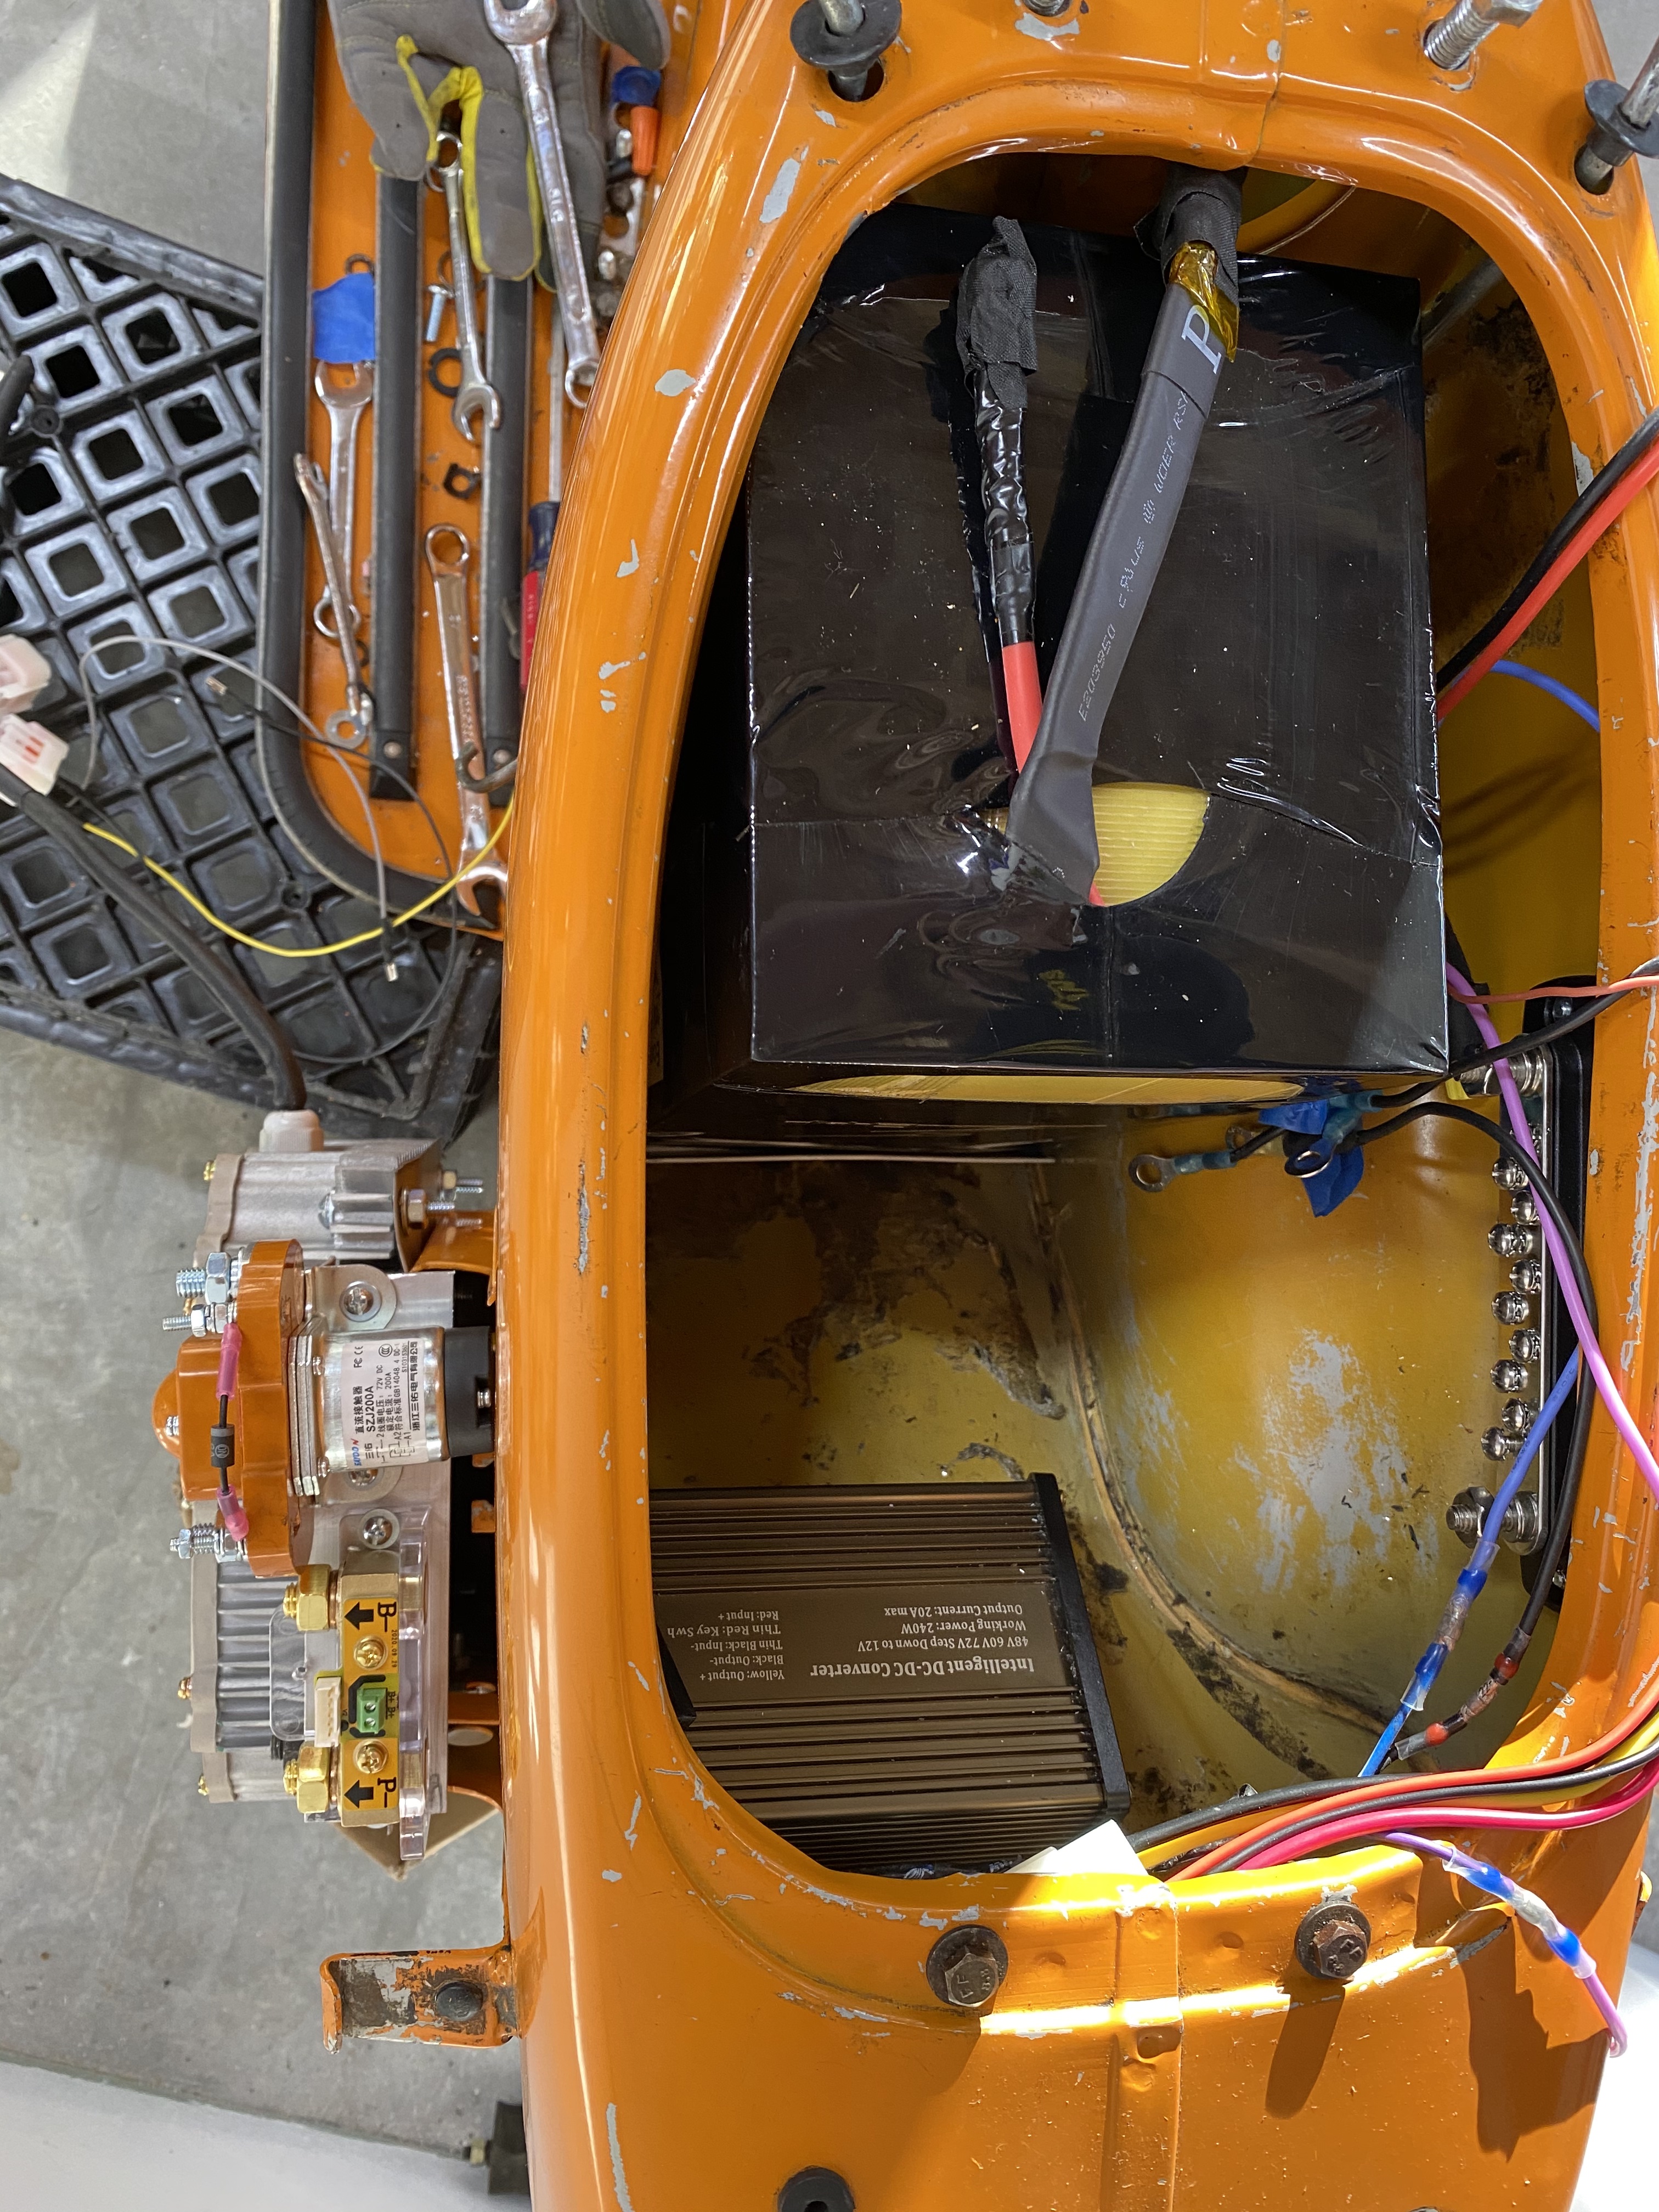
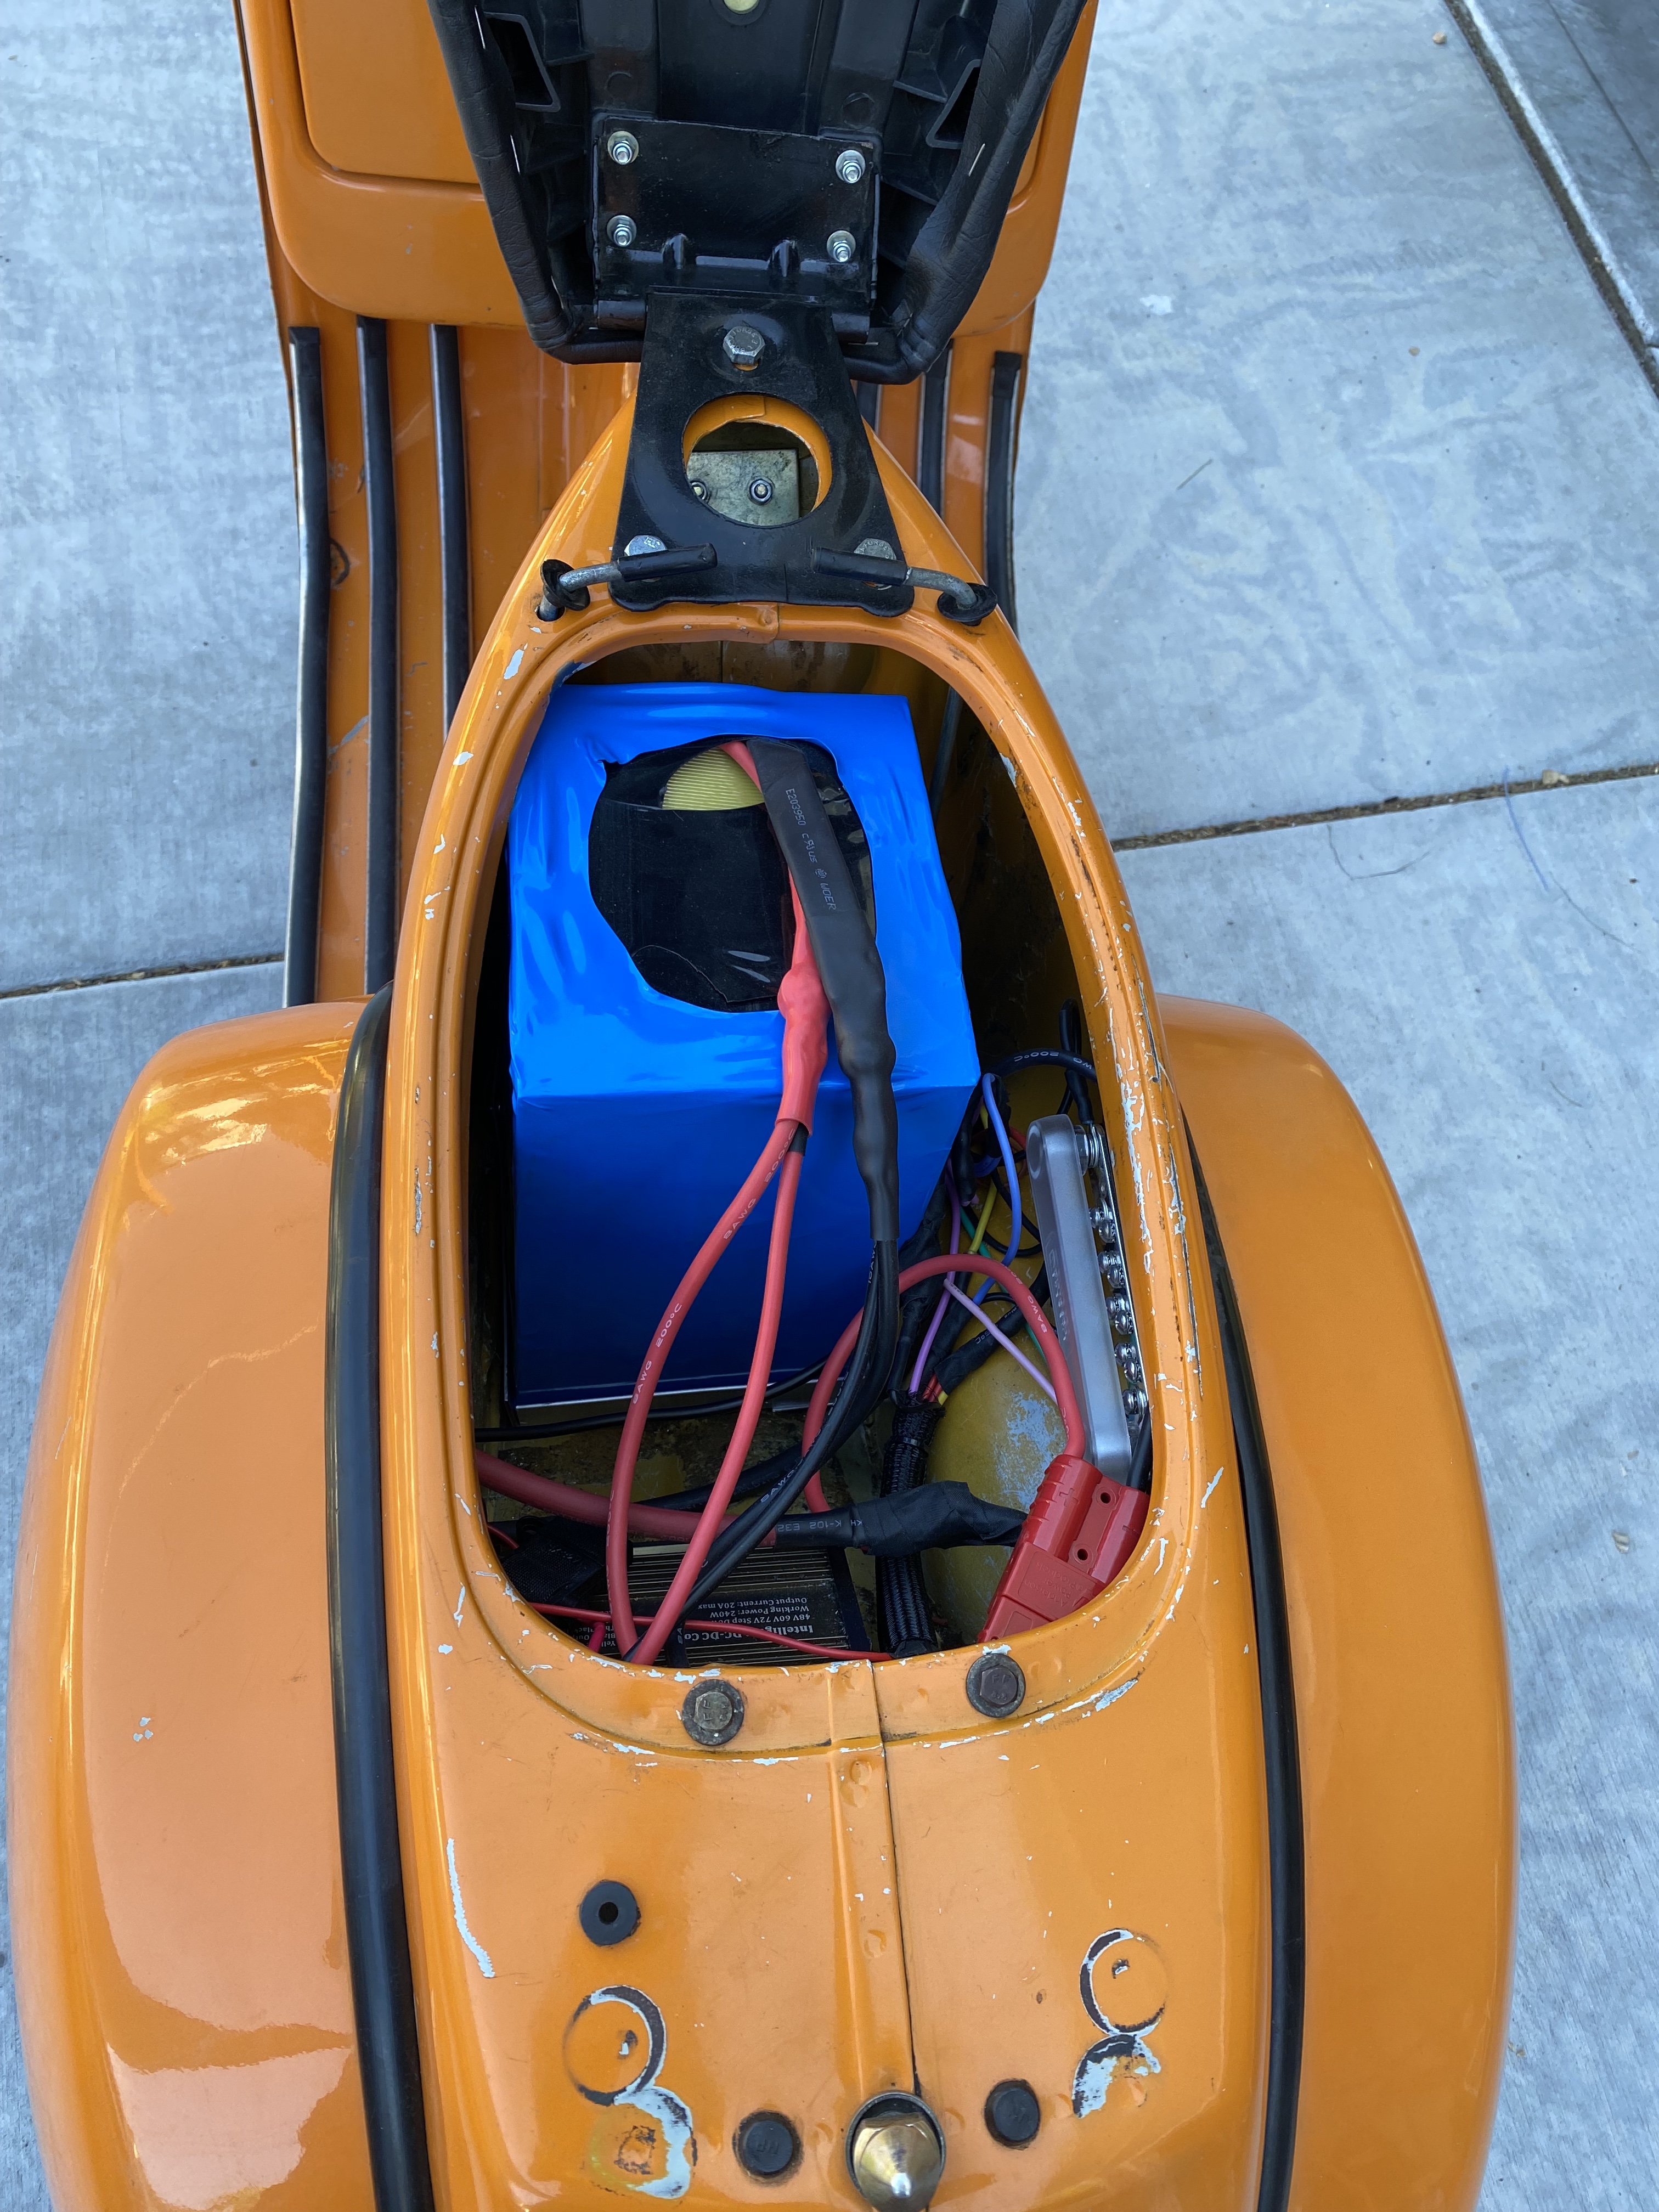
Custom battery pack - 20S10P Samsung 30Q 18650s
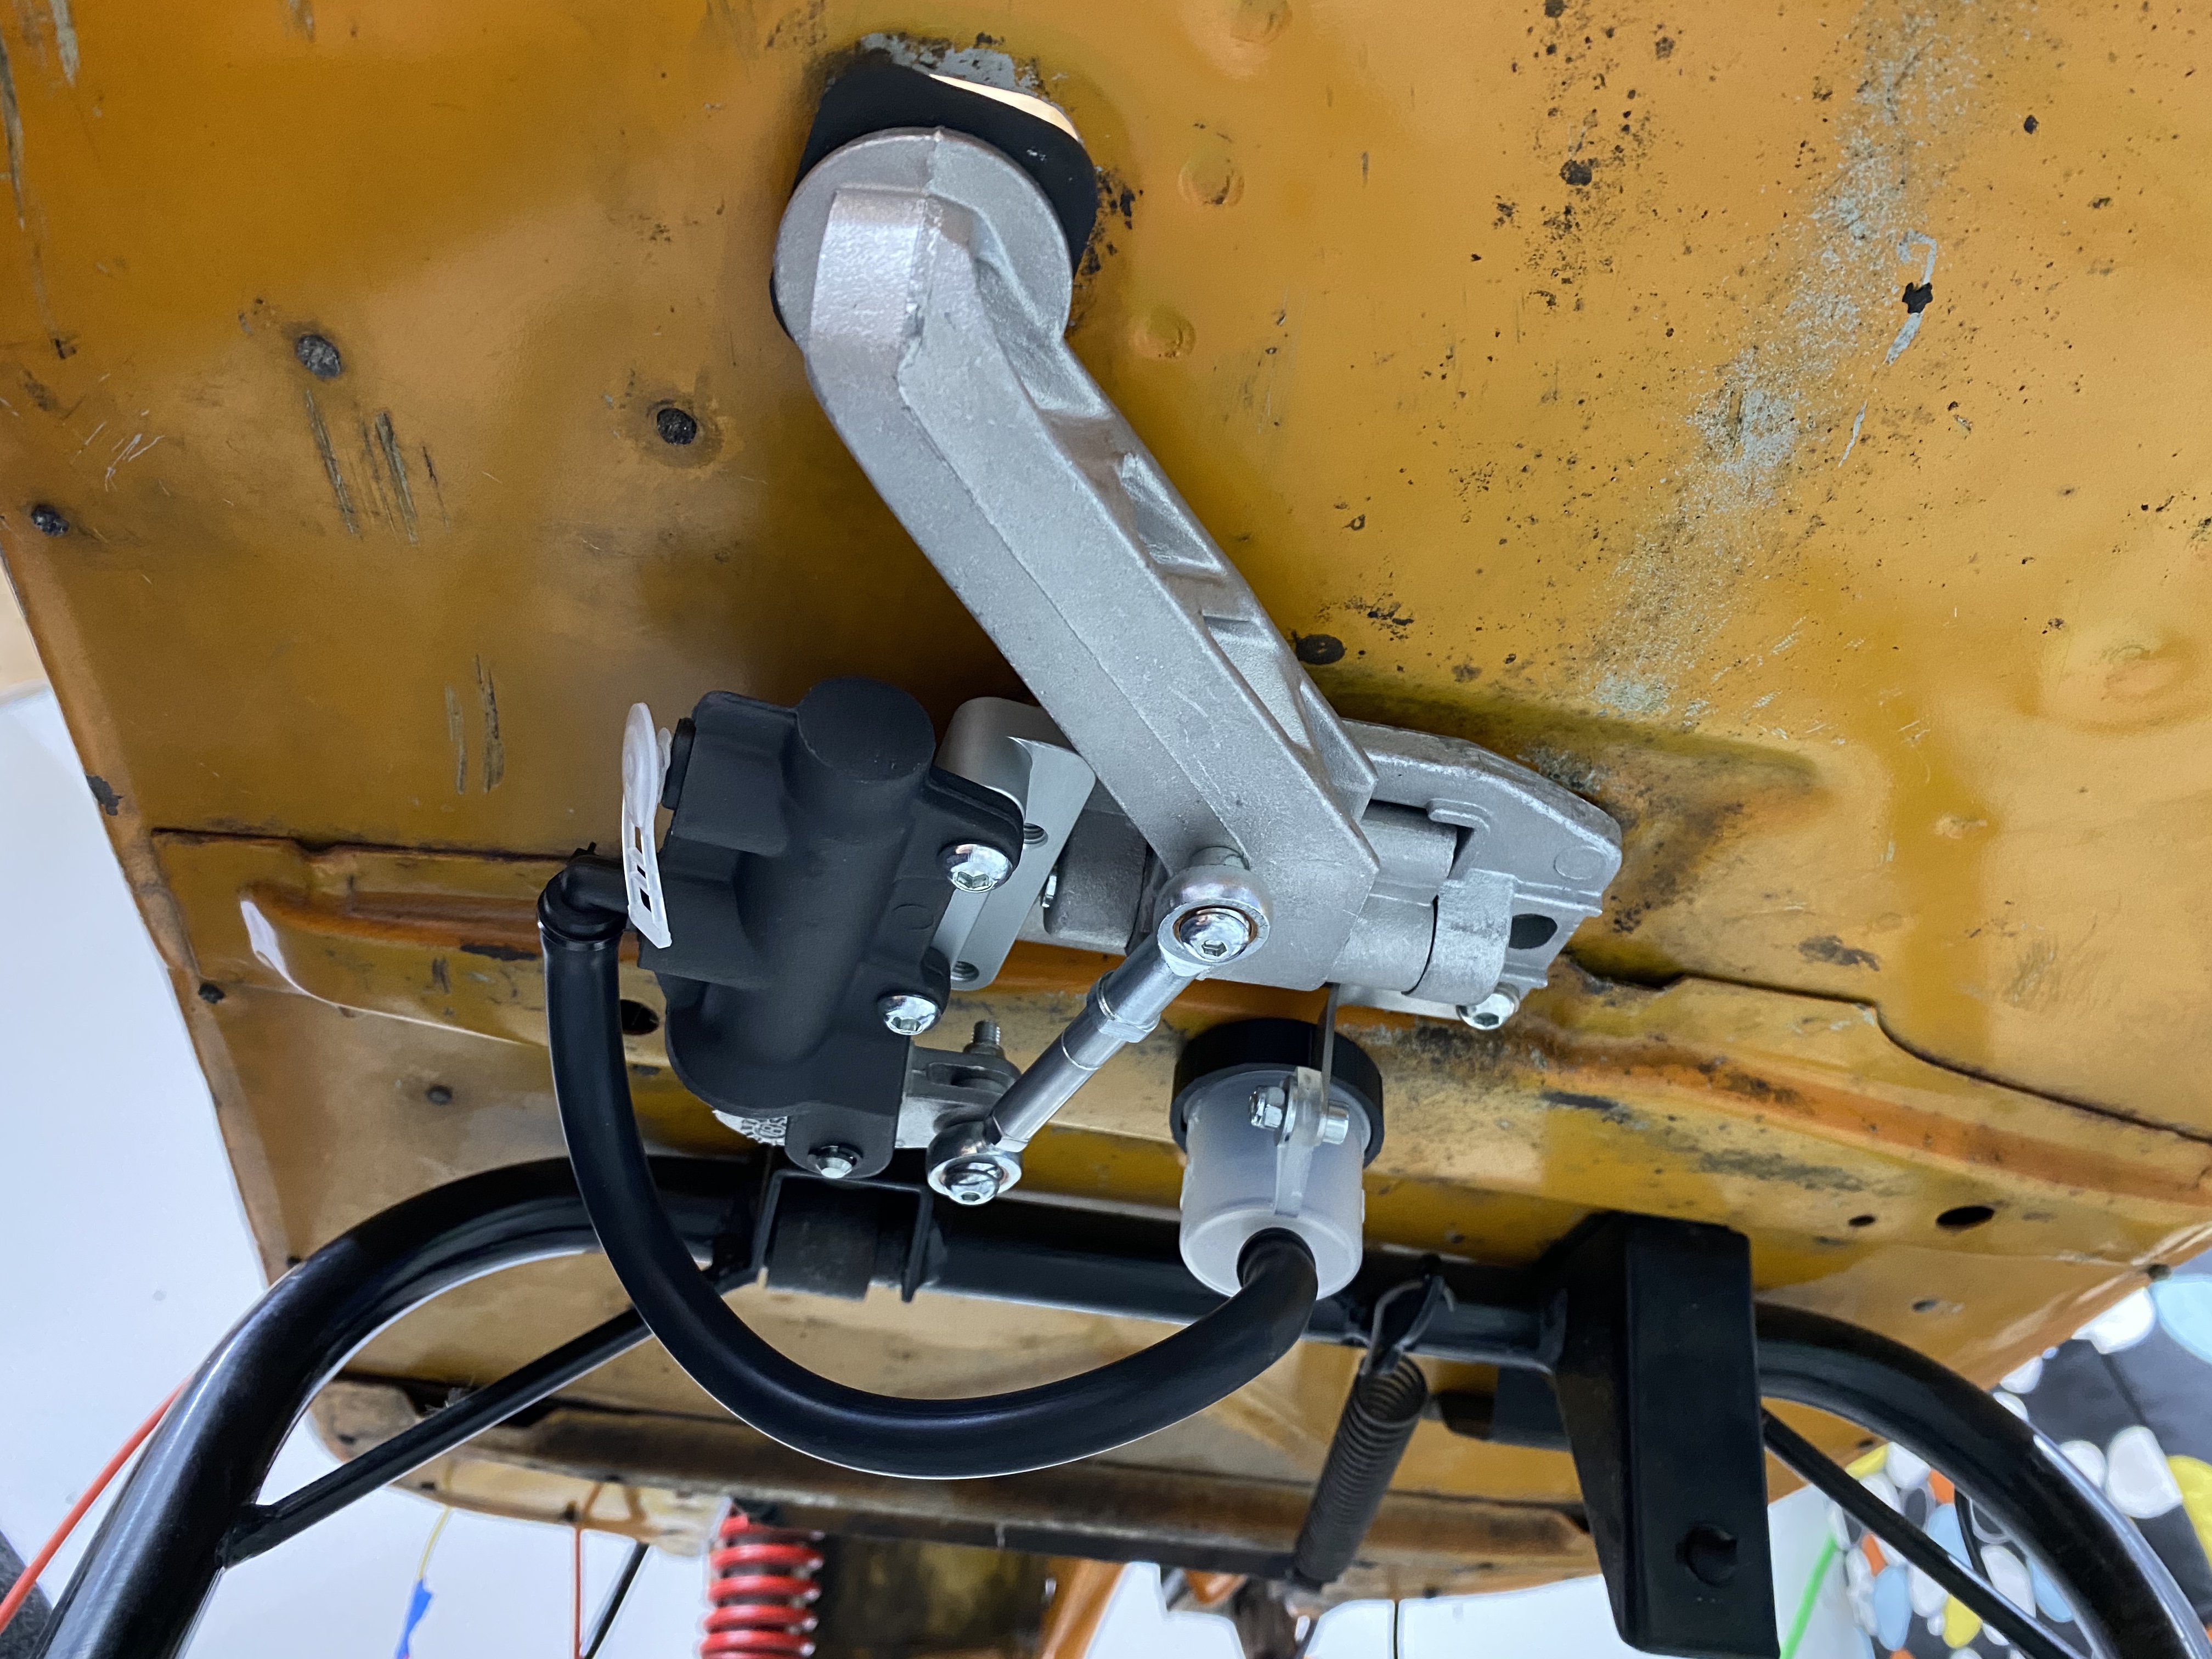
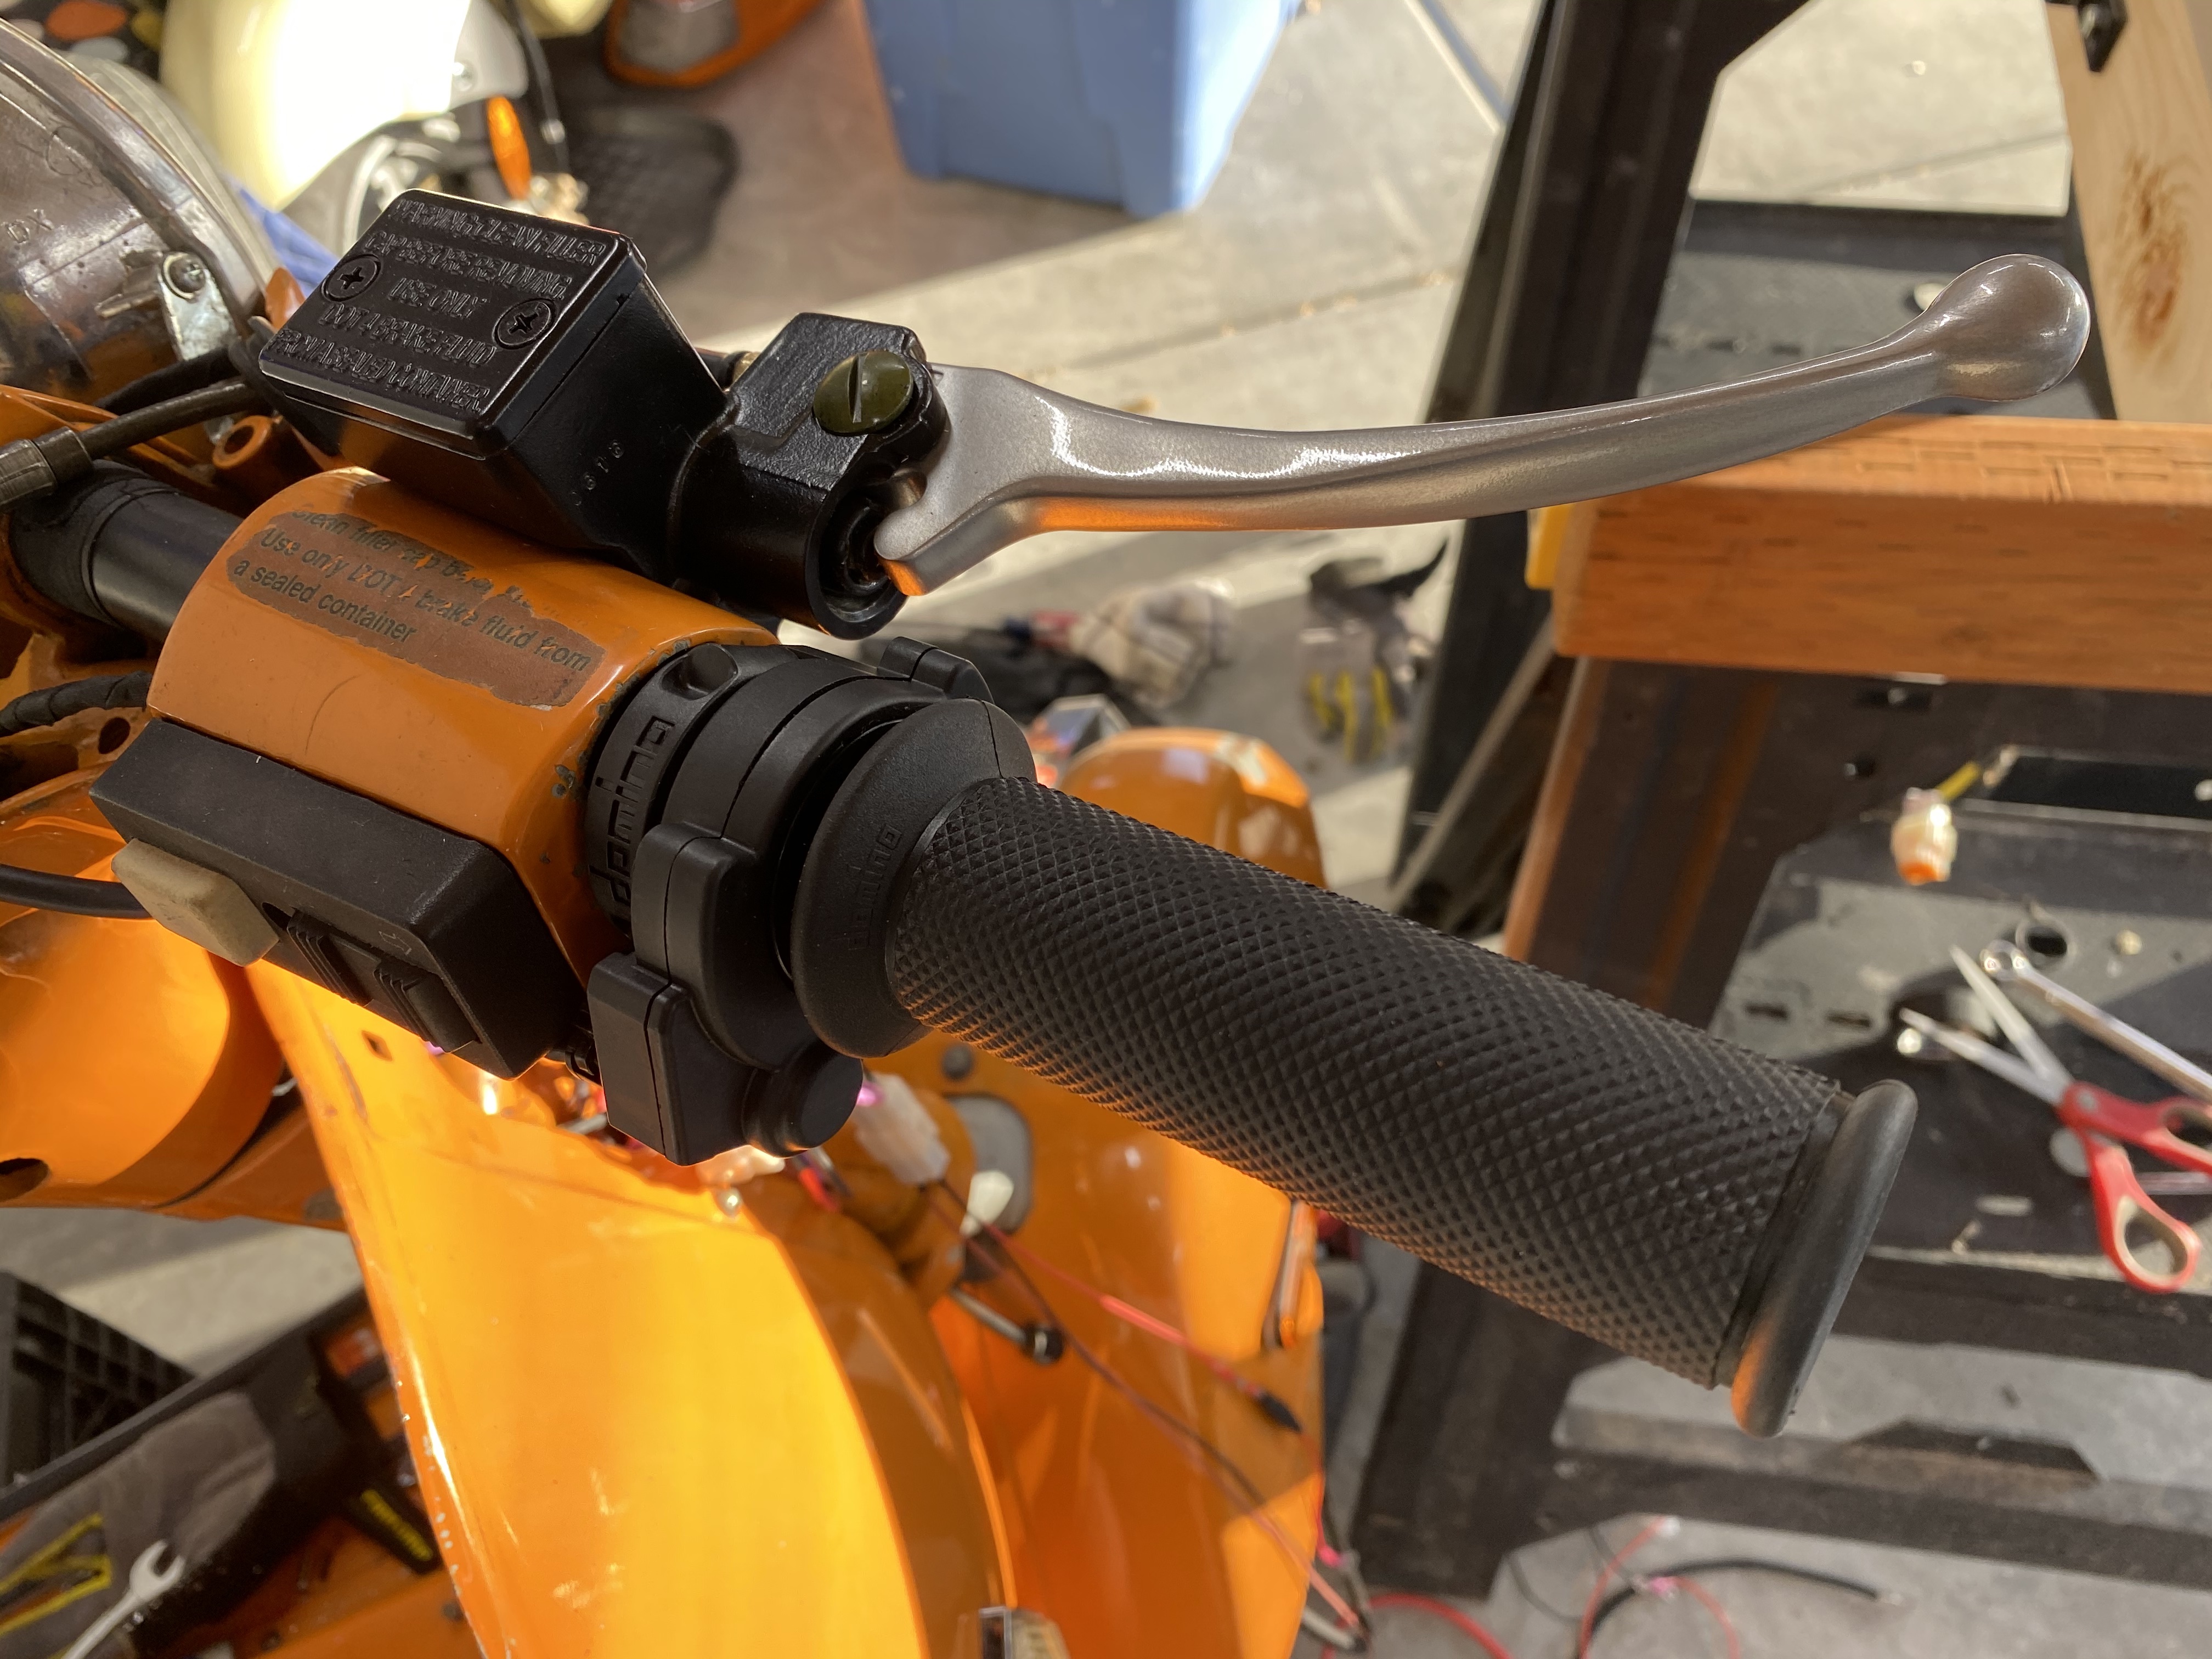
Domino 5v throttle

I have also since sold my Genuine Buddy 125 scooter to purchase a RadRover electric bike.
 
As you probably know, the Genuine Stella 2T is a PX150/LML Star under the hood. I bought this as a barely running project scooter and did a full teardown and overhaul of the ICE. When it was back together it ran great but I did something wrong with the gear stack. It slipped and just was unsettled, so the project has sat for a year.

loTterc.jpg


I've decided I wanted to convert this to a hub motor and get rid of all the oil everywhere that you need to keep these going! I also have a 2007 Genuine Buddy 125 that runs very well, so this electric would be kind of a novelty short hop scooter.

Here is what I very tentatively have in mind for the basics of the project:

72V 4000W hub motor
72V battery pack 17-25 AH

Pics so far

Pulling the fuel and mix oil tanks
DX9FfW0.jpg

ng3Ww3k.jpg


Creating a cardboard mock-up of the 25AH triangle battery pack
SvDlXLG.jpg


Fits into the tank void pretty well
VNSBqoY.jpg
 
I was away from this project for a few months but I'm back on it pretty seriously. As others have mentioned, the swing arm fabrication is the hardest part - pretty much everything else is off the shelf. While I'm working on getting the swing arm done, I've started dissecting the 12V sub systems and getting them mapped out one by one.

I'll be using a QS Motor 4KW hub motor

ojNdOHN.jpg


MHrNSdj.jpg


LED Lights everywhere
73urCaO.jpg


Pulled all of the old wiring harness out
2e7KcTs.jpg

8VFRb7H.jpg

jP6H4k7.jpg
 
I have been planning to build the battery pack myself out of LG MJ1 18650 cells. They are getting harder to source at the moment and I think I can have a more energy dense battery made for me from 21700 cells for the same cost.

I'll see. I'd like to make it, just for the experience of it. I have the hex cell holders and a small spot welder, so I'm ready to do it. I've only purchased a small number of 18650 cells so I can still change paths and feel OK about it.

fr6Aqg8.jpg

przV0bK.jpg

tXEGspU.jpg
 
I found someone who will help fabricate the swing arm for my project. He's a local guy who has a shop building custom electric hot rods and classics. He dropped a Tesla S motor into a 1957 Chevy Apache Truck. His truck was a big inspiration for my project overall and for building a sleeper without much cosmetic improvement.

Here is his badass truck:
IKfQyUc.jpg


I'm still awaiting small parts and pieces but am working on the 12V side things. For the rear cowl turn signals, the original bulb housing is grounded to the frame, ultimately via the top cowl spring. Although not entirely necessary, I have an objective in my re-wiring to remove all frame grounds and run them back to the battery. Therefore these turn signal bulb housings aren't plug and play for new LEDs and I have to forego using the weird pin connector setup on the cowl.

I bought some simple bulb sockets and cut the old bulb holder off. Then I opened up the hole to accommodate the new socket. I ran the new wires under the cowl tabs and will have a waterproof disconnect when I need to take the cowl off.


Q1oRZ2h.jpg

3J80Buf.jpg

It9M37f.jpg

YKcjCmL.jpg

KkfWeji.jpg


I love the LEDs, they are so BRIGHT!
Q7fhkGJ.jpg


I also found these nice butt connectors that combine shrink tubing and low temp solder. They work very well.
jzXjtKl.jpg


It has been very cold here lately and my little garage heater hasn't kept up, so I fiddled with creating some badging for the cowls. I looked up the Italian word for "electric" and liked the masculine form because the "o" at the end looked better. It was only after printing it that I recalled the Vespa electric model is called the "Elettrica", the feminine form. So I don't know if I'll use this, but it is fun to play around with. The paint needs some touch up and I may add some color.
6tm5DF6.jpg
 
Finished the front-end 12V wiring - installed fuse box, LED turn signals with adjustable relay, headlight, all of the cluster lighting.

New wiring for everything
4mJME5a.jpg

VboiCIU.jpg


I also replaced the front brake master cylinder, as the old one had stripped out screws and had been left unmaintained.

The left shifter tube fit the new grip and I will screw it into place so it no longer moves. The throttle tube wouldn't fit into the Domino potentiometer throttle housing, so I had to use a 7/8" steel pipe which I'll shim up to fit the 24mm holders. Otherwise the Domino will fit great. I went with a potentiometer rather than a typical hall throttle.

EGdWu3q.jpg


The hub motor I purchased has a disc brake on the rear and that kit came with a brake lever for the left handle, but I didn't want to cut the shifter housing apart and didn't really like the way that looked. I found a rear brake foot pedal master cylinder on SIP, which arrived this week. Looks very well made and I'm happy to be able to keep the foot stomping rear brake vibe! Unit looks really well made and I'm excited to get it installed.

tDkfra9.jpg


I also decided to simplify my cowl badging, so this is what I came up with from the 3D printer and some spray paint:

oIBndHC.jpg


The battery pack will be here from the builder this week. I decided not to build it myself and leave it someone with some expertise. I'll definitely build a smaller pack out of 18650 cells, but not for this just yet.

This is Lola, my garage beast. She loves hanging out while I fart around.

WjPqOyE.jpg
 
Battery pack builder got this turned around quickly and its on its way. We played around with a number of configurations and cell options.

For my needs I was more focused on performance vs. range. I live less than 2 miles from work and everything I typically do on a scooter is within 5 miles of my house. There are lots of hills in my area so I wanted a lot of grunt and speed.

I ended up choosing Samsung 30Q 18650 cells for a 20S10P pack (200 cells). That gives me 72V and 30Ah, with a constant power output of 150A with a peak of 250A. For a 20% decrease in range I get a 50% increase in power potential by choosing that particular cell.

9vAWYWB.jpg

YTkkczj.jpg

tAeobFe.jpg


Still buttoning up the 12V wiring harness but it is all coming together nicely. It's been fun so far. Yes that's an old 5A laptop charger serving as my 12V battery for the moment.
vYvaHTg.jpg
 
Glad to see you here! I look forward to your progress.

Since I have a nearly identical set-up it should be fun to compare notes.

One hint, order the bluetooth controller dongle. Trying to use the USB was a complete failure, and stalled me for almost two weeks until I could get it. Your motor will not set-up until you can access it and do the set-up. Unless you have a windows XP or 7 laptop, the USB connection will not work.
 
JimVonBaden said:
One hint, order the bluetooth controller dongle.

Thanks for the tip. I nearly forgot that and after I had placed my controller order, I contacted Kelly and they threw it into the box and did a quick PayPal. I found an old Kindle Fire tablet that basically runs Android and I was able to install their controller app on it. Hoping that will let me connect.
 
Received my pack yesterday and did a quick fit check. Like a glove! The builder created the exact outside dimensions specified.

K1jyXrJ.jpg


I built a stunt-battery so that I could do more precise fitment planning. At the moment I'm thinking an angled aluminum bracket is the way to go.

3spdM9h.jpg
 
It's a 20S10P built from 18650s. I believe the dimensions are 10"H x 5.5" W x 6.6"D. I went with a cell that gives me only 30Ah but in a 20S10P can crank out 150A Continuous/250A Pulse. That exceeds the stated motor capabilities, but higher kW motors are available if I want to go that route sometime down the road. Controller and BMS can handle it.
 
EmVeeTee said:
It's a 20S10P built from 18650s. I believe the dimensions are 10"H x 5.5" W x 6.6"D. I went with a cell that gives me only 30Ah but in a 20S10P can crank out 150A Continuous/250A Pulse. That exceeds the stated motor capabilities, but higher kW motors are available if I want to go that route sometime down the road. Controller and BMS can handle it.

Hi,

My battery is 7.7 x 9 x 5.5. I am guessing your space is larger than mine.

As for the motor, you can safely overdrive it quite a bit from what I have read here.
 
Been a few weeks since I posted an update. Yesterday I performed the angle identification procedure with the QS motor and Kelly controller. I had an old Kindle Fire and was able to get the Kelly controller app loaded onto it and it works great with the bluetooth controller adapter. I wanted to do this off-bike (plus I'm still working on the swingarm) so I made a simple wood mount and set it up on sawhorses.

9Tx3dOQ.jpg

EAqBJaz.jpg


After the photo above, I wired in the contactor and keyed ignition switch. Just hearing the contactor clunk to life with the key was exciting.
ztbEboY.jpg


I couldn't get the Domino throttle to spin the motor, but I was getting throttle input in the app and I could see the hall sensor values changing as I spun the wheel manually. Many thanks to @Resistor for helping during this process and with frustrating troubleshooting. Eventually I pulled and reconnected the wires for the Domino and it all started working! Seeing the wheel spin with the throttle and hearing that motor noise was a big deal.

From there I took it all apart and made a mounting plate for the controller, attaching it to the old spare tire mount in the left cowl area. I used some angled aluminum to mount the contactor and the shunt for the battery monitor. I'm not sure if that will ultimately work with the heavy gage wiring, but I'll see. Easy enough to come up with something else.

USBqjvO.jpg

1pBZUdE.jpg


As I've mentioned before, this project isn't going to win any concours prizes! I did another fitment of the battery after making a bracket underneath the battery. You can see the ground bus bar on the right and 72V to 12V converter mounted in the back.

x3fmlE3.jpg


All of the motor/controller pin plugs will connect and sit nicely under the battery bracket and will be easy to access. I re-mounted the Domino throttle on the throttle tube and I think it's going to be a nice clean install.

xN932ZB.jpg


Next I'll be finalizing wiring runs and cleaning them up and wrapping them. I'll wire in the 12V converter and make sure all of the 12V side still works. Then I wait until the swing arm is completed and fire it up. I should have swing arm parts back this week and I can test fit some things.

I also purchased an upgraded rear shock upper mount that has two attachment bolts instead of one. It is much beefier than the stock mount and I'm waiting to install it until I have the swingarm in place as I think it will give me some latitude to tweak the rear shock placement if needed.

s321136087814461186_p540_i3_w160.jpeg


Lastly, as I was drilling the holes into the scooter body for the battery shelf - I drilled a hole into my index finger. I thought my hand was clear but the drill bit came through much faster than I had expected. Idiot moment. I won't post a pic but it drilled a perfect circle about 1/2" into my finger and just spun everything around. Ouch. Be careful with those power tools, kids.
 
I haven't updated this post in a while, but thought I'd close it out. I completed the conversion about 2 months ago and I'm very happy with the end result. Performance is beyond what I had expected and the Stella is much better-balanced now than it was with the big ICE hanging out the ride side.

I spent quite a bit of time riding around with a tablet, tweaking controller parameters as I rode, to see what the real world effect was with them. At one point I got kind of greedy (stupid) and allowed too much current to pass to the contactor. My battery pack can peak at 250A for up to a minute and my contactor was rated at 72V/200A. I managed to fry it, but boy it was quite a ride for that 45 seconds or so. Wheelies on a steel scooter is white knuckle territory. I pushed it home and ordered a 400A contactor.

That took a few weeks to arrive and as I was installing it, I broke one of the wires on the contactor relay and had to order some of those from China. That took over a month to arrive. So that's the main reason I haven't updated anything....I was waiting on logistics from China. But the resistors arrived yesterday and I was able to get back on the road quickly.

Today I have been finalizing controller parameters and beginning to measure performance and battery life/range. The scooter will very easily do 50MPH and based on what I'm seeing after using up half of the battery power, I'd expect to have a 40 mile range. I spec'd the battery pack for max performance and not long range, so this is exactly what I had planned and hoped for. When I looked back on 15 years of urban scootering, I realized I pretty much ride as fast as I can go for a few miles at a time.

Here are some final pics and if I get around to it, I'll post a riding video. It is so different to ride through a neighborhood with only the rattles and dim whine of the motor. Overall I'm very happy and proud of this project. I knew almost nothing about how to go about this. I messed lots of things up and purchased little bits I didn't need or weren't correct. I would do it again in a heartbeat, and probably will. Cheers - Michael

RDAVIIs.jpg

s3BYOpM.jpg

UOqSPXT.jpg

wmtcPo2.jpg

GhcIADb.jpg

p3DlgdN.jpg

3LZbVfE.jpg

mQJ6JgK.jpg

jjihBbY.jpg

f1Cojev.jpg


I didn't spend much time or money at gas stations with the ICE, but I still find great pleasure in plugging it in and filling up the tank!
gSVolcm.jpg
 
Back
Top