*Dusting off the 1000lb of laptop batteries

dequinox

10 kW
Joined
Oct 31, 2009
Messages
955
Location
Eugene, OR
UPDATED
10/30/17

It's been a year or more, so I decided it's time to dust off this project. Building a battery finally, 12s8p. I will monitor with cell-logs and split the pack in half when charging/balancing with two Lipro chargers.
_ _ _ _ _ _ _
5/14/16

I've tested the idea that cells in pairs will show a lower IR value than each individual cell has. Surprise, surprise... Ohm's law holds for battery IR values as well as regular resistors.
_ _ _ _ _ _ _
5/4/2016
I've added a video kind-of going over the equipment I pulled together to process all the cells I kept for me-self.
_ _ _ _ _ _ _
9/2/2015
I've built a charging setup and ran an initial charge test. See the results on page 2.
_ _ _ _ _ _ _
This thread will be to document the teardown, testing, recovery, and subsequent pack-building associated with the pallet of laptop batteries I purchased from a local recycle place on June 30 (happy B-day to me!).

Please see the other thread for inquiries about purchasing lots of laptop batteries from this bulk purchase. I'll be selling them off for super cheap in the near future.
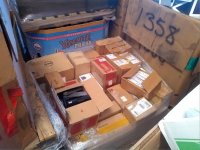
Pallet O Battries.jpg

Please drop in from time-to-time for updates on how this goes.
 
Well Happy B-day!
 
Teardown
Many packs can pop open by twisting
Can also stand on long edge and strike square (non battery contacting) corner lightly with hammer
Tough ones can be put in freezer then tapped along seam to crack open (I use 3/4" wrench)
Dell C series batteries are the tough nut to crack!

Bulk Testing
Leave connected, in pairs-trips etc with tabs intact - much easier to test and build by soldering tabs
Parallel quantities and charge all to identical voltage
Separate and allow to set for several days
Eliminate any with self discharge ... ebeach and dumun might want them?
Group cells by same brand, capacity etc.
Run comparative IR test - Set your Accucell8 to 1A discharge (~.2C, or higher) and timer 1 minute, mark each pair with voltage sag still discharging at 1 min (eliminates obviously poor or 1 of pair bad - and ... gives a capacity estimate among same type cell)
Rig as 30s, (tabbed as 2p = 60 cells per batch - 3p = 90 - 4p = 120), and discharge with 2-60w light bulbs 120W / ~120V = 1000mAh per hour for accurate capacity (3 hours discharge = 3000mAh + remaining voltage (3000mAh + 3.75V))
3 x 60w = 1500mAh/hr
4 x 60w = 2000mAh/hr
1 x 100w = 833mAh/hr
2 x 100w = 1666mAh/hr
3 x 100w = 2500mAh/hr
4 x 100w = 3333mAh/hr

Sustained discharge should be less than .5C (5200mAh discharging < 2600mA = 2.6A)
 
Be careful batteries can make fire. There is a potential of stored energy. If shorted or mishandle. For a battery to work over time it's best to match cells.
 
Well I was going to see if my pellet stove could burn them, but they look too big...

:x

Ha ha ha YES I plan to have fun with this. I'm not going to process and test all of them, just enough to get a couple kWh worth of ebike batteries for myself. The rest are going to get sold for others to tear down, or whatever they would like to do with them.

Some of the dead cells are going to end up as fodder for a spot welder I'd like to build.
 
i explained on your other thread how you have to proceed. you have to measure capacity on each and every one of these cans so there is some basis for further work with them.

until you know if they will store charge and how much charge they can store they are of no value at all.

you have to build up a charging rig that will hold the cans, with the tabs all stripped off down to the bare can so you can test each can individually, in parallel so you can charge them all up to the same full charge voltage of 4.20V or a little higher if it takes that to bring them all to 4.20V.

then take the cans and connect them in series in another testing rig that allows you to monitor cell voltage as you discharge the battery you build from these individual cans. when each can reaches the 3V level then record the Ah discharged to that point on the outside of the can and put it in a rack to hold it until you make your final culling sort. you will have to remove the can from the series when it reaches full discharge so you need to have a jumper wire to replace it in the series until all of the cans are evaluated for capacity.

then assemble cans with similar or identical capacity and recharge them again and build another series battery with them and then test the voltage sag on each cell as you discharge this battery so you can come up with a number for the relative internal resistance on each can.

with those numbers you will then be able to sort out the cans in such a way that they can be assembled into a battery that may be almost balanced and it would still require a fairly strong balancing current from the BMS to keep the pack you build from this scrap balanced.
 
I have a bin of laptop batteries I have been saving for when I make a solar setup. From the cells I have removed so far I found that half of the cells will sit at a good voltage and the others will be below 2v. I think the reason laptop batteries fail is because one string of cells goes below the 3v and the laptop will not charge them even though they are good, then later they keep loosing voltage and fail all together from being under 2.5v for so long. My advice is don't mess around with the below 2.5v cells and just focus on the 3v+ cells. I recently pulled out my old mini vaio laptop which was the $2,000 model back in the 2005 days and my extended battery(also very expensive, $250) I had in it would not charge. Luckily with this expensiver battery they put nice screw holes so I could crack it open quite easily. Two strings of cells were at 2.5v. Used my b6ac charger and brought them to 3.3v to match the one good string of cells and battery works just like new. This was after sitting for about a year, I could only imagine another year and maybe I wouldn't have been so lucky.
 
my original point was that since you do not know the history, you cannot even assume anything about the cans that are not fully charged when you first examine them.

it does not damage a lipo can to sit for long periods at low state of charge. that is actually the best way for them to be stored.

the problem is not knowing which cans will store charge any more and which will not. the only way to know that is to actually measure it with the wattmeter as i instructed.
 
dnmun said:
... with the tabs all stripped off down to the bare can so you can test each can individually, in parallel so you can charge them all up to the same full charge voltage of 4.20V or a little higher if it takes that to bring them all to 4.20V.

then take the cans and connect them in series in another testing rig that allows you to monitor cell voltage as you discharge the battery you build from these individual cans. when each can reaches the 3V level then record the Ah discharged to that point on the outside of the can and put it in a rack to hold it until you make your final culling sort.

then assemble cans with similar or identical capacity and recharge them again and build another series battery with them and then test the voltage sag on each cell as you discharge this battery so you can come up with a number for the relative internal resistance on each can.

with those numbers you will then be able to sort out the cans in such a way that they can be assembled into a battery that may be almost balanced and it would still require a fairly strong balancing current from the BMS to keep the pack you build from this scrap balanced.
Please don't listen to dumun!
Separating all cells and removing tabs is:
A waste of time and energy;
Serves no purpose ... unless you are building 1s1p battery packs;
Makes testing more difficult and time consuming;
Makes soldering much more difficult and dangerous!

Discharging LiCoO2 cells below 3.5V is not necessary and needlessly damaging ... there is negligible energy there!
(There is minimal capacity below 3.6-3.7V, but voltage sag to 3.5V is to be reasonably expected during modest discharge - on typically available recycled cells)
DrkAngel said:
My 1st test ...
I decided to map cell capacity using a mAh/10thV

Tools -
MeanWell 24V bulk charger (19.8 - 29.8V adjustable)
30V 4 digit volt meter, 100ths capable
Ah meter

I discharged my 25.9V recycled Lipo pack to 24.5V.
Then precisely equalized the cells at 3.50V.
I applied charge with MW (MeanWell) set to:
25.20V (3.60V) - full charge required .27Ah
25.90V (3.70V) - full charge required .53Ah
26.60V (3.80V) - full charge required 3.87Ah
27.30V (3.90V) - full charge required 3.15Ah
28.00V (4.00V) - full charge required 4.60Ah
28.70V (4.10V) - full charge required 4.10Ah
29.40V (4.20V) - full charge required 1.85Ah
(Ah is capacity between each .10V)
See - Capacity Mapping for graphs of current density of the cells I've used

Running a comparative IR test on like cells before a capacity test allows you to group cells of similar capacity in series, largely eliminating the probability of needing to remove weaker cells prematurely!

And PLEASE! ... don't let him convince you to skip the self-discharge step!!!
Building banks of equal capacity and most importantly, removing self-discharging cells, creates a build with no "need" for any balancing device ... the pack will not "unbalance" itself.
(Always monitor bank voltages though.)
 
Wish I could fall into a deal like this in Arizona. I would love to have a bunch of those battery packs. Now the "but". What kind of cell count are in the packs? I like to get 9 or 12 cells. I just bought 645 cells (in laptop packs) and have found different types of cells in several different units. Some of the cells are only coming in at about 1400 mAH. per cell, while others are 2400 mAH. I'm happy it seems most are of the later and not the former. I open the packs using a pair of locking pliers, most people use the name Channel locks. I first run a knife along the seam of the pack. Then I use the pliers to grab any part I can and just twist . I may break off pieces, but if I get an opening I use some long nose pliers and my knife to open the pack. I can open a pack in under one minute. I pop out the cells and clip all the wiring and then use cutters to cut cells apart. Then I take the tabs off the batteries and then test them. Takes a long time, but time is all I have.

One problem with offering these batteries for sell is the problem with shipping. I know that some people ship Lithium batteries via the Post office in the one price boxes and don't tell the Post Office that they are shipping these batteries. This is illegal. Lithium batteries must be shipped via ground transportation. I had a problem with some bad cells (1000 units) which I thought I was getting a great deal (Ultra Fire crap cells). Cells barely made 400 mAH when they were said to be 5000 mAH cells. I had to ship them back at my cost....$58!

So if the cost of the batteries can offset the shipping cost then buying them might be a good deal.
 
DrkAngel said:
Please don't listen to dumun!
...
And PLEASE! ... don't let him convince you to skip the self-discharge step!!!

Thank you for your viewpoint, and I see a lot of merit in your method of recovering cells from these packs. I intend to read and re-read your thread(s) on this before I get into full swing recovery work on these. I will consider dumun's viewpoint carefully, as I have yours, and come up with a method that works best for me, and that is safe. Keep your eyes on this, and you might see an interesting thing or two that you haven't tried.

dnmun said:
i explained on your other thread how you have to proceed. ...

Let me be clear, I don't "have" to proceed according to any particular advice. I will read what people have to write, and form a method of recovery that I feel will produce sound results based on the experience that people here share. I'll consider your advice just as carefully as I will that of others.

wb7dyu said:
One problem with offering these batteries for sell is the problem with shipping. ...

I know there are some restrictions on this, and that's one of the challenges to selling these over distance, which is why my intent wasn't really to "sell" them. It's going to be more like "FREE + A SMALL HANDLING FEE + SHIPPING".
I don't intend to make money here... the situation is that I have WAY more than I'll need for my builds anytime in the near future, and I want to spread the deal I got around a little.

:!: The fellow at the recycling place hinted that there may be more of these available in the future as well. :!:
 
Oh I believe there will be more in the future. But after dealing with used cells. I bet you will buy new cells of known quality in parallel spot welded strips to solder in series as you like. The reason is it's for an ebike and not a flashlight. Different demands. You will need to build larger parallel string of used cells to make work.
 
999zip999 said:
Oh I believe there will be more in the future. But after dealing with used cells. I bet you will buy new cells of known quality in parallel spot welded strips to solder in series as you like. The reason is it's for an ebike and not a flashlight. Different demands. You will need to build larger parallel string of used cells to make work.

What this guy means is that laptop batteries aren't designed for high C rate. But of course you already knew that, that's why you got a Pallet! :lol:

If you look at a discharge curve

courtesy of this guy who tests most batteries for fun

This is an example, some UR18650ZT I got from Lenovo packs. As you can see at 5 Amps they don't last long and the relationship isn't linear. This particular battery seems to enjoy a 0.2A discharge rate, but also looks ok at the 0.5A range. I wonder what they experienced in a 6-cell laptop!?

So yeah, the more you put in parallel the less stress there is on an individual cell because they're sharing the load (you're hub motor draws 20 amp continuous?)

Good luck with the tear down! and if you come across any orange Sanyo "UR18650ZT" lemme know!

Cheers
 
"Let me be clear, I don't "have" to proceed according to any particular advice. I will read what people have to write, and form a method of recovery that I feel will produce sound results based on the experience that people here share. I'll consider your advice just as carefully as I will that of others."

clear as you wanna be but if you don't follow some organized and sensible plan it will be just a waste of time.

how many others here have actually tested thousands of lithium cells to determine which to use in building a battery up from scrap battery packs?

since you have no experience it seemed appropriate to try to educate you about the issues that are the most important rather than watch you waste months and months for no purpose.
 
Like I said, I'll build my process based around your advice and that of the others on ES who've done this. I'm not trying to be rude, I'm trying to preempt anyone getting on here and chastising me for not doing it exactly the way they would. I plan on documenting the process as much as I have time to, and I don't want people posting "HEY THAT'S NOT HOW I TOLD YOU TO DO IT!!!" along the way.

...of course I can't control that, but I thought I'd at least address it.

jaunty said:
What this guy means is that laptop batteries aren't designed for high C rate. But of course you already knew that, that's why you got a Pallet! :lol:

I am aware of this... and yes I plan to build upwards of 20P configurations. I'm thinking no more than 8s since that is what I have a charger for... so something like 8s20p. At 2.2 Ah (assumed...) that puts my pack capacity at 29.6V x 20 X 2.2Ah = 1.3 kwh. An example of a potential layout is below:


For those who can't see it (i.e. all of you) it's about 8" x 11" x 2.6".

I'm not looking to dump power out of these... hopefully my cruising power consumption will stay at about 35 Wh/mi... which is what I was getting before. I think it stayed under 20 amps most of the time which puts the discharge rate at about 1 A per cell... on a 2.2Ah cell that's .45C.

Thanks for the input!
 
For low-power applications they will be good(unless they just don't have capacity).
But be prepared to invest countless hours for testing.

From my experience dissasembling about 100laptop batteries you shoud:
1. Take apart and have 1s2p (most batteries are in 3s2p), or 1s3p
2. Charge them in a tp4056 charger. Prepare multiple chargers(i would recommend at least 20).
3. If charged let them stay for a day and throw out these who lose voltage(eg. below 4.1)
4. Discharge all cells at even current and separately. Write parameters (current, maH discharged, internal resistance)
At the end you should have grouped 1s2p cells ready to be matched and welded.

I just shared the procedure i used. It took me about 4months to test 600cells...I am using 5tp4056 and RC charger Raytronic c60 (two-channel).

Cheers

//btw, what program did you use to create schematics in the previous post?
 
dnmun said:
how many others here have actually tested thousands of lithium cells to determine which to use in building a battery up from scrap battery packs?
I started testing another batch of 1000+ cells this week ...
Took me about 2 days to remove from packs and charge in batches to identical voltages.
Letting set a few days to indicate and eliminate self-dischargers.
Quick IR test then sort into 30s2p batches for 1A/hr discharge-capacity tests.

Might take 7-10 days of spare time effort to accurately test and rate 1000+ cells ...

See - Bulk Capacity Testing
 
atomek1000 said:
//btw, what program did you use to create schematics in the previous post?

That was done on autocad at my work.
 
Rough sorting to series strings that hold a charge not a bad place to start IMO.

You have so many, too many to cut every single one into individual cells. But surely you can find a few 18v strings that seem to be all ok in a batch that big. You will need to figure out a rig to easily single cell charge them to a state of balance, and to test voltage later with.

I suppose you could bulk charge them initially, but it could take a long time to bring a pack to balance that way. But you might identify some that do rough balance on a quick bulk charge.

Still going to be a shitload of soldering to take small 18v strings, and parallel the balance wires to get larger 18v strings. But that soldering should be quick and easy, compared to soldering fat wire to individual cans.

Also quite possible you will need to chop up packs to 3s or 4s or whatever, to cut out sections with bad cells. Not a bad strategy anyway, 3s sections that can be removed from a larger pack for repair or replacement.
 
Step 1 - Bulk Charging
Much simpler to charge in 3s oem packs.
Use MW S-150-12 at 10.5V and 1A to "precharge" cells above 3V. Very little capacity below ~3.6V, so should get there quickly ... if cells hold voltage.
With large quantity of 3s packs, with all cells holding between 3-3.5V, parallel all by wrapping tab protrusions with 22ga tinned copper braid, or bare wire. (no soldering - easy separation)

file.php
(3s24p charge banks)
Dependent on size of parallel group, set MW S-150-12 to 12.3V - and up to 12A, (keep charge rate below .5C)
MW S-350-12 ≤ 28A
Attaching leads in center of each end rail helps charge faster and more evenly.
Monitor cells for any heat production and be prepared to cut out of group.

As cells approach 4.10V, very likely, banks will vary in voltage.
Bleed down higher bank(s) using jumper wires to discharge device. I used jumpers attached to different points on the legs of soldering gun tip, but recently acquired 12V 3.33A 3D printer heating elements with nice long wires - added alligator clips and place heat element in bottle of water.
When banks are equalized, turn voltage to 12.6V and finish charge.
Separate after cells maintain ~4.20V and let set ... to check for self-discharge.
(I recommend, for a few days - you do not want self discharging cells unbalancing your battery build! You could use a BMS to constantly bleed down all the good banks that don't have self discharging cells ... but that sounds idiotic ... to me!)
I gave up using any type of BMS ~5 years ago and instead rely on self discharging cell elimination, accurate bank capacity matching and bank-cell level voltage monitoring.
to be continued - Step 2 - Comparative IR (Quick Condition-Capacity Estimate)

Note: Cheap multimeters might vary from actual-true voltage. Compare to some quality standard and most can be adjusted - recommend adjusting for 12vdc?
 
Step 2 - Comparative IR (Quick Condition-Capacity Estimate)
After letting equally charged cells set for several days(?) ...
Carefully measure voltage and eliminate any with notably reduced voltage self-discharge.

Comparative IR (Internal Resistance) - the concept

"Internal Resistance" is commonly viewed as the voltage sag of a cell under various discharge rates. (Commonly rated at a 1C discharge rate)
Cell composition and manufacture produce cells with a wide variance ... for different applications.

Most believe that a cells IR gets worse with age and wear.
After testing thousands of cells and monitoring their deterioration over the years ...
I have come to observe-believe that IR remains stable ... as cells wear out.
Most will disagree!
IR is based on capacity and IR deteriorates as cells wear out ... when based on original capacity.
However!, when based on cells current capacity, IR remains reasonably constant.

So ...
With cells of same manufacture - manufacturer, batch, date etc. ...
IR can provide a reasonable estimate of current cell capacity.

I use "my" "Comparative IR" test to eliminate any substantially deteriorated cells and ...
to match cells for running a full capacity test in batches of 30s2p,3p or 4p.
Batching (like manufactured) cells of similar IR has proven (largely) to match cells of similar capacity! (occasional deviant)

1. So, with large quantities of cells, 1st, batch cells of same brand, capacity similar date of manufacture (if possible) etc
2. Use a discharge device to perform identical discharges.
With 3s2p = 5200mAh and 3s2p 4320mAh I used a 2.6A 12V fan and progressed to a 3.44A 12V heating element in bottle of water. (Fan had super sharp blades and would move if not secured )
3. At 1 min. I metered voltage and marked cells with voltage sag = Comparative IR - (From cells of identical starting voltage)
4. Then quickly check and compare each of the 3s
5. Combine "like manufacturer" cells of similar IR for next step ...

Continued - Step 3 - Bulk Discharge-Capacity Testing
 
dequinox said:
DrkAngel said:
Please don't listen to dumun!
...
And PLEASE! ... don't let him convince you to skip the self-discharge step!!!

Finally someone had the balls to say it :lol:

I have followed DrkAngel's testing process with great results.
 
Pricing has been posted in the other thread, here.
 
Back
Top