LightningRods
1 MW
You may have noticed that Recumpence just started a thread with a title very similar to mine. He's more concerned with being first than being best, but otherwise it's the same idea.  I've been talking about starting a Qulbix build on the Lightning Rods Mid Drive thread for some time. Matt was also about ready to start his Qulbix build and so he suggested that we start our builds at the same time.
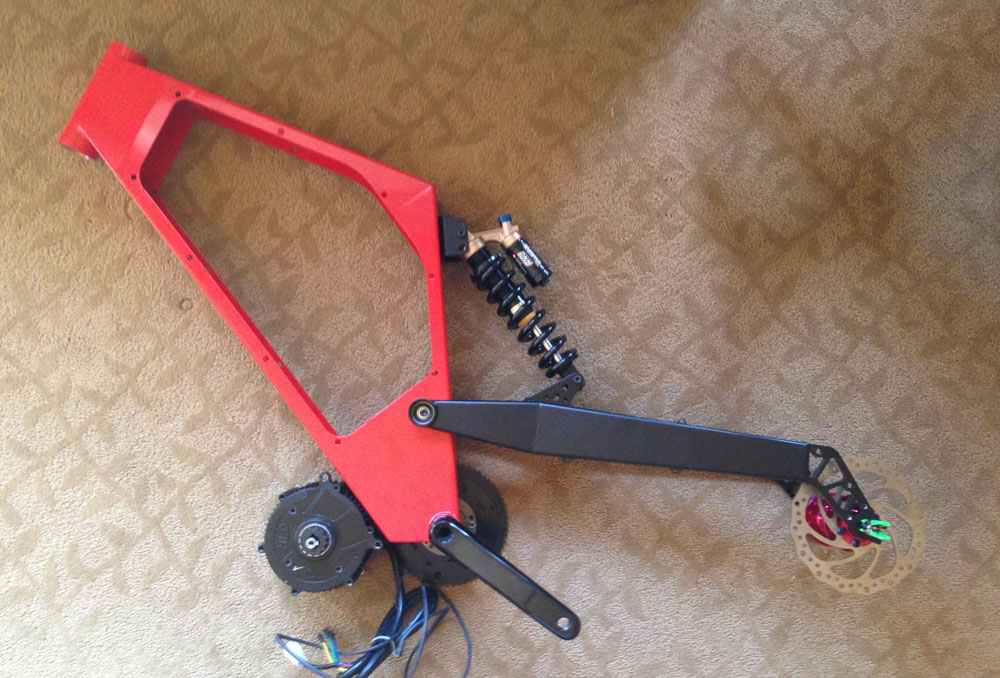
The Qulbix is the most popular off road ebike frame. It's rugged, reasonably light weight, has a nice big battery box built in, and the company is responsive and pleasant to deal with. They're located in Eastern Europe and so their pricing is very good. My only beef with them up to this point is that they have all been hub motor bikes. About 19 months ago a customer contacted me and asked if I'd build a mid drive for their Q140R. I said yes, they shipped the bike to me, and then they got into financial trouble. The bike sat and eventually was sold to another owner. Early this year Mammalian shipped his brandy new Q76R to me and I was back in the Qulbix business.
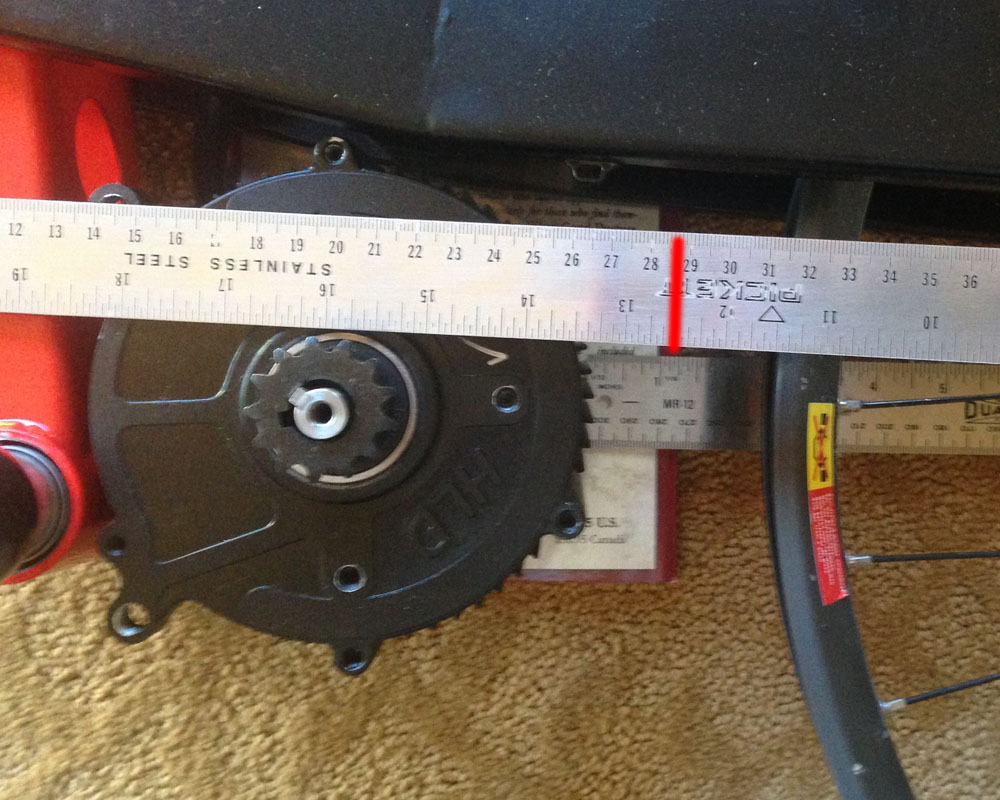
This is going to be an interesting build! I'm actually building two different Qulbix drives at the same time. One is going to be an evolution of my existing mid drive. It will use my Big Block motor and run through two stages of motor reduction, both being #219 racing kart chain. I'm making custom laser cut stainless steel chainring sprockets. This drive will have 1/2 the reduction of my normal mid drive, assuming that users will be running in the 3000-5000 watt range. The increased rpm at the chainwheel will go to a custom 7 speed rear gear cluster, again laser cut stainless steel. My plan is to use much higher tooth count rear sprockets to reduce driveline stress and to eliminate tooth skipping in the high speed gears.
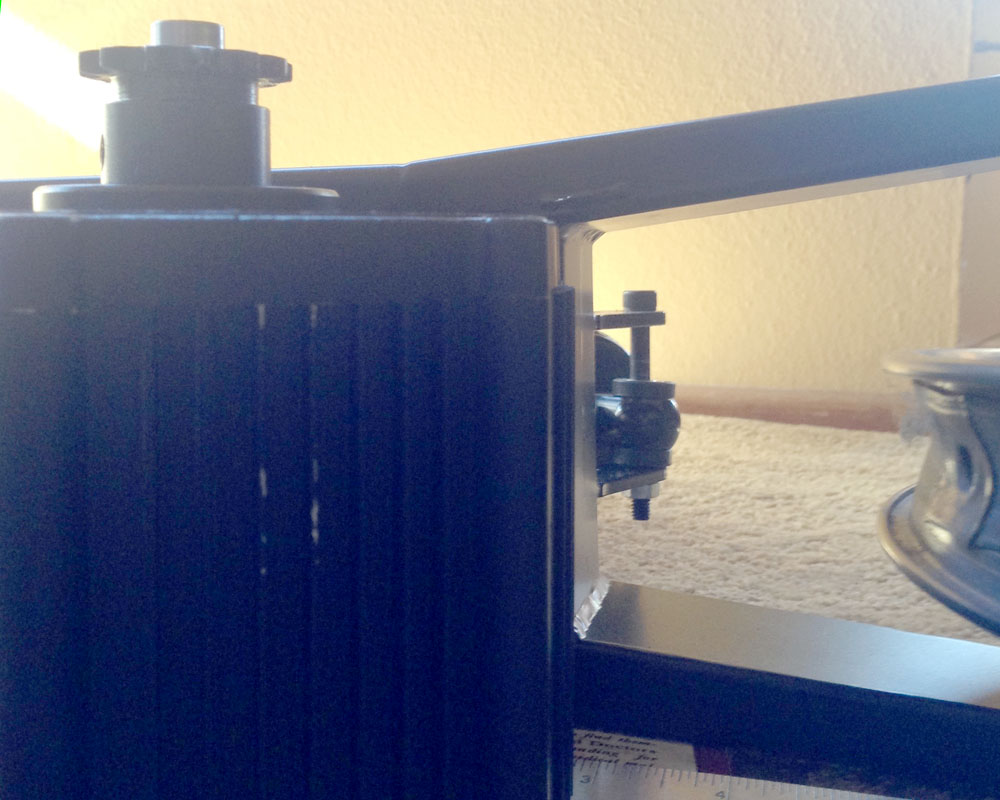
The other Qulbix drive will also be a Big Block, but this one will be single stage reduction to the left side. I've come up with an idea for a way to mount a driven sprocket on the left side of the wheel without disturbing the location of the disc brake rotor and caliper. I'm using the 165mm dropout width to make room for a big fat knobby tire on the back. I'm having a custom billet hub made from 6160 for this application. The right side will have a normal bicycle gear cluster. It won't have to be anything special because it won't see anything but human power. The idea on this single speed drive is that it will be high voltage for a wide power band with as much power as the big motor will make.
Doing my builds the same time that Matt is will no doubt make for some interesting comparisons. I'm building a hot Mustang GT to Matt's Ferrari. Or maybe I'm building a Ford GT40 to his Ferrari. You just never know.
Game on!
Mike
I've been talking about starting a Qulbix build on the Lightning Rods Mid Drive thread for some time. Matt was also about ready to start his Qulbix build and so he suggested that we start our builds at the same time.The Qulbix is the most popular off road ebike frame. It's rugged, reasonably light weight, has a nice big battery box built in, and the company is responsive and pleasant to deal with. They're located in Eastern Europe and so their pricing is very good. My only beef with them up to this point is that they have all been hub motor bikes. About 19 months ago a customer contacted me and asked if I'd build a mid drive for their Q140R. I said yes, they shipped the bike to me, and then they got into financial trouble. The bike sat and eventually was sold to another owner. Early this year Mammalian shipped his brandy new Q76R to me and I was back in the Qulbix business.
This is going to be an interesting build! I'm actually building two different Qulbix drives at the same time. One is going to be an evolution of my existing mid drive. It will use my Big Block motor and run through two stages of motor reduction, both being #219 racing kart chain. I'm making custom laser cut stainless steel chainring sprockets. This drive will have 1/2 the reduction of my normal mid drive, assuming that users will be running in the 3000-5000 watt range. The increased rpm at the chainwheel will go to a custom 7 speed rear gear cluster, again laser cut stainless steel. My plan is to use much higher tooth count rear sprockets to reduce driveline stress and to eliminate tooth skipping in the high speed gears.
The other Qulbix drive will also be a Big Block, but this one will be single stage reduction to the left side. I've come up with an idea for a way to mount a driven sprocket on the left side of the wheel without disturbing the location of the disc brake rotor and caliper. I'm using the 165mm dropout width to make room for a big fat knobby tire on the back. I'm having a custom billet hub made from 6160 for this application. The right side will have a normal bicycle gear cluster. It won't have to be anything special because it won't see anything but human power. The idea on this single speed drive is that it will be high voltage for a wide power band with as much power as the big motor will make.
Doing my builds the same time that Matt is will no doubt make for some interesting comparisons. I'm building a hot Mustang GT to Matt's Ferrari. Or maybe I'm building a Ford GT40 to his Ferrari. You just never know.
Game on!
Mike