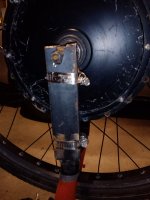
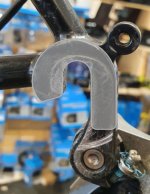
Options for fixing over filed axle dropout?

Joined
Aug 23, 2021
Messages
64
I'm working on an e bike conversion from my steel road bike, 1000w 48v rear hub. I've sent it to the e bike workshop for tuning and they have inspected the filing I did on the rear drop out to fit the new axle.

Sadly, the mechanic thinks it's suspect, not terrible, but not great, based on the fact that I unfortunately, in my inexperience and limited mechanical and biking knowledge, filed a right angle and created a weak point.

His assessment was that it's probably ok to ride for a bit, but it might fail at some point. He was unable to offer much more of an opinion on how safe or otherwise it was, but the lingering doubt is enough for me to want to nip it in the bud.

Other than feeling crap that I messed up, I'm wondering what my options are to fix it. I suggested welding and re-filing, which apparently should work.

Does anyone have any opinions/advice on this? Would really appreciate it.

Pictures here: https://postimg.cc/gallery/8W7qTGV

And a second opinion on the structural integrity would be welcome as well. Thanks in advance.
 
LewTwo said:
Works for camshafts .... should suffice for bicycle frames as well as long as there is good (100%) penetration.
Not always :/ A teenage attempt at changing the cam grind on a 125cc commuter motorcycle didn't end well for me, it welded fine, insulated it to cool slowly, no visible issues after grinding and polishing but it fell out after about 20 miles all the same (no big loss, ran like crap anyway). Some alloys don't weld easy, almost certainly not an issue here but it may apply to some bike frame material builders come across. A lot of 60s and 70s race motorcycle frames where (bronze) brazed for a reason, welding would have been weaker.

Looks like you've got loads of thread length to spare so that should be an easy job for the welder, just a disk/plate on the outside faces. Cutting those will take much longer than welding them, if you've got the option of cutting and shaping those yourself then it could save quite a lot on the cost.
 
stan.distortion said:
LewTwo said:
Works for camshafts .... should suffice for bicycle frames as well as long as there is good (100%) penetration.
Not always :/ A teenage attempt at changing the cam grind on a 125cc commuter motorcycle didn't end well for me, it welded fine, insulated it to cool slowly, no visible issues after grinding and polishing but it fell out after about 20 miles all the same (no big loss, ran like crap anyway). Some alloys don't weld easy, almost certainly not an issue here but it may apply to some bike frame material builders come across. A lot of 60s and 70s race motorcycle frames where (bronze) brazed for a reason, welding would have been weaker.

Looks like you've got loads of thread length to spare so that should be an easy job for the welder, just a disk/plate on the outside faces. Cutting those will take much longer than welding them, if you've got the option of cutting and shaping those yourself then it could save quite a lot on the cost.

Thanks. All I've got is a file, which I'm clearly not very good with. Does the cutting require something more industrial?
 
MaximilianMM said:
...
Thanks. All I've got is a file, which I'm clearly not very good with. Does the cutting require something more industrial?
It shouldn't, a vice, hacksaw and file is all you should need. Not a big job, just a fiddly one and a junior hacksaw (the small ones, about 6" blade length) would be fine, I prefer them for that kind of thing as the thin blades cut faster. Wasn't sure if the frame was steel or aluminium from the pics, looks like aluminium from the colour and welds but it looked like there where a few brown rust spots too. If it's steel and there's enough thread length you could probably just cut and file a couple of M10 or M12 nuts but if it's aluminium then you'll need some plate of the right grade, better of asking the welder what to use in that case as they'll explain what they want and probably have some offcuts of the right grade to hand. They'll probably also want to add some bracing too, probably just a couple of strips/triangles to fill in the V if it's steel but maybe bigger pieces covering the dropout and extending up the frame tubes if it's aluminium.
 
stan.distortion said:
MaximilianMM said:
...
Thanks. All I've got is a file, which I'm clearly not very good with. Does the cutting require something more industrial?
It shouldn't, a vice, hacksaw and file is all you should need. Not a big job, just a fiddly one and a junior hacksaw (the small ones, about 6" blade length) would be fine, I prefer them for that kind of thing as the thin blades cut faster. Wasn't sure if the frame was steel or aluminium from the pics, looks like aluminium from the colour and welds but it looked like there where a few brown rust spots too. If it's steel and there's enough thread length you could probably just cut and file a couple of M10 or M12 nuts but if it's aluminium then you'll need some plate of the right grade, better of asking the welder what to use in that case as they'll explain what they want and probably have some offcuts of the right grade to hand. They'll probably also want to add some bracing too, probably just a couple of strips/triangles to fill in the V if it's steel but maybe bigger pieces covering the dropout and extending up the frame tubes if it's aluminium.

Cheers, that's super helpful. The frame is steel.

I've never done anything like this before. Would you recommend going to a specialist frame builder or should any welding shop be ok?
 
I think it's fine as is. Your filing didn't touch the thickest part of the dropout. You could get a round (rat tail) file to smooth out the corners a bit so the stress is perhaps a bit better distributed. But personally I'd be fine the way this looks on a road bike (less so on something that sees more impact). Steel is nice because it generally does not fail in a drastic and immediate fashion - just be aware of it and inspect for cracking or bending every month or so.

Unless it's a very small [friendly shop], it's probably going to be at least $100 for a welder to do anything on this. Not worth it IMO unless the frame is very nice to begin with or has sentimental value.
 
MaximilianMM said:
....
Cheers, that's super helpful. The frame is steel.

I've never done anything like this before. Would you recommend going to a specialist frame builder or should any welding shop be ok?
Any but I'd try car exhaust places first as they're more likely to be using TIG than MIG, either would do but TIG is better suited. Seeing as it's steel it could also be brazed, might be easier to find (most car garages would be able to do it) but I'd put some bracing in the V if brazed as it wouldn't offer much support to the area you've filed thin. It may be ok as-is, if it was mine I'd probably try it but I wouldn't call it safe, it's been significantly weakened and it's being asked to handle many times the load it was originally designed for.
 
As COAR stated, probably OK as is, but I would add two good torque arms, check regularly and don't employ regen if the system allows it.
 
This is the way we learn. I would not sleep well with a right angle, this may not be good advise. I would take a rattail file and round it but do not cut any deeper if that has meaning to you. Always called them stress risers.
 
If you aren't running them already, I'd install some torque arms, one on each side, and ride it. If it does fail (maybe, maybe not), you'll be right where you are right now - looking for a welder. That's worst case.
 
Thanks all for the detailed responses, I really appreciate the advice. I feel like an absolute lemon!

I've had a range of responses (not just here), from 'it'll be fine', to 'it'll open up like a can opener immediately', fwiw. So I definitely want to err on the side of caution and either fit new dropouts (I've been quoted $600 AUD which seems steep), if I can find them cheaper, or get a re weld to bolster it. And certainly fit two torque arms (I already had a Grin V4 on there).

The frame builder I talked to raised the question of whether this frame is even sturdy enough for a motor.

Any thoughts on that?

Also if anyone is able to advise on what a reasonable price for replacement dropouts and labour would be that'd be awesome.

This is the frame: https://road.cc/content/news/90334-genesis-unveil-equilibrium-disc-2014
 
MaximilianMM said:
The frame builder I talked to raised the question of whether this frame is even sturdy enough for a motor.

Any thoughts on that?
Sorry no easy yes or no answer here; depends on the power you're feeding the motor, your weight, riding style, road condition, etc., all of which we know nothing about. :?

BTW, those (don't know what they are called) recessed? alcove? indented? dropouts are often problematical for hub motors. The washers may not fit, axle nuts almost surely will not, and harder to get the TAs to line up nicely with the stays.

Since you are this far, why not continue on? The Grin TA v.4 are good quality TAs and if you can get them securely fitted you may be alright. Unless you are a heavy rider hammering the throttle and regen on cobblestones and jumping up and down curbs lol (but probably not because-- roadbike).
 
I had a broken steel dropout (bike was at least 20 years old) that our local framebuilder repaired for $75 since he had some extra dropouts and just charged for one hour labor.
 
99t4 said:
MaximilianMM said:
The frame builder I talked to raised the question of whether this frame is even sturdy enough for a motor.

Any thoughts on that?
Sorry no easy yes or no answer here; depends on the power you're feeding the motor, your weight, riding style, road condition, etc., all of which we know nothing about. :?

BTW, those (don't know what they are called) recessed? alcove? indented? dropouts are often problematical for hub motors. The washers may not fit, axle nuts almost surely will not, and harder to get the TAs to line up nicely with the stays.

Since you are this far, why not continue on? The Grin TA v.4 are good quality TAs and if you can get them securely fitted you may be alright. Unless you are a heavy rider hammering the throttle and regen on cobblestones and jumping up and down curbs lol (but probably not because-- roadbike).

Right, fair. The mechanic at the e bike shop reckons the frame should be ok with sensible riding and torque arms.

This is my Grin V4 fit, they seem to be fine around the dropouts with a torque washer: https://photos.app.goo.gl/FJqVDWU3nLUvN9sA9 The axle nut actually fits inside the recess so that's ok.
 
Now do the other side w/ another Grin TA.
If the one you have now doesn't want to fit well on the cassette side, use a V4.
Since most of the drop-out support is now gone, you not only have to think about preventing the axle from spinning, but also holding the wheel in the chain-stay ASM.
 
2old said:
I had a broken steel dropout (bike was at least 20 years old) that our local framebuilder repaired for $75 since he had some extra dropouts and just charged for one hour labor.

Bargain!
 
stan.distortion said:
MaximilianMM said:
....
Cheers, that's super helpful. The frame is steel.

I've never done anything like this before. Would you recommend going to a specialist frame builder or should any welding shop be ok?
Any but I'd try car exhaust places first as they're more likely to be using TIG than MIG, either would do but TIG is better suited. Seeing as it's steel it could also be brazed, might be easier to find (most car garages would be able to do it) but I'd put some bracing in the V if brazed as it wouldn't offer much support to the area you've filed thin. It may be ok as-is, if it was mine I'd probably try it but I wouldn't call it safe, it's been significantly weakened and it's being asked to handle many times the load it was originally designed for.

Thanks, I'm going to try some garages.

To clarify, are you saying brazing wouldn't offer as much fortification as welding? I had a quick Google and some sites seemed to be saying they can be similar in strength.

Update as well: I've got it back from the shop. They reckon it's rideable but could potentially fail at some point. They advised me to inspect it regularly to see how it's holding up and fit a second torque arm.

I'm still going to try and get the welding done though.
 
An option is to grind the frame flush and just weld on 1/4" flat steel plate with another slot for the axle, thats if you have enough axle length on the motor. The key would be to make sure the new steel takes the full load or be sure frame and new steel are even and both take the load equally. A non welding method would be to make a glorified torque arm with a very tight fit and use steel epoxy and hose clamps with notches in the steel to prevent the hose clamp from slipping off the steel ta. That method wouldnt be able to take the weight but it would help prevent the axle from breaking the dropout just be sure its a very tight snug fit because believe you me I've gotten away with some very loose fitting torque arms of the exact same method minus the epoxy.

You just dont want the bicycle frame dropout to take any rotational movement of the axle
But you want the total weight to have sufficient metal beef to not break. Which looking at your images in the first post your fine on the front, you just want a very snug, tightly fitting torque arm to like literally never move and have zero flex, hence flat surface to use epoxy let set and use hose clamps.
But welding would be ideal.

I will allow you to be amazed at my handy work of excellent proportions of masterly crafted torque arms, yet elegantly designed with expert grinder skills. And do please note the notches for hose clamp. This particular design wasn't the tightest fit, tbh. My new expertly designed ta's are snug tight fit which took a whole whopping 30 minutes total vs 5 minute masterpiece.

Enjoy


20210801_210107.jpg
 
MaximilianMM said:
... (I've been quoted $600 AUD which seems steep)...

Now I know that Singapore and Aussie dollars are sometimes smaller than Yankee dollars but AU$600 seems a bit extreme to me.

MaximilianMM said:
To clarify, are you saying brazing wouldn't offer as much fortification as welding? I had a quick Google and some sites seemed to be saying they can be similar in strength.
Yep ... and I have seen web sites refer to 'soldering' as 'welding'. Let us clarify the difference.

WELDING:
Two pieces of metal are joined together by melting a portion of both pieces and mixing them together at the molecular level. As they cool the metal forms new crystal structure between the two pieces fusing the bits together. This is your typical "joint" (and filler rod is usually added as well) but there also exists a form of welding called surfacing in which the second bit of metal is only the filler metal. This second method is sometimes used place a harder alloy than the base metal on the surface for wear purposes and in other instances used to fill in gaps or voids. The base metal must be the same element (i.e. not Aluminum and Iron).

SOLDERING/BRAZING:
This is a surface bond ONLY. Two pieces of metal are joined together by heating the base pieces to a sufficiently high temperature that an filler alloy will melt into a liquid state and flow between them. This filler alloy seeps into gaps in the crystalline structure at the molecular level forming a mechanical bond between the surfaces as it cools back to solid state. The filler alloy base metal is usually a different base element(s) (i.e. copper plus tin, aluminium, manganese, nickel or zinc used as filler for ferrous metals).

There are a few other specialized forms of 'welding' used including:
... explosive welding where two pieces of material a driven together by the force of an primary explosive. This method may be used to join dissimilar base metals together (i.e. ferrous to aluminum). This method is sometime used in the marine industry to place ferrous metal hard points on aluminum boat hulls.
... friction welding where two pieces of material are rubbed together with enough force and frequency to produce sufficiently high temperature to soften both pieces of metal and mechanically bond their crystalline structures. This method is sometimes used to join cast/forged flanges to ends of steel tubes in the manufacture of drive shafts.
... others

The only real world use case I can think of where 'soldering/brazing' might be stronger that 'welding' is in the jewelry industry where certain soft metals may be joined using silver-solder. All that being said, bronze filler alloy used to join ferrous metals can be EXTREMELY strong and for a period of time in the last century was the prefered fabrication method for bicycle frames (usually lugged but not always). I know of the at least one instance of custom frame builder that uses a tig torch with bronze filler to join stainless steel components of his frames.

Side Note:
Bernzomatic makes a small inexpensive brazing kit (when I say inexpensive that is in comparison to the AU$600 the frame builder wants). https://www.bernzomatic.com/Products/Hand-Torches/Manual-Ignition/WK5500OX
I have had one of these and used it to repair a steel tube structure for an patio awning. It is inadequate for large jobs (goes through oxygen canisters like you would not believe) but it could be adequate for small tasks like attaching screw lugs to a steel bicycle frame or adding a bit of bronze filler metal to a oversized dropout slot.

Also note that the reynolds 631 is a 'work hardened' frame material. Any sustained application of heat to the frame will weaken it somewhat in the areas closest to that point. https://www.reynoldstechnology.biz/materials/steel/s-631/

Leave us not forget adhesives. I used to drive a 1999 Honda Insight (the original mass manufactured hybrid car). The aluminum body joints were all done with adhesive, heat and pressure. My 1990 Miyata CT7000 bicycle frame is made of carbon fiber over thin aluminum tubes. Those tubes are joined together with aluminum lugs via an adhesive. These days there are some extremely strong epoxy adhesives available to the consumer. I think that if I was faced with your problem that I might get a bit of 1/8 inch (3mm) or 1/4 inch (6mm) thick steel and bond it to the dropout area of you frame. Fill in the corners of the drop out with the same adhesive (perhaps with some carbon fiber filler). Then reshape the dropout slot with a rat-tail (round) file. Optionally you could also braze or silver-solder that bit to the frame.
ScreenShot XXX.jpg
The one thing that I would absolutely NOT do is remove any additional material from that dropout.
 
As above, maybe some extra bracing up the frame tubes but I've no doubt that would be as strong as original. Fwiw, there are plenty of cheap and good quality hole saw sets available now and they're ideal for making a heavy disk that would work ok, I often use the cheap aldi sets on 6mm or more steel and they'll last for years with low speeds and plenty of oil.

$600 is a "just go away" quote, they're not interested in doing it and for that price you could probably pick up an industrial quality (refillable with cutting and welding/brazing torches) portable oxyacetalyne kit and do it yourself, brazing isn't all that difficult. There isn't really a realistic price estimate for that kind of job, some places may take it on through the books and will probably charge somewhere around $50-150 as an hourly rate with minimum 1 hour but that's more of a "beer money" job, 10 minutes if everything is already prepared and $20 in the hand.
 
I watched the guy do the job on my bike which required that he cut off both dropouts, put the frame in a jig then carefully weld both dropouts on the frame. He wasn't running around, just working carefully and it took him 45 - 60 minutes. The new parts worked perfectly for a long time until the bike was stolen from my son.
 
LewTwo said:
MaximilianMM said:
... (I've been quoted $600 AUD which seems steep)...

Now I know that Singapore and Aussie dollars are sometimes smaller than Yankee dollars but AU$600 seems a bit extreme to me.

MaximilianMM said:
To clarify, are you saying brazing wouldn't offer as much fortification as welding? I had a quick Google and some sites seemed to be saying they can be similar in strength.
Yep ... and I have seen web sites refer to 'soldering' as 'welding'. Let us clarify the difference.

WELDING:
Two pieces of metal are joined together by melting a portion of both pieces and mixing them together at the molecular level. As they cool the metal forms new crystal structure between the two pieces fusing the bits together. This is your typical "joint" (and filler rod is usually added as well) but there also exists a form of welding called surfacing in which the second bit of metal is only the filler metal. This second method is sometimes used place a harder alloy than the base metal on the surface for wear purposes and in other instances used to fill in gaps or voids. The base metal must be the same element (i.e. not Aluminum and Iron).

SOLDERING/BRAZING:
This is a surface bond ONLY. Two pieces of metal are joined together by heating the base pieces to a sufficiently high temperature that an filler alloy will melt into a liquid state and flow between them. This filler alloy seeps into gaps in the crystalline structure at the molecular level forming a mechanical bond between the surfaces as it cools back to solid state. The filler alloy base metal is usually a different base element(s) (i.e. copper plus tin, aluminium, manganese, nickel or zinc used as filler for ferrous metals).

There are a few other specialized forms of 'welding' used including:
... explosive welding where two pieces of material a driven together by the force of an primary explosive. This method may be used to join dissimilar base metals together (i.e. ferrous to aluminum). This method is sometime used in the marine industry to place ferrous metal hard points on aluminum boat hulls.
... friction welding where two pieces of material are rubbed together with enough force and frequency to produce sufficiently high temperature to soften both pieces of metal and mechanically bond their crystalline structures. This method is sometimes used to join cast/forged flanges to ends of steel tubes in the manufacture of drive shafts.
... others

The only real world use case I can think of where 'soldering/brazing' might be stronger that 'welding' is in the jewelry industry where certain soft metals may be joined using silver-solder. All that being said, bronze filler alloy used to join ferrous metals can be EXTREMELY strong and for a period of time in the last century was the prefered fabrication method for bicycle frames (usually lugged but not always). I know of the at least one instance of custom frame builder that uses a tig torch with bronze filler to join stainless steel components of his frames.

Side Note:
Bernzomatic makes a small inexpensive brazing kit (when I say inexpensive that is in comparison to the AU$600 the frame builder wants). https://www.bernzomatic.com/Products/Hand-Torches/Manual-Ignition/WK5500OX
I have had one of these and used it to repair a steel tube structure for an patio awning. It is inadequate for large jobs (goes through oxygen canisters like you would not believe) but it could be adequate for small tasks like attaching screw lugs to a steel bicycle frame or adding a bit of bronze filler metal to a oversized dropout slot.

Also note that the reynolds 631 is a 'work hardened' frame material. Any sustained application of heat to the frame will weaken it somewhat in the areas closest to that point. https://www.reynoldstechnology.biz/materials/steel/s-631/

Leave us not forget adhesives. I used to drive a 1999 Honda Insight (the original mass manufactured hybrid car). The aluminum body joints were all done with adhesive, heat and pressure. My 1990 Miyata CT7000 bicycle frame is made of carbon fiber over thin aluminum tubes. Those tubes are joined together with aluminum lugs via an adhesive. These days there are some extremely strong epoxy adhesives available to the consumer. I think that if I was faced with your problem that I might get a bit of 1/8 inch (3mm) or 1/4 inch (6mm) thick steel and bond it to the dropout area of you frame. Fill in the corners of the drop out with the same adhesive (perhaps with some carbon fiber filler). Then reshape the dropout slot with a rat-tail (round) file. Optionally you could also braze or silver-solder that bit to the frame.
ScreenShot XXX.jpg
The one thing that I would absolutely NOT do is remove any additional material from that dropout.

Thanks for taking the time to draw that and share the info.

The adhesive option seems like a good one as I am struggling to find a welder at the moment. (I'm currently in lockdown in sydney with only a 5km radius allowed).

If you are filing the existing dropout with an adhesive or filler, I'm assuming that would not be strong enough on its own minus the plate? I guess the two just both add fortification.

And can I confirm you are suggesting to attach that plate on the inside of the dropout as in the picture? I would then need to make sure I have enough clearance.

But as Markz said I suppose the plate and the original dropout would need to line up perfectly so that the force is on both.

One thing I'm wondering about is the option of 'refilling' the existing dropout, which the mechanic mentioned and some others.

Does this mean anything to you guys? I don't really know what it would be, but I'm imagining it as a solution which uses the original dropout by adding back the filed metal with welding, rather than an exterior plate?
 
stan.distortion said:
As above, maybe some extra bracing up the frame tubes but I've no doubt that would be as strong as original. Fwiw, there are plenty of cheap and good quality hole saw sets available now and they're ideal for making a heavy disk that would work ok, I often use the cheap aldi sets on 6mm or more steel and they'll last for years with low speeds and plenty of oil.

$600 is a "just go away" quote, they're not interested in doing it and for that price you could probably pick up an industrial quality (refillable with cutting and welding/brazing torches) portable oxyacetalyne kit and do it yourself, brazing isn't all that difficult. There isn't really a realistic price estimate for that kind of job, some places may take it on through the books and will probably charge somewhere around $50-150 as an hourly rate with minimum 1 hour but that's more of a "beer money" job, 10 minutes if everything is already prepared and $20 in the hand.

Right, good to know cheers. I'll look into hole saw sets if I'm cutting something myself.
 
markz said:
An option is to grind the frame flush and just weld on 1/4" flat steel plate with another slot for the axle, thats if you have enough axle length on the motor. The key would be to make sure the new steel takes the full load or be sure frame and new steel are even and both take the load equally. A non welding method would be to make a glorified torque arm with a very tight fit and use steel epoxy and hose clamps with notches in the steel to prevent the hose clamp from slipping off the steel ta. That method wouldnt be able to take the weight but it would help prevent the axle from breaking the dropout just be sure its a very tight snug fit because believe you me I've gotten away with some very loose fitting torque arms of the exact same method minus the epoxy.

You just dont want the bicycle frame dropout to take any rotational movement of the axle
But you want the total weight to have sufficient metal beef to not break. Which looking at your images in the first post your fine on the front, you just want a very snug, tightly fitting torque arm to like literally never move and have zero flex, hence flat surface to use epoxy let set and use hose clamps.
But welding would be ideal.

I will allow you to be amazed at my handy work of excellent proportions of masterly crafted torque arms, yet elegantly designed with expert grinder skills. And do please note the notches for hose clamp. This particular design wasn't the tightest fit, tbh. My new expertly designed ta's are snug tight fit which took a whole whopping 30 minutes total vs 5 minute masterpiece.

Enjoy


20210801_210107.jpg

Thanks! Nice work. Definitely more elegant than anything I'm currently capable of.

I guess I could even buy a Grin torque arm and cut a slot in the hole to epoxy it so that it is removable.
 
Back
Top