Stealth FUTR owners builds and pics

The problem is not the brakes, its rather the motor that is too wide. Almost all of the MTB brakes have the very same distance, about 20mm. I usually space out the disc brake with 3 of these https://em3ev.com/shop/em3ev-disc-spacer/
So 7.5mm
But then you also need to modify the actual caliper mount as well I remove about 4-5mm from the mount to make everything work.

Hope Tech 3 X2:
file.php
 
Cricket_Swe said:
Hey people! I need advice. I just got my Adaptto back from repair and don't want to risk breaking it again. It appears I have too tight of a fit where the cables come out of my qs205 v3 motor, causing them to get damaged. The frame is alpha and I use Hope tech 3 V4 brakes. The problem is that these brakes are so big I need a spacer for my brake disc or the brake won't fit between the disc and motor causing extreme flex on the disc. But with the spacer the disc comes too far out minimizing the space for the cables. So ideally I should have a different rear brake that is smaller in width so I can remove the disc brake spacer and give more room for the cables.

So my question is, what rear brake do you recommend? I'm currently using hopes 203mm vented disc. The brake is 45mm thick although the part that matters is around 19,5mm. And the spacer is 2mm.


The solution is what Alex said above but I have to add something. if you don't want to modify your brake adapter then you should add three dropout washers instead of two. it worked perfectly fine for me. with only two I had to modify them a lot!
 
Cricket_Swe said:
So how exactly did you manage to modify the dropout spacer?


Hey have a look at what i did with my wheel:

\\ (•◡•) / said:
Also good news I got my motor wire issue sorted!
infact it actually has room to spare, so really happy with that (Thank-you to all the people who gave me help and passed me forward to the other thread)
don't have any pics of the actual motor wire clearance on the frame yet but I promise to post some once I take them (probably when the bike is done in a week or two)
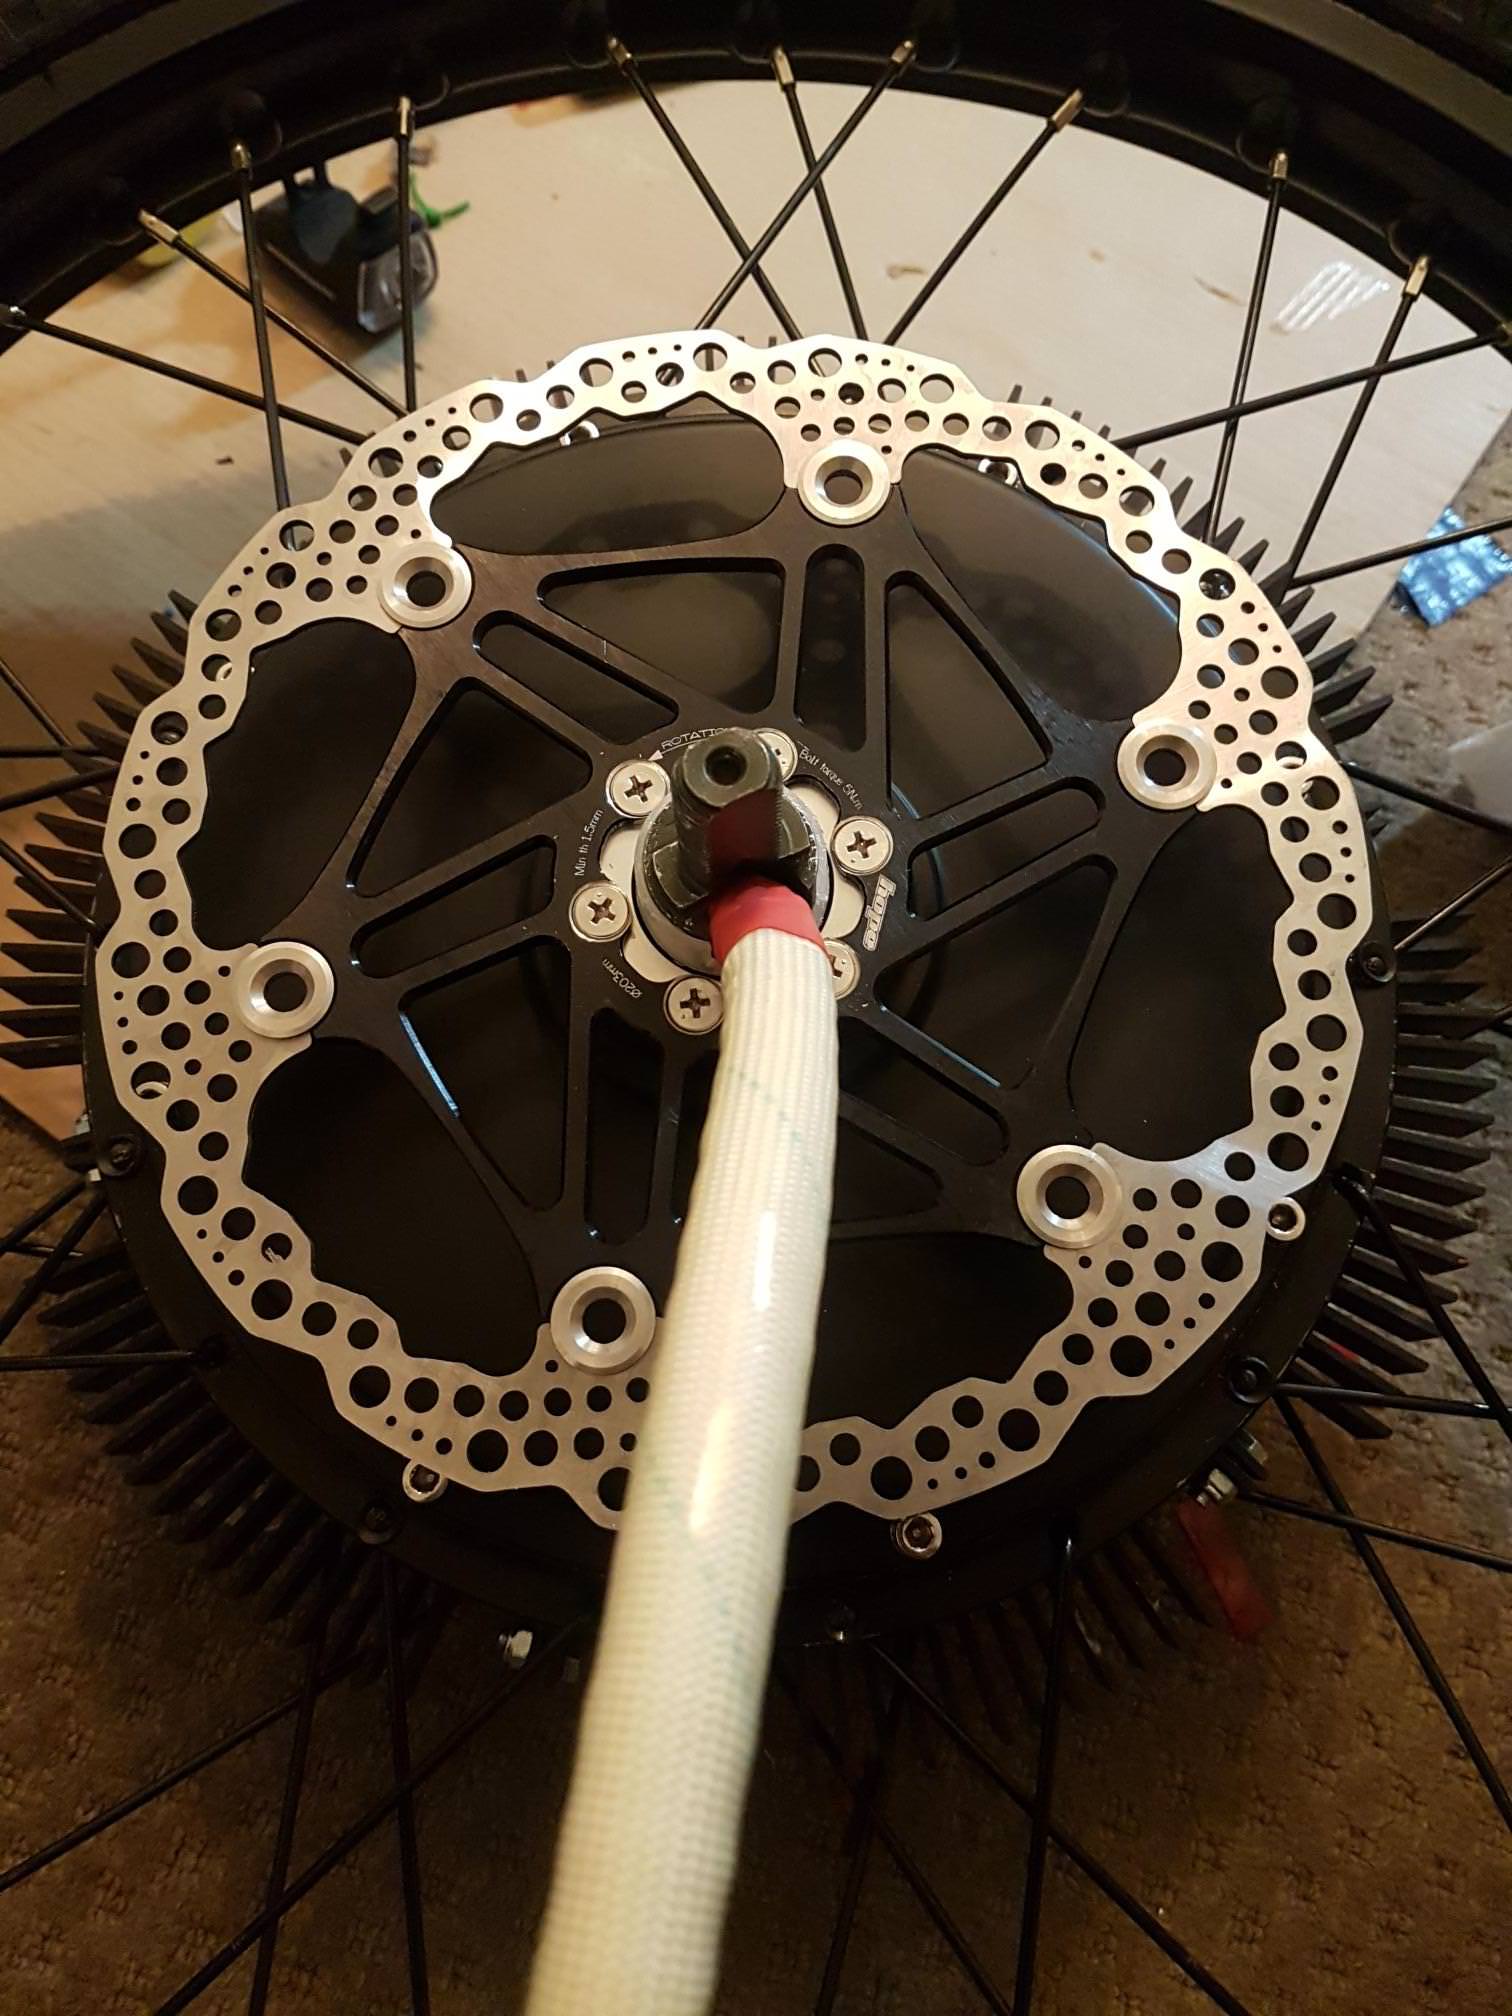
for now here's a teaser:
sRmASIb.jpg

YJnD4kz.jpg

RJuFq2G.jpg

eOcZNXc.jpg

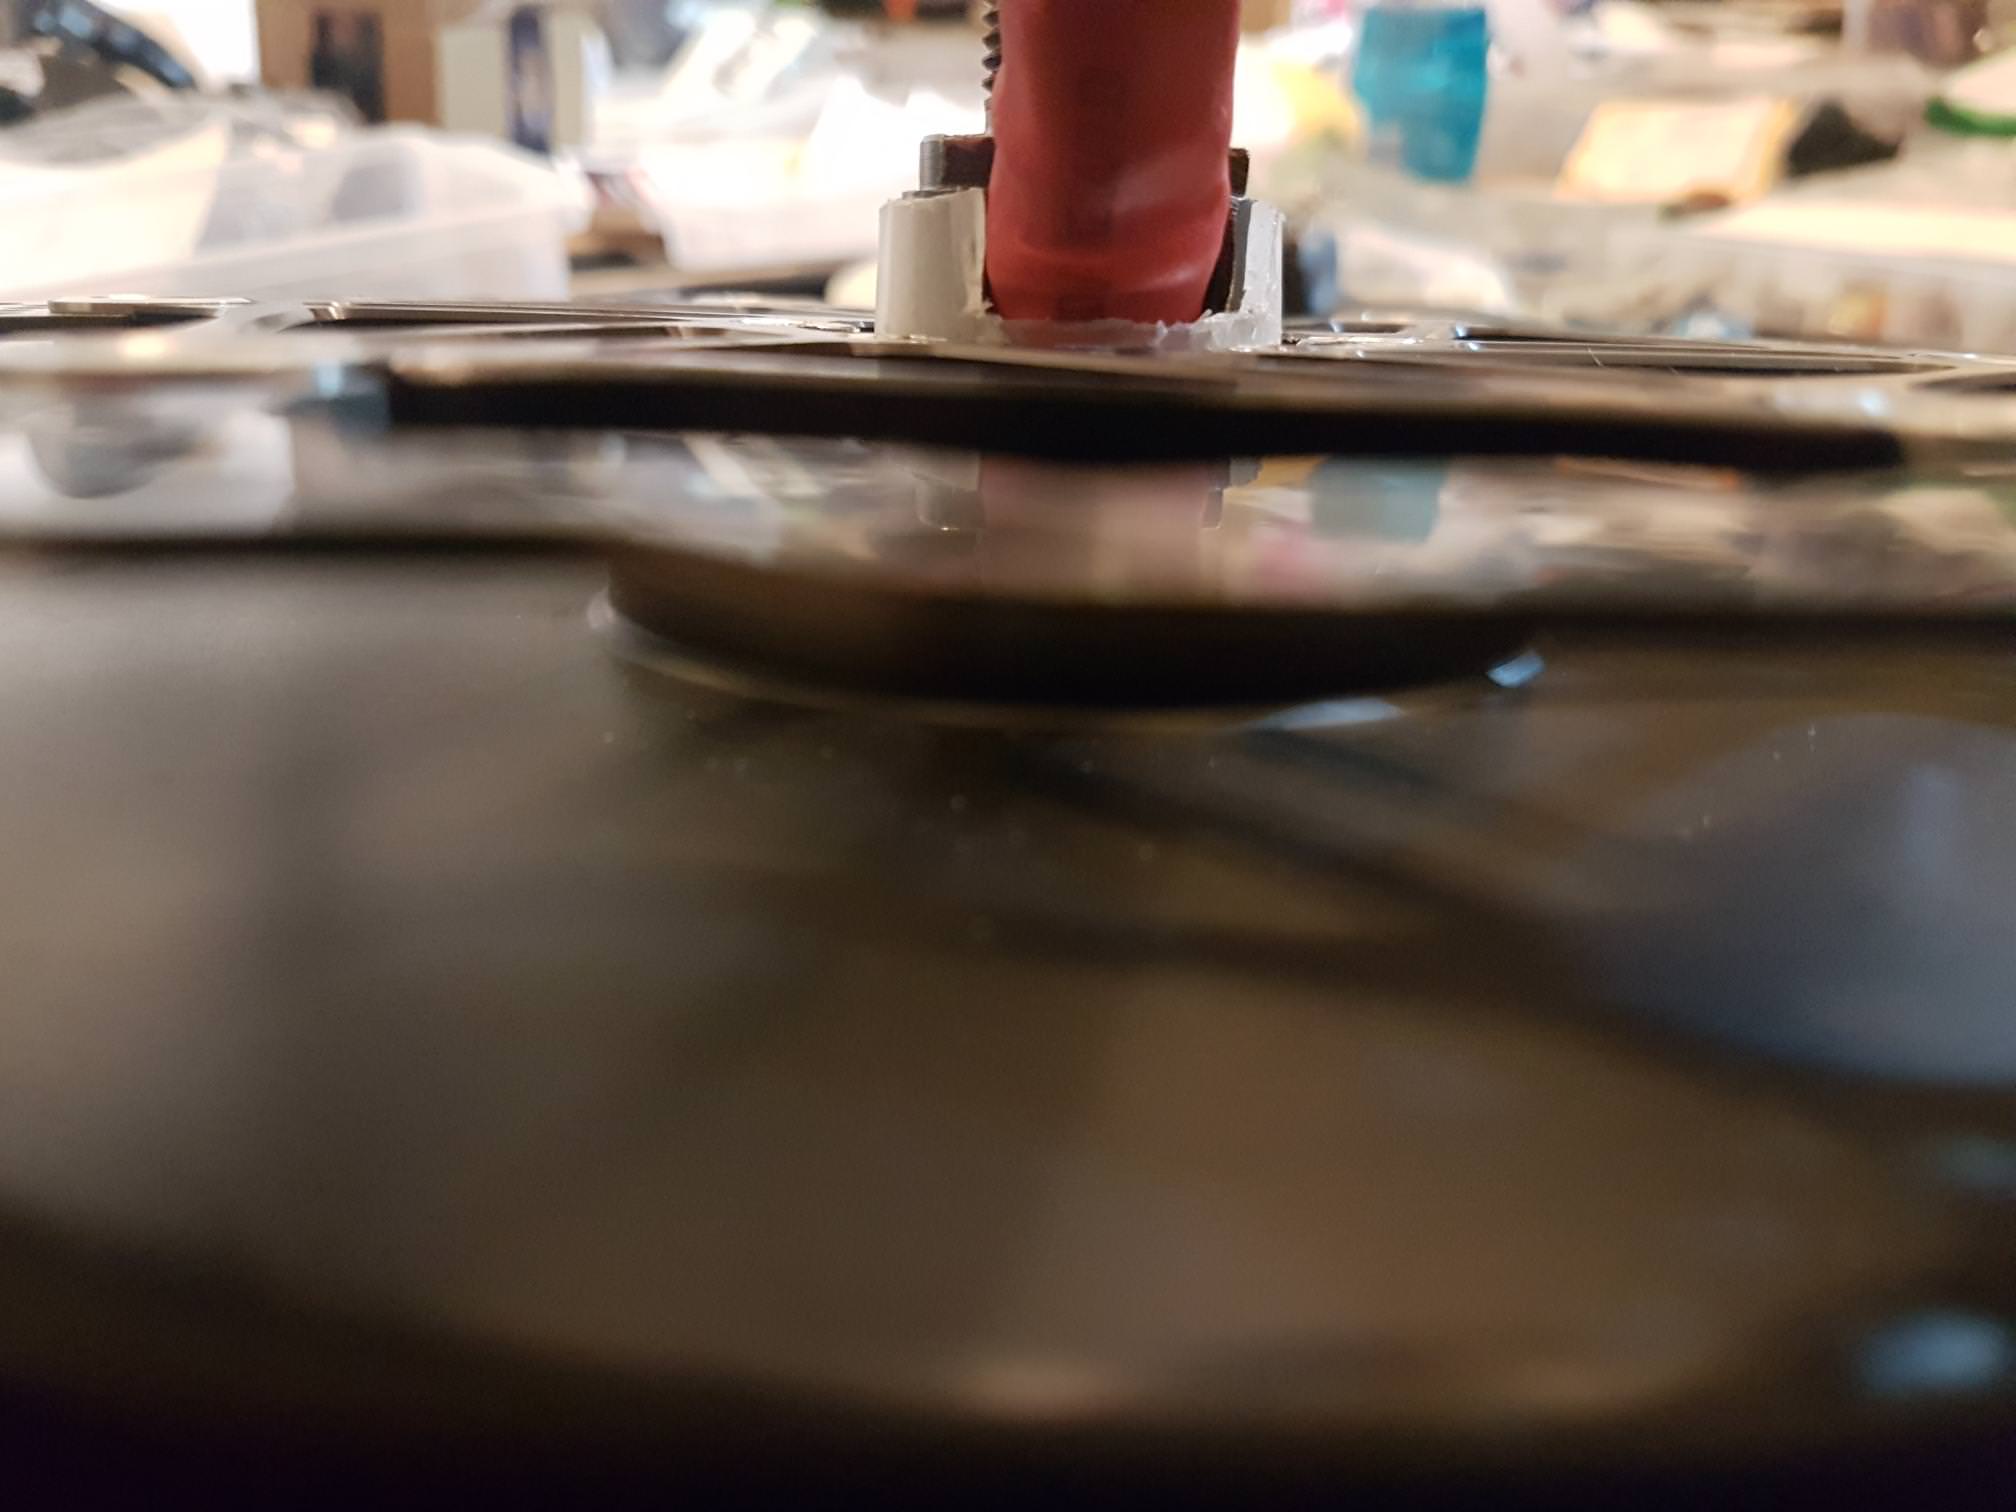
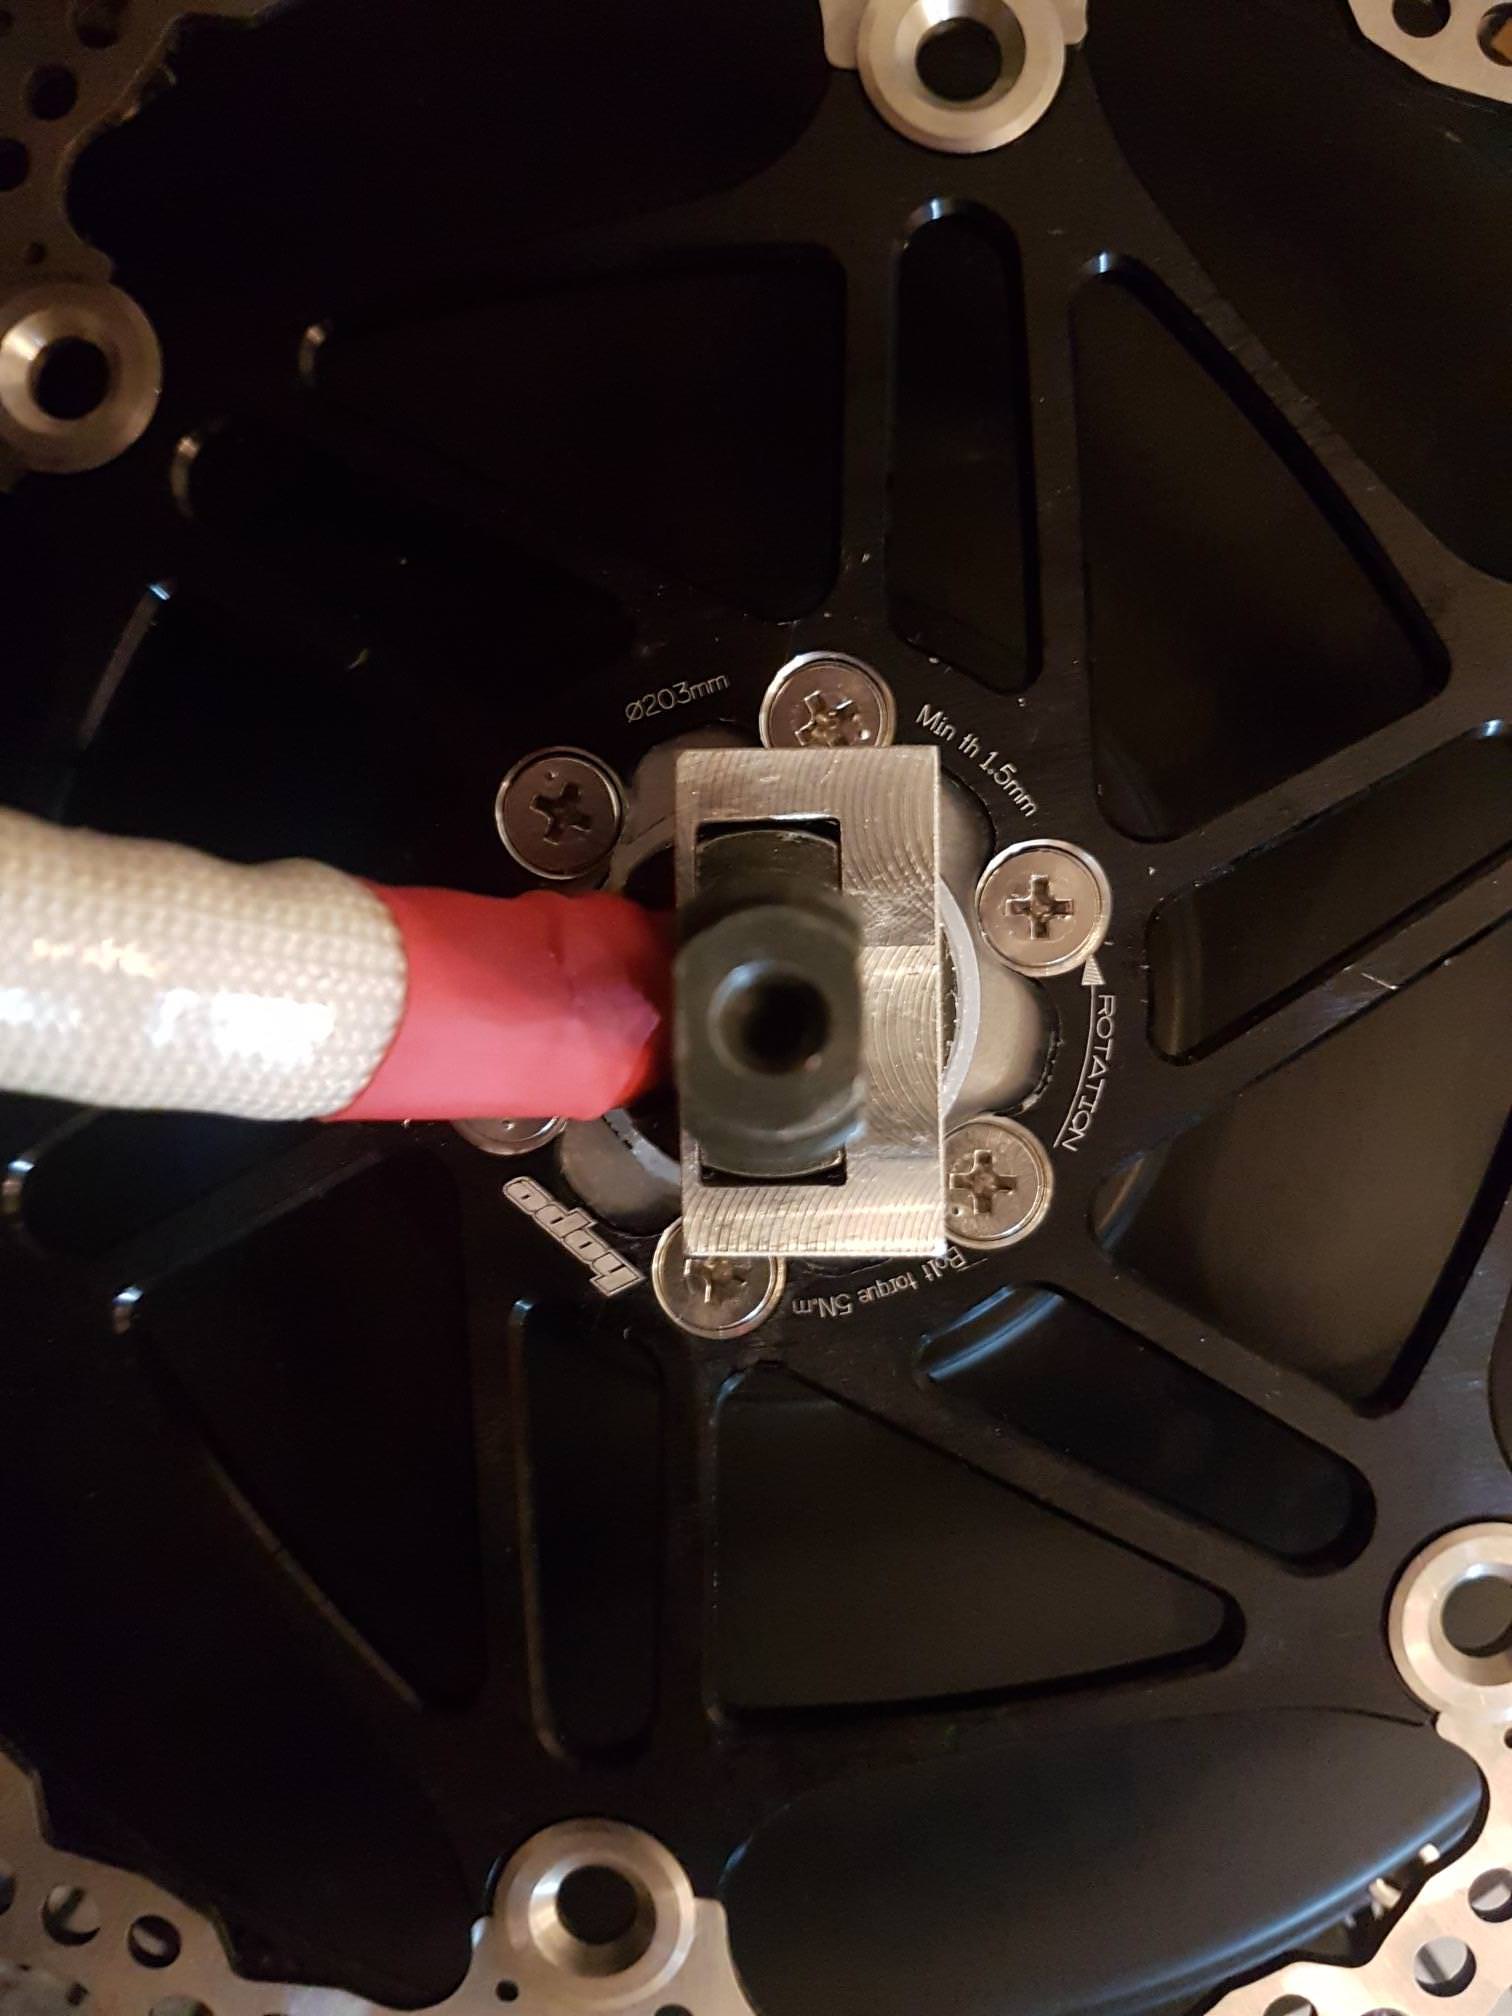
the plate you can see is a 4mm water-jet cut aluminium spacer with a milled slot. this spaces the dropout out a bit more giving the motor wire a great little home. it's funny actually because my dropout would originally sit maby 3 or 4mm out from my motor naturally and would then compress onto the motor when I tightened the nuts, but now it fits perfectly. I think whoever made my frame knew I was going to put in a QS 205 and was rooting for me. Anyway cyas later (for now)
Oh yea, and, I also have some really neat torque arms being made out of either D2 tooling steel or standard has strength steel ATM. will share photo's of that in a few days

seems I was in your exact shoes a while ago, I too run a qs 205 with hope tech 3 v4's and hope 203mm rotors on my alpha. also just to let you know I have my motor on my frame with the same combo as you and everything fits with lots of room, the motor wires arn't even close to the disk and the brake has lots of room from scraping the motor, so just know it can be done. also don't use as many rotor spacers as shown by allex on the bomber (the bomber has wider dropouts and smaller wires, so need to move the rotor out to the brake with spacers), as I said I use the same combo as your attempting so luckily you should be able to follow this guide and skip my trial and error process:
1) buy 1x 2mm hope spacer http://www.chainreactioncycles.com/hope-rotor-spacer/rp-prod3288 (only use 1x 2mm, the less rotor spacers you use the less your rotor will be pushed out into your phase wires). With 2mm spacer your brake will have enough room before it scrapes the side of your motor and will also keep your rotor in enough that you will have enough space to route your wires. You may also see that after using a 2mm spacer that you could even go with 1mm before your brake caliper will scrape your motor esentially giving you an extra mm of clearance for your wires, but don't because unforchantly with the hope rotors where there recessed at the back there diameter of the recession is smaller than the diamater of the extending circle mounting point on the qs205, so anything less than a 2mm rotor spacer and your rotor will only make contact to the mounting point of the qs205 with roughly only the outside 2mm of the rotor touching, so not a great idea.

2) countersink your disk bolt holes and use countersunk hardware, this alone will give you a lot more room

3) (optional, I did it but it isn't strictly necessary, you can get away without doing it, but it's recommended) you can remove the wires for the spare set of hall sensors in your qs205 to make the wire bundle thinner (just snip the wires to your spare set of sensors, you'll see the wires are bundled up in the middle of the motor, just snip all the spare set wires and pull the 6 wires out of the wire bundle making it thinner, and if your main hall sensors ever die in the future you can just open you motor back up, cut your main hall wires and solder them only the wires coming out of your secondary sensor set)

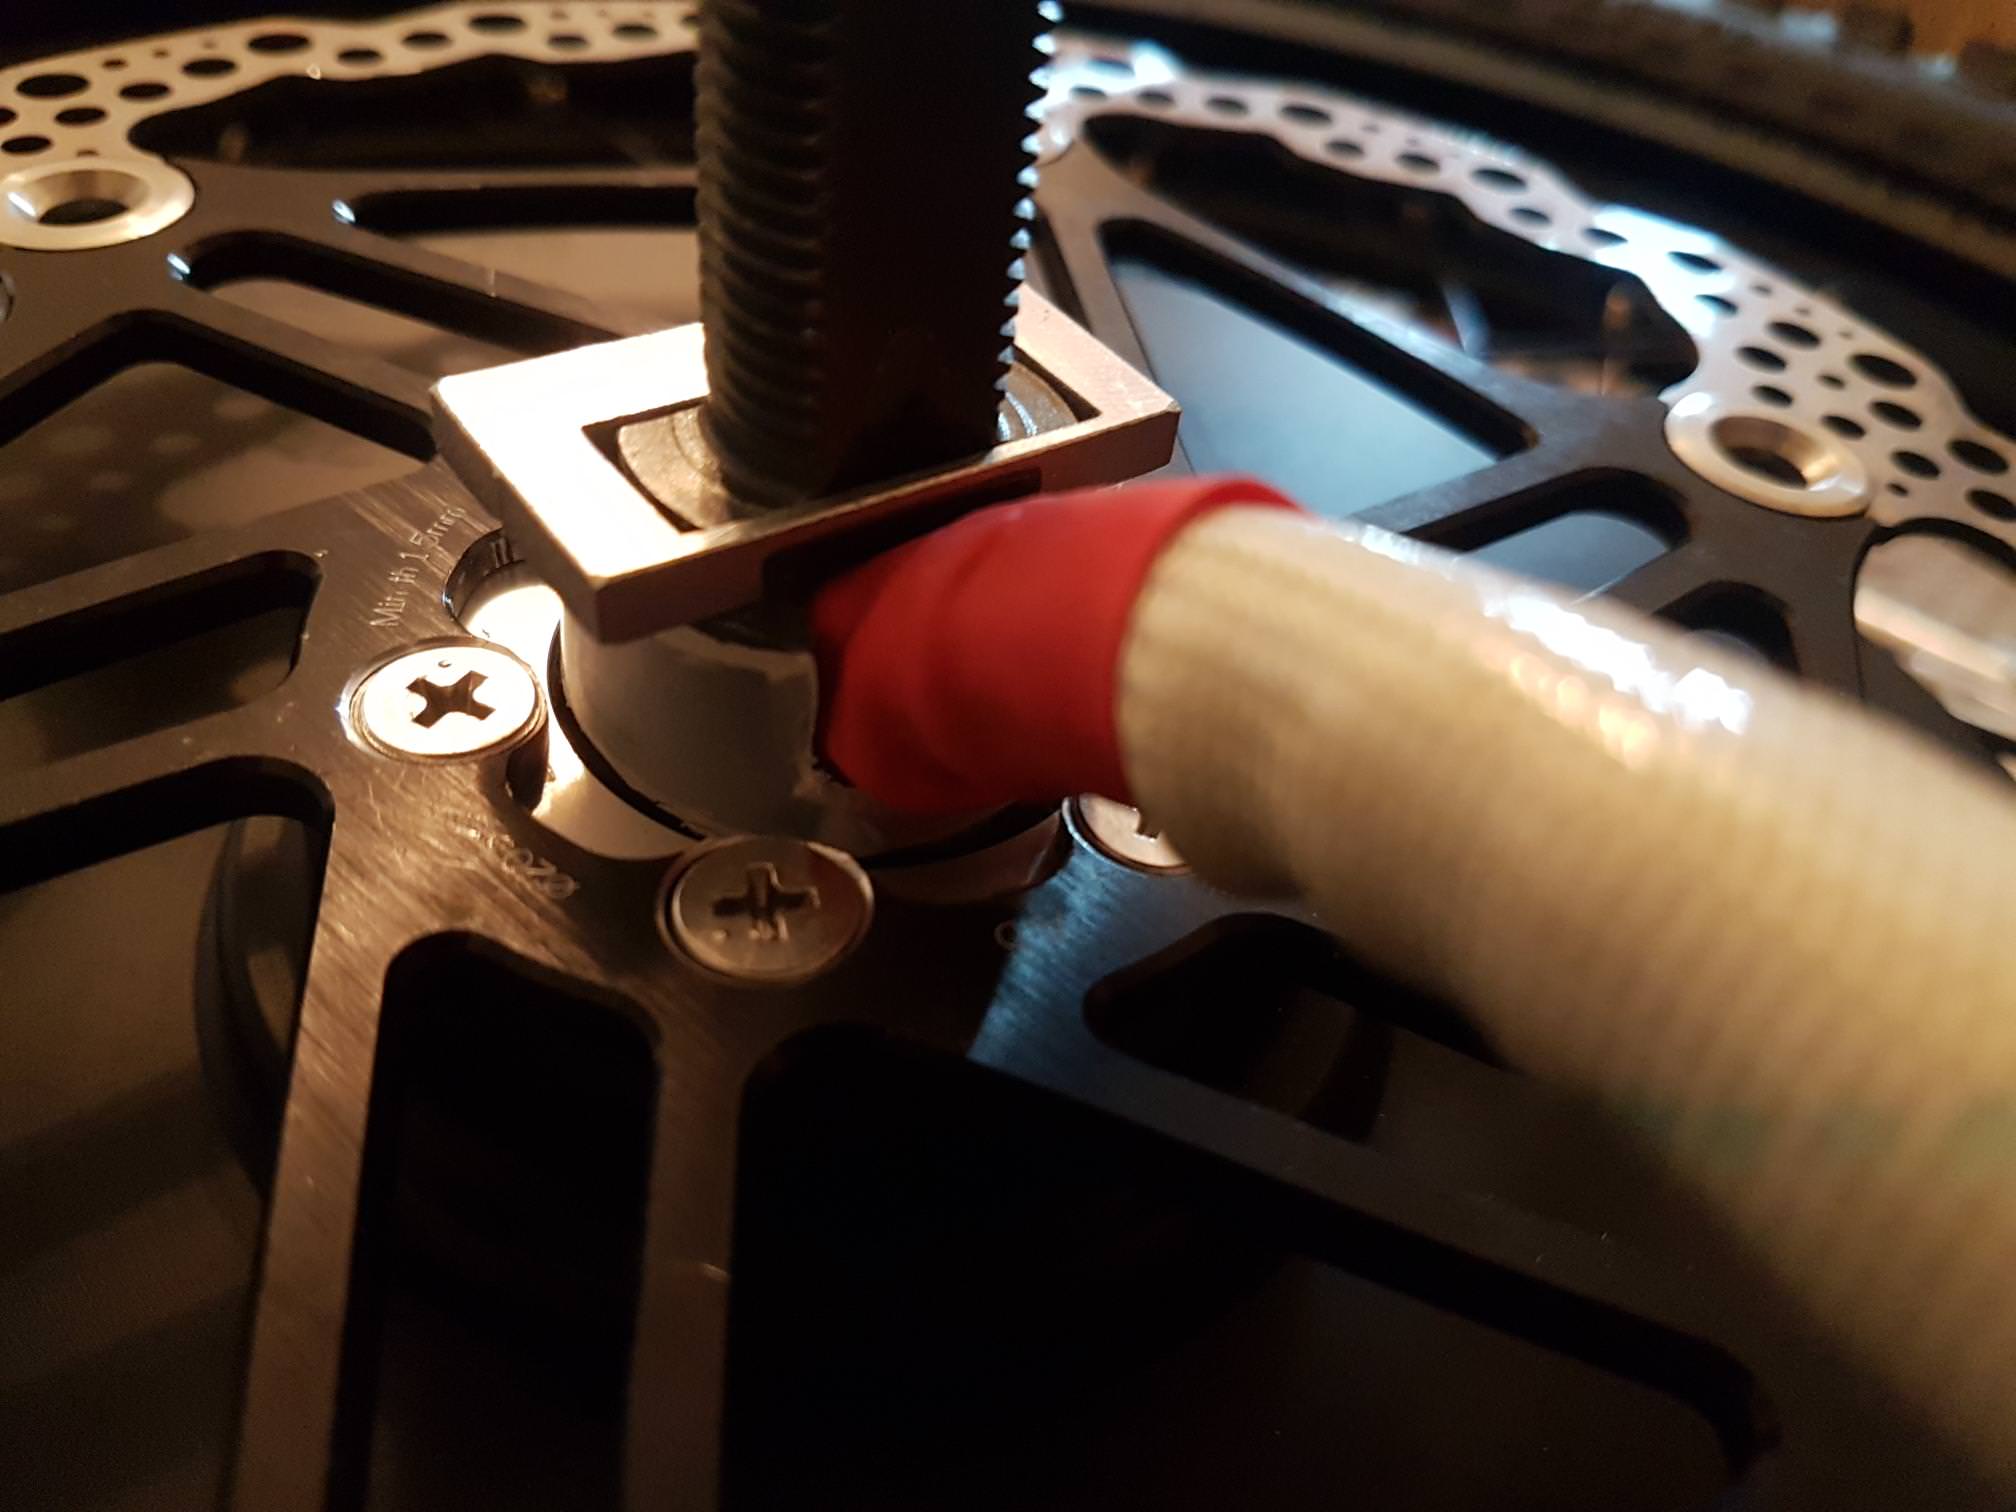
4) basically you have to do this.... well not really but it will give your wires tonnes of space from the rotor, as you can see in my earlier photos on my motor shaft: get a plate cut that slides perfectly onto your axel, this will act like a spacer, spacing your swingarm away from your rotor giving your wires more space, my dropouts on my alpha were actually a touch wide originally and when I put the spacer in it actually ended up being perfect for my dropouts, but even if yours isn't a touch wide by default the dropouts are preety flexy and can just be pulled out with one hand when putting the motor in, doesnt take much force at all and since the frame is make of cromoly it's not gonna damage it, especially since it's widening it by proberbly only a couple degress of angle. (my spacer was custom milled down to 3.7mm of thickness, but 4mm will work perfectly aswell)

5) jeez this is becoming a little long... almost done though. make a shield so your wire can't possibly touch the rotor, i stole this idea from 'ridethelightning' in this thread https://endless-sphere.com/forums/viewtopic.php?f=6&t=62650&start=225#top to give credit (if you're reading this lightning, thanks man :) ), bascially buy a door stop like this: https://www.bunnings.com.au/adoored-100mm-white-cushion-door-stop_p3961376 , take out the inside part, saw off the pack and push/tap it onto your motor shaft with a mallet and a block of wood, then cut out the part for your wire, once again you can see this in the photos of my motor.

anyway thats all I can think of atm, it's a bit of a process but the futr alpha, qs205 and hope brakes are a fucken killer combo :p , so it'll be worth it, also to give credit where it is due basically all my ideas were stolen or replicated from this process in this thread: https://endless-sphere.com/forums/viewtopic.php?f=6&t=62650&start=225#top so look there for more detail, also ill post photos of my wheel in frame with how much wire space and space between rotor and motor i have with my 2mm rotor space and the custom 3.7mm space if I remember tomorrow.
cheers!
good luck
 
Some good info in there chaps. Remember to add longer disc brake bolts too if you have your rotor spaced out a bit. they can chew out pretty easy - resulting in the need for a whole new motor side cover....

I've basically finished my next Beta - but will unpack it and upgrade the controller with a new one I have coming.

Looks wise, its basically done, but have now routed the cables better since this photo.

white-beta-bullseye.jpg


I'm pretty happy with the way this bike pops with white forks and rims.

Going with a 12t Mac on 14s (58v hot) gives nice pull from a standing start and max speed of 43kmh in a 26" rim. It will only be better with a decent controller and throttle.

I ordered a S12SN torque simulation controller from BMSBattery - I think this will be a ok solution and will be keeping the budget in check (and for onsale)... Will be sure to do a review when it turns up.

Now to get some time in on my alphas!
 
Love it Lash, Hopefully, mine will look as good as that, Hey Whats largest tyre you can fit with 26" on the rear?
 
Lash said:
Some good info in there chaps. Remember to add longer disc brake bolts too if you have your rotor spaced out a bit. they can chew out pretty easy - resulting in the need for a whole new motor side cover....

I've basically finished my next Beta - but will unpack it and upgrade the controller with a new one I have coming.

Looks wise, its basically done, but have now routed the cables better since this photo.

white-beta-bullseye.jpg


I'm pretty happy with the way this bike pops with white forks and rims.

Going with a 12t Mac on 14s (58v hot) gives nice pull from a standing start and max speed of 43kmh in a 26" rim. It will only be better with a decent controller and throttle.

I ordered a S12SN torque simulation controller from BMSBattery - I think this will be a ok solution and will be keeping the budget in check (and for onsale)... Will be sure to do a review when it turns up.

Now to get some time in on my alphas!

Hey Lee,
Did you get the 12t MAC and 14s battery going? I am curious as this is the route I will go with my next build if Adaptto doesn't make a come back.
 
I didn't want to cut off any of the extra wires/plugs on my Midi-E in case they are needed later on, but this left me with a bulky mess of wires at the base of my controller.

So I made a 3D printed wire cover for my Midi-E on my Alpha. It took about 5 prototype revisions before I was happy with it, but now I can keep all the original wires/plugs and cover it all up nicely. :)


View attachment 1
DSC_4698.JPGView attachment 2

It is held on by magnets I glued into pre-made holes.
DSC_4689.JPGView attachment 4

This is what it's hiding shown inside one of my many prototypes with the top ripped off.
DSC_4688.JPG

If anyone would like a copy of the print you can find it here:
https://www.thingiverse.com/thing:3029639

I would suggest tweaking it to suit as everyone mounts their controller in a different spot, but the overall design should work. :)
I plan on changing the design and making another one for my Fighter's Mini-E next.

Cheers
 
Rix said:
That looks great CD, does your cover plate double as a skid plate?
Thanks Rick. It's not terribly strong so I doubt it will take much of an impact. It should deflect most rocks and sticks fine, but a large impact hopping over a log will probably destroy it.

That being said, it should be possible to make it much stronger and it might work as a skid plate...tbh I didn't think to do that, but now you say it I think it's a good idea. The good thing about 3D printed parts is they are pretty easy to tweak and remake. I might make the one for my Fighter a skid plate. Thanks!

Cheers
 
Allex said:
More work but worth it:
Extend the wires
And hide the mess inside:
Yeah, good point, but as you say...more work. Too late for me now.

I do have one question though...how the hell did you manage to fit all those chunky connectors through that hole? :shock: That must have been one frustrating job!

Cheers
 
I do have one question though...how the hell did you manage to fit all those chunky connectors through that hole? :shock: That must have been one frustrating job

Thats what I was thinking.
 
Not a prob as I modify all my frames with a oval hole down there, and you can fit those connectors very easy.
Even do a bigger hole up near the head so I can fit bigger display connectors.
file.php
 
cheeko said:
Love it Lash, Hopefully, mine will look as good as that, Hey Whats largest tyre you can fit with 26" on the rear?

I've gone with 2.35 wide and thats a comfortable close.

2.5 and 2.6 would probably be rubbing at some stage or make fitment a nightmare. There are a few things at play when fitting the rear so its good to have some leeway, as you will need to be also worrying about brake rotor alignment too. Having some leeway is a good idea.

Rix said:
Hey Lee,
Did you get the 12t MAC and 14s battery going? I am curious as this is the route I will go with my next build if Adaptto doesn't make a come back.
Hey Rix, yes I got it going. the 12t gives really nice torques and pulls up hills and such from a standing start. Its also a bit quieter than the mxus. top speed is still a respectable 43kmh on the flat.
My new torque sine wave controller turned up yesterday, so im going to redo the whole thing to use that instead of my old square wave POS. so stay tuned as it will be putting out even more awesome!

I will mount that on the outside though, for cooling - so will have to drill a hole in the frame. as luck would have it this seems good timing as CD and allex have posted some pics of various ways to do this. ;)

I was thinking of making the hole in the cover instead of the frame. Anyone care to state reasons against doing this?

Cheers.
 
If you do it on the beta cover, you battery pack might be in the way.
I have a lot of dampening material down there so makes a perfekt fit for all the wires.
Screen Shot 2018-08-04 at 10.08.11.jpg

Here you can see the cable path in the foam
Screen Shot 2018-08-04 at 10.08.20.jpg

On later builds I started to have halls plug and phase wires on the outside, for easier rear wheel service. Rest of the wires are tucked inside the frame.
Screen Shot 2018-08-04 at 10.08.00.jpg
 
Lash said:
[
Rix said:
Hey Lee,
Did you get the 12t MAC and 14s battery going? I am curious as this is the route I will go with my next build if Adaptto doesn't make a come back.
Hey Rix, yes I got it going. the 12t gives really nice torques and pulls up hills and such from a standing start. Its also a bit quieter than the mxus. top speed is still a respectable 43kmh on the flat.
My new torque sine wave controller turned up yesterday, so im going to redo the whole thing to use that instead of my old square wave POS. so stay tuned as it will be putting out even more awesome!

I will mount that on the outside though, for cooling - so will have to drill a hole in the frame. as luck would have it this seems good timing as CD and allex have posted some pics of various ways to do this. ;)

I was thinking of making the hole in the cover instead of the frame. Anyone care to state reasons against doing this?

Cheers.

Tell me more about your Sinwave for the MAC12.
 
Can the v-Boxx be installed on the beta? In for sale thread stealth USA in Cali states that it can be installed yet I haven’t seen one build with one...
 
stoney said:
Can the v-Boxx be installed on the beta? In for sale thread stealth USA in Cali states that it can be installed yet I haven’t seen one build with one...
I don't see how that would be remotely possible as is, given the V-boxx has to be the axis for the swingarm.
I would think it would require major rework of the frame (which does not mean impossible if you are good with machine tools and welding :))

What you can install I believe is a Schlumpf speed drive (or its cheaper ATS Asian replica) that will give you two gears
 
thanks for the pics allex, that is helpful and you're right there will be a little pocket there for wires on the inside behind the battery.
The external phases is tempting too, as you suggest to make rear wheel changes easy. A cable sheath of some sort could help protect the wires too from water or rocks.

Hey Rix,
The controller im about to test for the mac is this one https://bmsbattery.com/ebike-kit/721-s12sn-1000w-40a-torque-simulation-sine-wave-controller-ebike-kit.html

there are a few threads around on it, for the life of me i cant find the thread that inspired me to buy it and try. But long story short he loved it for his MAC.
Looks like the price has gone up another 20-30 USD - maybe because of trump trade wars?

Hope to get some time in this week to test it out, and report back.
 
Lash said:
A cable sheath of some sort could help protect the wires too from water or rocks.

I copied Jay's suggestion to use an old inner tube for this years ago and never looked back. Only extra thing I did was cut a few small drainage hole in the bottom to prevent water pooling in there.

Cheers
 
Lash said:
Hey Rix,
The controller im about to test for the mac is this one https://bmsbattery.com/ebike-kit/721-s12sn-1000w-40a-torque-simulation-sine-wave-controller-ebike-kit.html

there are a few threads around on it, for the life of me i cant find the thread that inspired me to buy it and try. But long story short he loved it for his MAC.
Looks like the price has gone up another 20-30 USD - maybe because of trump trade wars?

Hope to get some time in this week to test it out, and report back.

Looks promising, the price increase is probably a combo of the trade wars and 4X exchange rate. I have noticed a trend over the last 2 months and the USD is a little bit weaker against the EUR and I think that probably translates to other currencies as well even though I haven't checked. Would you be able to make a short 15 second video of the flybys when you get the your controller set up? I am told a sinewave quiets things down on a geared hub motor but haven't observed it. I know on direct drive hubmotors, its pure silence.
 
Looking for a plug similar to this one on the halls wire. Anyone have a manufacturer and model number for the plug
? Thanks
file.php
 
Back
Top