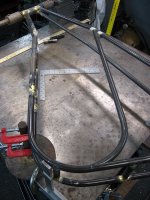
APL's V4 Cruiser Build.

APL

100 kW
Joined
Aug 6, 2018
Messages
1,113
Oh boy, a new build! Hopefully I won't belly flop on this one, but you never know, I've been pretty good at that lately. :oops:

I came across several 13s/10p - 26ah batteries a while back, and it's either use 'em or lose 'em, so I need a new frame to
put these big boys in.

I decided to go with a four tube girder frame this time, since it's more 'square battery' friendly, and I don't want to have
to reconfigure the battery packs. Trying to make a big square hole in a bike frame look good is near impossible though,
so she's not much of a looker. This is what happens when you send marketing home, and let the engineers have their way.

I've never built a small tube girder frame before, so who knows how this will turn out, I guess we shall see,... :confused:

OK, so lets get started, five 6' lengths of 3/4" .049" 4130, a 1-1/2" piece of .080" head tube, and a slab of 1/4" soft steel.
About $150. worth of frame ectoplasm.
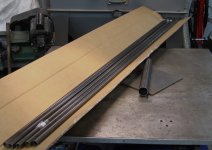
It begins..jpg

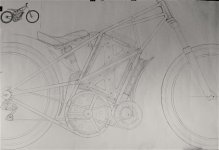
First, I did a rough sketch in CAD, and once I had things moved around the way I wanted, I transferred the sketch to a full
sized drawing that I will use in the shop. The drawing allows me to place the tubes on and make sure that I have the bends
right, triangulate measurements, and I can also place actual bike parts on it and make changes on the fly.
CAD drawings don't really do me much good in the shop, although some prefer to build that way, I prefer full size, in pencil.
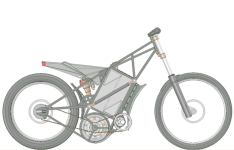
V4.png

V4 full size shop drawing..jpg

The batteries and the motor are about the same 10" size, so I put them together and slung it all down as lows I could.
Since the motor is going to be in the line of fire, I surrounded it with a bash cage 'ring', and helps to frame, or feature
the motor.

So this frame starts with a head tube and a pair of dropouts. Add the two top tubes, and the two down tubes, and bingo,
we have a frame. Everything else is just braces and brackets.
 
Thanks spinningmagnets, it's good to be building again! Ahhh, the smell of grinding chromoly and burning brass!
 
Cruisers share some of the same DNA as mopeds and motorcycles, as well as bicycles, so they are a bit heavy duty, which
is why I like to make them. It's not uncommon to throw some angle iron, or hot rolled steel in the mix.

This bike is going to have some 35 lbs of batteries and a hefty 16 lb motor in it right off the line, but since I'm not going
to be pedaling all that much, weight doesn't matter to me. This is a straight up transportation bike, but street legal, as
long as I act responsible around others, and keep the power and speed down.

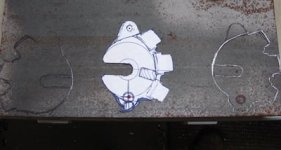
Anyway, I start with a piece of soft 1/4" steel for the dropouts, for strength, and to give the axle some bite. I sketch a
dropout from the drawing, scribe it, and plasma cut some rough slugs.

Dropouts scribed.jpg

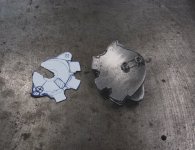
Then they get bolted together, and the bench grinder evens them out.

Cut and bolted dropouts..jpg

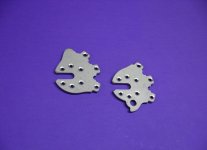
After a work out with the hand file on the tabs, to make sure that the notches are exactly the same, I take them apart and
drill some holes to make brazing these big slugs easier. (yup, brazed)

Tap out the hanger, and wala, Dropazoids! Or maybe Cruiser-zoids... :)

Drilled and taped droputs..jpg

The disc brake hole will be drilled later.
 
It will be interesting to see how this turns out :thumb:
I guess you will be brazing?

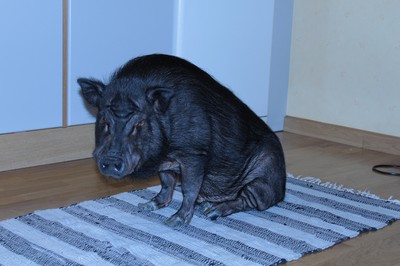
I hope you dont mind me saying, but the first ting in my mind was that it reminds me of the pet pig I had :D

That little hang belly where the motor is..
A canadian mini pig (dont know if it the right term over there)
Gray skin, at least after some time in the sun. Pink belly in the winter. Black hair.
Lovely creature, much loved in the family :wink:
 
Pet pig? How dare you sir! That is a wild boar I'll have you know,.. dan-ge-rous as hell, and thats NOT fat belly!
It's muscle... :)

Thanks for the thumbs up j bjork, I've always enjoyed watching your builds! I'll be brazing it, cause that's what I do best,
I haven't nailed down a TIG welder yet, it's one of those gonna-do things that continues for years. Someday...

Yea looks,.. well I'm hoping it will look better in real life, I'll keep trying. I know it's going to ride nice though, with a low
center of gravity like that,.. gonna stick to the road like a ran over toad! 8)
I thought it might look better as a board track racer too,.. might have to draw one up. :wink:

It's a road bike for sure, and I hope I don't meet up with anything higher than the motor, but thinking back on all the
riding I did with the last bike, theres not to many times that it would matter. I guess I'll find out the hard way.
 
That is an interesting looking set up with the cranks out front of the motor.

Glad to see some brazing, I have brazed 8 mountain bikes for myself and doing the research now on a custom mid drive that I will braze the frame for.
 
Oh a new build by APL so I'm surely subscribing to watch all the technical building porn that will be posted here :lol:
Good luck and enjoy building!
 
APL said:
Pet pig? How dare you sir! That is a wild boar I'll have you know,.. dan-ge-rous as hell, and thats NOT fat belly!
It's muscle... :)

Absolutely, and the pig I am talking about looked just like a young wild boar and was not fat. Even a wild boar has a certain roundness to the belly :wink:
And he could be dangerous, some big birds learned the hard way. One summer they were messing with him, and hacked on his back.
Suddenly they stopped. I understood when I found the feathers from one of them, they got too close to the mouth :lol:

VHXrhoa.jpg


He looked just like this one, not some fat laughable thing. He also scared off the neighbors dobermann that came to the fence and barked at him. He ran up to the fence and barked back. The dog made big eyes and ran off.

Sorry for the big off topic, what I am trying to say is it looks good.
Not like a pig in a bad way, it just remind me of a cool pig :thumb:

Nothing wrong with brazing, some seems to think it is better to build frames that way.
I dont know, but I am just better at welding.
 
Wow, that is a respectable looking animal! Looks like it could rip you a new one and not even think about it.
And it does look like my bike! :lol:

No worries, it's all fun and games here. This bike is more about holding big batteries than anything else, and a good
test bed for other projects. I think it will have close to a 60 mile range without pedaling a stroke, and enough power
to be pretty darn scary, if I want.

Thanks for the compliment SlowCo, and shirk, I'm going to try to braze it, although I'll have to get the BIG torch tip out,
cause some of these joints are pretty massive, and it's not going to fit on my brazing table, so I'll have to get all Doctor
Sues like with extensions and brackets,.. but I'll get her done. :wink:

The next step is getting some bends in the DT's,.. if I can pull that off, I'll feel better. Chromoly is made 'not' to bend,
so this may get ugly,.. but I did some previous testing on some, and although it came out a bit wrinkly, it worked well
enough to use. I would go with the heavier .058" tube for the DT's but I don't think I can bend it with my cheap jack-and-
saddle bender. I've always built 'straight tube bikes', so that's another first.
 
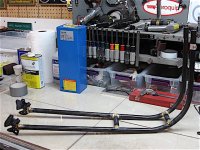
You were right, they didn't bend too bad, most of it was getting the MO figured out, and the first tube had to be cut up
for the rear battery box 'J' tubes,.. so nothing wasted yet.

V4 Tubs bent..jpg

I'm not getting a good feeling about using .049" for the upper part of the down tubes though, so I'm going to order up
some .058" lengths, and either try to bend it or at least splice some in for the upper part. I can use some for the short
middle pieces up there too. That will give me four .058 tubes going to the bottom of the head tube.
Extra shipping time,.. but safe is safe.

Meanwhile I can set up the table fixture, and cut & miter some of the smaller tubes, and bridges. Ah, well,.. a slow start,
but still slowly moving along. :)
 
I'll be using the old dusty & trusty Crystalyte 35XX motor in it, and pulling most of the parts off the old bike, but if I can
ever get the axial motor to step up, this is where she's going to hang. :wink:

If the bike works out, I plan to build another one just like it, so I can cruise with friends and family, and have a back-up
ride when it comes down to the experimental stuff. I hate being without it,.. it's becoming an emotional safety valve. 8)
 
Still creeping along, and not a lot to show, mostly cutting and prepping tubes. I had to backpedal and rethink the whole
down tube setup and strategy.

At first the one piece DT from head tube to dropouts seemed simple, but the reality is that it's close to impossible to get
several bends, head tube miters, and dropout notches all to line up and fit together perfectly,.. twice.

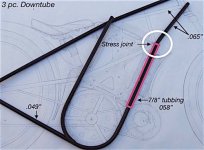
And the first joint down from the head tube needs to be really strong, since it's a high stress area, with three tubes and a
bracket brazed together there. The little .049 tube is just not going to cut it.

The answer is to use some 7/8"/.065" tubes for the front of the battery box, and slide the other tubes inside it. It's almost
a perfect fit, and allows me to use heavy .065" tubes up top side. It also makes the first joint almost 1/8" thick, which is
super strong,.. and makes it easy to get the head tube miter right, and get that tube brazed in by itself.

V4 3 pcs Downtubes..jpeg

So now I'm playing the waiting game with shipping again.

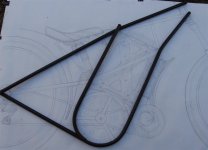
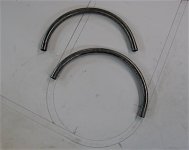
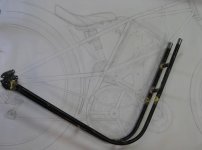
I have the top 'ring' tubes bent though. They're just made out of cheap seamed tube, because it's soft and easy to bend,
and mostly for looks, although they do give some support to the battery box.

Top ring bends.jpg
 
Since I changed the down tube, I need to do the build a little different, and since I have all the rear end parts, I might
as well start there.

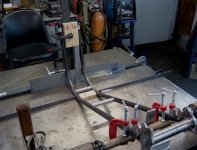
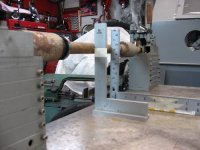
This fixture-picture would squeeze a tear from a grease brush, but it's an odd frame to build, so angle iron and clamps
it is. I start with a sharpie certer-line down the center of the table and then use squares to bring it vertical. Yea, I
know,.. whatever,.. it works. All I need to do is tack the two bridges in place.

CS fixture. .jpg

After the bridges are in, I can braze the dropouts in just by clamping the tubes vertical. Next I'll tweak the alignment,
and it's ready for the next phase,.. which would be the front battery box tubes.

The new tubes came in the mail today, so I'm all set to rock. She's starting to crawl off the table,.. we have lift-off! :)

Bridges and drops..jpg
 
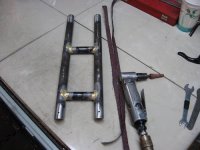
Front B-box tubes are cut, and a few more bridges are brazed in, this is one of the few times when "burning your bridges
is a good thing. I usually use rough sandpaper strips and an air tool to abrade the joints, and to open up the pores in the
steel and give the brass some channels to move through in the tight spots.

Front B-box & bridges..jpg

A quick check of the B-box fit to see if I'm 'in the realm', so far. so good.

Check frnt. B-box fit..jpg

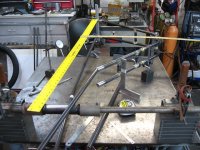
The next step is to get the frame set back up on the table fixture, and tack braze the upper down tubes to the head tube.
This fixture uses a 6" centerline, so I can find the center of the frame anywhere on the table by measuring up 6" from the
table.

IMG_2675 (1) copy.jpg

The last step before I achieve 'frame-dom'. I had to extend the table in back a little for this guy, I usually just do the main
frame on this table, and add the rear end later. But this is an odd dog for sure, and I'm not sure any fixture would work
well for it.

IMG_2678 (2) copy.jpg

Lots of triangulating and clamping to do, but once the head tube is in, I can put some wheels on it, and finally start to see
what kind of monstrous 'thing' I'm creating! :)
 
Thanks shirk, yes fixtures,.. they are varied and many, it seems there is no such thing as a perfect fixture. I've seen a
multitude of them in my day.

I settled on the table-tacking fixture way back when, and never changed it. Originally it had big electro magnets that
clamped the tube holders down, but it soon became obvious that they were overkill.

One nice thing about this set up is that gravity is always trying to keep things 'in' alignment, where as most other fixtures
are always being pushed 'out' of alignment,.. and I have a nice heavy duty work table when the fixture is not in use.
I can also build virtually anything on it, not just bike frames. But of course, it has many disadvantages as well, the main
one being, it's big and heavy as hell, and can't just be "put away" anywhere.
 
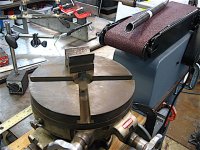
No frame yet, but getting close. I took a few days to build a tube mitering machine from a cheap belt sander.
I changed out the top roller with a 1.5" spool. Takes a little effort and still needs work, but it's working good for now.

IMG_2683 .jpg

I have a set of fancy Ti coated hole saw cutters for the mill, but don't like using them. Way too much eff'n around
and expensive to sharpen.

I've always liked grinding miters, and use to have a machine something like this that I could quick change rollers on,
for different sizes of tubes. But I only need a 1.5" head tube roller for now. Belts are cheap, and last a long time.

I cut the tube at an angle, bench grind it close, and belt sand the rest,.. only need to use the hand file a smidge.
I'm just using a tool rest at the moment, but plan to work in the rotary table later on when I get the time.

Just need to make sure that the belt is moving away from you, and not towards you.
 
What model is the belt sander?

I use cheap hols saws in my small benchtop mill would like to make an abrasive tube notcher at some point.
 
Its a Manards item, but generic and several companies re-lable it. Stay away from the Harbor Freight piece of junk.
When the smaller roller is used, the length gets out of range for the belt sander, so thats an issue that I need to fix.

Not sure how to go yet, I might cut a section out of the middle, re-weld it, and use the shorter 24" x 4" belts. Or,
use a side mount arbor spindle, so rollers can be slid on and off from one side, and throw the middle belt sander section
away altogether.

Probably cheaper to just start out with a motor and drive roller, and build the rest.. just need a way to keep belt tension.
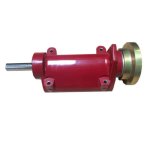
My old one had a self contained arbor assembly up front something like this, that the rollers mounted to.

arbor assembly.jpg

The sanding roller could mount to the motor shaft too, and then put the tension roller out back. Might lose some grip on
the belt though, I've never tried it.
 
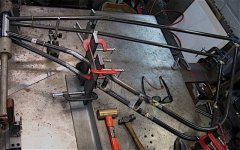
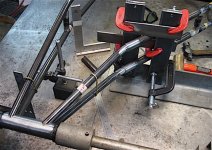
I decided to put the top tubes in, as long as it's in position, which was a lot of messing around. Four tubes will help keep
the head tube from moving around when it gets brazed.

Tubes mitered..jpg

This frame is making me get creative with the clamps. Some vent holes, and just a few more tweaks here and there, and I
can clean everything up for brazing.

Head tube miters..jpg
 
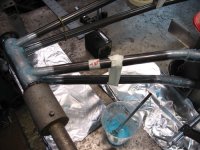
All fluxed up with some GFM type ’B’ bronze brazing flux, and it’s ready to go.

GFM type 'T' bronze flux..jpg

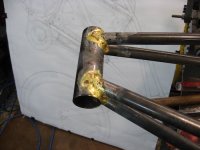
After a some torch work, and a lot of brass, she's stuck together but good. It's good to build it up a little, so it will finish
out nice.

Head tube brazed..jpg

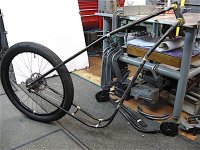
Finally, it’s a frame! One more e-bike in the world. :thumb: Hanging mighty low though,.. Yikes! The old wart hog has
some serious belly hang! Sure hope that works out... :confused:

It's a frame!!.jpg

It’s all bridges and laterals now, so I guess I’ll start with the ‘J’ tubes next, and go from there. I’m curious to see it with the
motor in it.

'J' tubes mtered..jpg

Looks like I'm out of the woods for now, so it’s time to start dismantling the old bike and start mocking up some parts on
the new one.
 
Back
Top