Greendog
100 W
- Joined
- Jun 15, 2021
- Messages
- 127
Greetings all of Endless sphere  from Greendog,
Great work everyone some truely exellent Ebikes and other mean machines found here. I'm looking forward to adding my creations to the list.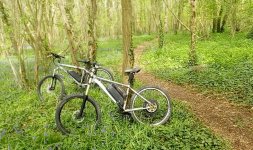
Thanks everybody for the collective knowledge that makes ES a great EV resource and community,
Very impressed with the level of engineering and inspired by the photography skills.
Building my bike took bit more time than i first expected,
but that was fine as it was a lot of fun,
i learnt lots building my first ebike, if i post all of the process hopefully it maybe of help to others doing similar bike builds. Will try do more pics of work involved next time,
Doing lots of research makes build go smoother and even then you will encounter unexpected challenges but that's half the fun.
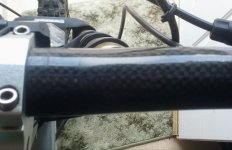
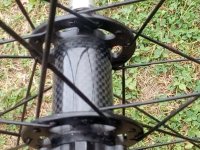
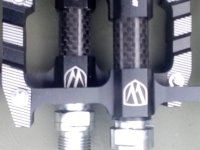
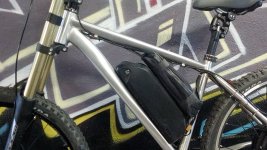
I got lucky with frame in two areas, the down tube is hydroformed squareish which makes the battery cradle more secure, giving a flatter surface to bolt on than a tube on most frames.
Secondly the frame is just big enough to fit a large 1500w (2200 peak on 52v ) kunteng controller between battery and top tube. 8)
To mount the battery securely and in a low position, required installing two extra rivnuts in addition to the existing bottle mounts, one either side of them.
I used the bolt with two nuts on ,then counter rotated method to install the rivnuts, :|
i recommend getting a rivnut installation tool as I did on my next build as this makes a critical area of the build much easier.
I started by test fitting the battery,
marking where the battery cradle/base needs to be,
then just the cradle to mark where the holes for the rivnuts should go so they land on ok areas for fixings in the cradle.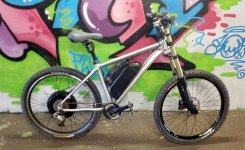
Four fix points feels secure, I've not had any issues even after couple crashes and lots rattling rocky down hill runs , maybe could get away with just three with a light battery and on road.
The cradle needed more holes drilled to match the extra rivnuts, lower two went in non standard places, one in the aluminum bottom portion of cradle, as found on the hailong cases that can accommodate a small controller in the battery case,
mine won't be going there so lots of room for big washer and m5 bolt, the other ended up under the battery to cradle connection,
i used a low profile head bolt to avoid interference, the other two went into the plate provided on the cradle, just needed use grinding bit on a drill to extend the bottom slot a little,
while grinding I also counter sunk the hole in aluminium part of battery base/cradle to accommodate the rivnut top on the frame, and removed some of the plastic at the top and bottom of cradle to match the profile of the down tube, after that it sat nice and flush.
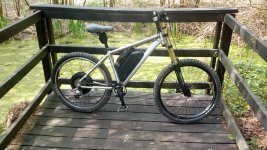

Next i needed get headset in, be nice to have correct tool to install but I just used my default multi tool a big hammer and lump of wood : ) as I had the hammer to hand i put an m6 in the star fangled nut and whacked that in the steerer tube.
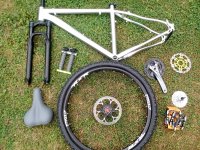
So front end on, wheel, fork, bars, saddle done,
Having these on means you can turn bike upside down which makes installing the hub motor rear wheel easier.
Getting the wheel in was bit tight needed to stretch the stays out a bit 4mm each side,
The cassette side needed about 4 washers I substituted these for a nut instead, ground down to right width added bonus of now gnarled surface on nut for inside of dropout bolt up against.
I ordered a hub motor with cassette which meant it came with a 12mm axle on gear side and 14 on the other, bit odd but the dropouts needed to be filed deeper so i compensated by making one side a bit shallower so 5mm one side 3 the other.
probably just go with seven speed freewheel next time as cheaper and bit slimmer and axles equal you don't use gears much with the 1500w anyway, :wink:
How deep you can go depends on how much material there is on your dropout you don't want to go to far,
As this will weaken them and be aware as wheel goes further into the dropout it puts the position of rotor deeper in the caliper,
I used a hand file and grinding bit on a drill,
go slow as you want a tight fit axle flats are 10mm,
qr dropouts are 9mm so barely half a mm of the flat sides of the dropout I used the inside of washers provided as a template to scribe a line to know how far to go with the filing,
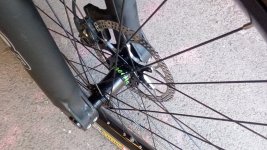
The caliper was very close to the motor and rotor not central , filing the caliper mount on frame sorted this,
this whole process required test fitting the wheel far to many times than I care to remember,
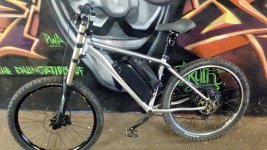
while bike upside down and took chance make sure wheels dished accurately and ran true, nice tight spokes,
Then tyres and torque arm was installed,
With tyres on could put bike tyre side down now felt great making progress and get a feel how bike gonna look fresh set of tyres always looks great,
Then chucked on some deore hydro's, SRAM 8speed ,single speec170 crank with bashring
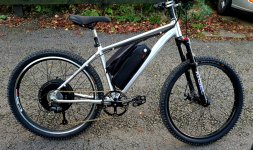
Next was controller used a bag which was tight squeeze between battery and top tube I used load sticky back Velcro its not visible and very secure, chucked a chain on,
bit of a clearance issue the deraileur getting caught on motor cover bolts could solve with a spacer behind cassette but I just wound in limit screw and lost highest gear not needed anyway, and i like the peace of mind it and chain being that bit further from spinning motor,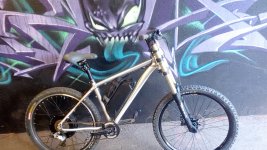
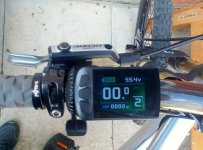
couldnt wait to go for ride so hooked up screen and pas, didn't have to do the brake switches as not needed might add regen button later though.
I cut the full twist throttle that came with kit in half to make a half twist later upgraded to a left hand thumb throttle,
got busy with zip ties,
Went for a blast, needless say I loved it, reminded me scrambler bike I had as a youth, lots of excess cable looked like a science experiment
  , acually rode it like this for month before I bit the bullet and tidied wires by cutting and soldering left halls too small to many to be worth it , I recommend a bit of practice soldering if you not done much , the joys of ebiking, soon as I finished bro wanted one so had the fun of making a its twin to
Great work everyone some truely exellent Ebikes and other mean machines found here. I'm looking forward to adding my creations to the list.

Thanks everybody for the collective knowledge that makes ES a great EV resource and community,
Very impressed with the level of engineering and inspired by the photography skills.

Building my bike took bit more time than i first expected,
but that was fine as it was a lot of fun,
i learnt lots building my first ebike, if i post all of the process hopefully it maybe of help to others doing similar bike builds. Will try do more pics of work involved next time,
Doing lots of research makes build go smoother and even then you will encounter unexpected challenges but that's half the fun.


I got lucky with frame in two areas, the down tube is hydroformed squareish which makes the battery cradle more secure, giving a flatter surface to bolt on than a tube on most frames.
Secondly the frame is just big enough to fit a large 1500w (2200 peak on 52v ) kunteng controller between battery and top tube. 8)
To mount the battery securely and in a low position, required installing two extra rivnuts in addition to the existing bottle mounts, one either side of them.
I used the bolt with two nuts on ,then counter rotated method to install the rivnuts, :|
i recommend getting a rivnut installation tool as I did on my next build as this makes a critical area of the build much easier.
I started by test fitting the battery,
marking where the battery cradle/base needs to be,
then just the cradle to mark where the holes for the rivnuts should go so they land on ok areas for fixings in the cradle.

Four fix points feels secure, I've not had any issues even after couple crashes and lots rattling rocky down hill runs
The cradle needed more holes drilled to match the extra rivnuts, lower two went in non standard places, one in the aluminum bottom portion of cradle, as found on the hailong cases that can accommodate a small controller in the battery case,
mine won't be going there so lots of room for big washer and m5 bolt, the other ended up under the battery to cradle connection,
i used a low profile head bolt to avoid interference, the other two went into the plate provided on the cradle, just needed use grinding bit on a drill to extend the bottom slot a little,
while grinding I also counter sunk the hole in aluminium part of battery base/cradle to accommodate the rivnut top on the frame, and removed some of the plastic at the top and bottom of cradle to match the profile of the down tube, after that it sat nice and flush.


Next i needed get headset in, be nice to have correct tool to install but I just used my default multi tool a big hammer and lump of wood : ) as I had the hammer to hand i put an m6 in the star fangled nut and whacked that in the steerer tube.
So front end on, wheel, fork, bars, saddle done,
Having these on means you can turn bike upside down which makes installing the hub motor rear wheel easier.
Getting the wheel in was bit tight needed to stretch the stays out a bit 4mm each side,
The cassette side needed about 4 washers I substituted these for a nut instead, ground down to right width added bonus of now gnarled surface on nut for inside of dropout bolt up against.
I ordered a hub motor with cassette which meant it came with a 12mm axle on gear side and 14 on the other, bit odd but the dropouts needed to be filed deeper so i compensated by making one side a bit shallower so 5mm one side 3 the other.
probably just go with seven speed freewheel next time as cheaper and bit slimmer and axles equal you don't use gears much with the 1500w anyway, :wink:
How deep you can go depends on how much material there is on your dropout you don't want to go to far,
As this will weaken them and be aware as wheel goes further into the dropout it puts the position of rotor deeper in the caliper,
I used a hand file and grinding bit on a drill,
go slow as you want a tight fit axle flats are 10mm,
qr dropouts are 9mm so barely half a mm of the flat sides of the dropout I used the inside of washers provided as a template to scribe a line to know how far to go with the filing,
The caliper was very close to the motor and rotor not central , filing the caliper mount on frame sorted this,
this whole process required test fitting the wheel far to many times than I care to remember,

while bike upside down and took chance make sure wheels dished accurately and ran true, nice tight spokes,
Then tyres and torque arm was installed,
With tyres on could put bike tyre side down now felt great making progress and get a feel how bike gonna look fresh set of tyres always looks great,
Then chucked on some deore hydro's, SRAM 8speed ,single speec170 crank with bashring
Next was controller used a bag which was tight squeeze between battery and top tube I used load sticky back Velcro its not visible and very secure, chucked a chain on,
bit of a clearance issue the deraileur getting caught on motor cover bolts could solve with a spacer behind cassette but I just wound in limit screw and lost highest gear not needed anyway, and i like the peace of mind it and chain being that bit further from spinning motor,

couldnt wait to go for ride so hooked up screen and pas, didn't have to do the brake switches as not needed might add regen button later though.
I cut the full twist throttle that came with kit in half to make a half twist later upgraded to a left hand thumb throttle,
got busy with zip ties,
Went for a blast, needless say I loved it,


