Kiwi Tired legs2
1 µW
- Joined
- Nov 23, 2021
- Messages
- 3
Hi all, Great forum very useful this is my first post.
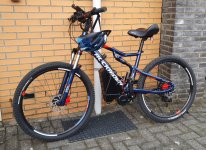
Here is the start of my first Ebike conversion. Comments, suggestions and encouragement would be welcome. I have mocked up fitting dimensions and it is clear installation will be very tight but should work.
Too late now anyway as I have ordered parts and am now playing a waiting game for delivery by Luna. Three weeks waiting now and I am getting very impatient to start hence this early post.
[b]Bike - Marin Mount Vision XM6 2013 Full Suspension Large Frame[/b]
[ATTACH type="full" alt="Main.jpg"]301723._xfImport[/ATTACH]
[b]Conversion Kit Bafang BBS02 from Luna Cycle [/b]
• BBS02
• 52V 14 AH Shark Case
• Lekkie 42 Tooth Bling Ring
• 500C Mini display
• Clarke Ebike Hydraulic Brake Set 160/180mm
• Thumb Throttle
The new E bike brake conversion kit added a fair bit of cost. Justified because my old rotors and pads were shot and I hope that the inbuilt sensor cut offs will clean tidy and reliable.
[ATTACH type="full" alt="ebrakes.png"]301722._xfImport[/ATTACH]
[b]Battery Fit [/b]
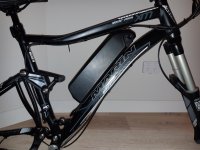
So many vendors quoting slightly different dimensions and every mm counts here. In the end I downloaded a template from fasterbikes.eu. With air released from shock I tried the battery right way and wrong way up. Moving rear swing arm though full range. Clear things will be very tight. I may not have enough room to dismount from the base plate... or...Maybe the concave shape of the shark battery case at pointy end will be enough to save me here.
Mounting wrong way round might be easier fit as with shock extended, I seem to have room to unlatch from mounting plate. But I don’t like the idea of fighting gravity or having cables exit at the top, so will try to the right way up.
[ATTACH type="full" alt="1 small.png"]301717._xfImport[/ATTACH]
Right way round looks better I think but is very tight for removal. Again maybe the concave profile of the battery case at the pointy end will give me the wiggle room I need to remove.
[ATTACH type="full" alt="2 Small.png"]301718._xfImport[/ATTACH]
If I rotate the rear shock 180 degrees to move the valve, I gain precious few mm but will need to Dremel out just a little piece of the pivot arm
[ATTACH type="full" alt="3 Small.jpg"]301719._xfImport[/ATTACH]
[b]Chain line[/b]
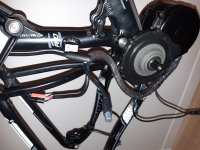
Looks promising I downloaded the template from BfangdirectUSA (very helpful) and cut it for the Lekkie 42 Tooth Bling Ring. If anything I might need to space it out ?
[ATTACH type="full" alt="4 Small.jpg"]301720._xfImport[/ATTACH]
[b]Mounting plate and rotation stabiliser idea.[/b]
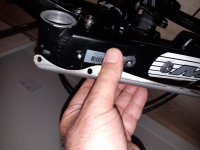
I have an idea in mind to reduce torque rotation around bottom bracket. I plan to add a plate to the underside of the down tube, bolted to existing factory boss screws. Ideally with plate spaced away from top tube so that I can run cables underneath but the priority is to create a frame mounted fixing point to link up Bafang plate, motor and frame with a single bolt. Mocked up below in MS Paint CAD. Fixing M6 bolt would pass right though through mounting plate and Bafang motor lug then into the new fixing point bolted to frame.
[ATTACH type="full" alt="5 Small.jpg"]301721._xfImport[/ATTACH]


