The Cycle Satiator, universal charger for the enthusiasts

john61ct said:
The CV period - if there is one - will be a small fraction of the CC stage.
"If there is one?" It is often longer than the CC stage, especially with higher power chargers. (Which is one reason why going higher in power doesn't always get you significantly shorter charge times.)
 
Yes, the higher the initial C-rate at lower SoC range

the lower the SoC% where voltage hits the setpoint

and thus the higher proportion of total charge time spent at CV stage.

With lower C-rates, say 0.1C and below, can just use HVC to terminate charge, "charge to X and stop" aka CC-only profile

to get closer to the (too high) vendor-theoretical max capacity, voltage can be set a little closer to max without undue stress harming longevity.

That really only comes from high voltage setpoint **combined with** letting endAmps go too low.

If I use CV my usual endAmps is 0.05C or maybe 0.02C if the use case really requires highest cap utilization.
 
markz said:
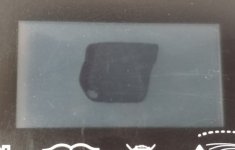
Has anyone else had a aesthetics problem with the screen. When its on I dont notice it. Plastic covering from new is off.

I recently received mine and it has the same problem. Has anyone had this remedied under warranty?

satiator.jpg
 
Mine is brand new out of the box three days ago and has the mark in the screen. It is not something I am worried about.

I ordered the Satiator with two 14S7P hard case batteries from EM3EV. Batteries are expected in a few days. The charger came with ST3 charge lead instead of expected Anderson plugs. Apparently the batteries have changed from the pics on EM3EV website.

I want to be able to charge and discharge these packs in parallel.

ST3 is a bit of a pain. Is there an ST3 splitter cable or am I going to be replacing plugs? I don't really want to do that... I want keep it all original in case there is a problem later.

What is the third wire?
 
On the batteries, you would have to ask EM3EV what they are using hte 3rd wire for.

On the Satiator, the 3rd wire is a multipurpose wire.

When used with the XLR-phono/anderson adapter that comes with the Satiator from Grin (plugged into the XLR on the non-satiator end of the Satiator's included cable), the 3rd wire is a data signal wire used for programming, etc.

When used either directly from the XLR, or with an XLR-other-3-pin-plug adapter that includes that 3rd wire to it's own pin, it can be used as a thermal sensor signal wire for packs like NiCD and NiMH that need those for safe charging shutoff.

When used with satiator firmware that supports it, an OEM can setup the Satiator to detect that it's particular battery is connected and start charging with the correct profile for it, based on IIRC a resistance on that 3rd wire to ground. (this is mentioned either in the Satiator info page or one of the blog page posts about the satiator, and also somewhere here on the forum, probably within this thread).


Regarding the ST3 splitter, you'd probably have to make your own, or contact EM3EV or Grin Tech to see if they can make you one. (or some other place that may sell ST3 connectors and cables).
 
Cusmade.

https://cusmade.biz/Product/Detail/22

Email jeannette@california-ebike.com She should have the Cusmade pigtail. The actual designation is below with specs. A great connector for higher charge rates.

Power 1103A
Specification
Operating Temperature : -25℃~+80℃
Rated Voltage : 48V AC/ 60V DC
Rated Current : 15A MAX
Contact Resistance : ≤10mΩ
Insulated Resistance : ≥20MΩ
Terminal Material : Copper Alloy (Gold plated)
IP Rating : IPX5
Mating Cycles : ≥2500
Plastic Material : Male Jacket:pVC Female Jacket:TPU Female Panel:pA66+GF Meet UL94-V0/RoHs Requirment

TDB said:
Mine is brand new out of the box three days ago and has the mark in the screen. It is not something I am worried about.

I ordered the Satiator with two 14S7P hard case batteries from EM3EV. Batteries are expected in a few days. The charger came with ST3 charge lead instead of expected Anderson plugs. Apparently the batteries have changed from the pics on EM3EV website.

I want to be able to charge and discharge these packs in parallel.

ST3 is a bit of a pain. Is there an ST3 splitter cable or am I going to be replacing plugs? I don't really want to do that... I want keep it all original in case there is a problem later.

What is the third wire?
 
Thanks.

Somehow I didn't have topic reply notifications for this thread...
 
Batteries arrived today. I was trying to gather up everything I needed all at once and it turns out the battery charge lead is its own thing that plugs into the side of the case... I can cut one of those up without any problems.

The EM3EV dongle has ST3 to Anderson so it also looks like the third pin in the ST3 plug is not used.
 
Hi there,
is there a way we can see the Charge Graph from the Satiator on a connected PC?
It would be very interesting in this scenario where I am trying to see the relationship between the amount of charged Wh and my battery SoC.
thanks for your help!
 
Hello,
I would like it very much if the Cycle Satiator could also evaluate a "temperature signal" (10k NTC) from a lithium-ion battery in the future.
On the one hand, I would find such a temperature display interesting, but it is also a safety feature to be able to reduce the charging currents at very high but also very cold temperatures.
 
Why would a Satiator lose all programming after working for several months flawlessly?
GC360-7205
 
Mine did that a few months ago. Told Grin about it and they did a exchange.No real reason given why it happened.
 
evolveinla said:
I'm having a similar problem with my 72v unit.

Worked perfectly for about 10 days, now it's giving an error message 'shorted 0.0v', regardless if the charging cable is connected or disconnected to the charger.

When you connect it to a pack, the charger starts charging normally, but it does spark/pop just like the previous user mentioned. Already contacted Grin about it, I'm sure they get it rectified. Other than this problem, I love the charger.

found this on google.
i have a brand new satiator with FW 1.0.26

it has similar behavior. Sparks on connecting a battery. and in idle it shows the "short 0,0v" message.

this is my 2nd satiator and thats not normal. is there a fix or something? maybe reflash firmware?! or ist this unit toast?!
 
Hi, i just bought a Satiator 72V but the USB cable was unavailable (and quite expensive since needed to buy the USB connector AND the adapter which I did not need since my battery charges directly through the XLR.

I am therefore trying to recreate this USB TTL connector and bought:
- 1 XLR female connector
- 1kohm resistance
- 1FT230X connector (comes with 4 wires:
- red 5v
- TxD white
- RXD green
- ground black)

I am now trying to connect the ft230X to the XLR and was looking for confirmation that I:
- need to connect black ground wire to connector 2
- need to connect both 5V (red) and RX (green) on connector 3
- need to connect in series of 5V a 1kohm resistance


Is that right and indeed the TXD does not need to be connected or I am missing something (just weird to me to have to connect the 5V to the communication port)?

Thanks for your help.
 
Not an answer, but...

USB-TTL reads in stock. $14 too expensive when it saves these sorts of problems?

It is easy to build profiles directly on the satiator if you read the manual. One battery... maybe two or three profiles. Set and forget. No cable required... ever!
 
Thanks, you forget the need also for the adapter to get the jack connection, shipping costs and import costs making the price ridiculous for something that costs USD 5 to make (I live in Switzerland) - would cost USD 72 plus taxes i.e. roughly USD 100.... I am sure that changes the perspective LOL

Also, always better to have names of profile displayed rather than Voltage etc, and for USD 5 why not do it.

More fun to build than to buy, learning something every day ;)
 
I understand your point about importing. Those two parts cost about $100 to Australia. Most of it freight. That is why I give it some thought and buy everything at the same time. Cables don't cost any more to ship when they are in the box with the charger.
 
Even for that option on ebike-solution (only official reseller in Europe):
- USB Cable: EUR 20.92
- Jack connector: EUR 16.72
- Shipping EUR 14.92
- Taxes on arrival: EUR 18 + 10%
Total: EUR 77.6 i.e. USD 93... pretty crazy how well this world is made on pricing arbitrage, isn't it ;o)

Conclusion: my option to build it myself is the only solution which is not ridiculous from a pricing point of view (and by the way, at USD 300 for a Satiator, I think Grin should include a TRX to USB cable (instead of going through a Jack) that would cost them USD 5-7 to manufacture.
 
I think it would be better to have the programming connector either in the charger case or between charger and XLR.

None of this answers your original question.
 
Halleluhiah, I tried the connections below and it worked first time (both reading and writing). So you wan make your own USB to TTL cable very easily.

So if you want to build yourself a XLR to USB connector, you need to buy:
- 1 FT230X connector : EUR 10.16 shipped on Aliexpress
- 1 XLR female connector with 3 pins: EUR 1.98 shipped on Aliexpress
- 1 resistor of 1kOhm : EUR 1.79 for 20 pieces on aliexpress

Total cost: EUR 13.93 (pretty sure one can get even cheaper).

To be soldered:
Solder the black FT230X wire (ground) to pin 2 of the XLR
Solder the 1 Kohm resistor to the TXD (white) wire of the FT230X
Solder the other side of the 1KOhm resistor to pin 3 of the XLR
Solder the RXD (green) wire of the FT230X to the same pin 3 of the XLR => So the Pin 3 of the XLR is connected directly to the RXD and indirectly (via the 1KOhm resistor) to the TXD
The Red (5V) wire of the FT230X does not need to be connected

Then you connect the USB to your PC (yet the other side of the system NOT connected to the Satiator) => The FT230X will eb autoimatically recognized, yet most likely you won't have the driver installed
Then install the proper driver (https://ftdichip.com/drivers/d2xx-drivers/) for the D2XX, for WIndows 10 you can click here: https://www.ftdichip.com/Drivers/CDM/CDM21236_Setup.zip

Once driver installed, start the Satiator and select "Connect to PC". Once done, connect the XLR female of the USB cable to the XLR male of the Satiator

Go to the Satiator system on your PC select the right port (in my case when I installed the driver, I got a new COM5 appear) and click Connect.

From there it is pretty self explanatory.

Only weird stuff is that the profile are easily uploaded and saved, but looks like the Satiator refuses to save the new System settings (like brightness etc) that I am trying to change, It tells me "Success" when I "Save to Satiator" but we don't have the same definition of success then. Not the most annoying thing anyway.

Conclusion, this was actually fun to do and not very complicated (I am pretty bad at soldering, yet managed to do it first try).
 
Good work.

Nothing from the forum x-spurts on everything during this.
 
Back
Top