e-Evil *Imperial* w/ 750w Bafang Mid Drive

stuntmanmike

100 W
Joined
Mar 20, 2011
Messages
148
Location
Dix Hills N.Y.
I decided to build an easier kit before jumping head first into my Davinci Drive/Astro motor, dual suspension build. I have no e bike experience as yet but I have built quite a few electric long boards & an e-mountain board, successfully. I figure I can learn from this and be more prepared when I build the other. I have been riding bikes for many years & have a massed quite a few bikes & parts, a horde, really...I'm sure most of you understand.
For this build I'm using an old school Evil bikes, Imperial frame which was billed as a "Freeride Hardtail" back in the day when it came out. Its a very well built frame but was always a bit heavy to pedal any kind of distance. I'm hoping the Bafang set up lends itself well to this frame as it would be nice to use this one again. I think the the electric bike thing is a great way to breath new life into old bikes.
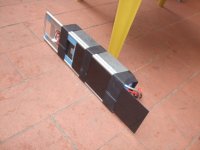
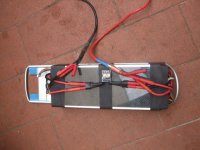
So this is what I got done so far:a.JPGView attachment 66.JPG9.JPG8.JPG10.JPG5.JPG3.JPG

-So all that's left is lacing up some wheels adding a derailleur & the brakes which have to be cable type due to the supplied levers.
Any advice or questions?
 
I would recommend running a smaller front chain ring to keep controller temps down if you plan to do any sort of hill climbing.An astro would be insane would be cool if somebody came out with a complete astro kit to just bolt on including throddle controller amd all the jaZz.
 
wormsman said:
I would recommend running a smaller front chain ring to keep controller temps down if you plan to do any sort of hill climbing.An astro would be insane would be cool if somebody came out with a complete astro kit to just bolt on including throddle controller amd all the jaZz.

http://www.recumpence.net/parts.htm
 
An Astro motor definitely would be crazy but this kit is kinda sealed & I really don't want to mess with the internals just yet... I have the Davinci w/ Astro motor ready to go for the next bike I build after this one.
You'd recommend a smaller chain ring? Like what size? & thanks for the advice.
 
I ordered some more batteries today, I had 2 already from one of my e-skates so I got 4 more. My plan is to use six 6s 25C 8000mah lipos paired in two's & attached in series w/10awg wire. From there I'll make a parallel harness w/XT90 connectors to the controller...Does this seem correct? I'd like to make the parallel harness with as few connectors as possible by soldering the parallel leads together directly tied with copper wire. I am familiar with Lithium polymer batteries from RC & my other projects but I'm a bit confused w/this because I'm using 6...

-Please advise, this needs to be correct.

-Also what kind of range do you think I will get with this config.? Is it even enough for this build or shall I add two more?
(Ill be using a back pack lined with lipo safe bag material for battery storage)
Thank you.
 
just buy the cheap parallel harness off of hobby king or ebay. Then crimp/solder your own connector on the lead. Takes a few minutes at most.
 
1KW- Thanks,
That's a good idea, but I think its almost the same amount of work cutting off the XT60 connectors(the only 6x harness they have is XT60 only) & replacing them with XT90's. & I know I can make a better one myself using better quality materials & better solder joints.

DAND214-Thanks,
It will be 12s that I'm going for & according to the specs. the controller can handle 48v which should be fine, I think.


My question was more about the configuration I'm doing & if it was correct? & what kind of range can I expect to get with this?
 
Hi Mike, nice bike!
I have that exact motor, I Use it with 6x6s 5000mAh, so the config is exactly the same. The range change a lot from the assist level, use of Pas /throttle...(and from the standard variables)....but with 24Ah of 12s lipos, sure you get a great range :shock: you could be able to pass the 100km easily, and I think you are a true biker, so even more...

For the assembly....I'm not that battery guru....If I've understood your way, It seems good, we need to serialize 2 group of 3 paralleled 6s bricks, in our case.

For my lipo packs (I Have 4 for 3 bikes) these are my typical preferences:

- I like to use the same connectors that the bricks originally have for the parallel connections.
- I prefer separated connectors (so no XT and similar) ,
- I use properly sized HQ bullets (8mm for the astro) for the final main leads (ESC connection).
- Basically I use 2 harness sets, one set with the exact connector's number for the packs to be paralleled (the "permanent" connection), the other with a pair in surplus (so 3 for the permanent connection and 4 for the main leads side) I use this surplus pair (typically HXT) to charge the Pack.
- I Have a reasonably oversize fuse (250A in my case) inline with the "+" lead, just to protect the pack from external shorts.
- I used angle profiles (alloy) T profiles (alloy) and CArbon fiber plates, to assemble a shield for the whole pack so that the single bricks are well tight, I use large shrinks rings and velcro strips to secure everything solidly., this way I can easily disassemble the shield in its single modules and reshape the pack if needed.

Since I have the drive and the Pack disassembled, right now, I plan tomorrow to make pictures and a short video of the reassembling process. This could be of help to visualize my Battery solutions, and How smart and easy is an Astro Drive, while properly configured and tuned, to be mounted and dismounted, and used.
Also I want to make some video showing low speeds and start from 0 that are the weak points of the system (compared to an ideal perfect system), but indeed are more than acceptable if you don't intend to make trials or other slow/static technical, Maybe this will add fresh and useful material about the sensorless Vs Sensored debate :wink: .

EDIT:
That's the internal of my "camo bag" with 4x 6s 5000mAh :wink: The wires are protected by another Angle profile, that is secured to the whole assembly by velcro stripes. I wrap the profiles/plates internally with adesive pads used for the internals of pediatric and orthopedic shoes....one side is a plastic and elastic material with very strong adhesive coat, when the other side has a really soft and thin organic pad surface. It is 3mm uncompressed and less than 1 compressed.
The Angle (20mmx20mm) And T profiles I use are 1.5mm thick, the carbon material is a CARBODUR unidirectional 50mm stripe that comes in 1.5mm thikness and 2 metrs lenghts at acceptable price, and HK 1mm thick 300x100mm prepreg plates.... It's maybe the cost of a Lipo brick for the work as shown....
 

Attachments

  • DSCF3777.JPG
    DSCF3777.JPG
    74 KB · Views: 9,069
  • DSCF3778.JPG
    DSCF3778.JPG
    73.7 KB · Views: 9,069
  • DSCF3780.JPG
    DSCF3780.JPG
    85.9 KB · Views: 9,069
Thanks Jules,
That was super informative.
I made my parallel harness Saturday and used a mesh wire loom to make it nice and solid. I also came up with a good solution for the battery back pack. I used an old Northface "Gulper" hydration pack and removed the water bladder. It's a great size for this and I can certainly fit my six 6s batteries in lipo bags between the two compartments in rows of three. I ran the wire harness through the drain hole in the right rear bottom of the pack and got it to the perfect length where it won't interfere with peddling or the rear wheel. I also replaced the power lead on the drive unit it self with a larger e-Flight connector that I can easily access if there's a problem. I'm thinking Maybe to add a 200-250 amp circuit breaker or fuse on the power side of the harness after speaking to Panurge but I'm unsure of where to get one?
So now I'm waiting on my batteries and for the wheels to come back from being built at the bike shop....photo 2(5).JPGView attachment 1photo 4(3).JPG
 
I use an inline fuse only also with the BBS. A fuse is virtually part of the pack in my mind and is independent from the bike in which it will be used.
A reasonable approach could be to oversize the fuse in respect to the ESC, say 50-100% more of the Amps your ESC is able to peak at, But, In theory the same battery pack should be oversize in respect to the ESC in terms of AmpsRate, and This kind of fuse is primarily intended to protect the Pack from external shorts (most cases coming just from the ESC) and not the ESC, so in the Ideal world, (the lipo world :mrgreen: ) the fuse should be sized with the intention to stay under the maxAmperage you would like your pack works, that should be anyway far from any Amperage at which the ESC could work, in any circumstance...
A Fuse popped is really dangerous for an ESC, Mostly if an RC one, so it is important that you really want the fuse to interrupt the circuit only when a disaster short comes from outside the pack and never occurs during High peak AMPS while riding, even if the ESC is over its rating.
Note also that a fuse isn't often intended to pop at the exact moment that a current reach its nominal rate, At least these kind of fuses...
A fuse breaker is an option, I would say With the BBS you could use near whatever setup you prefer, but with the Astro, less components in the circuit=less potential failing points, plus, a c.breaker for 50vDC 250A should be big, $$ and heavy.....
CarAudio, marine, and automotive shops are anyway the places to look for HQ Fuses/breakers/switches

A Camelbag or hydration pack or some small hiking backpacks are perfect for the purpose :wink: you are right.

After testing a bit I decided to use COiled wires, since I feel that non coiled leads, but long enough to move freely over the bike, are dangerous, . You may find some coiled wires for the BBS, because of the 25Amps, But something in fine strain - 8g size for the Astro is uncommon and $$....
 
^^
Thanks.
My batteries arrived yesterday, so I got to work soldering XT90 plugs onto each one. I also made three separate series harness' for each group of two. I installed some Hayes Mx1 disc brake calipers which I had around for a while & realized how much easier these are than installing & bleeding hydraulic ones... The trade off is in the performance I know, but for this project they should do fine. I also installed a Sram x-9 8spd trigger shifter & cant decide if I want to use an X-7 or x-9 derailleur, I have both. Maybe the X-7 because it seems a little less fragile. The handle bars are becoming pretty crowded now, particularly the right side where I mounted the thumb throttle. It now has the brake lever & shifter to contend with, but I spent a lot of time getting the placement just right where each component can fully extend to distend w/o touching the other. Too bad there's no reach adjustment on the Bafang levers now, I'm sure someone here will improve them eventually...I brought a set of 26" double wall rims & profile mtb disc hubs to the bike shop last week to be laced & I'm just waiting for them to come back. So whats left is:
Derailleur adjustments & changing the sprocket on the drive unit. I already have the adapter, any ideas on how many teeth I should go with for the sprocket???
e e imperial 001.jpge e imperial 002.jpge e imperial 004.jpge e imperial 006.jpge e imperial 007.jpg
 
http://www.bike-emotion.org/downloads/manual-of-c961.pdf

I didn't buy my kit in the states, so when it came it was set to the default levels. I searched & found the manual for the C961 display(I didn't get a manual either) & it explained just how to program the unit. It was quite easy actually, & I was able to change all the levels in the drive to the higher settings. I went w/9 levels of PAS(from 3) and set the speed limiter to 55kmh (from 25)...I never got an answer to my sprocket tooth dilemma so I went with a 44t 104Bcd Race Face chain wheel. That's maybe 10 less teeth than the original & much lighter being made of aluminum. The only thing is I'll loose the cheap plastic bash guard that came with unit. This is only a problem is if it serves a second purpose & I suspect it does, of keeping the chain on....? In any case I'll try to replace it with an older E-13 "Super Charger", hopefully it works...

I'm still waiting for my wheels to come back from the bike shop...But other than that I think its just about done.
 
I'm very curious to see how you like the frame when it's all done. Like I mentioned, I have been looking for one of those for quite some time but I've always been concerned about the seat tube angle being unusual for normal street riding.
 
Hi Todd,
I'm pretty curious myself...before this conversion, this wasn't a bike for anything other than downhill, well for me anyway...Just look at the steep angles, in its defense it did work well for it's intended purpose though. I think by adding a motor and I'm not sure this is the right one for it, should definately make it more versatile...we'll see. I also just began building a Davinci drive w/ an Astro 3220 on a full suspension dh bike. So if this doesn't work out I have that to concentrate on.
 
I installed a Race Face "Turbine" 44t sprocket w/the adapter & everything went together pretty easily. To me it actually looks factory finished with this sprocket. I heard from my LBS & they said I needed a new 135mm rear hub for this bike so I ordered a Profile Racing 36h rear disc hub which should be in today or tomorrow. I should have my wheels back & built this weekend, hopefully...An interesting feature of the older Sram X9 trigger shifter is that allows you to see which gear your in. I am going with an X9 Derailleur as well.


photo 2(5).JPGphoto 3(2).JPGView attachment 1photo 4(3).JPG
 
**Update**
I got the wheels back from my LBS & they are killer! I'm very happy with how they came out. I ran into some trouble with the rear axle not fitting into the dropouts, so I have to look for a long steel bolt which I'll do this week. Otherwise I think it came together pretty well. I added a chain guard to the Race Face Turbine sprocket & I think it will work the same as the original.
First ride this Saturday...photo 2(5).JPGphoto 3(2).JPGphoto 4(3).JPGphoto 5(2).JPG
 
Hey Mike - I'd like to know how your chain line is looking after installing the adapter and race face ring. I may have missed it but do you have a 68mm or 73mm bottom bracket shell?
 
joshseitz said:
Hey Mike - I'd like to know how your chain line is looking after installing the adapter and race face ring. I may have missed it but do you have a 68mm or 73mm bottom bracket shell?
Hi Josh,
The chain line was way off...The way I remedied it was to remove the smallest gear on the rear cassette(9spd Sram) & shim the cassette a little closer to the chain right side stay. The rest I made up with by adjusting the Sram X9 derailleur which is fully adjustable and easy to use. So this left me with an 8 speed set up & an almost* perfect chain line. I'm lucky to have a good friend that works in my LBS & he & I worked on this all week to get it right.
edit***It has a 68mm BB.
 
I rode this bike for the first time this weekend & I must say I was surprised.
First at how quiet it is, second that it was pretty fast, which really caught me off guard. I was thinking this whole thing may be a bust after reading through all the threads here but wow! was I wrong. I set this to 9 levels of Pas & found the throttle override is relative to the Pas level your in. On Friday I couldn't get the display to work because the magnet attached to the wheel was too far away. So the bike was stuck on level 4 of Pas with no display. Not realizing this I thought this was all it could do...but I was wrong again.
I made my own magnet extender & by Saturday everything was working properly. I was able to set it to level 9 & that's where the fun began. Up & down stairs, off drops, step-up jumps and 30mph street runs. Ill try to get some video soon. This thing is awesome for what it is...
 
stuntmanmike said:
I rode this bike for the first time this weekend & I must say I was surprised.
First at how quiet it is, second that it was pretty fast, which really caught me off guard. I was thinking this whole thing may be a bust after reading through all the threads here but wow! was I wrong. I set this to 9 levels of Pas & found the throttle override is relative to the Pas level your in. On Friday I couldn't get the display to work because the magnet attached to the wheel was too far away. So the bike was stuck on level 4 of Pas with no display. Not realizing this I thought this was all it could do...but I was wrong again.
I made my own magnet extender & by Saturday everything was working properly. I was able to set it to level 9 & that's where the fun began. Up & down stairs, off drops, step-up jumps and 30mph street runs. Ill try to get some video soon. This thing is awesome for what it is...

Very cool! Looking forward to seeing the video.

How did the frame geometry feel for normal pedaling?
 
Hi Todd,
The bike really feels great now, before peddling was a hassle for sure (it's a heavy frame). I used to walk it up hill & ride down as peddling up was out of the question. But now I'm sure I can climb just about anything with the way its geared. As for the geometry, I think the Totem is a perfect fit for it. Years ago I ran a dual crown Marzocchi Shiver & that was too big, although I didn't know it at the time. Now with this fork it feels balanced & nimble, a different bike then from what I could remember.
I think you should get one Todd although they are getting kinda hard to find check Pinkbike.com they're out there.
 
stuntmanmike said:
Hi Todd,
The bike really feels great now, before peddling was a hassle for sure (it's a heavy frame). I used to walk it up hill & ride down as peddling up was out of the question. But now I'm sure I can climb just about anything with the way its geared. As for the geometry, I think the Totem is a perfect fit for it. Years ago I ran a dual crown Marzocchi Shiver & that was too big, although I didn't know it at the time. Now with this fork it feels balanced & nimble, a different bike then from what I could remember.
I think you should get one Todd although they are getting kinda hard to find check Pinkbike.com they're out there.

I'm keeping my eyes open. Problem is I want a large frame and those seem to be even harder to find.
 
There was another frame that was an almost perfect copy of the Evil called the Ducan "Cocker" made in the UK, funny name I know but I think they still make them. It had the same geometry & twin top tubes as the Imperial the difference was in the drop outs, I think. If you cant find an Evil search for one of these.
 
Back
Top