DIY Toroidal Axial Flux PM

Looks great. Is carbon fiber sheet conductive?
I would imagine it might be conductive, but insulated from the enabled magnet wire. I am not sure it it would impact the performance or not. It's a good question.

It's not easy to bond new composites to already cured composites. You could cure the carbon with a peel ply or maybe find some with a surface finish ready for bonding.
You could look at using other core materials too. Balsa might work well (as long as it gets sealed.) It can also be easily laser cut.

You could also 3D print your winding ring with triangulated (or honeycomb) cutouts like a screen. You could then use that as the winding jig that then becomes a sandwich core for the composites. The holes in the ring allow the 2 sides to be connected and be much more rigid. There are different composite fillers you could use to fill those voids. This should reduce fdm print time a bunch too. The composite won't likely bond with the print but should be strong with the composite filled / connected voids.
You could also add these voids in a different core material like balsa mentioned above.

How does a 3mm X 3mm X 3mm cube magnet look in your setup? Really asking if it's worth going through the trouble for the extra .5mm for the other magnet while trying to build / glue it all up.

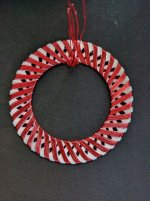
Thanks for the pointers. I made some changes to the design again and added voids per your suggestions. The voids correspond nicely with where the wire does not lay on either side. This should allow epoxy or composite filler to easily make bond to the otherside hopefully. Another thought I had was to use some ferrous material to wind around. I found that I can get 0.4mm spring steel, which I could either use a single layer of, or use a few laminations to improve inductance. I do worry that using a ferrous material might have negative consequences due to it being a single piece, but being so thin, I'm hoping it would reach saturation easily and potentially improve the torque.
Screenshot 2023-03-25 103651.png

I am going to try to make another winding using this new version, and if it goes the way I am hoping, I am going to order some of these made from chipboard (0.8mm), and some with the spring steel (0.4mm) and see how they go.

I think I might have changed my mind on carbon fiber, at least for now, only because I can only get it in 1mm thickness thought the Send Cut Send service that I am using. And I think that makes the faulhaber winding not worth it. I think the biggest gain I can get from this winding type is the ability to get more turns into a thinner stator with less resistance. Even though there will be about a 30% reduction in torque do to the angle of the windings, I can get the rotors closer together which will increase torque, and without the end turns, I can reduce the resistance by ~30% as well. Also, getting more or the same torque from less copper means less losses at higher RPM. I think....
 
I do love send cut send but for carbon thinner carbon fiber or maybe fiberglass you might have some luck with cncmadness or Home as the specialize in carbon fiber (also probably cheaper). Looks like CNC Madness has 0.5mm carbon fiber.
Thanks for that suggestion. I definitely got a cheaper quote from CNC Madness than I did from Send Cut Send. Also, they mentioned that they have 0.2mm carbon fiber too after reaching out to them.


I think this design will work well. It's still solid enough to wind around. The holes should allow for better potting, and it looks pretty neat too. Oh and I finally ordered a piece of rubber to fix my pressure pot, which means I might actually get around to making complete stators again. It's been a while.
PXL_20230327_105956411.jpg

Also, I actually measured the length of a phase on the different winding styles, and unfortunately the Faulhaber winding pattern really does not shorten the total length by all the much (46.4cm) vs the previous winding pattern (48.4cm). I am not sure why I thought it was more than it actually was initially. I'm assuming I made some silly math error. In reality this is only ~4% reduction in length and ultimately resistance for the same conductor.
This winding pattern also will have a reduction in torque due to the angle of the windings. So while I can fit the same number of turns in a smaller package, I worry that it may not be worth it.
 
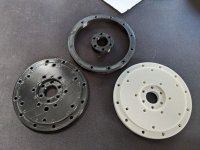
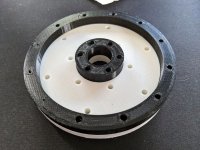
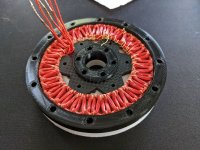
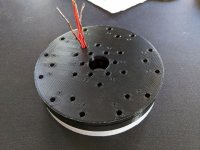
I have spent some time recently making some improvements to the potting press that I had used in previous iterations. I made it so that I can use machine screws to close the press tightly, which should make it much easier to fit it in the vacuum chamber, and the pressure should be a bit more even than it was with a bunch of c clamps on it. I also broke it into 4 parts instead of the two that it was previously. This should make removing the stator a bit easier. I intend to pack use wax between all the parts to help as well. But In the worst case, I can break the rings out of it after curing and those are cheap to reprint.

PXL_20230407_123349877.jpgPXL_20230407_123404513.jpgPXL_20230407_123413681.jpg

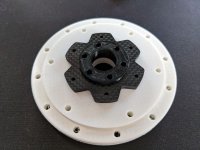
Also, thank you very much for the CNC madness suggestion. They have a variety of thicknesses. and I was able to get 4.5mm for the stator center, Which was what the last stator turned out to be, so I was going to make another stator like that one if I can. I also remodeled the stator center piece to be more laser cut friendly. And I will countersink the holes on the bottom side to mount it to the hub after potting.

PXL_20230407_123427133.jpgPXL_20230407_123448292.jpgPXL_20230407_123530301.jpgPXL_20230407_123602533.jpg

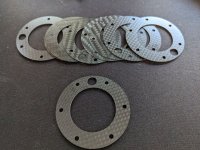
I have also designed a spacer for the stator to interface with the hub. CNC madness had 0.2mm and they came out perfect. I got a variety of 2mm, 1mm, and 0.2mm spacers. This will give me more control over pushing the stator away from a rotor face that I have not done before. Hopefully allowing me to shrink the air gap even further.

PXL_20230407_123751617.jpg
 
Hi HalbachHero,

Did you find any changes after switching over to Carbon Fiber prints?

I am too working on a Axial Flux Alternator and am planning to use Iron filled PLA for the Rotor assembly and PETG filament for the Stator assembly.
Thanks for sharing so much information, this is really helpful for beginners like me, I am learning a lot reading this port.
Wish you all the Best for your endeavors.
Cheers!!
 
Back
Top