auraslip
10 MW
- Joined
- Mar 5, 2010
- Messages
- 3,535
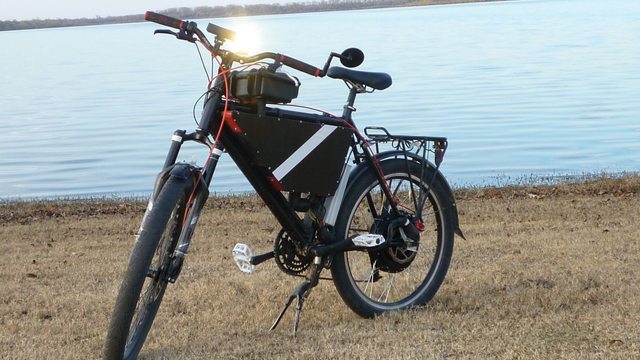
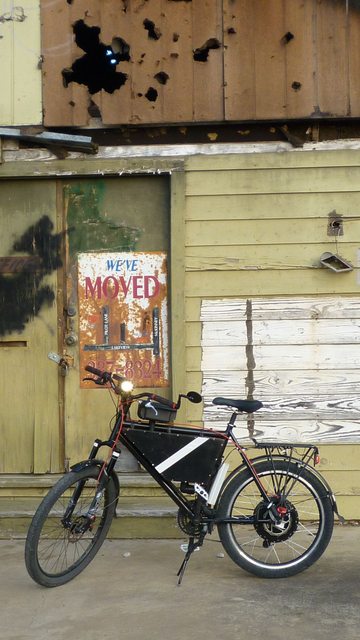
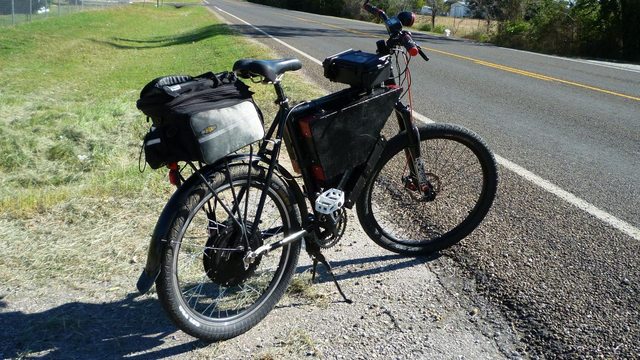
This is the culmination of five threads; How to build a 50MPH Ebike ebook, suspension forks, handling with different wheel sizes, lockable control box, and frames suitable for battery boxes.

Quick stats:
33 mph at 48v and 41mph at 72v with SLA booster pack.
30 mile range at top speed. 50 mile range at 20 mph.
Forced air cooling through angled PVC pipes on battery and controller boxes.
Water proof box for power, light, and speed switches.
Integrated charger.
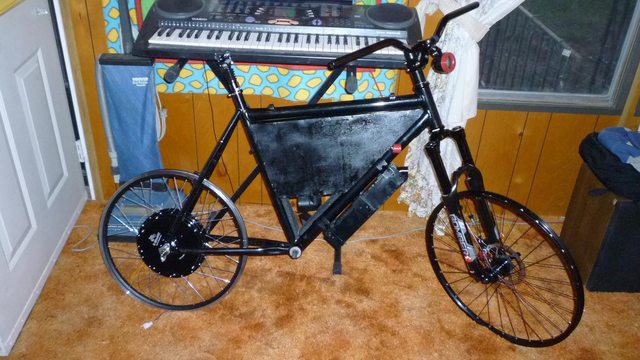
Frame: 22" aluminum moutain frame from performance bike
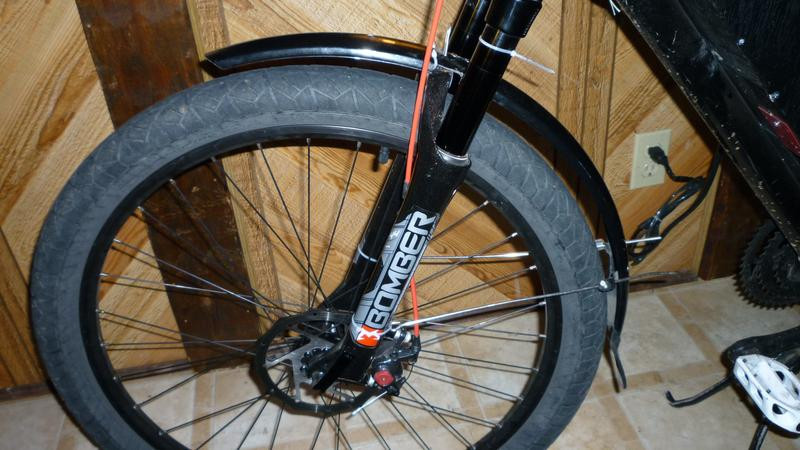
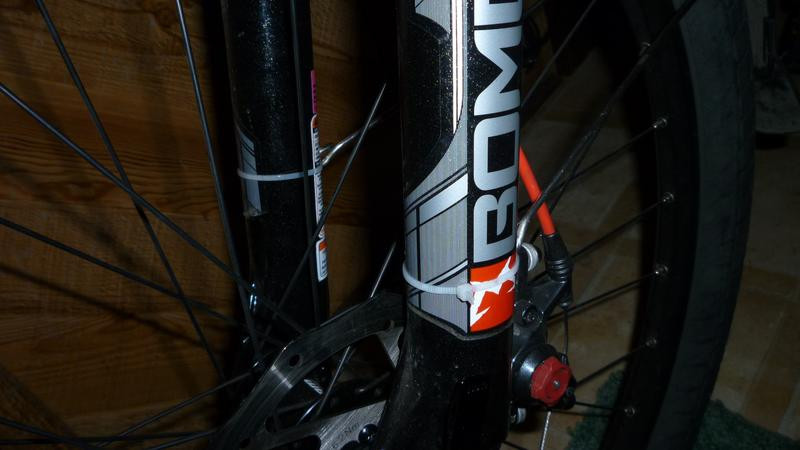
Fork: Marzochi 140mm travel 44 RLO
Brakes: avid bb7
Motor: Ebikekit.com rear 9c 2806
Cycle analyst: ebike.ca
Wiring & connects: hobbyking
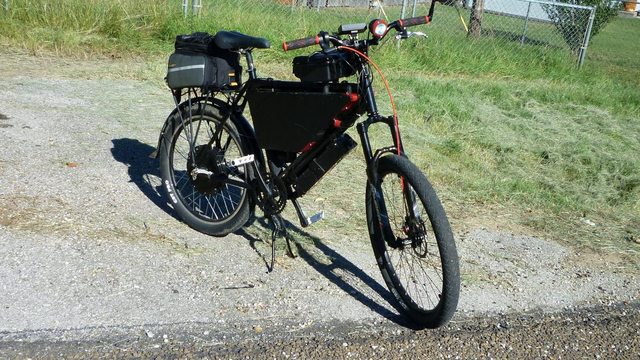
Geometry; Frame choice and wheel sizes:
I chose the largest most open frame I could buy in order to fit my 48v20ah ping, charger, and dc-dc converter in the triangle. Such a large frame for a 6' tall guy has a large stand over height, so I decided on a 24" wheel in the back and a 26" wheel in the front. This combined with a 140mm travel suspension fork (the frame calls for a 100mm travel) increases the trail of the bike substantially, and is supposed to give stability at higher speeds. However the bike is still too tall. There is no way I can put the seat up high enough to comfortably pedal, and still touch the ground. This also means the ride is rougher because all my weight is on the saddle instead of through the natural shock absorbers of my legs. Additionally the bike at 6.5" wide the battery box is to wide. It too interferes with pedaling, and because I have to spread my legs makes it harder to stand over. There is nothing I can do to make the box thinner as I am for now constrained by the 6" width of my battery pack.
I have to criticize greasypants and his ebook, "55 MPH ebike" for this. His bike is no pedal, and as such he can build the box wide and leave the seat low. A no pedal bike is not for me though as I like the exercise, extra range, and safety from the law that a hybrid bike has. I will say that his book is great, and has guided me through the battery box building process.
Pros:
 Easy to fit battery in such large frame.
Lots of tire clearance with 24" wheel.
Improved handling?
Cons:
To wide to comfortably pedal.
Hard to stand over at stop lights.
Less regen braking power due to smaller rear wheel.
Smaller rear wheel means it's harder to pedal at speeds.
At high speeds the handling seems twitchy. I push left and the wheel quickly snaps back to the right.
Fixes:
20" wheels.
New thinner battery pack and battery box.
Smaller frame?
pedal extenders
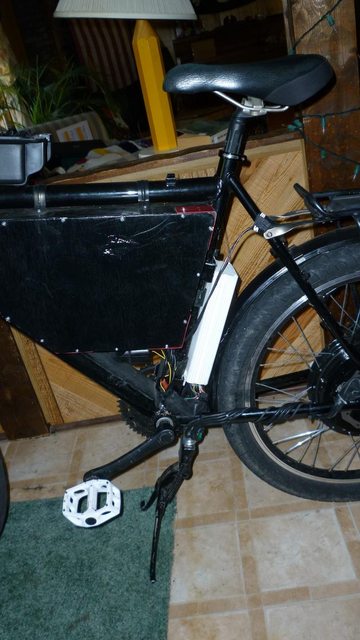
Battery and controller boxes:
I was sick of leaving my $800 battery in my trunk bag. Not only was it unprotected from the elements, thieves, and crashes, but it the high center of gravity and position so far back severely messed up the handling of the bike. Basically I stole the design for my battery box from greasypants' book. He is a skilled wood worker. The only wood I've ever worked is my ow........ Annnnnnyways it was the harderst part for me. It took many hours, and I'm still not happy with the quality of the box. Next time I may pay a carpenter.
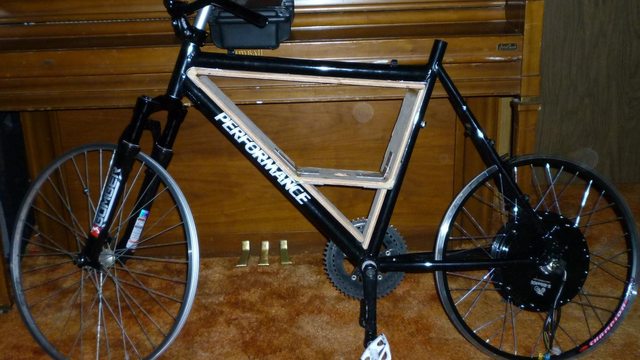
The side panels are 1/4" oak, and the main triangle is 1/2" oak. I don't believe the 1/2" oak is needed as the main weight of the battery is on the bike frame. However I couldn't find 1/4" wood screws.
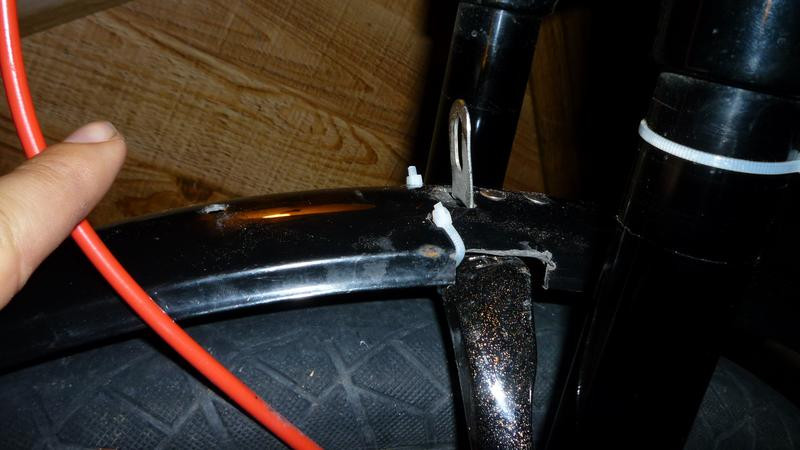
I used 90 and 45 degree pvc bends for airflow and as a rain proof cabling soloution. Air goes in, but rain (hopefully) doesn't.
I should of made the box for my massive 18 fet lyen controller to be larger. I only gave an inch of room in the box for wires. As a consequences most of the wires are hanging out side the box now.
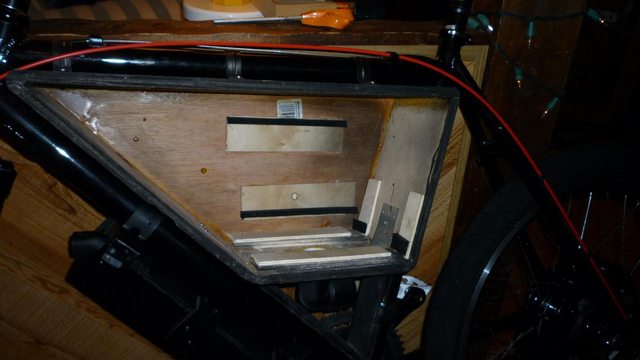
1/4" wood shims and rubber used for for car doors are used to hold the battery tight. Note how I arranged the shims so the battery would get airflow of most of it's body.
I'm not going to show you the battery and wiring installed because I am embarrassed. I couldn't remove the battery and control from my old bike because it was my main ride. As such I did as much wiring ahead of time as I could. Don't do this. I wasted time, and gave WAaaaaaaay to much slack in some cables and not enough in others. It's very messy.
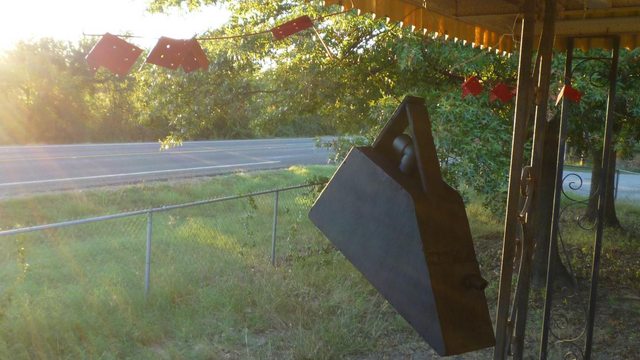
Waterproof lockable control Box:
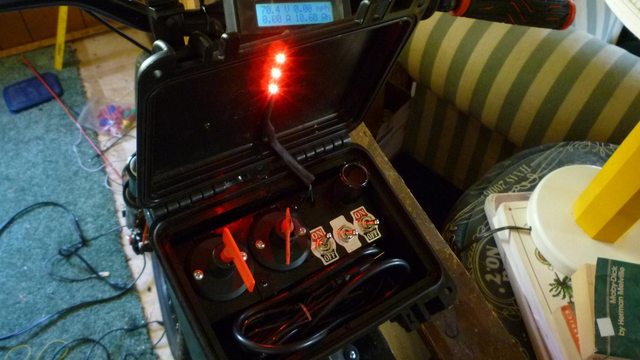
Pros:
It's waterproof!
It looks cool with LED!
All the switches work as planned!
Cons:
It's to big and interferes with pedaling.
I'll probably never lock it up, which was the main reason I couldn't get a smaller box. To lock it.
I drilled the holes for the PVC nipple mounting solution off so the box is slightly crooked.
The massive switch for the charger is unnecessary. All I needed was to wire a pre-spark resistor between the charger lead and the charger. This way I could use a simple 10amp switch just by plugging the charger in before I flipped the switch.
The massive main power key switch is to larger. I had to cut it down, and now it looks crappy and feels flimsy.
Cigarette lighter doesn't get hot enough to light a smoke.
Other:
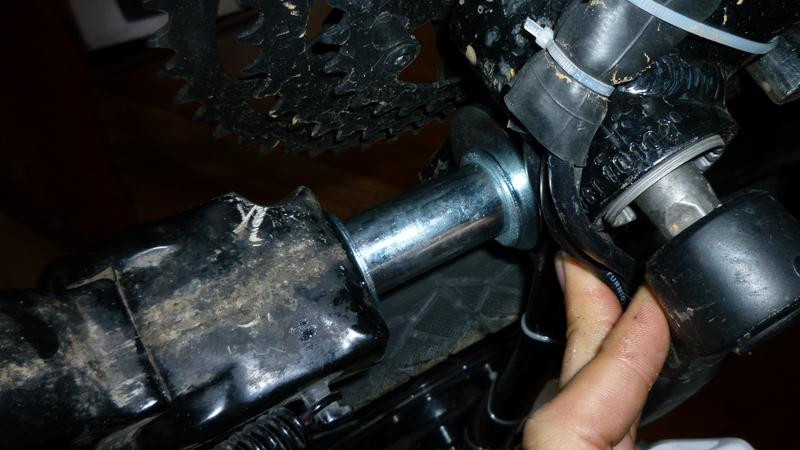
The kick stand didn't reach the ground with the new frame. I love/hate this kickstand. It didn't come with any mounting hardware, it rubbed the rear derailleur cable on my old bike, and it comes loose all the time.
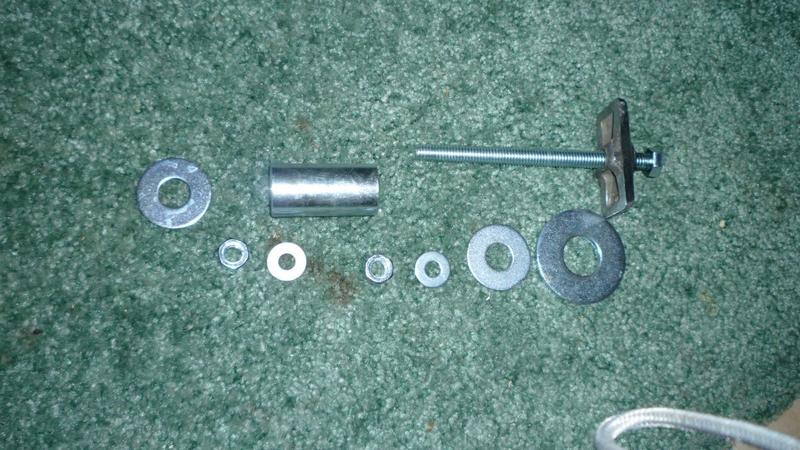
I had to shim it with some scrap metal.
A major pain in the ass. Even with locktite I still can't get it tight enough for it not to shift.
The light is a fog light from wal-mart I painted. Search my history for more info.
Except for the ability to comfortably pedal, my new bike is superior in every way. That doesn't mean I'm not already planning on a thinner box with headway cells, and smaller wheels. I'm not content with the final product, but I'm happy with what I've learned.
Quick stats:
33 mph at 48v and 41mph at 72v with SLA booster pack.
30 mile range at top speed. 50 mile range at 20 mph.
Forced air cooling through angled PVC pipes on battery and controller boxes.
Water proof box for power, light, and speed switches.
Integrated charger.
Frame: 22" aluminum moutain frame from performance bike
Fork: Marzochi 140mm travel 44 RLO
Brakes: avid bb7
Motor: Ebikekit.com rear 9c 2806
Cycle analyst: ebike.ca
Wiring & connects: hobbyking
Geometry; Frame choice and wheel sizes:
I chose the largest most open frame I could buy in order to fit my 48v20ah ping, charger, and dc-dc converter in the triangle. Such a large frame for a 6' tall guy has a large stand over height, so I decided on a 24" wheel in the back and a 26" wheel in the front. This combined with a 140mm travel suspension fork (the frame calls for a 100mm travel) increases the trail of the bike substantially, and is supposed to give stability at higher speeds. However the bike is still too tall. There is no way I can put the seat up high enough to comfortably pedal, and still touch the ground. This also means the ride is rougher because all my weight is on the saddle instead of through the natural shock absorbers of my legs. Additionally the bike at 6.5" wide the battery box is to wide. It too interferes with pedaling, and because I have to spread my legs makes it harder to stand over. There is nothing I can do to make the box thinner as I am for now constrained by the 6" width of my battery pack.
I have to criticize greasypants and his ebook, "55 MPH ebike" for this. His bike is no pedal, and as such he can build the box wide and leave the seat low. A no pedal bike is not for me though as I like the exercise, extra range, and safety from the law that a hybrid bike has. I will say that his book is great, and has guided me through the battery box building process.
Pros:
Cons:
Fixes:
Battery and controller boxes:
I was sick of leaving my $800 battery in my trunk bag. Not only was it unprotected from the elements, thieves, and crashes, but it the high center of gravity and position so far back severely messed up the handling of the bike. Basically I stole the design for my battery box from greasypants' book. He is a skilled wood worker. The only wood I've ever worked is my ow........ Annnnnnyways it was the harderst part for me. It took many hours, and I'm still not happy with the quality of the box. Next time I may pay a carpenter.
The side panels are 1/4" oak, and the main triangle is 1/2" oak. I don't believe the 1/2" oak is needed as the main weight of the battery is on the bike frame. However I couldn't find 1/4" wood screws.
I used 90 and 45 degree pvc bends for airflow and as a rain proof cabling soloution. Air goes in, but rain (hopefully) doesn't.
I should of made the box for my massive 18 fet lyen controller to be larger. I only gave an inch of room in the box for wires. As a consequences most of the wires are hanging out side the box now.
1/4" wood shims and rubber used for for car doors are used to hold the battery tight. Note how I arranged the shims so the battery would get airflow of most of it's body.
I'm not going to show you the battery and wiring installed because I am embarrassed. I couldn't remove the battery and control from my old bike because it was my main ride. As such I did as much wiring ahead of time as I could. Don't do this. I wasted time, and gave WAaaaaaaay to much slack in some cables and not enough in others. It's very messy.
Waterproof lockable control Box:
Pros:
Cons:
Other:
The kick stand didn't reach the ground with the new frame. I love/hate this kickstand. It didn't come with any mounting hardware, it rubbed the rear derailleur cable on my old bike, and it comes loose all the time.
I had to shim it with some scrap metal.
A major pain in the ass. Even with locktite I still can't get it tight enough for it not to shift.
The light is a fog light from wal-mart I painted. Search my history for more info.
Except for the ability to comfortably pedal, my new bike is superior in every way. That doesn't mean I'm not already planning on a thinner box with headway cells, and smaller wheels. I'm not content with the final product, but I'm happy with what I've learned.