
winkinatcha
10 kW
I reached a big milestone last week in being able to modify one of my kits controllers, so that it produces a maximum power compliant with Australian e-bike laws/regulations for a pedal-assist electric bicycle (250w).
This means I can now provide a "base kit" to enable someone to build a legally compliant e-bike here in Aus, meaning the converted bicycle requires no registration, licensing or any other stuffs... basically a legal pedal-assist electric bike rider has all the same access rights as a human-powered-only cyclist. Above the legal requirements and the electric bicycle becomes an unregistered vehicle, meaning not legal to be ridden on anything but private property, reserves and other such special areas...
Personally I reckon the 250w legal limit is about half to a quarter of practical power levels... For some reason Australia has adopted European standards, How I wish we adopted US or Canadian, where 1000w is legitimate.... Ah well, maybe time will change this (including the European standard potentially allowing more power)
Anyways with the whole power output thing sorted, I wanted to document installing a modified kit to build an AUS legal e-bike...
this first iteration reveals all, including the power modifications,... Over time I'll refine the process so I can provide a "how-to" manual for "installing" a modified kit.
Installing an electric bike conversion kit
First step, sort out the bicycle.
I am a big beleiver in converting from a good base bicycle. Although the power levels from a legal kit is not going to provide earth shattering power and a runaway scarey steed, I personally want the bicycle to be converted to be full operational and safe prior to the conversion...
For this iteration I used a cheap brand new, out of the box dual suspension bicycle.
First step... Put the thing together...
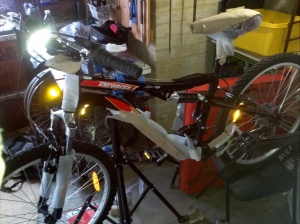
Bikeout of the box, on the stand and all bits in the right place:
First thing, change the handlebars and aheadstem from cheap steel to alloy...
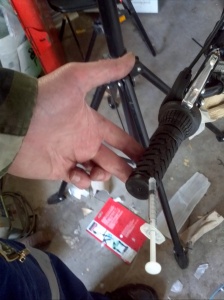
A simple method for removing Grips from handlebars without destroying them:
Using an insulin syringe with around 1cc of water, insert syringe into grip, so needle is through rubber and resting on handlebar tube beneath.. inject about .1cc in various places round the grip, and the grip will loosen n slide off with ease...
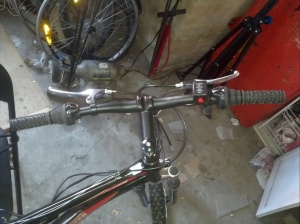
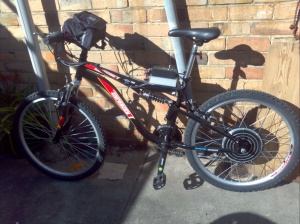
New bars and headstem in place (mmmmmmm sexy!):
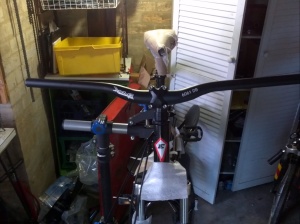
Bike finished (damn lens on phone camera was fogged... :
:
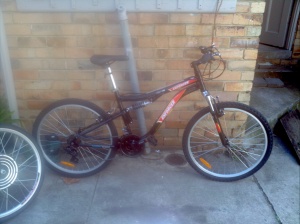
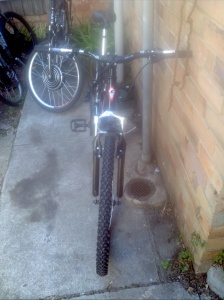
An unpowered test ride, all good, surprisingly nice bike to ride, though I wouldn't do anything in terms of taxing off road stuff on it.
Right.. now to the nitty gritty and getting the kit sorted n installed...
the process of making a "vanilla" kit (in the box as received from Chines manufacturer) into an installable legal version
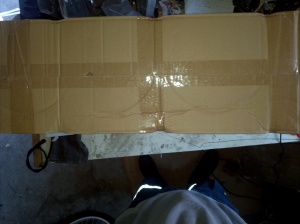
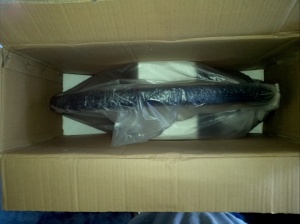
Kit in box:
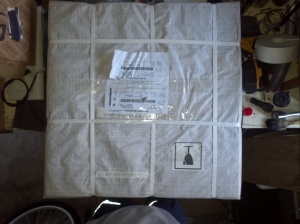
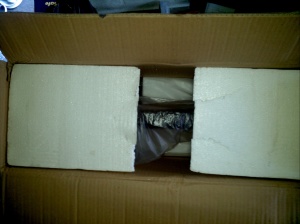
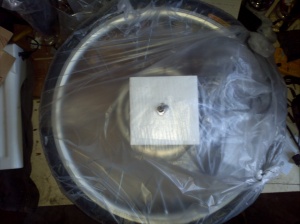
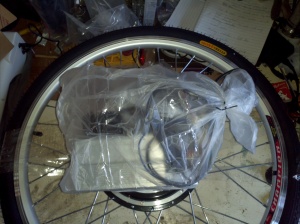
Yaaay... Kit outta box, n here are the contents aprt from the wheel motor:
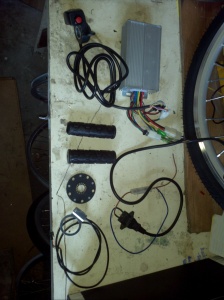
Controller (aluminium box) throttle, hand grips,,, pedelec sensor is the round wheel thingy and the silver washer thingy with sensor wire on the bottom left... The kit doesn't come with this, but I add these as well as additional components as part of "upgrading" the vanilla kits...
"upgrading" the kit controller before installation
the process of upgrading the kit controller is thus:
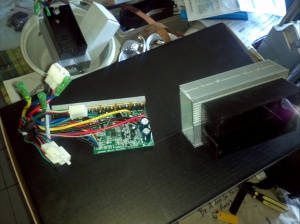
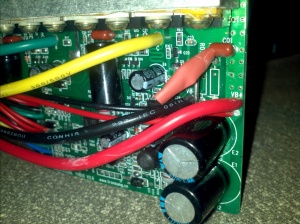
Open up controller and remove circuit board:
Locate the "shunts":
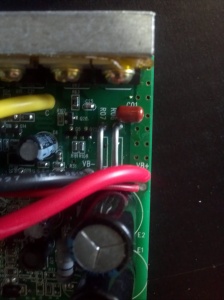
Without getting too techo.. these shunts are made from a special type of resistance wire, and the controller "reads" from these wires and limits the current supplied based on the electrical resistance of the shunts.
For this type of controller design, varying the resistance of the shunts varies the maxcurrent the controller will supply. The greater the resistance of the shunts, the less current...
the controllers in vanilla form supply roughly 20 amps (rated at 500 watts at 24v).
By removing one of the shunts, I can double the resistance (two identical resistors in parallel in an electrical circuit provide HALF the resistance of one of the resisters)
Shunt removal
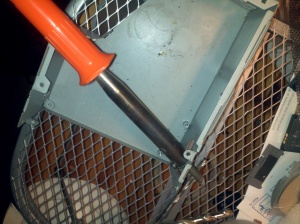
Big eff off 80 watt soldering iron, requiring speed and precision, but necessary to get around the heatsinking properties of high current bearing circuitry in this part of the controller:
Remove one leg of a shunt (kept on board so modification can be reversed)
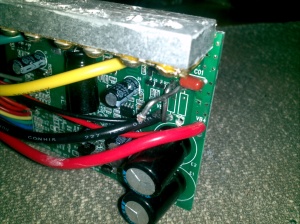
Pop some heat shrink over the top, leave un heated as a potential indicator of how hot it gets inside the controller...
Add some electrical tape to edge of board where it slides into case.. not had a problem yet but don't like the proximity of power to the case so this is a cautionary thing
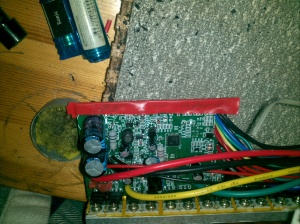
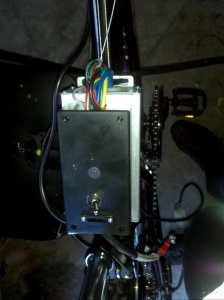
Add Breakout box to top controller (forgot to photograph this step, so this is a photo from a different build):
Make up break out box cover:
On off Switch, between battery and controller, Blade fuse, Low voltage beeper/LED warning.

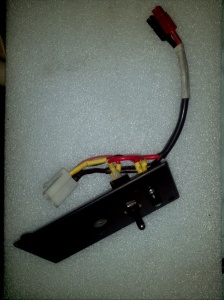
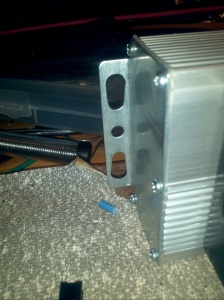
Finally, File the mounting tabs to fit the u-bolt "mounting hardware"
Controller Mods Done... Now the wheel/motor:
A "design flaw" with these kits, is that the nuts and washers for the wheel are threaded onto the power and control cable that comes from the wheel shaft, and connectors are then added... this means that a freewheel cant be threaded down this cable and attached to the wheel motor.
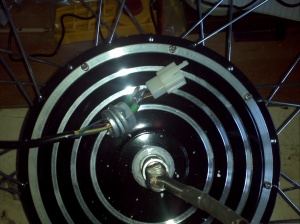
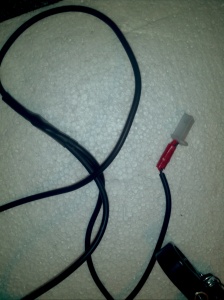
Fist step, then, is cut this cable:
Cutting this cable also gives me the opportunity to put a single connector in, closer to the wheel for (relatively) easy wheel removal in case of tyre changes and flat repair etcetera.
Thread on Free Wheel:
I like to be able to use the freewheel from the original bike, as this means I can use the original bike's gear set (handlebar gear changers, derailers, Freewheel).. less swapping out of components.
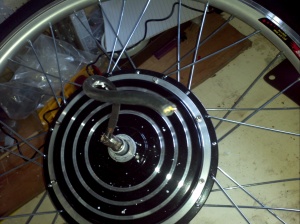
Prep the wheel/motor thread with a smidge of grease:
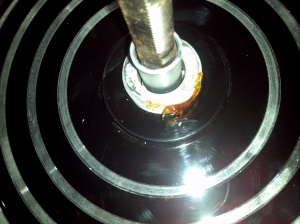
Note the silver coloured spacer on the shaft... used to stop the frame from impacting the freewheel n stopping it from being free.
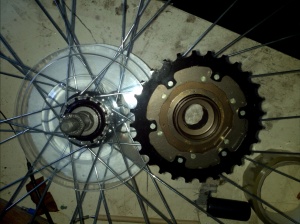
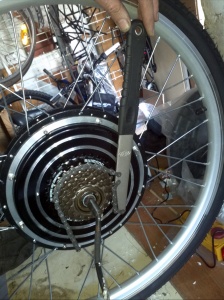
Freewheel threaded on and tightened with a chain whip:
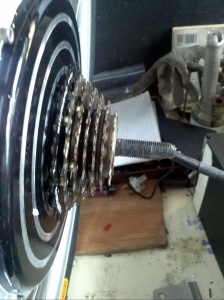
And... as oft happens, the freewheel is wider than the silver spacer mentioned above...
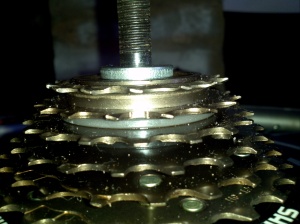
Shimmed out with some washers... Much better:
Time to add connector to cable:
I use a 12 pin connector, using 8 of the pins...
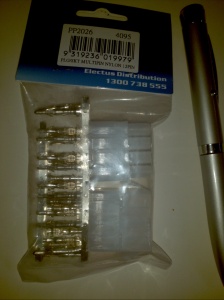
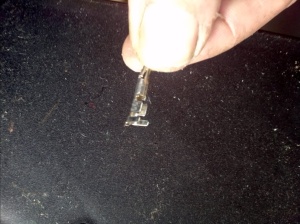
Crimp and solder pins onto the wires...

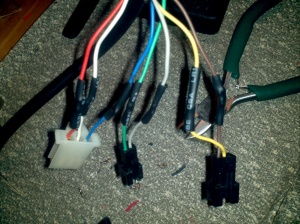
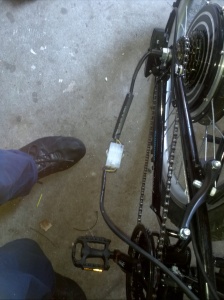
Cut and splice all electrical cables (handbrakes, Thumb throttle, Controller-to wheel)

Install Wheel and new connector:
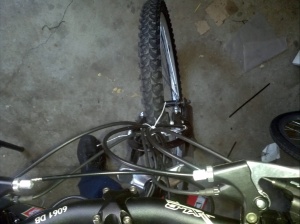
Install handlebar controls:
(oops crap photo)
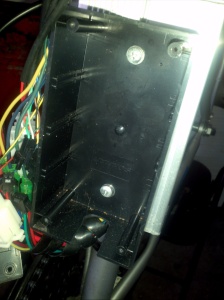
Mount the controller (slight challenge on this non-standard frame, but the basic "mounting hardware" I provide (U bolts and Uber Zip Ties) is designed to be pretty universal...)

Connect breakout box front cover:

Close it all up
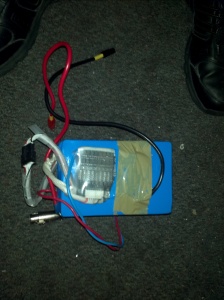
Now for the Battery....
For these Base Kits, I use a 24v 10ah Ping Battery... (Ping is the battery assember, located in HongKong.. the battery he supplies come with a Battery management system (BMS) that provides cutoff on low voltage, battery cell balancing, and altogether a "plug and play" solution)
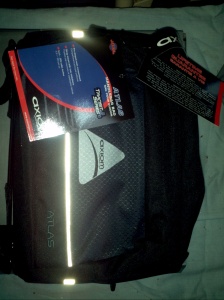
This gets stuffed inside a handlebar bag, simple though not entirely elegant battery mounting solution..
The handlebar bag:
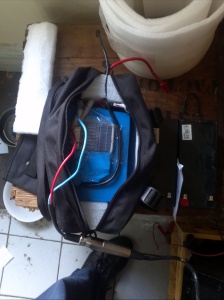
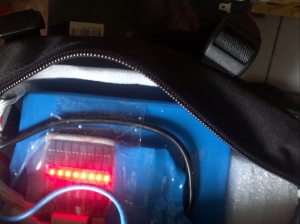
Battery inserted and padded liberally with packaging foam.. NOT polystyrene, but closed bubble high squish resistant stuff.
Battery Charged up and Ready to go:
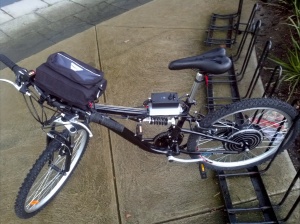
Handlebar bag mounted n ready to ride...
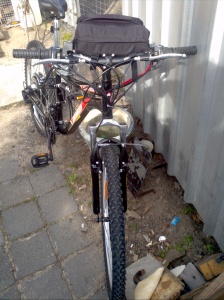
Yeah Babay! Ready to roll take ot for a test 10 km rid... all good
Removed the stickers... changed the cranks (original 43 tooth large chain ring upped to 48)
And Voila... one working legal (in Aus) e-bike:
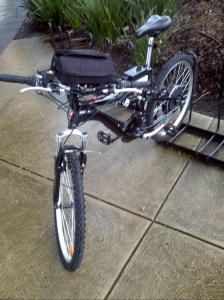
Right... three more builds to go
joe
This means I can now provide a "base kit" to enable someone to build a legally compliant e-bike here in Aus, meaning the converted bicycle requires no registration, licensing or any other stuffs... basically a legal pedal-assist electric bike rider has all the same access rights as a human-powered-only cyclist. Above the legal requirements and the electric bicycle becomes an unregistered vehicle, meaning not legal to be ridden on anything but private property, reserves and other such special areas...
Personally I reckon the 250w legal limit is about half to a quarter of practical power levels... For some reason Australia has adopted European standards, How I wish we adopted US or Canadian, where 1000w is legitimate.... Ah well, maybe time will change this (including the European standard potentially allowing more power)
Anyways with the whole power output thing sorted, I wanted to document installing a modified kit to build an AUS legal e-bike...
this first iteration reveals all, including the power modifications,... Over time I'll refine the process so I can provide a "how-to" manual for "installing" a modified kit.
Installing an electric bike conversion kit
First step, sort out the bicycle.
I am a big beleiver in converting from a good base bicycle. Although the power levels from a legal kit is not going to provide earth shattering power and a runaway scarey steed, I personally want the bicycle to be converted to be full operational and safe prior to the conversion...
For this iteration I used a cheap brand new, out of the box dual suspension bicycle.
First step... Put the thing together...
Bikeout of the box, on the stand and all bits in the right place:
First thing, change the handlebars and aheadstem from cheap steel to alloy...
A simple method for removing Grips from handlebars without destroying them:
Using an insulin syringe with around 1cc of water, insert syringe into grip, so needle is through rubber and resting on handlebar tube beneath.. inject about .1cc in various places round the grip, and the grip will loosen n slide off with ease...
New bars and headstem in place (mmmmmmm sexy!):
Bike finished (damn lens on phone camera was fogged...
:
An unpowered test ride, all good, surprisingly nice bike to ride, though I wouldn't do anything in terms of taxing off road stuff on it.
Right.. now to the nitty gritty and getting the kit sorted n installed...
the process of making a "vanilla" kit (in the box as received from Chines manufacturer) into an installable legal version
Kit in box:
Yaaay... Kit outta box, n here are the contents aprt from the wheel motor:
Controller (aluminium box) throttle, hand grips,,, pedelec sensor is the round wheel thingy and the silver washer thingy with sensor wire on the bottom left... The kit doesn't come with this, but I add these as well as additional components as part of "upgrading" the vanilla kits...
"upgrading" the kit controller before installation
the process of upgrading the kit controller is thus:
Open up controller and remove circuit board:
Locate the "shunts":
Without getting too techo.. these shunts are made from a special type of resistance wire, and the controller "reads" from these wires and limits the current supplied based on the electrical resistance of the shunts.
For this type of controller design, varying the resistance of the shunts varies the maxcurrent the controller will supply. The greater the resistance of the shunts, the less current...
the controllers in vanilla form supply roughly 20 amps (rated at 500 watts at 24v).
By removing one of the shunts, I can double the resistance (two identical resistors in parallel in an electrical circuit provide HALF the resistance of one of the resisters)
Shunt removal
Big eff off 80 watt soldering iron, requiring speed and precision, but necessary to get around the heatsinking properties of high current bearing circuitry in this part of the controller:
Remove one leg of a shunt (kept on board so modification can be reversed)
Pop some heat shrink over the top, leave un heated as a potential indicator of how hot it gets inside the controller...
Add some electrical tape to edge of board where it slides into case.. not had a problem yet but don't like the proximity of power to the case so this is a cautionary thing
Add Breakout box to top controller (forgot to photograph this step, so this is a photo from a different build):
Make up break out box cover:
On off Switch, between battery and controller, Blade fuse, Low voltage beeper/LED warning.
Finally, File the mounting tabs to fit the u-bolt "mounting hardware"
Controller Mods Done... Now the wheel/motor:
A "design flaw" with these kits, is that the nuts and washers for the wheel are threaded onto the power and control cable that comes from the wheel shaft, and connectors are then added... this means that a freewheel cant be threaded down this cable and attached to the wheel motor.
Fist step, then, is cut this cable:
Cutting this cable also gives me the opportunity to put a single connector in, closer to the wheel for (relatively) easy wheel removal in case of tyre changes and flat repair etcetera.
Thread on Free Wheel:
I like to be able to use the freewheel from the original bike, as this means I can use the original bike's gear set (handlebar gear changers, derailers, Freewheel).. less swapping out of components.
Prep the wheel/motor thread with a smidge of grease:
Note the silver coloured spacer on the shaft... used to stop the frame from impacting the freewheel n stopping it from being free.
Freewheel threaded on and tightened with a chain whip:
And... as oft happens, the freewheel is wider than the silver spacer mentioned above...
Shimmed out with some washers... Much better:
Time to add connector to cable:
I use a 12 pin connector, using 8 of the pins...
Crimp and solder pins onto the wires...
Cut and splice all electrical cables (handbrakes, Thumb throttle, Controller-to wheel)
Install Wheel and new connector:
Install handlebar controls:
(oops crap photo)
Mount the controller (slight challenge on this non-standard frame, but the basic "mounting hardware" I provide (U bolts and Uber Zip Ties) is designed to be pretty universal...)
Connect breakout box front cover:
Close it all up
Now for the Battery....
For these Base Kits, I use a 24v 10ah Ping Battery... (Ping is the battery assember, located in HongKong.. the battery he supplies come with a Battery management system (BMS) that provides cutoff on low voltage, battery cell balancing, and altogether a "plug and play" solution)
This gets stuffed inside a handlebar bag, simple though not entirely elegant battery mounting solution..
The handlebar bag:
Battery inserted and padded liberally with packaging foam.. NOT polystyrene, but closed bubble high squish resistant stuff.
Battery Charged up and Ready to go:
Handlebar bag mounted n ready to ride...
Yeah Babay! Ready to roll
take ot for a test 10 km rid... all good Removed the stickers... changed the cranks (original 43 tooth large chain ring upped to 48)
And Voila... one working legal (in Aus) e-bike:
Right... three more builds to go
joe