Charging via a parallel connection - not working anymore !

Joined
Mar 26, 2011
Messages
42
Location
Sydney
Hello hello.

I thought I would throw this one out to the friendly Endless-sphere community...to help get some sanity around this ! :p

I have a 20s lipo ebike that I am looking to set up so I can bulk charge in parallel. What I mean be that is to have a parallel connector running off the connection between the battery and controller. This is so I can just plug is the charger without having to break the connection from battery to controller all the time. Reconnecting at 84v is very loud and scares my dog (and me !) !!

So I have actually been able to do this with my old charger a EMC-2000. This worked putting in a parallel adapter between the battery and controller. Plugging in the charger to the parallel connector had the charger kicking off and charging fine.

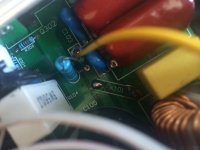
I have since starting using a new EMC-1000 charger, this works fine when I plug it directly to the battery (normally) however fails to start charging when plugged in via the parallel connection as described above. The parallel connection is fine, I can read 73V out of that. Just does not trip the charger off to start a charge when in parallel.

I have also tries taking out the lead to the controller and just having the battery and charger connected by the top of the Y section of the parallel cable....nothing it does not start which seem strange as they are directly connected.

Interested in anyone thoughts as to what come be going on. Should this work in theory ? it did with the old charger that has since died ! What's going on?

any help appreciated.
 
You don't mention that the new charger works in another way. Does it?

What is different? The charger. Bad plug on it? or something like that?
 
too answer previous posts, charger has been working fine when connecting directly to the battery


I worked a bit more on this and it appeared the issue why there was no response out of the charger was a bad connection between the special lead I made up to connect the charger to the parallel connector. I made another lead to connect in the charger to the parallel and got a reaction from the charger.

Once I replaced the lead from the charger to the parallel connection the charger kicked off fine. However when I connected the parallel lead connected to the battery into the controller, the charger just stop working completely. No lights, completely dead. Really strange. Charger has that familiar burned electric smell inside it but no smoke ! The charger is bricked. Gone.

I am getting the idea from previous post here that what I am doing is supposed to work and not cause issue with the charger. Is this correct ?

Again all I am doing is connecting a charger in parallel between a connected battery and the controller. Should there be any issues in principle with this ? Just seems strange this worked with a different charger and not blew this one up .....

thanks for any help

Smokey
 
Ahh, I don't know why it is, but I do know RC chargers are very fussy. It's not liking something when you energize the controller.

So it does work, you just need to unplug the controller.
 
So I have opened the damn thing (the emc1000 charger) and to my surprise and delight I may have located the source of the issue.....looks repairable.

On the PCB there appears to be a component missing (blown up), or it may be a broken shunt.(not sure)

Where do I find out what I need to repair this board with. BMSBATTERY.COM are never good a replying on these questions.

Attached is the picture of what appears to be an issue and hopefully the only issue....labeled K101

Again the symptom of the issue is the charger does not power on at all after been plugged in parallel to a battery/controller.

I searched for a component in the casing and there was not a half blown up component, so assume K101 may be a shunt.

Would love to solve this one and get back on the road !

Cheers
Smokey !! :)
 

Attachments

  • photo.JPG
    photo.JPG
    157.5 KB · Views: 844
why do you say there was part there that blew up? i don't see any remnants in that picture.

do you know if the AC is present inside the charger?

can you measure the 340v DC across the rectifier diode bridge?
 
The picture does not show it too well however it very much appears this was a shunt and looks broken.

If I look at board there are other part of the board that are labelled KXXX and there are just stunts. (Solder wires bridging to areas)

I am assuming areas labelled K on the board are consistent with function.

Will check if AC is present in the BOX, however I think the AC fuse blew last time I turned it on, so will need to replace that component and check.

Thanks for your input, I hope not to have to chuck this one !!
 
Those "K" wires are probably not shunts, but rather just jumper wires to bridge PCB traces they either couldn't or dind't want to bother with routing around components in a way that didn't require a wire jumper. It's common.

Sometimes they'll also have jumper spots for options, and so a jumper is not always installed on every board with the holes for it--just on the ones that have that option.


My guess is there isn't supposed to be anything in that spot. If there had been a vaporized wire there, it'd be likely to find little molten balls around the area stuck to things, or at the least loose inside, and possibly carbonized marks on nearby components. There would also not likely be any solder left in the holes, as that would probably melt long before the wire did.


I'd go thru the troublehshooting steps Dnmun and others have for you to find out what hte problem is.
 
Your guys are spot on....certainty bridging that bridge did not solve the issue....I have done the following

1. Bridged the bridge
2. Installed a fresh fuse for the AC input
3. Turned it on
4. Shazame as before.....blew the AC input fuse and the house fuse at the same time

The charger was doing this before I bridge the bridge so assume this was not the source of the issue.

So it is fair to say that there is no ( sustained) AC power to the board !
 
have you taken the circuit board out of the case yet? they have the heat sink glued to the side of the case as i recall so you have to cut the glue stuff with a utility knife to free it.

your switching transistors may be shorted to the case. do you have GFCI on the circuit that blew? the case may be energized to 340V if the IGBT is shorted to the case. but we can isolate the problem yet.

did your jumper wire burn open this time? you should remove it before powering up again and we will need to see how the circuit is arranged to determine if putting that jumper there has damaged the charger so much it will not work now.

so we will need a picture of the bottom side of the pcb and bigger pictures of the top side to see where that wire you inserted was located.
 
Back
Top