Evolution of Skill....

John in CR said:
Great .... so your bandsaw was a great purchase.

It would have been impossible to get this far without. Seems jigging material is the biggest challenge to getting the machine to cut well. Takes all of the sweating out of the equation....

DIdn't consider the slotting idea. makes sense. The drop outs are snug right now, so I will add the clamps prior to the welding phase of the swing arm and determine if I need to slot them..

Len
 
Back on the horse.....

Got slowed with this build due to a terrible sickness over the last few weeks and work.... I think (hope) the last green caterpillar decided to crawl out of my right nostril this am. No bacon frying yet, but while sick I was able to fit the critical head tube junctures to tight tolerances, as well as notch the rear swingarms to accept the dropouts.

head tube, (top tube frame rails)
Dscn2009.jpg


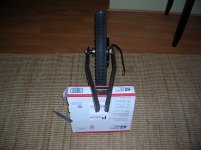
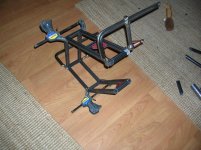
drive side swing arm pieces + dropout clamped/magnet jigged together..
View attachment 1
Dscn2011.jpg

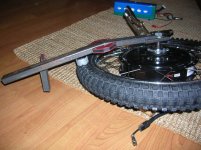
We have been in the mid/upper 30's for the last few weeks. This simply should not be at this time of the year in pittsburgh.... Hopefully we will be in bacon frying weather soon.... You may notice the amount of tire clearance, I want to be able to run this size wheel as well as 24" mountain bike rim on the back in the future, so I gave myself some room......

Len
 
Just ran across this thread, great build you have going! You do all the dropout work with that band saw? Maybe drill a pilot hole for the rear of the dropout slot? I had been trying to make the same sort with my jig saw, and it just wasn't cutting the thick steel well enough to keep going with the work. In the mean time I think I figured out a way to make a clamping dropout without needing to use super thick stock, but I gotta make it before saying it actually works.

I'm so jealous of those wheels I built for you. Sooooooo jealous. Thanks for the kind words!
 
yeah john, that little 4X6 bandsaw has been the key to all of the cutting everything parralel, square, etc..

I basically just took the two dropout blanks, clamped them together, put them in the carriage, and then let the saw drop. Then I flipped over the clamped dropout blanks and cut the other side. Had to hacksaw about 3/16" on each side to level them out, and then I used a drill press to round the back of the dropouts. Then the hand filing. More hand filing. Cut the dropouts to 9.28mm, then I hand filed the dropouts the axle sits in so that it is SNUG.

Keep me posted in your dropout clamp idea. I am a little nervous about running a hole vertically through dropouts and then tapping it for a cap bolt. I just don't think I can do so very straight with a bolt large enough to have any clamping force given the width of dropouts. Thats why I am leaning toward the more crude pinch bolt at the back of the dropout idea...


Len
 
Mine is more of a sliding dropout/ lollypop/ pinching idea where the pinching body keys into the dropout and also handles chain tension.
 
Not yet, just in my head still. I will see if I can sketch or CAD them out soon and keep milling machines out of the construction needs.
 
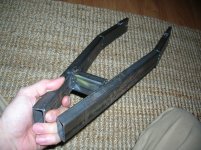
Made some progress today - swing arm is tac -welded together. stopped at the pivot & BB bracket area. Still have some final decisions to come to before striking an arc.

So I measured my clearance in the swingarm regarding wheel diameter. I can run anything from a 20" - 26" tire diameter. I am going to have to start thinking about different mounting brackets for the rear suspension depending on what wheel diameter I am running. I will need some kind of "riser/spacer" when running the shorty wheels. I also have to consider BB height and decide if I want to just run short armed bmx cranks (140-150mm) when I am running these 20" wheels, and then run longer, conventional length crankarms when (if) I switch back to a taller wheel. This is why I stopped where i did on the swing arm...
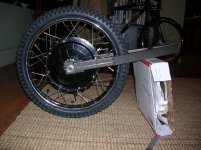
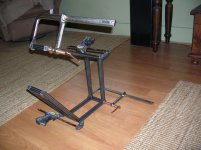
Dscn2015.jpg
Dscn2013.jpg
Everything ended up pretty square/straight....
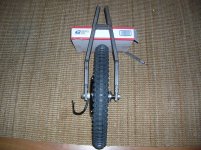
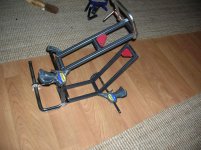
Dscn2014.jpg
Dscn2016.jpg
So if anyone with a sharp eye can see, I decided to re-cut the sections of the swing arm that attaches to the dropouts; on my first attempt, I just notched the inner side of these sections to accept the dropouts. Today I decided to do them over again, and slot these sections down the middle to allow for more welded surface area/ strength...
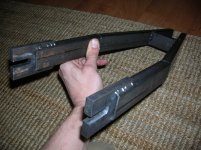
Dscn2017.jpg
I didn't bother changing my wire today to a smaller guage - thus the glob tac welds.... Plus she's mad at me for neglecting her all last month..
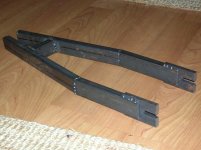
Dscn2019.jpg

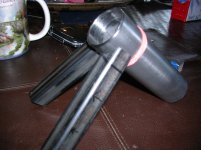
On another note, I was having a hard time sourcing a tube with an ID that could fit ANY conventional bicycle seat post size. Fortunately I found 1 - 3/8" OD X 1.245 ID tubing (.065 wall)
View attachment 2
- turns out this works very well with a 31.6 mm seat post.
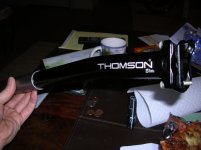
Dscn2021.jpg

Bonus....just happen to have 2 different posts of that size here at the house. I was going to weld on a pinch bolt/nut to secure to post, but the fit is so perfect, I think I can get away with slotting the backside of the post and using a conventional 34.9 seatpost clamp/collar...

Its such a motivator when your project starts moving from 2 dimensions to 3 dimensions!

Len
 
Hi Len,
Looking good 8) ,
I just thought I would give you the heads up about your bicycle shock so you dont have to go through the same sort of stuff I am at the mo, The shock spring will need to be the stiffest you can get. I have a similar shock position and stroke and my shock came with a 550lb spring fitted as standard but its way..way to soft . I have had a play with a cheapo shock that is fitted with a 1200lb spring and this is much better, but the problem I have found is trying to find a 1000lb+ spring to fit my shock body, the stiffest one I can find for my shock (at the mo ) is a 800lb and I am waiting delivery and hopeing that this will be stiff enough.
Cheers,
 
Gwhy,

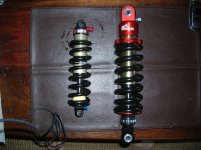
I have a 600 # manitou swinger shock, pictured on the left

and 1000# motocross rear shock from a company called Fast Ace, pictured on the right:

Dscn2023.jpg

I am torn - I spoke with Hal about his rear shock set up on the Albino V2 project many moons ago, and he described the exact same issue you are dealing with. For that very reason, I went with an actual motocross shock initially. The only probem is that the shock weighs close to 4 pounds rather than the mtb-specific Manitou @ roughly 1.25 pounds.

He was taking about sourcing a custom 1000# spring for his mtb shock. I hope YOU figure it out before I get to that point so I can use the solution :D

Len
 
Hi Len,
I have now fitted a 800lb spring ( was 550lb) on my 200mm i2i shock and I makes it very nearly acceptable for my needs ( but not quite :evil: ) but I think it will still be far to weak for any form of road riding. So now Im on plan C :mrgreen: the stroke on my shock is around 3cm'ish and im using about 2cm'ish so I think im going to look for a 165mm i2i decent shock and move the shock mounting points to keep the same ride height and Im hopeing that the 2cm'ish travel will be enough without bottoming out. It is very easy to get springs for this length of shock upto 1200lb buy buying a very cheap tacky shock just for the spring. I am running out of plans now but I do have one more plan D which is to have 2 shocks a longer stroke ( with the 800lb spring ) in parallel with a shorter one with a stiffer spring but to have some form of free travel on the shorter one. This may be perfect for my use as it will make the suspension very tunable for what I want and it will still be lighter than a proper motorcycle mono shock.

Edit: I have been looking for a oil over coil short ( 165mm ) shock and now im not totally sure if the the cheapo shock springs will fit over the shock body.. I need to do a bit of reasearch before I decide :?

Have anyone reading this got a coil over oil 165mm i2i shock that can give me the shock body dia from, this would be a great help.
 
Sounds do-able with a shorter-travel mtb shock+1200 lb spring.

However, I want a bit more than 2cm of usable travel.

Keep me posted -

Len
 
My longer shock is 4cm'ish travel and using just under 3cm of the stroke ( I was getting my numbers mixed up and I lost 1cm somewhere :D ) and 165mm i2i would be about 3cm travel. Its never a good idea to use the full stroke of a shock as it do put even more strain on the internals but it might be the only way forward for me at the moment. The total wheel travel is more than enough using the just under 3cm of shock travel. I will let you know how I get on.
 
Lunch break -

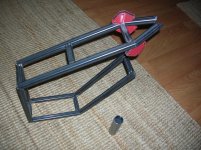
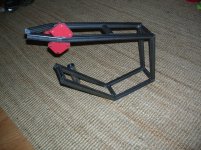
Sides of the main frame tac welded in place. I've clamped the cross braces in place. Head tube & last sections of top/down tube frame pieces are going to be the real challenge - particularly getting the head tube right ... That area I will be jigging to get right....

Dscn2024.jpg
Dscn2025.jpg
Dscn2026.jpg

more to come

Len
 
Cross braces for the main frame tac welded in. Now onto the head tube sections.

Dscn2027.jpg

Top frame sections connecting the head tube held in place with a magnet.

Dscn2028.jpg

Want to get the head tube angle pretty to close to where I designed it, so this part is going to take some time. That hunk of steel weighs a good bit already. Going to have to come up with composite material of some sort for the panel insets to manage the total weight a little....


Len
 
The headtube is my least favorite part of the build. The rest of it can be a bit off, but if the headtube is off the entire bike is garbage.
 
couldn't stand it.

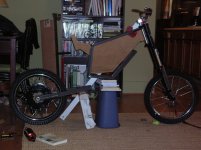
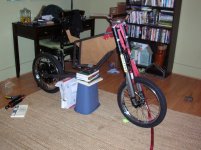
mocked up again with the bits and pieces I have so far... :D

Dscn2029.jpg

Dscn2030.jpg

I have compression straps on the front fork to account for sag. At this height, I would be fine with running the moto bars. I have some clip ons that fit the upper stanchions on the fork.

I guess we'll see what pans out....

Len
 
roger that Hal. RST sigma. there was a thread about them somewhere around here. Its an inverted design, so the stanchions are clamped in the triple clamps. Just happen to be 45mm, and that happens to be a common fork tube diameter on several modern day sport bikes that use clip ons.

If that thing doesn't work out for me, I am going to bag the whole dual crown set up and go with a nice long travel single crown fork.

Looks like that RST sigma will be good to get me started, perhaps for general street use.

Len
 
Ah yes, the RST sigma. The fork that gave my computer a virus when I looked at a pic of it.

Looks pretty beefy, 45mm is pretty big for the stanchions.
 
Thanks Greg. I agree - as it sits right now, that head tube angle is quite steep, more akin to road bicycle racing geometry ~ 73 degrees or so.
However, the back end is going to sag from where it is in the pic, causing the head tube angle to slacken a bit. By my calcs, if I can tune the rear shock to sag 1.5" - 2.0" inches, my head tube angle will be just about where I want it ~ somewhere in the 67-70 degree range... The big variable/question right now is which shock to run - moto? - what # spring, and whether or not my complete setup (up to about 90 pounds estimated now) + rider (175 pounds) will be enough weight to get the desired sag on a shock that was designed for at least 125 pounds of total additional weight.

The key is going to be multiple mounting locations on the swing arm and frame for the upper and lower rear shock mount position. This will allow me to "tune" the head tube angle if I can't achieve the proper amount of rear sag. Haven't quite got to it yet, but I am planning on using a bolt on - bracket system in order to get where I need to be. That way I can also just fab up a new bracket if anything changes (shock length, front fork, wheel diameter, etc.)

Len
 
Back
Top