Oatnet's x5403/Norco A-line, and Front-Mount battery stuff

I did a fork mounted 2kw-hr pack on a bike we built in a couple hours for a buddy to race at the last event.

High and forward does seem to be a great place to carry weight on a bicycle. However, I didn't like the heavy steering effects, which made it kinda awkward when you were really railing corners and needed to make a series of instant small steering input corrections to hold your line. If I could brace it from the frame alone, so it didn't turn with the forks, but keep the weight in the same place, I think I would really like it.

IMG_20111017_192504.jpg


IMG_20111017_192449.jpg
 
liveforphysics said:
I did a fork mounted 2kw-hr pack on a bike we built in a couple hours for a buddy to race at the last event.

High and forward does seem to be a great place to carry weight on a bicycle. However, I didn't like the heavy steering effects, which made it kinda awkward when you were really railing corners and needed to make a series of instant small steering input corrections to hold your line. If I could brace it from the frame alone, so it didn't turn with the forks, but keep the weight in the same place, I think I would really like it.

I remember that build well, I was really pleased to see you made it! :D

Anyhow, it took me a day or so to adapt to the new steering feel, and then maybe a week of progressively deeper leans/sharper turns to get a sense of how much better handling had gotten.

The steering felt twitchy at first, because having the mass up there made the bike lean over much faster than I was used to, it felt like I would lowside. Then I discovered that the lean is very predictable and controllable. No matter how hard or fast it goes into a lean, I can set my lean angle immediately, and with precision. It seems like the deeper I lean, the faster I can lock the angle. Thanks to that, I am taking corners much faster, with much deeper leans than I would have dared in the past.

I've spent a fair amount of time pondering why this works, and I have a two theories about it. First, when I lean into a turn, the bike is 'pushing' the battery mass sideways. Because the mass is mounted over the fork, the force vector from that 'push' runs directly through the fork, compressing it and planting the front wheel firmly. The steeper the lean, the harder the battery is 'pushed', and the firmer it plants. Second, my steering inputs aren't fighting a mass on the frame that wants to keep going straight, or the resulting occilations as the frame flexes between the battery mass and steering input.

Exiting turns, and Side-to-side transitions, are also faster for me, With just a little extra turn in, the battery mass snaps the bike back up much faster than I can pull it up myself. To me, it feels like a fighter jet. 8)

I would have expected the gyroscopic effect of the spinning wheel would have been more difficult to overcome than the battery mass, so I am suprised to hear you report that the mass impeded your abiltiy to make fine corrections. However, I probably don't have even a fraction of your skills, experience or road feel, so maybe I'm just not refined enough to notice.

Was there any slop or flex to the battery box mounting, or the boxes contents? Slop felt all manner of odd, because it added its own unpredictible occilations and steering inputs. Hmm, I wonder if there was enough flex in the handlebars/stem to affect some slop, because as I think back to the 'I'm just a beach towel' mount, I tried a bunch of mechanisms to secure it to the handlebars, but no matter how tight I got the mount, it felt... wrong. It was only after I got the mass hard-mounted to the stanchions - and going absolutely going nowhere - that it felt stable.

Anyhow, when I drag these twins out to a future track day for 144v testing, maybe you'll be around to flog one for a few laps and see if you still feel the same way about fine inputs. Besides, at that voltage the CroMotor's no-load speed is 128mph, 80% of that is 102mph, which would require much bigger balls than I am dangling. You are probably one of the few that could take a 144v CroMotor build to its limits. :mrgreen:
 
JRH is building me a wheelset with a CroMotor in the back wheel, the front wheel will be on a 20mm through-axle DH hub. This is my first foray into using moped rims/tires on ebikes, so I learned a lot from JRH as he helped me sort out the configuration.

I was really glad for his expertise, because without it I would have asked for a really dangerous wheel build. The strongest spokes and strongest rim don't necessarily make the strongest wheel. After checking with him, I thought I'd post what I learned, in case anyone else knows as little as I did. This is in no way intended to be a guide - I have insufficient experience - but to highlight some of the issues involved. Pretty much everything below I picked up from John, except for anything that is wrong.

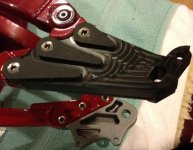
The front wheel bicycle hub is the weak point in the build. The RockShox Boxxer fork's 200mm front travel will help with hard bumps. However, John is still worried about the hub flange, so he wanted to use 13ga spokes "to encourage spoke breaking vs hub failure." The smaller spoke size also dictated a lighter steel rim, as the heavier alloy rim required 10ga/11ga spokes.

The rear rim is 17" to suit the 13kv of the CroMotor. Since the motor has more top end than I need, I wanted to go wih a small wheel to maximize accelleration, keep the motor cool, etc. I'll swap in 144v packs for testing/exhibitions (maybe even <gasp> LiPo :lol: ), but the rest of the time I'll probably keep them at 72v or 100v. I considered a 16" rim, but if I choose to run this at 72v nominal (roughly 79v for LifePO4) top speed would only be 46mph. Besides, I can run a Gazelle tire on the rear rim.

John likes the Michelin Gazelle M62 Moped Tires, I read a lot of good reports about them, and the are 'p' speed-rated to 93mph, so it seemed like a slam-dunk to use them on both wheels. However, I wanted my front wheel to be larger than the rear wheel - the Norco A-line comes with a 230mm fork, My Boxxer forks 'only' have 200mm, so I can use a little extra height to correct the rake angle. However, Gazelle moped tires are only made in 17"/18" diameters, so an 18" moped rim was the largest I could go.

That said, guess what? Good luck finding an 18" moped rim to fit that 18" moped tire, 16"/17"/19" are your choices - and a heavier 18" Motorcycle rim is too much weight for a bicycle front hub, plus as mentioned earlier it would need heavier spokes that would make the front hub flange fail first. When we thought the motor was 9.5kv, John bought a 19" rim and pair of 19"x2.5" Deestone tires/tubes at my request, So I decided to just go ahead and use that combo on the front wheel anyhow.

Which brings me to the mixed bag of nutty calculations used to describe tire diameters. Some tires are rated just as a diameter, I guess like bicycle tires. Other have ratings with 2 numbers, like automobile tires. Lets use 110/80 as an example - 110 is the width in mm. so the tire is 110mm wide. 80 describes the height of the tire, but it is a percentage of the width, not mm, so in this example 110mm*80%=88mm tall.

It is important to note that the width is measured across the widest part of the tread, which is not neccessarily the widest part of the tire, so if you buy a 110mm tire to fit a 120mm space, you still might find the tire rubs. In addition, I already knew from bikes that a wider the rim will also spread the tire wider. It seems that practical experience with the tire rim-combo at hand is the only way to be sure it will fit, so it seems like a good idea to leave some wiggle room when sizing the tires.

Most of the Moped tires seemed to be 2.25", 2.50", 2.75", and 3.0". The Boxxer forks have something like a 4.5" gap - room to fit any of them. However, the rear of the Norco A-line is about 3.5" where the treadline on a 16" or 17" rim meets the frame. I was concerned that 3" might be too tight a fit, especially since I might need even more wiggle room when shimming the Cromotor's 135mm axle into the Norco's 150mm dropouts, so I was more inclined to go with 2.75"/2.50". On the other hand, I wanted as much diameter as possible to cushion the heavy hub motor. On the other other hand, each extra .5" of tire width adds 1" of diameter, which decreases the accelleration I want, and increases top end I probably won't use. So while I would have liked to use a 16" rim with a 3.25 (22.5" diamter) wide tires for maximum padding, they might not have fit. The 17" rim with 2.75" tires is the same 22.5" diameter, plus I can use the Gazelle.

More details I got from John: Wheel Diameter: bicycle rims are measured at the top of the tire, but Moto/Moped rims are measured at the top of the rim. Rim Width: Bicycle wheels are measured between the rim's outer surfaces, while the moped rim is measured to the inner surfaces.. Typical moped rims are 1.35", my ebike-preferred Alex DX-32 rims are 38mm(1.5"), but both are roughly the same size. In theory, my 19" front wheel with 2.5" moped tires should be the same size as a 24" (19"+2.5"+2.5") front bicycle using Alex DX-32's and 2.5" Maxxis hookworms.

Thanks to Saint JRH! :D

-JD
 
Oat, just saw this thread. So cool you are going to build 2 of these high speed bikes. Luke is in Santa Cruz. I can't imagine he can't get some of his friends to join him for a a run down to LA to push your bikes to the 100 mph limit?? Sounds like a great week end :?: You don't mind flames do you :?: :?:

What are your plans for the dropouts for the A-line frames? I finished a pair of dropouts last weekend that extended the A-line wheelbase 7 inches. I will try to get photos posted this weekend. I need a 800 pound spring for my rear shock :!:

I commuted on a 17" Gazelle laced to a 9C mounted on a Giant Faith II for a year (24s2p Lipo, 18 fet ecrazyman). Tire was bullet proof compared to the multiple pinch flats I experienced on a 26" Hookworm over the same route.

Hope to get the wiring done and some CA data posted this weekend.
 
I just got the plastic test parts for the replaceable dropouts, and I am simply stunned by the great quality. This is a complex part, especially where it mounts to the frame. It has one flat section that also curves against the frame at the bottom, one "wavy" section that the frame curves around at the top, and a step between them. These are meant to be the load bearing surfaces, so they must fit precisely, relative to each other. Their position is also relative to the three bolts that keep the dropouts in postion to these surfaces. The fit of the original parts is so tight I had to mallet the dropouts to get them off.

Our very own Magudaman CNC'd these beauties in short order, based only on a pair of the removable dropouts I sent him, and he reproduced them so EXACTLY that they are just as snug as the original dropouts, with tolerances I would say are at most +/- .001", and exceeding my wildest hopes.

While doing that, he also moved the bolt hole back 2", and moved the dropouts in 7.5mm so I could fit the 135mm CroMotor into the 150mm dropouts. Since these are removable, the dropouts are fully enclosed. And heck, I haven't even showed the lightening he did on the back side! Really Really impressive work, crazy good skills, I am beyond thrilled. Plus he has been great to work with, very responsive, shared expertise in metal selections, I'd give my highest recommendation on any parts you need made.

Given that is CNC, he can also make more, so I can buy a 3-4 sets, maybe build one for Mrs Oatnet too. With parts from Justin, even a clown like me can pick up one of those A-line frames currently selling on ebay and make an awesome, durable downhill ride, without mucking about with torque arms.

I only had time over lunch to bolt on one side, but tonight I'm going to put on a motor/brake/deralliur to confirm fitment, more pics to come.

'I'm dreaaaming of an A-Line, Christmas... Not like the hardtails I used to know...'
-JD

Note: the plastic block wasn't quite big enough to make the test parts, so you can see it is chopped off a bit at the rear axle mount. It will be fully rounded on the final piece.
 

Attachments

  • IMG_0064_640.JPG
    IMG_0064_640.JPG
    60.9 KB · Views: 3,105
  • IMG_0066_640.JPG
    IMG_0066_640.JPG
    71.4 KB · Views: 3,105
wow, this just amazing work. this place is filled very talented people! i absolutely have to get those for mine! very impressive! count me in for a pair!!!
 
I'll be in for a pair as well. Please do let us know when you are ordering the final sets; I can send cash any time for such a thing.
 
:shock: :shock: :shock:

wow man, makes my work look like a dogs dinner!!

I'd strongly recommend using a slot + a pinch bolt rather than an enclosed axle though, the small touch ups I needed to do to get my axle to fit tightly took hours, and taking the wheel off means taking the whole rear end apart, including breaks and derailleur. gets to be a pita after a while. it also relies allot on the precision of the axle your putting into it... if it varies even half a mm along its flat spots you'll know about it, and the axle wont sit tight /will develop some play unlike what'd happen with a pinch bolt.

try changing the 'slot' direction to being horizontal rather than verticle, so your axle can come out the back, and maybe beef up the top side above the axle a tad since it will be taking the full load of the wheel on its own. then you can run a pinch straight down into the lower section. alternatively you could work out a way to bring the slot out in front of the derailleur mount, perhaps giving less chain wrap but keeping it vertical...

as it is im still temped to get a set myself too... what final material are you using?


edit

I may even be interested in one with the standard axle hole, as ive got long term plans to put a mid drive on this bike! would be good to have an extended wheelbase for a normal rear end available!
 
I have seen good success without torque arms on my norco 125; it has horizontal dropouts as you speak of without a pinch bolt. The bolt contact surface is knurled. With good torque on the bolts i have seen excellent lack of twisting. I wonder if good knurled surfaces would keep more peoples bolts tight under regen as long as the dropout is strong enough to resist the twisting.
Or the pinch bolt suggestion :).
 
I might ask for a pinch-bolt setup in the future, but the stubby little CroMotor axles limit the material I can get against the flats, and the enclosed axle hole is a stronger design. Plus it prevents the axle from sliding backwards, so the axle nuts will only need to hold the dropouts to the motor, not keep it from moving in the slot, so I can use thicker dropouts and engage less threads.

Besides, these removable dropouts are the only way I'd ever be able to try an enclosed axle hole. I'm aware that its going to be more work during fitment, but once installed I rarely have need to pull a motor back out.

I have asked that the diameter around the axle hole be 2" instead of 1" to have more metal aroound the hole. As Fractal pointed out to me in PM, I'll need to dremel out some materal to keep the wires from being pinched against the dropout.

Magudaman recommend 7075 T651 aluminum, 1/3 the weight and stronger than mild steel.

I was hesitant about ally at first, but after some research I came around. It is already annealed, and because the axle hole is fully enclosed, I am not expecting to see flex in the material. Here are the metal properties he found on a website and forwarded me.

7075 T651
Physical and Mechanical Properties Ultimate Tensile Strength, psi 71,000
Yield Strength, psi 58,200
Brinell Hardness 150
Rockwell Hardness B87
Chemistry Aluminum (Al) 87.1 - 91.4%
Zinc (Zn) 5.1 - 6.1% max
Copper (Cu) 1.2 - 2.0%
Chromium (Cr) 0.18 - 0.28%
Iron (Fe) 0.5 max
Magnesium (Mg) 2.1 - 2.9%
Manganese (Mn) 0.3% max


1018 Mild (low-carbon) steel
Minimum Properties Ultimate Tensile Strength, psi 63,800
Yield Strength, psi 53,700
Elongation 15.0%
Rockwell Hardness B71
Chemistry Iron (Fe) 98.81 - 99.26%
Carbon (C) 0.18%
Manganese (Mn) 0.6 - 0.9%
Phosphorus (P) 0.04% max
Sulfur (S) 0.05% max


Finally, on to the pron! I did a test fit with an 5305 (yes, I put it in backwards :lol: ) The rear shock isn't in yet, so the frame is where it would be with the rear shock fully compressed, and it looks a bit funny. I should be getting the correct driver for the press to install the FSA 1.5" to 1.125" reducer headset, that will allow me to install the Boxxer's, which also are at an odd angle. You can see how far back the wheel is, with the extra 2" on the dropouts.

IMG_0077_640.JPG

IMG_0071.JPG

IMG_0078.JPG

IMG_0080.JPG

IMG_0083.JPG

IMG_0088.JPG

IMG_0099.JPG
 
Nice! Is that a 26 inch wheel?
 
wow. those things certainly count as pron. Seeing them on the bike with the motor, all my reservations flew out the window. They look ideal.

oatnet, I can only speak for myself, but please don't leave me out of this purchase; I can literally email transfer you cash on faith at any time for a couple pairs of those things if there is time on the CNC to make extras when you finally order them. If that is impossible, I hope we can either talk to the magudaman about buying more or buying the file itself.
 
Andje said:
wow. those things certainly count as pron. Seeing them on the bike with the motor, all my reservations flew out the window. They look ideal.

oatnet, I can only speak for myself, but please don't leave me out of this purchase; I can literally email transfer you cash on faith at any time for a couple pairs of those things if there is time on the CNC to make extras when you finally order them. If that is impossible, I hope we can either talk to the magudaman about buying more or buying the file itself.

Being Canadian, and hunting PinkBike for appropriate Bikes to convert.
I find the ads full of A-lines,other Norcos.
@ reasonable'ish Prices.
Would be great to have access to this design in the future.
 
Andje said:
wow. those things certainly count as pron. Seeing them on the bike with the motor, all my reservations flew out the window. They look ideal.

oatnet, I can only speak for myself, but please don't leave me out of this purchase; I can literally email transfer you cash on faith at any time for a couple pairs of those things if there is time on the CNC to make extras when you finally order them. If that is impossible, I hope we can either talk to the magudaman about buying more or buying the file itself.

Thanks Andje!

I'm not in this for the money, I just wanted to build out a kick-ass frame. As far as I am concerned, Magudaman owns the design he made to fulfill my request. Once we are done getting everything sorted out, I hope he lines up a bunch of work producing them, opens a shop, and starts making eBike stuff full-time. :mrgreen: He took this project and ran with it, demonstrated iniative and work ethic and made it happen! Thanks Justin!

The A-line's interlocking system was the only removable/adjustable dropout design I found where the bolts didn't carry most of the load, let alone used three bolts instead of just two, and by far the strongest I saw. I think it is a great platform for ebikes; it weighs more than other frames I have used, but I hope that translates to durability.

Brentis said:
Being Canadian, and hunting PinkBike for appropriate Bikes to convert.
I find the ads full of A-lines,other Norcos.
@ reasonable'ish Prices.
Would be great to have access to this design in the future.

Be careful, 2008 and earlier had fixed dropouts, and I'm not sure if I saw any other Norcos with removable dropouts. This dropout design is specific to the 2009 A-Line model, I think later years still had removable dropouts, but I don't know if they are the same.

I'd recommend snapping up a frame from your fellow Canadian for $400 shipped, before he sells out of them: :mrgreen:
http://www.ebay.com/itm/230720636741

-JD
 
Got the FSA 1.5" to 1.125" reducer headset on tonight, also got the Fox DHX-RC4 9.5" x 3.25"/450lb spring rear shock partially installed (wrong size spacers on the front), so I slotted one of the Boxxer's, this is more how it will ride when done. Take a look at that standard, square-taper bottom bracket - compare that to a bike you know - and you will get a feel for how massive and robust this frame is. It isn't light... but in a heavy duty application like this, I think that is OK!

Dbaker also had some informative results testing his ride today... :D I'll wait for him to post them (unless I can't keep my mouth shut anymore) and post my calculations on the motor.

-JD

IMG_0102_640.JPG
 
Just programmed my CA DP to 23 pole motor and 1854mm measured circumference. I got 63.8mph on 99.6v with my 18 fet controller, using 430W.

Got permission to share Dbaker's results, above. Sadly, I originally mistook this no-load report for an on-road report, 430 watts it should have been obvious. That is 4.3a, that sounds a little high for no load, but this is quite clearly a 9.5kv motor that will perform about the same as the 5305 I already have on the frame right now.

Either the italian guy (whose report I based my purchase on) had a different winding (like maybe the original sample at 13.5kv), or he totally lied about getting 140kph(84mph) from this motor. High Speed motor FAIL. :evil:

OK, Bring on the 5403 from the group buy, that should be a fast motor.

23.25 Diameter
73.01 Circumferance, inches
6.08 Circumferance, feet
867.89 revolutions/mile
9.50 KV of CroMotor
99.60 Voltage
946.20 RPM Unloaded
65.41 MPH unloaded
756.96 RPM Loaded (80%)
52.33 MPH loaded


file.php
 
Thats a let down, but the number should in the middle of 5304 and 5303, much like a 9c 2805... but the power band of a faster kv motor is so much better... Even tho the torque should be remarkable... did your friend told you about the neck smashing torque?
 
Oatnet, what does a reducer headset do?
 
Our '09 A-lines are made for a 1.5" fork, instead of the standard 1 1/8" fork, like the Boxxers I use. A "reducer" headset lets me run the 1 1/8" fork. :D

-JD
 
I got the dropouts from the Magudamaniac just in time for Christmas, (Thanks Justin!) Justin was working hard to meet the Christmas deadline I had asked for, and to meet my request he had to get cutting before I got around to sending him the second list of changes. With so many complex changes we are still sorting things out on this v1.0 set, but I was just so happy to get it finished and be able to play with it! Unfortunately the brake bracket did not get moved along with 2 moves of the axle hole, so he is making an adaptor for this set. There was a little burp on the flat of the axle hole on both pieces, we need to get that moved to the curve at the end. Plastic is also more forgiving, so I had a good bit of filing to get the bolts in - frankly I don't see anyway around doing this, I was suprised I didn't have to with the plastic. Those minor tweaking issues aside, the pieces exceed my expectations, and look great!

Many of the changes I asked for, Justin had already done, so I won't list them. I would like to turn the axle hole 90 degrees, so the weight of the bike is resting on the the flats, as I think someone here mentioned. I had asked that the area around the axle hole be expanded from a 1" radius to 2"; not sure that is necessary, especially if my motor has full-length axles on the next build, with plenty of material against the flat.

I think the enclosed axle hole is going to work out well, I like that it can't slide in the dropout. I might try a pinch clamp version at some point, but after working with the enclosed axle, it really suits me. It will probably not suit motors where the wires come out the end of the axle, because you would have to clip the wires every time you change the motor.

Anyhow, onto the pron, I think these things are beautiful, and have I mentioned how thrilled I am? :mrgreen: Great Job Justin!

-JD

IMG_0134.JPG

IMG_0135.JPG

IMG_0136.JPG

IMG_0137.JPG

IMG_0146.JPG

IMG_0151.JPG

View attachment 2

IMG_0155.JPG

IMG_0164.JPG
 
Back
Top