VPower / CammyCC 48V20Ah LiFePO4 Repair by Amberwolf

I forgot to note the initial readings, but by the time I got done measuring groups, charging current is 2.79A, 51.76V. Peak current shows 2.89A, Vmin 48.9V, so I assume those are the initial values.

Klutzy hurty hands do not make for easy manipulation of probes, so it took several minutes to get the readings done, and I'm sure they don't represent starting charge states exactly because of that. Still, they show there is not a huge difference in any of the groups, really.
3.25
3.24
3.25
3.26
3.14
3.15
3.25
3.24
3.24
3.23
3.18
3.24
3.24
3.25
3.17
3.25

At almost 3A charge, it might take up to 6 hours to recharge it, assuming it does not shut off for balancing stages and that it took no more than 18Ah out of the pack.

I'm tempted to do the soldering during the charging, but I can imagine blowing up both charger and battery trying to do it. So I will probably stop charge for a bit and solder it up. I'll be leaving all the existing welds, too, just adding the solder for a greater surface area of connection between the nickel strips and the cells.
 
So...I'm becoming an expert in losing data now. THis time it was caused by some glitch in the WU, perhaps caused by too high a voltage on it's input vs what it's regulator is designed to take, but not enough to blow it up? I found it "stuck" on 2.68A, 61.8V, 724Wh, and not rotating between the other values in the Wh/Ah/etc window, with a couple of @@ signs immediately in front of the 2.68A at the top left. :( The only way to fix it was to unplug it from both pack and charger and the backup battery, resetting all the data. :roll:

Last I had looked at the pack before this point was around 12.5Ah or so, which I think was roughly an hour and a half or perhaps two hours before I noticed the fan had shut off on the charger and then looked at the WU. As I was working in the otherwise silent room it was charging in, the whole time, I am pretty sure I would have heard/noted the fan noise change and checked right then, but it is possible it took some time for it to sink in to my tiny walnutshell brain that it had stopped. I just don't know. :(

THe TWM setup to monitor backward current flow never registered anything but the voltages, matching within known tolerances the readings on the WU and the Fluke.


Each time I had checked the cell groups prior to this point, they were within 0.04V of each other; at the 12.5Ah point that range was 3.42V to 3.46V, with the reparied group right in the middle of that.

Right now (and for the last several hours) it is just sitting there trickle-charging at around 0.06A, with something like 12Wh total back into the pack after the reset.


Next time I do this I'm going to use the CA, the WU, AND the TWM all monitoring, with battery backups on both WU and TWM, so that at least ONE of them will save the readings I am trying to get. :(

I was going to be testing this pack on a trip with hill climbing today, but that's cancelled due to still more of my lack of awareness of things when working on the bike(s).
http://www.endless-sphere.com/forums/viewtopic.php?p=336930#p336930
 
there is no trickle charging with the lithium ion storage. the 60mA is the shunt current on the BMS i would expect, no charge is entering the cells. it is performing normally it seems.
 
I'd guess you're right about that, as an ammeter inserted between the battery main leads and the BMS shows no current flow in or out of it that way (though there probably is some shunting current going on in the balance wires periodically, because I think I have heard the charger fan kick on now and then (though I never actually catch it when I get in there) which it only does when actively charging.

It's been sitting off the charger and BMS since my last post about it, and a voltage check of the groups finds all of them within 3.41V to 3.56V, most of them right about 3.52V. Hooked up to the CA on CB2, holding the brake on the motor wheel, I get a surge current of about 48A during the one-second test of full throttle I did that way, with a voltage drop down to 49V (from the 56V it was resting at). The pack was at room temperature at that point, in the 54F front room I was working in. (I wanted the pack to be cold for that test and the work below).

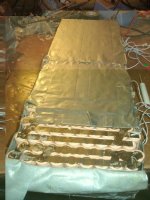
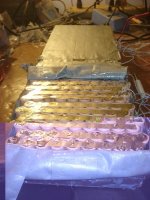
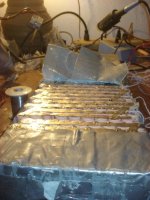
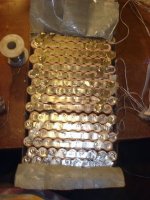
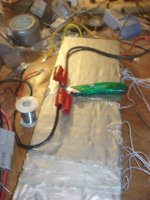
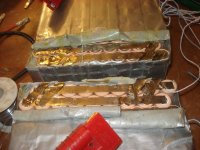
I finally had a short time to check out some of the other groups' tab welds (though not all of the pack, just about 1/4 of them) and I added solder between the existing welded tabs and the negative cell ends (the case ends) on that section. I didn't do the positives (the buttons) because I can't get under the tab with the solder without shorting to the case or melting the protective ring.
DSC03864.JPG
I was as careful and slow as possible in peeling the tape off the cells so that I would not vertically stress any of the welds, but it sticks so well I'm sure some were stressed anyway, and it's possible that any weld-breaking was done in this process. No way to know.
DSC03865.JPG
It's really hard to tell if any of the welds were seriously compromised or not, but there were several cells scattered throughout that I could see where one of four or five spot welds had broken (or never made contact in the first place), but no cell I could see in that 1/4 of the pack was visibly disconnected from the rest. None of them failed a continuity between the tab and the cell, but I could only measure the negative ends (again, the probes couldn't reach the buttons).
View attachment 6
DSC03867.JPG
DSC03869.JPG

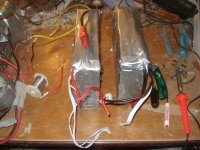
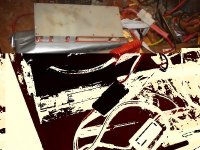
Since this pack is too wide to fit in a triangle as-is, I then severed the tabs connecting the two halves, and added a single-contact Anderson Multipole with a keyed housing different from any other on the pack or bike (the red type), so that I cannot accidentally connect something wrong at any point.
DSC03870.JPG
Unfortunately with only one contact in there, it is VERY easy to pull apart, but I can just use a ziptie or similar to hold the housings together if necessary.
DSC03871.JPG
DSC03872.JPG
The pack is not finished, in that I still need an outer layer of protection against punctures, scrapes, etc., and that I still have to go thru the other 3/4 of the pack for weld-checks/etc. I won't have time to do any of this until probably Wed at the earliest, and maybe not even then. I'd rather be testing this pack out on CB2 instead of the NiMH but until I can protect it a bit better than it is, I can't risk clamping it to the frame and having it break welds or short something out.
DSC03873.JPG
I only get one day off next week (same as this week), with a schedule that varies each day from the previous, so I have very lttle time between trying to get enough rest and taking care of household stuff, myself, and dogs; I end up browsing ES when I should be resting but cannot sleep. :) This is one thing I really dislike about retail, especially during the holidays.
 
I am doing the same exact job you are doing. I have 20 bad cells from the same battery as yours. Talk about time consuming. When I get the cells installed And Hot glued in I was thinking of using something other than duck tape. I was thinking of shrinkwrapping the packs. Maybe have some rubber sheets between the pack and shrink wrap. NIce Job. Your done. how many hrs? 40plus I bet.
 
So far I'd say maybe 12 hours or so of my time at most. Most of that time was spent unwrapping it in the first place. :lol: Well worth it so far. :) Now I just need to find more time to finish reinspecting the rest of it for potential problems, and perhaps investigate a way to solder down positive ends (buttons) under the tabs.

Then I expect it'll take at least a couple of hours, maybe more, to re-package it into something durable that I can put on CrazyBike2.
 
Mistakenly left the pack connected to the BMS but not the charger for the last 2-3 days, as I forgot to disconnect the main and balance wires before heading off to work. It's a test I wanted to do anyway, so not really a problem, I guess. :)

At the balance wires, each cell is at 3.47 or 3.48V, nothing above or below that, full pack voltage of 55.6V. (all measured with the same Fluke as before).

Now I've left it all unplugged from the BMS, until I can get back to it (maybe tomorrow). I'd really like to get it all inspected physically so I can seal it up for use on the bike. :)
 
Hi AMBERWOLF: It looks like you have made a good pack out of something that was bad, and I hope you get a long life out of it. I have one more of those 48volt 20ah packs that is really only a 15ah pack but it still work good. When it's gone I will never have a pack with 288 little cells again its too risky unless you can fix them like you did. Job well done. :mrgreen: :mrgreen: :mrgreen:
 
Thanks!

While accumulating all the other bits I need to secure these packs onto CB2, I've been letting it sit unconnected to BMS or charger. Measured all cell groups and they're all between 3.41V and 3.48V, except group 6 (two down from the one that had the bad cell), which was 3.37V. So that group apparently also has a cell that has high-self-discharge, though not nearly as bad as group 4's was.

Since the pack is not sealed up into anything, I'm probably going to cut the strips between the cells on group 6, until I find one that is lower than the others.

--First cut the strip connetion between the two halves of group 6, check the voltage of each side, wait an hour, then check again.
--If either one has dropped any lower (not likely) I'll have a good guess where the bad one is. If it hasn't, I'll wait up to a few hours to see if it changes.
--Then cut the suspect half into two other halves, and do the same, with similar wait times after cutting to allow voltage settling.
--Again, until I have single cells to check.
As I do this, each stage will have less cells to hold up the voltage of any cell that is discharging internally, so it should become more obvious which section the bad cell(s) is in, hopefully before I actually get more than one section cut down to individual cells.

If the method works right, I'll have 9 cells still on one full tab, and 4 or 5 on another, and 2 or 3 on another, and two more individual ones (one of which won't get reconnected, and will be removed from the pack to be used for some other purpose).

If I'm unlucky, there will be multiple cells with a problem, and it will take longer to narrow down.

Either way, I'll recharge each cell back to full again with a Sorenson, and then let it sit unconnected to anything, and see which cells drop and how fast. Or maybe instead I'll use some magnets and wire to reconnect the whole group, then recharge it all with the BMS and pack charger, then disconnect it all and pull the magnets and wire off, and let it self-discharge again to see the results. Hopefully I won't have to wait 2-3 weeks to find out. :)


I also would still like to monitor each cell group in the whole pack at the same time for voltage sag under load on the bike itself, during a ride over say, 50-70% discharge of the pack, to see which groups drop out of balance faster than others and also how much sag there is under isntantaneous load, and how quickly each cell group recovers from the sag. Unfortunately I don't yet have any multiple-cell cell-level monitors I can use except for the one discussed previously, the MaxPro, which I think might catch fire if I left it hooked up. :roll:

I can always hook up a bunch of my multimeters, which will let me monitor many of the cells at the same time, though it will certainly not be easy mounting them to the bike in a way that lets me read them all while riding. :lol:

I can also just finish building up the GF v2.6 BMS, and wire it up so that I get individual cell-group LED indication of LVC, so that at least I can see each cell hitting LVC under load once it gets drained far enough to do that. I just wouldn't wire up the LVC to cut off the controller, so that I can continue to push it a bit until at least the first few groups hit LVC (unless one is a lot lower than the others). I'd probably still need the wall of multimeters wired up for this, but I would not have to have them in-view while riding, just accessible when I stop to check. Though I do still have to dig up a few more parts for the BMS first (I forget which ones now).

It's not really super-important to do this, anyway, it'd just be nice to have the information. Characterizing the full pack would also be an interesting exercise, and hopefully useful information or at least methods to use for others when working with their own repaired packs, in the future.
 
the problem with the cutting, called a binary search, is that you also have to cut the paralleling metal strip adjacent it in the next row. but you only have to cut one end of the cell row that you are searching. but cutting the rows is not too big a deal since you can patch the parallel link back together with small wire since the current flow is in series, and those links you should not cut. unless you reformat the pack eventually.
 
Since the plan is to solder the flat braid across the tabs afterward to restore the current-carrying ability (like I did with the first repaired group4), it should be ok regardless of which strips I have to cut, right?

Besides, it has to beat the stupidity I did the first time of pulling the whole strip off completely. :lol: :oops:
 
the balancing current for the strip that connects them in parallel is small and the current through the series links is large. the amount of current flowing sideways is handled easily by the 24 G wire used by the sense wires so you don't need the heavy braid at all if you never cut the series links. but those links are limited by the 4 little tiny spot welds that connect the links anyway.

if you wanna solder the braid somewhere, you could solder it in series, but the braid would get in the way when you fold the two halves of the pack back together. that is the worst thing about using the format that vpower uses to build those packs. with just the thin 1mm thick rubber pad between.

the top of cell #1 is separated from the bottom of #16 by 1 mm of pad, thats over 50V DC. with sharp metal corners of those metal strips curled up after cutting, and pointed either into the insulation around the cap of the cell or into the rubber pad. really bad design imo. they should not allow these on planes, just because of the inherent risk due to the design. which is where the regulations should be focused imo, not on just restricting based on chemistry. they could not be manufactured in the US this way i suspect.
 
dnmun said:
if you wanna solder the braid somewhere, you could solder it in series, but the braid would get in the way when you fold the two halves of the pack back together. that is the worst thing about using the format that vpower uses to build those packs. with just the thin 1mm thick rubber pad between.
I'm actually not putting them back into a single brick, since it's too wide for the frame spaces I have on my bikes anyway, and I want to balance the weight if I have to split it in say, two panniers. So it's going into two Kydex boxes, made of U-shapes that will sort of interlock, and then be strapped together with recycled pallet straps using the spring-clip type of tensioner. I've used those before to hold SLAs and whatnot onto CrazyBike2, so I know they can work for this size stuff.

I have a drawing in I think the last page or two of CB2's thread for this, that I meant to crosspost here, but dont' have time just at the moment to find and do that. Will do when I get back.
EDIT: http://www.endless-sphere.com/forums/viewtopic.php?p=343226#p343226
from CB2 thread said:
A friend brought some small pieces of Kydex by for me to check out, it's about 1/4" thick. One piece about the size of my palm and one about teh size of my foot, with another piece of ABS of similar size. The ABS is much more flexible and distortable than the Kydex, at teh same thickness.

A possible plan for making a protective shell for the two halves of the Vpower pack is to make two U shapes of Kydex, and then use some strapping with a tensioner on it to clamp them around. Should be stiff enough not to flex significantly under vibration, unlike the duct tape/cardstock packing they come wrapped in. Might help keep spotwelds from breaking. :)
file.php

I'm in the process of searching for and collecting old mousepads that have that thin black closed-cell foam in them to use between the pack and the Kydex, so everything fits tighter and is even less prone to vibration that could break welds/etc.


the top of cell #1 is separated from the bottom of #16 by 1 mm of pad, thats over 50V DC. with sharp metal corners of those metal strips curled up after cutting, and pointed either into the insulation around the cap of the cell or into the rubber pad. really bad design imo. they should not allow these on planes, just because of the inherent risk due to the design. which is where the regulations should be focused imo, not on just restricting based on chemistry. they could not be manufactured in the US this way i suspect.
That's probably true--I know I wouldn't want to make them like this. Even though this one has maybe 2mm of pad plus 1/2mm of cardboard, I don't think it's enough with the vibration they get in use. That's another part of the reason for separating the halves into the Kydex boxes.

I agree about the construction vs chemistry being the basis for restrictions, but I seriously doubt you'd ever get any government organization to really look into that sort of thing and monitor it in a useful way. (just look at TSA for an example of screwed up implementations of monitoring what could have been useful info, and sorting people/things/etc by it).
 
So far I've been running this pack now and then with DayGlo Avenger and a FUsin motor, and once or twice with CrazyBike2 and the 9C. There's a bit of info here and hte next page:
http://www.endless-sphere.com/forums/viewtopic.php?p=352003#p352003
on the DGA stuff, I can't recall if I have any details in teh CB2 thread.

Eventually I hope to find a spare cell to replace the dead one I removed; at the moment it doesn't matter too much.
 
I moved the pack to CB2 temporarily for the Death Race 2011, and am leaving it on there for a bit (mostly because I'm injured and can't physically remove it yet, but also to test what it is like on a higher-demanding bike).


It's in the black box on the left side rails. Formerly a battery box hodling a single SLA from a powerchair, used in pairs for the 24V powerchair system. I have a second box like that, too. It's ABS, and just inside it on the rail side is an aluminum spreader plate so the bolts don't rip thru the plastic, with more plastic and then foam between the plate and boltheads and the battery itself.

file.php


file.php


file.php


file.php


Crossposted from the CB2 thread:

Work commute data below (including part of the test rides last night, basically everything since charging it back up, after the race and test usage). Note that I'm using the VPower/CammyCC pack, with the NiMH left on the bike in case I blow taht up and still need to get home. :)

25m 28s trip time
5.460miles
23.1mph max
12.8mph avg

27.7Wh/mile
2.934Ah
150.94Wh
59.62Amax

56.4Vstart
52.8Vrest
47.4Vmin

There's no charge data yet, as I am going to run down the pack to BMS cutoff to make sure that works, if possible. Another reason to leave the NiMH on there, so I can still get home after that point. :lol:


ALso, in the race itself, I used about 2.3Ah on those nearly-two-laps, saw some peak amps for up to several seconds around 40-50A during hard acceleration from a very slow or stopped state, etc. I'm afraid I didn't remember to note down the race data before I reset the CA, cuz I'm stupid. :( Max speed was (I think) 27MPH, though, probably on the long straight after turn 13 the first time.

Maybe if LFP noticed the CA readings while he was on the bike, he can post here any he remembers?
 
amberwolf said:
I'm injured and can't physically remove it yet

Injured? Come on now! It's DEATH Race 2011. Mere injuries are not allowed. You go right back out there and kill yourself all proper, now. :twisted:
 
I tried, really I did. :lol: If you saw my leg right now, and not the rest of me, you might think it's part of a corpse. :p


Oh, and something that didn't even occur to me until last night: I didn't have anything other than a fat bungee cord tightly bound over the top of the black ABS lid of this case holding the BMS and pack in it, besides the tightly packed dense foam around it, yet it did not shift around in there or spill out onto the track during the crash. This surprised me when I realized it last night, as by all rights the thing should've come out and splattered all over the asphalt. :shock: :oops:


I'll have the actual trip data from today later, as I'm already laying down after work trying to rest my poor left hip and knee and both shoulders/arms that are being so abused by having to keep all my wieght off the right leg, and forgot to write it all down before laying down. Not getting back up for a while now. ;)

Today it performed about the same as it did yesterday; I think I'm at about 5Ah used now. I'm off work tomorrow, so I might not go anywhere and just rest and fix some problems with the bike caused in the crash taht I didn't even notice until today (like the chain and derailer being messed up in a way that appears impossible but obviously isn't). Friday I work a short day, so I will probably use another couple Ah then, and again Sunday my next workday.
 
cumulative ride data from today's commute:
46m 19s trip time
10.22miles
25.8mph max
13.2mph avg

27.8Wh/mile
5.570Ah
283.3Wh
59.7Amax

52.8Vstart
52.7Vrest
46.8Vmin
 
cumulative ride data from yesterday's commute:
1h 15m 31s trip time
16.34miles
25.8mph max
12.7mph avg

28.1Wh/mile
9.021Ah
455.7Wh
60.37Amax

52.7Vstart
51.6Vrest
46.3Vmin

Since the Vpower pack is now down about halfway in "expected" total power, I checked all the cell voltages at the balance wires:
Starting from most negative, with * representing the repaired string:
3.24V
3.24V
3.24V
3.25V*
3.21V
3.21V
3.25V

3.24V
3.24V
3.23V
3.22V
3.24V
3.24V
3.24V
3.22V
3.23V
 
There was a little load, from the lighting system, which is about 700mA or so, IIRC. I forget exactly. :(

WOuld like to check it under motor loads, even just unloaded motor current, which is less than a couple of amps, but I'd have to have someone hold the front end of teh bike up and run the throttle while I do the cell checking. No local volunteers. :( (or conscripts)

Could theoretically use the FUsin on DGA to do it, since DGA is upside down for something I was doing before the race (can't remember what, though), but I can't move either bike close enough to the other for the wires to reach (by about 10 feet), due to room arrangement and my stupid leg/foot.

Will probably have to build an incandescent-lamp load instead, or use my stovetop elements, and see what it's like that way.
 
Finally hit LVC on the Vpower pack, almost home (about 1/2 mile to go). Wrote down the following from the CA before swapping over to the NiMH pack and finishing the trip home:

1h 31m 10s trip time
20.36miles
25.8mph max
13.4mph avg

28.5Wh/mile
11.52Ah
575.65Wh
62.64Amax

52.7Vstart
46.8Vrest
41.3Vmin


Since it's a cell-level LVC, then after I got home and fed dogs and whatnot, I swapped back from NiMH to Vpower, then left the bike on but not doing anything until it cut out again, so I coudl go back and verify the actual lowest values.

Pack voltage (after turning the bike off and waiting a minute, then back on) was 47.1V rapidly dropping over about 15 seconds to 46.5V, where the BMS cut power.

Cell voltages, from - to + just like before, with the repaired string marked with *:
3.12
3.08
3.16
3.17*
2.15 ----
2.19 ----
3.18
3.12
3.13
2.98 --
2.72 ---
3.12
3.11
3.11
2.67 ---
3.09

The ones with ---- are really low, presumably the ones causing LVC trigger (whcih I guess is 2.0-2.1V; don't know for sure).

Mark of --- isn't quite as bad, then -- is a bit better, but all of these cell groups probably have either some bad cells (or weak cells) or broken/damaged tab welds.

However, it's not too bad for a 2-year+ old pack that's been apart and fixed, and is missing a cell in the fourth-up string. :)

I guess I'll need to open it up and check out the other striings to see what's going on there.

For now, it's charging back up to full, so I can use it for my work commute the next two days. Wed if there is time I'll take a look at the strings, then two more workdays and Sat will be next free day.


I'm pondering if I might be able to use the Venom charger here:
http://www.endless-sphere.com/forums/viewtopic.php?f=2&t=27204&start=0
as just a cell monitor to log the voltages of 8s sections while under load, via USB, to a PC. I haven't read it's instructions yet so I don't know if it will do it or not, but if it will it gives me a way to test this.

I could wire up a test tap to one 8s section at a time, hooked up to the Venom just running off my 12V NiMH lighting pack. Laptop can go in the cargo pod, strapped down and padded, to realtime log the data of a ride.

Of course, it'll be my luck that it only works if it's actively charging or discharging the cells via the Venom, which I don't want, but hey, it's a thought. :)
 
Thats like DOGMAN said along time ago you can almost count on (1-ah per mile at that speed) seems really good amber. :mrgreen:
 
I'm surprised that I got as much power out of it as I did, given it's age and condition and whatnot, but it's doing fairly good so far. I guess it's more like 0.5Ah/mile, in this case, and considering that is without any pedalling at all, and harder accelerations than I would normally do with the NiMH (though still not quite as good as I'd like it to be; I'm just shy of blowing up the controller or motor), I could probably get better performance than this, even.

If I replace the bad cells or whatever is wrong in those low strings, I'm sure it'd work out even better.

Charging data:
Vpower (LS-CA):
46.5Vstart
59.5Vfinish (w/charger just disconnected)
4.0Ap
238Wp
818.53Wh
15.05Ah

This is for leaving it on the charger to balance, too, so I'm sure not nearly taht much energy actually is put back into the pack. Guesstimate of 18 hours on charger? Cant'r emember what time I put it on last night, but I took it off at 14:30 today.


First node of commuting data, since I'm gonna run it down again to see how consistent it is:
19m 0s trip time
4.521miles
22.3mph max
14.2mph avg

31.1Wh/mile
2.711Ah
138.5Wh
62.26Amax

59.5Vstart
53Vrest
47.7Vmin
 
Because of the potential for running out of juice and hitting LVC *in traffic* and being unable to pedal my way out of it right now, I decided I would skip the rest of the second rundown test. :(

I did however find in a trip last night that if I keep the amp draw way down, and speed low (12-15MPH), I can get a lot more range out of the pack:
http://www.endless-sphere.com/forums/viewtopic.php?p=400415#p400415
Regen also works with it, up to almost 8A in tests so far, now that I have that working.

Data from trip:
2h 8m 26s trip time
27.01miles
24.6mph max
12.6mph avg

18.7Wh/mile
9.762Ah
508.34Wh
58.92Amax

Vstart
51.7Vrest
46.7Vmin

1.1% Regen
0.1131 Regen Ah
-7.94A regen peak


Charge data from overnight:
Vpower Pack (LS-CA):
52.0Vstart
59.5Vfinish
4.00Ap
635.62Wh
11.62Ah

So about 2-ish Ah of balancing, I guess, so far.
 
Back
Top