Custom aluminum frame with 2.8kwh capacity

Hello,

Been a cold winter in Norway, so I did not have any motivation to do any more work.

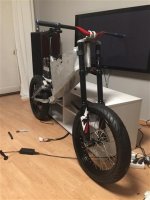
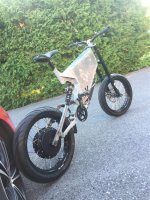
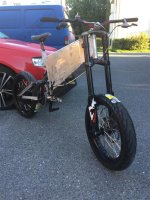
But the last few days the sun and asphalt has dried up and I want to get this going. Where I live, it is perfect to use a bike to get around, so this is high on my priority list.
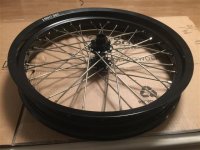
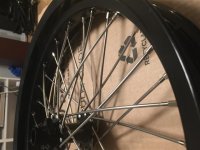
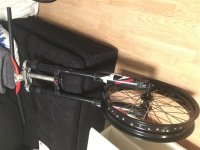
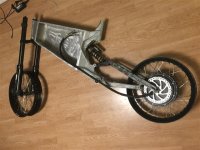
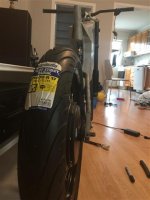
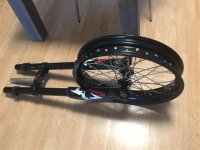
Did manage to re lance the front wheel, used Sheldon Brownes guide to do so, worked flawlessly. It is spoked with three cross pattern, should be plenty strong.
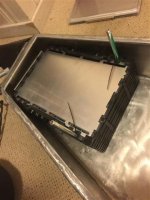
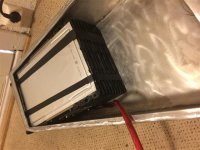
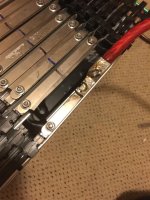
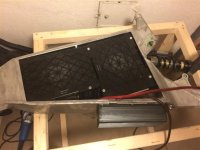
On my list is making a good battery solution. Previously, I thought about stacking the cells against each other, without the original fittings and plastic clamps, but after looking more in to what is possible, I think using the original pack layout is the best solution for protecting the cells.

Originally, I was aiming for 22s2p, giving a pack voltage of 81.4v, but fully charged the voltage would be too high for my controller(92.4v), so I will try out 20s2p instead. A little less voltage, but easier to build and fit the battery inside the already tight frame. So I only get 2.56kwh of battery capacity.

If not mentioned before, the bike will be fitted with Michelin Pilot Sport tires, so it should stick really good to the ground. Something that is needed with the hubmotor I am using(I hope ;) )
 

Attachments

  • IMG_3958 (Custom).JPG
    IMG_3958 (Custom).JPG
    55.7 KB · Views: 1,326
  • IMG_3959 (Custom).JPG
    IMG_3959 (Custom).JPG
    52.4 KB · Views: 1,326
  • IMG_3961 (Custom).JPG
    IMG_3961 (Custom).JPG
    39.6 KB · Views: 1,326
  • IMG_3962 (Custom).JPG
    IMG_3962 (Custom).JPG
    52.3 KB · Views: 1,326
  • IMG_3963 (Custom).JPG
    IMG_3963 (Custom).JPG
    59.6 KB · Views: 1,326
You thought I had given up didnt you ;) ?


I helped my little brother with his GNG kit and finally got the motivation needed to start again. What stopped me last time was lack of motivation to start truing the spokes and fit the battery pack to the bike. As always, I try to stuff too much in too small frames. So it was a lot of grinding and thinking gettting the pack inside. I have not fully test fitted the packs, but I think it will fit now. Still going for 20s2p, giving me 80-84V fully charged, with 35Ah of capacity.

The Enerdel cells are protected with three plastic frames, and some padding between the cells. In order to get the pack thin enough I had to let the cells sit against each other without any of the padding that Enerdel uses. I hope that the cells handles the small movements that will happen during riding without any problem. Since I will bolt the packs together, the movement should be minimal.

Also got the wheels done, with new tires on, I think the bike really look good with the wheels. The frame is a bit on the large side, but that is the cost of using large cells. No way around that with this setup.
 

Attachments

  • IMG_4604 (Custom).JPG
    IMG_4604 (Custom).JPG
    32.2 KB · Views: 1,262
  • IMG_4596 (Custom).JPG
    IMG_4596 (Custom).JPG
    31.1 KB · Views: 1,262
  • IMG_4593 (Custom).JPG
    IMG_4593 (Custom).JPG
    29.2 KB · Views: 1,262
  • IMG_4568 (Custom).JPG
    IMG_4568 (Custom).JPG
    52.7 KB · Views: 1,262
I just wrote a long update with many details, just to see that the page updated and all dissapeared, oh well. I will re do a short summary.

After a long week using all my spare time and more than that, I finally managed to take a test drive this morning. It has been a long couple of days tryng to fit the batteries in a far too small frame and fitting all the small details. It does take time, especially when you have to think out how you want to solve each problem. But I am happy to see that the bike is together and works. It still needs to be used a bit to see what works and what needs re work before I breaks it down and paint it. It also needs a rear brake mount. The Sabvoton controller software was a hassle to work with at first, before I understood the infrastructure. The manual was so bad that I got confused, but after trying different combos for a while the automatic hall sensor combo actually worked. After that the controller worked really good. The bike launches all right, but I have not adjusted the current to maximum yet, so more to try out

But for now I will test it and have some fun. I have a 203mm front disc with a 2 pot caliper in the front that started to smoke a bit after some heavy braking, so ideally, I would get regen and a rear brake also, to deload the front brake.
 

Attachments

  • IMG_4653 (Medium).JPG
    IMG_4653 (Medium).JPG
    111 KB · Views: 1,233
  • IMG_4652 (Medium).JPG
    IMG_4652 (Medium).JPG
    86.5 KB · Views: 1,233
  • IMG_4647 (Medium).JPG
    IMG_4647 (Medium).JPG
    63.8 KB · Views: 1,233
  • IMG_4645 (Medium).JPG
    IMG_4645 (Medium).JPG
    46 KB · Views: 1,233
  • IMG_4644 (Medium).JPG
    IMG_4644 (Medium).JPG
    94.6 KB · Views: 1,121
  • IMG_4633 (Small).JPG
    IMG_4633 (Small).JPG
    44.4 KB · Views: 1,233
  • IMG_4632 (Small).JPG
    IMG_4632 (Small).JPG
    45.3 KB · Views: 1,233
  • IMG_4629 (Small).JPG
    IMG_4629 (Small).JPG
    46.1 KB · Views: 1,233
  • IMG_4627 (Small).JPG
    IMG_4627 (Small).JPG
    56.4 KB · Views: 1,233
  • IMG_4626 (Medium).JPG
    IMG_4626 (Medium).JPG
    74.9 KB · Views: 1,233
  • IMG_4644 (Medium).JPG
    IMG_4644 (Medium).JPG
    94.6 KB · Views: 1,121
Sweet build! That is some really nice frame hack n slash work! I wish I had the skills and patience for that. Then widening the lower of the swingarm was crazy too!

I would have put a larger front rim on the bike otherwise think its coming together nicely. They don't give you much room for those diesel sized wires coming from that hub!
 
skeetab5780 said:
Sweet build! That is some really nice frame hack n slash work! I wish I had the skills and patience for that. Then widening the lower of the swingarm was crazy too!

I would have put a larger front rim on the bike otherwise think its coming together nicely. They don't give you much room for those diesel sized wires coming from that hub!

Thank you :)

I don't like how the wires exit the hub particularly, they have too little space. Maybe there is a better solution, but for now I will just make a slotted spacer that I will weld on so the wires don't need to be forced down as much.

I actually like the look of the front wheel being that size, it is just how Supermotards look. Mx bikes have a different front wheel size, but Sm bikes rarely have.
 
Back
Top