I'm trying to build a spot welder using a transformer and the following "100A LCD" timing circuit (not purchased yet):
https://www.ebay.com.au/itm/3850659...15&osub=-1~1&crd=20220824073210&segname=13017
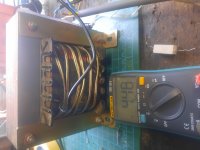
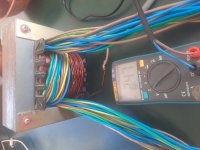
The transformer I have is not from a microwave, I think it came from the second hand store and was kindly donated to me by a friend. I think it's larger than a MOT, and only has one winding with a centre tap (called an Autotransformer).
I connected it to 240V ac mains supply and it seemed to work fine, the centre tap was exactly half way through the winding, and measured about 125V ac.

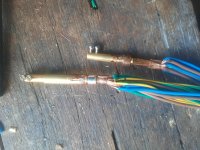
I added six turns of very light gauge wire as a test, and this produced 4.48V ac open circuit. From this, I think the transformer had about 321 turns on the primary to begin with. I've since removed about half the turns to make room for some large gauge wire for the welder. Now when I plug it in (no secondary yet), it trips my 16A circuit breaker "MCB" some of the time. I think there is randomness because inrush current varies depending on when in the cycle the transformer is energised.
Can anyone tell me some strategies to reduce the inrush current so I can energise the transformer reliably through a 16A MCB? I'm unsure if adding a secondary and shorting this through some nickel (welding) will further increase inrush current and tripping isssues. I'm guessing I'll only need <100ms welding time once the timing circuit installed.
Has removing some turns from the primary increased the inrush current? If that is the case I could add a few turns back on.
Another option is to do controlled switching and delay closing to minimise inrush, but this needs some programming and electronics I think.
Any help or suggestions are appreciated.
https://www.ebay.com.au/itm/3850659...15&osub=-1~1&crd=20220824073210&segname=13017
The transformer I have is not from a microwave, I think it came from the second hand store and was kindly donated to me by a friend. I think it's larger than a MOT, and only has one winding with a centre tap (called an Autotransformer).
I connected it to 240V ac mains supply and it seemed to work fine, the centre tap was exactly half way through the winding, and measured about 125V ac.

I added six turns of very light gauge wire as a test, and this produced 4.48V ac open circuit. From this, I think the transformer had about 321 turns on the primary to begin with. I've since removed about half the turns to make room for some large gauge wire for the welder. Now when I plug it in (no secondary yet), it trips my 16A circuit breaker "MCB" some of the time. I think there is randomness because inrush current varies depending on when in the cycle the transformer is energised.
Can anyone tell me some strategies to reduce the inrush current so I can energise the transformer reliably through a 16A MCB? I'm unsure if adding a secondary and shorting this through some nickel (welding) will further increase inrush current and tripping isssues. I'm guessing I'll only need <100ms welding time once the timing circuit installed.
Has removing some turns from the primary increased the inrush current? If that is the case I could add a few turns back on.
Another option is to do controlled switching and delay closing to minimise inrush, but this needs some programming and electronics I think.
Any help or suggestions are appreciated.


![20220922_105153[1].jpg 20220922_105153[1].jpg](https://endless-sphere.com/sphere/data/attachments/186/186192-c50d4b7986956b3615bffac431b06e09.jpg)
![20220922_105047[1].jpg 20220922_105047[1].jpg](https://endless-sphere.com/sphere/data/attachments/186/186193-1928291178be1e45f5256a6730779215.jpg)
![20220922_104756[1].jpg 20220922_104756[1].jpg](https://endless-sphere.com/sphere/data/attachments/186/186195-d4b76f619e4aa317cfde9d43b84774eb.jpg)
![20220922_104844[1].jpg 20220922_104844[1].jpg](https://endless-sphere.com/sphere/data/attachments/186/186194-13b1a71bd779f84d6cbb29d866c66fd2.jpg)
![20220922_104901[1].jpg 20220922_104901[1].jpg](https://endless-sphere.com/sphere/data/attachments/186/186196-7ce1ac2fe0c1625b51879611e236ef1c.jpg)
![20220922_110006[1].jpg 20220922_110006[1].jpg](https://endless-sphere.com/sphere/data/attachments/186/186191-a9662879b9a31b95f9354aca292f22dd.jpg)