DIY spot-welder, transformers from microwave ovens?

OK I looked it up. I suspect that a mechanical switch (relay) is too slow to respond quickly enough. And the timer only goes down to 0.1sec which is already too long, and... The 0.1s increments are too big. This results in way too much power due to the long pulse (and a relay is likely to be inaccurate at such short time frames)
You need an SSR (silicon based relay) that can pulse down to less than 10ms. Given that you are working with AC (50-60hz)you'll also need a timing circuit that can give you at least this degree of control so you can let through halves of AC waves. Most switch at the zero point of the wave form.
Reducing your amps (without shortening the pulse) to the point where you're not blowing holes will result in crappy welds , like burns, that heat the battery too much.
PS.
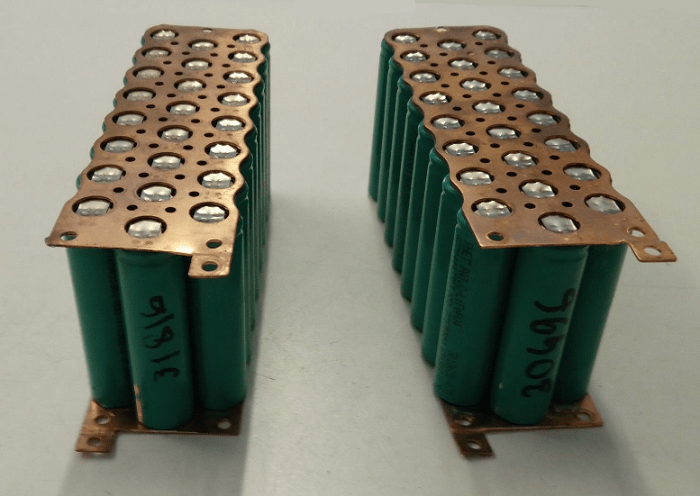
I guess if you are using flimsy 0.1 or 0.15mm nickel you could try going up to 0.2mm and see if that helps, but you really should try to fix the timing issue first
 
But to answer your question, use thinner cable to generate less amps. Same number of wraps ~2-3. Crappy way of doing it though. You'll end up with little burn marks that sink heat into the surrounding area and give inconsistent weak welds.

Lots of amps = melting metal,
Short time = minimal heat dispersion....and no holes!
For the win :wink:
 
thank you for the explanations kdog :thumb:
and you were right : i have only 0.1 x 5mm strip ATM.
can just using thicker strip be a/the (temporary) solution for getting good connection without piercing ?

for the quicker timer do you have a suggestion for a cheap plug and play item that i could add to my machine that would allow to not change the winding AND produce good results ?
 
Buy this - its easy way to control your time and current. Unfortunately 20ms is lowest setting but it good enough.

https://www.aliexpress.com/item/32873812813.html?spm=a2g0s.9042311.0.0.27424c4dzyyeAO

BTW i have spot welder with same MOT. :)
 
krlenjuska said:
Buy this - its easy way to control your time and current. Unfortunately 20ms is lowest setting but it good enough.

https://www.aliexpress.com/item/32873812813.html?spm=a2g0s.9042311.0.0.27424c4dzyyeAO

BTW i have spot welder with same MOT. :)

thank you krlenjuska , very interesting that we use the same MOT may be you can tell how to get the best of it ;) :
on your spt welder, how many turns, what awg, and what timer controlls it ? the one you linked to on aliexpress ? can you detail your setup ?
 
I have taken a 1200 watt MOT and rewound the secondary using 4/0 wire which was very difficult to get into the opening available.
This process resulted in two turns of secondary winding (maximum number I could get). I now have only 1.125 bolts but a lot of amps. I am not totally satisfied with the results and I am wondering if I have enough voltage for the transformer to be effective.
I can solder well with a variety of materials (large and small pieces) but I am not even close to being able to do a spot weld as the heat build up is slower than what I expected. Does anyone have any experience with the "right" voltage for this operation both for soldering and spot welding?
 
Make sure you have removed the magnetic shunts from between the primary and secondary coils (a small stack of lams). Then make sure you have no high resistance points along the path to the electrodes which will need to be copper. At ~1v any resistance means rapid loss of current.
Are you operating the primary coil at its proper voltage?
Picture might help.
 
You may need a little more voltage to overcome the resistance of the probes and workpiece. I think something like 4 turns is going to work best. On my MOT, I tried 4/0 but could only get 1-1/2 turns in. Smaller wire like O ga. might get enough turns.
 
Just finished a MOT spot welder. It's making poor welds but heating the battery terminal so much it starts to sag and collapse.

Secondary wire is fine-stranded, 6.5MM diameter at the conductor which would make it about #2 AWG. 1 turn. Getting about 3V open circuit at the welding terminals. Using a 40 amp solid state relay with an MOV across it for the spike. Copper electrodes, #4 AWG (5mm dia) solid copper wire filed down to 1.6mm diameter at the tips, about 2.5mm gap between them.

I made an attempt at measuring the current using a scope on couple of taps along 15 cm of the secondary wire, using the formula I = voltage * Area (mm^2) / [0.0175 * Length (M)], but the results seemed too high, 4400A, I don't believe the result. Measuring about 500mV peak, or about .35 volts RMS with the scope during a weld.

I have an arduino controller that is currently using a 50 ms pre-weld pulse, and four pulses of adjustable length (started out at one but have been playing with this parameter) from 8 ms to 250 ms. 200 ms between pulses. I measured the pulses with a scope, and they are coming out accurate as far as timing. I was using one pre-weld and one adjustable weld pulse, went to four weld pulses but both tests gave inconsistent welds.

At lower times, 8-50 ms X 4 pulses, I'm getting weak welds. At higher times - 50-100 ms, I occasionally get a good weld, but results vary a lot. I'm heating the battery positive terminal so much it is collapsing. The terminal is getting too hot, sagging. Good thing I have a pile of scrap 18650's to play with.

Is it possible I'm really just generating too little current, and the collapsing terminals are the result? Need bigger secondary wire or parallel turns?
 
You might be right about not enough current. You want a lot of current and a very short pulse to minimize heat spread. If you can get more turns somehow I think it will help.
 
fechter said:
You might be right about not enough current. You want a lot of current and a very short pulse to minimize heat spread. If you can get more turns somehow I think it will help.
Thanks Fechter. I re-wound the MOT with real actual #2 welding cable, 2 turns and a bit more. Figure more voltage is more current with the same amount of copper. I found out I still had some of the magnetic shunts in place, took them out. Redid the electrode points so they are lower resistance. The whole arrangement should be at least twice the current. Need to redo that current measurement with more care, it would be nice to know how much current is actually being generated.

I'm getting a lot more decent welds now,with lower time, but still inconsistent. One weld will be good, next one will be weak. I have the time turned up as far as it will go without burning through. I'm thinking the four pulses are too much, maybe I'll back off on that. Also the time between pulses should be longer, I think that helps limit heat spread.

Well, maybe it is time to parallel two MOTs?
 
fechter said:
What is your pulse time?

Results are better after some adjustments:

Previously, when I was burning through, I was using 25 ms pre-weld, then pausing 250 ms, then 4 pulses adjustable, 200ms apart, set up to 46 ms before it burned through. Saw some people using a scheme like this on some random Youtube video but that wasn't working. More time burned through, but less time made weak welds, never found the sweet spot.

I got rid of the pre-weld pulse, currently using two adjustable pulses, spaced 300 ms apart. Currently set about 60 ms for each pulse. Getting more consistent results, maybe 6 welds out of 7 are strong. If each terminal has three welds, it seems to always be a good weld even if the first one is bad. I'm having more trouble with the first weld - like the strip isn't making good contact with the terminal yet. I'm getting a "feel" as to whether a weld was bad - if it sparks a lot it is always bad (we blew up a piece of nickel strip instead of welding it probably because the weld tip was sitting on the edge of the strip)

Weld pressure is important too. Too much and the terminal sags under heat and pressure. I'm finding a lot of pressure at first, to get the nickel strip conformed in good contact, then a firm but not heavy pressure during the weld works better. Have no way of gauging the force.

I repeated the amp measurement on the scope using the method described previously. With a 6.5 mm dia wire, 10 CM wire length, the scope was measuring 150mV p-p or about .106 volts RMS during a weld. I'm calculating about 2009 amps by the formula cited above, which seems believable. What is a reasonable amp measurement in a real spot welder?

[EDIT] A little googling finds commercial spot welders in the 3000 to 5000 Amp range, This guy says 1100A is OK but he likes to use lower currents yet - 400A. Also lays out the method for measuring current in a heavy wire. He recommends two pulses.
 
Just for fun here is the arduino code I am using. Really simple, no display, the potentiometer position tells you approximately how much time you are setting it to. One can use the serial monitor to check out the code when troubleshooting, but in actual use it isn't needed.

Also, the arduino MUST be inside a steel can. The heavy magnetic fields around the transformer and spikes from turning it on and off fast will generate erroneous data inside the microcontroller. It will begin executing random instructions or start executing programs in uninitialized memory. No amount of power supply filtering will stop a magnetic field from changing bits inside the brains and making them crazy. I learned this on a commercial product years ago, never making that mistake again.


Code:
/*   
 *    Microwave Oven Transformer MOT spot welder controller
 *    
 *    Uses a 1K pot to set the weld time from 8 milliseconds to 500 milliseconds. 
 *    
 *    2020-08-31  Tested 
 *    

 *    
 *    
 *    2020-08-31 Rev 2 
 *    
 *    Set pulses to 4.  Set maximum range to 250 millisecs.  Preweld pause to 250 mS  Inter-weld pause to 100mS 
 *    
 *    2020-08-31 Rev 3  
 *    Rebuilt machine with real welding cable #2, 2.25 turns of wire in the transformer, better contact with the terminal electrodes
 *    Increase interweld pause to 200 
 *    250 MS is way too high for max.  Set at 200 MS
 *    
 *    2020-09-02 Rev 4
 *    Set preweld to zero
 *    Set number of pulses to two
 *    Set range of Pot to correspond to 100 mS maximum pulse
 *    Set interweld time to 300 ms
 *    tested and found 6 welds out of 7 on real batteries were acceptable
 *    Measured amps with scope across 10 cm of wire at 2009 Amps (150 mV P-P or 106 mV RMS across 10 cm)  
 *    Measured pulse times with scope and found them accurate +/- 4-5 ms (turn-off time of the solid state relay)  
 *    
 */


#define CX 1 

int switchpin = 3;        // D3 - This pin connects to the solid state switch (relay) on the positive terminal

int weldbuttonpin = 2;    // D2 - This pin connects to the button that activates the switch, initiating the weld

int potpin=0;            // Potentiometer on A0

int preweld = 25; // was 50 This is the time in milliseconds that the spot welder uses to pre-weld (the first pulse in a dual pulse weld)

int postprepause = 250; //  Was 500 This is the time in milliseconds that the spot welder waits before initiating the second pulse in a dual pulse

int maxweldpulse = 100; //  Was 200 was 250 Was 500 This is the highest auto setting in milliseconds. 

int interweldPause = 300; // was 100  

int NumberOfWelds = 2;   // Counter for welds

int counter = 0;  

int debouncepause = 200; // This is just to prevent accidental double activations due to physical imperfections in buttons

int potvalue = 0;       // value read from potentiometer

int weldtime = 0; 

unsigned long timevalue;  

boolean LEDswitch;  

boolean test;

void setup(){

  #ifdef CX
    Serial.begin(9600);
    Serial.write("\nStartup \n");
  #endif
  

  pinMode(switchpin, OUTPUT); 
  pinMode(weldbuttonpin, INPUT); 
  pinMode(potpin, INPUT);  
  pinMode(13, OUTPUT);    // Heartbeat LED
  timevalue = millis();  

}

void weld(){
  #ifdef CX
       Serial.write("\nStart Weld"); 
  #endif
  
    
    counter = NumberOfWelds;  
    while (counter > 0){
      counter--;
      Serial.write("\nCounter = ");
      Serial.print(counter, DEC);  
      digitalWrite(switchpin,HIGH);      
      delay(weldtime); // Final Weld Time X MS
      digitalWrite(switchpin,LOW);      // Turn off welder
      delay(interweldPause);  
      
    }
    

    while(digitalRead (weldbuttonpin)==LOW) {
      delay(debouncepause);                         // Wait for the switch to be released before continue
    }
}


void loop() {
  digitalWrite(switchpin,LOW);  // safety, turn off solid state relay by default. 


if(digitalRead(weldbuttonpin)==LOW){

   
  delay(debouncepause);

#ifdef CX
       Serial.write("\nButton Pressed"); 
  #endif
  
  potvalue=analogRead(potpin);   // Read Potentiometer

  delay(10);  

  weldtime = map(potvalue, 0, 1024, 8, maxweldpulse);  // Weldtime minimum 8 ms up to max = maxweldtime

  #ifdef CX
       Serial.write("\nPotentiometer Reading "); 
       Serial.print(potvalue, DEC);
        Serial.write("\nWeldtime "); 
       Serial.print(weldtime, DEC);
  #endif

  weld();                                  
}
  digitalWrite(switchpin,LOW);   //safety

  
  if (millis() - timevalue > 1000){  // heartbeat LED
    timevalue = millis();
    LEDswitch = !LEDswitch; 
    digitalWrite(13, LEDswitch);  
  }


}
 
The first pulse is supposed to just "clean" the weld spot and the second pulse does the welding. Maybe back off on the first pulse time. I'd go for something just over 1 power line cycle, around 16ms.

Another thing to consider is that using line frequency and a solid state relay, the relay can only turn on or off during a zero crossing, which would happen 120 times per second. When the Arduino enables the relay, it most likely won't actually turn on until the next zero crossing (depends on relay model). And no matter what kind of SSR, it can only turn off at a zero crossing, so the actual turn off may be almost 1/2 cycle after the relay is told to turn off. At 60Hz a half cycle is 8.333 ms. So your welding pulse time will be some multiple of 8.3ms. Using a timer, the actual weld time might vary +/- 16ms depending on when it started relative to the power line cycle. Multiple pulses may each have their error that add or subtract from the actual time.

A more advanced way to do it would be to set the weld time in terms of half cycles and use a counter to trigger turn-off or at least use a zero crossing detector to start the timer so you have consistent timing.

On my DC welder, I think I'm running around 1ms for the first pulse, 8ms for the weld pulse and about 3,000 amps. Beautiful welds.
 
I know, my second post, and this is the MOT topic, might be better in copper strips to batteries, and it may be a silly question, but if the aim is around 3000A why not modify a standard $20 welder and use 3 car batteries for a tenner each from a car breakers yard?
See a relatively trivial mod at https://endless-sphere.com/forums/viewtopic.php?f=14&t=108047#p1581204
This way you have millisecond time resolution off the shelf, no limitation of synchronising with triacs and zero switching, no limitation of AC supply current to domestic house sockets, no dangerous 110V (240 UK), just add more FETs and batteries for more current. The currant is constant during the pulse, switches cleanly and is programatically controllable if you want to do clever things with multiple pulses. have a bank of relays to switch in varying numbers of batteries of different currents if you need that (motorbike, car, truck)
The big benefit of using MOTs would seem to be for big chunks of metal where you need power for several seconds. A limitation is that you can't get more power than the wall will supply.
I imagine that if anything we may need even higher power and shorter duration to compensate for the higher specific heat and thermal transfer properties of the copper as well as electrical resistance being lower
Thinking tungston probe tips from cutter tools. Have requested some copper samples to play with. Now I just need a battery project to use it on :)
 
There are several welders like the one you linked to. They work well, but you have to lug around a bunch of acid-leaking car batteries. Not something a lot of people would want in their house. I use a similar welder with some hobby lipo batteries and it works quite well. I guess one of the attractions of MOTs is you can usually get them for free and you only need a control circuit and some hefty wire. They also won't leak acid or blow up if you get a spark near them.
 
There's a lot of innovation going on, and a MOT-based welder is very adjustable. If using a single large MOT, a garage-builder can get 1500W of power from a common wall socket.

I have a kWeld, and it is very useful for a specific job. Its a precision timer that uses a battery for the current (a car battery or a LiPo). I bought the first large MOT that I experimented with, but once I started looking for them, I now have four (three of them for free).

The MOT can be easily re-wound for any voltage between 2V and 12V, with a resulting amp-current from 700A-125A.

In the pic below, the cells are spot-welded to nickel tabs, and the tabs are welded to a copper plate. Of course the first weld is the tabs to the copper plate, which is where this MOT-based welder would work well. Welding the tabs to the cells would be better done by a kWeld or similar device. Since the welding of the tabs to the copper plate is done away from the cell, the precise timing is not important, and you can get the copper so hot it glows. The MOT is not precise, I simply use a cheap foot-switch. However solid-state timers are available for the 120V MOT inputs.

However, when welding to the cell, you don't want the cell to get too hot. The kWeld is a precision scalpel, the MOT is an adjustable-weight sledgehammer.

BatteryBusStyle1.png
 
Hi, thanks for taking the time to explain and I agree, sometimes you need a scalpel and other times a sledge.
The MOT with mechanical foot pedal seems good for bus bars to tabs.
Welding copper to cells seems to need scalpel precision and slegehammer power, nickel copper sandwich. Resistance brazing, Ultrasonics, laser? Tricky on a budget
We could improve timing resolution by working backwards, varying the switch on time and calculating to the zero crossing point. I need to stop talking and start trying some of this. Cheers for the intro
 
spinningmagnets said:
There's a lot of innovation going on, and a MOT-based welder is very adjustable. If using a single large MOT, a garage-builder can get 1500W of power from a common wall socket.

I have a kWeld, and it is very useful for a specific job. Its a precision timer that uses a battery for the current (a car battery or a LiPo). I bought the first large MOT that I experimented with, but once I started looking for them, I now have four (three of them for free).

The MOT can be easily re-wound for any voltage between 2V and 12V, with a resulting amp-current from 700A-125A.

In the pic below, the cells are spot-welded to nickel tabs, and the tabs are welded to a copper plate. Of course the first weld is the tabs to the copper plate, which is where this MOT-based welder would work well. Welding the tabs to the cells would be better done by a kWeld or similar device. Since the welding of the tabs to the copper plate is done away from the cell, the precise timing is not important, and you can get the copper so hot it glows. The MOT is not precise, I simply use a cheap foot-switch. However solid-state timers are available for the 120V MOT inputs.

However, when welding to the cell, you don't want the cell to get too hot. The kWeld is a precision scalpel, the MOT is an adjustable-weight sledgehammer.

BatteryBusStyle1.png

I've been meaning to build my 80x 40T cells into a 20s pack or 4x 20s units for a while now.
I was meaning to solder them with a very powerful gun iron but recently decided to take the MOT route. Now. looking here i see people using copper and bus bar plates so now i am wondering will my mot build be able to hack copper etc.

Reading your comment about an MOT being a sledgehammer i think i might have to disagree depending on how it was built.
It seems you can get quite a bit of control with the correct controller. I am ordering the dual pulse 100A switcher with lcd display.
If you build it well then why not be able to get good results. From what i have seen few people seem to get a good winding on the 2nd, the insulation is too thick! One guy removed the insulation and replaced with heat shrink, this may be a little risky so good fusing is required. this way he could get an extra winding on the mot. This causes an issue with higher voltage but it also gives you more power as there is more copper in the window. another option might be to get extra wide heat shrink keep the 2 or 3 windings rather than 3 or 4 but double up the amount of copper wire in the heat shrink. This way you get more power still hut retain a lower voltage.
Not all MOT's are built alike!

But on the other hand if you can afford a fancy spot welder that has real time current and voltage regulation and not just a set duration then you can't really do much better than that.
 
This guy has good ideas of how to make a clean looking unit.

[youtube]S2UfglFeOH8[/youtube]

:D :bolt:
 
I tried using a mot for spot welding the nickle strips couldnd get a consistant weld,then used a dual pulse timer switching a solid state relay,still wasnt any good,in the end i gave up on it and got one of the 5 fet battery spot welders from ebay,all the fets shorted on the first weld!,it was the power sagging for the fet driver when it welded,changed the fets with ones in my junk box but they had a higher rds so didnt deliver as much current that was after sticking a diode and 470uf cap on the power rail to the fet driver,it works absolutly perfect using a 40ah car battery,only cost about £20 too,cheaper than the overrated k weld.
 
Back
Top