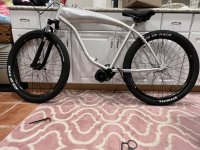
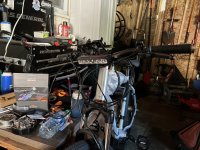
Gas tank frame build

Tyler5883

1 mW
Joined
Apr 25, 2023
Messages
10
Location
Boston, MA
Hey guys, this is my first bike build and first time trying to actually document a project so bear with me.

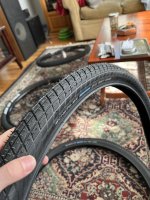
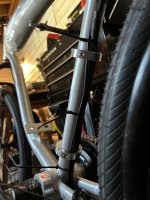
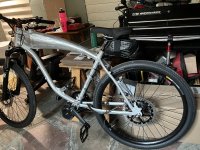
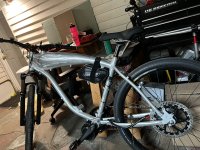
I saw this posted on craigslist and thought it would make for a cool project since it was a frame originally built for a gas motor. After some research, I found that the frame was most likely a CDHpower frame, sold on amazon. The price for this whole package was about the same as I would pay if I purchased the frame new so I figured what the heck and bit the bullet. It came with a few parts, but I only plan on reusing the tires and the front fork.
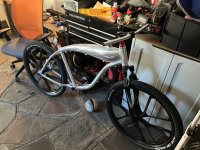
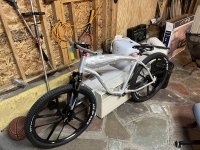
First pick up 1.jpgFirst pick up 2.jpg

I really like the tank built into the frame personally, and I think I want to run all my wiring that comes form the front, through the gas fill cap and out the bottom to hide them for the most part. First item on the list is to get rid of the ugly wheels that came on the bike.

New Wheel Setup:
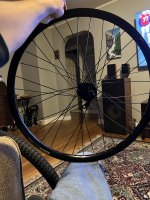
  • Rims - Mavic EX630 rims
  • Front Hub - Shimano Deore HB-M525A Front Hub
  • Rear Hub - Sturmey Archer S-RK3
  • Spokes - 13g Spokes
  • Spoke Nipples - Sapim brass reduction nipples
  • Tires - Maxxis Ace of Pace
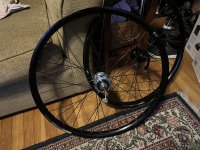
I have never laced up a set of wheels before but it went pretty smoothly, once you get into the groove, its actually quite relaxing. Finding parts was more challenging than I thought it would be, almost nothing was in stock. I had to source a few parts from the UK like the rear hub and and spokes.

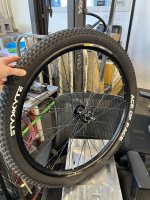
Laced rims 1.jpgLaced rims 2.jpgNew rim with old tire 1.jpg

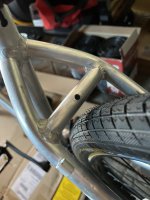
Once I got that out of the way, I learned one of the reasons you shouldn't put 27.5" wheels on a 26" frame. Learning is part of the fun though right? The rear tire interfered with the frame of the bike when it was fully inflated. Not too bad, a set of smooth tires could fix the problem but I'll tackle that in the near future. To finish up the wheels, I decided to lock down the brake setup I wanted to run and purchase the rotors.

Brake Setup:
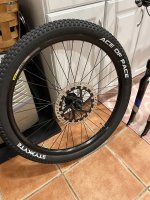
  • Rotor - Magura MDR-P 220mm Rotors
  • Caliper - Magura MT5estop
  • Pads - Most likely something from Magura but unsure yet
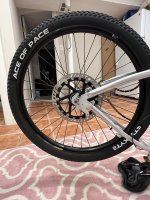
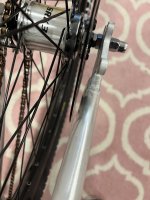
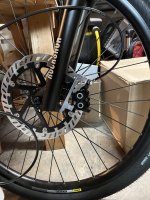
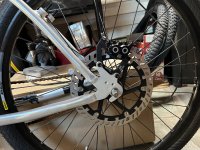
After installing the new rotors, I got to learn another new lesson on why research is important. Coming from a car and motor cycle background, I didn't realize 220mm rotors were considered very big and not all forks can fit them. I apparently didn't take a picture of the front fitment issues so you'll just have to believe me, the disc was hitting the fork tube before the hub was fully seated in the dropouts. Time to start hunting down a new fork, off to ebay. The rear seems to fit fine, tight but fine, clearance is clearance in my line of work (correct me if bikes don't follow this rule).

New brake rotor 1.jpgNew brake rotor 2.jpgNew brake rotor 3.jpg
 
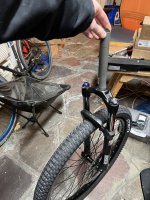
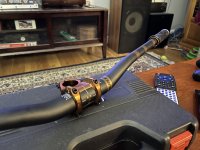
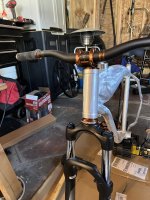
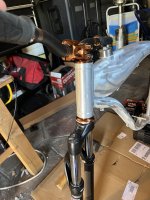
Since I was going to have the front end disassembled to replace the fork, I figured I would pick up a new headset and front handle bar assembly since I was leaning way to far forward with the setup that came with the bike, and I have no idea how healthy the front headset bearings are. The bearings have no crunch but figured it wouldn't hurt to replace.

Front End Assembly:
  • Fork - RockShox XC30 TK 27.5"
  • Top Headset - Nukeproof Horizon Top Headset Cup - Zs 44-28.6
  • Bottom Headset - Nukeproof Horizon Bottom Headset Cup - EX 44-40
  • Headset Adapter - Nukeproof Reducer Crown Race (1.5" to 1.1-8")
  • Stem - Nukeproof Horizon Stem
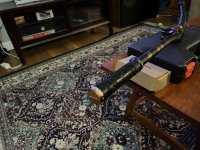
  • Handlebars - Nukeproof Horizon V2 Alloy Riser Bar
  • Grips - Nukeproof Horizon Race Grip
I went with these parts mostly because I have an image of what I want this bike to look like in the end, and this accent color helps achieve that end goal, without knowing the quality of these parts, I was pleased when I received them and saw they were well made. I still need to fully seat the bottom headset cup, but did not have the means to do so at home, I will fully seat it when I take it into my shop for a final assembly after I paint the frame.

New forks 1.jpgHandle bar assem 1.jpgHandle bar assem 2.jpgFront end assem 1.jpgFront end assem 2.jpg


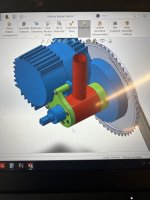
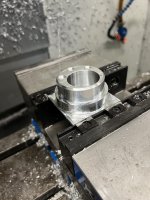
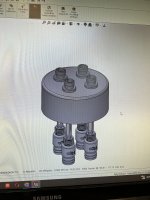
Now that all that is out of the way, the motor was my next focus (as some of you may have noticed from the last two pics). I have zero experience with ebikes, so I had no idea if stock 750w was going to be enough to satisfy the itch so I went with the BBSDH. I went this route because from what I saw online, it seems like you can modify the internals and even upgrade the controller in the future if I wanted more power, seemed like a good fit at the time. My original goal for this build was to tuck the motor on the inside of the triangle, turns out that was going to be more effort than its worth, so the usual spot it is. I was having trouble figuring out what kind of bottom bracket I had, so instead of doing even more research, I said eff it and made my own.

Motor Assembly and supporting Parts:
  • Motor - Bafang BBSHD - Luna Cycles Hotrod Programming
  • Display - Eggrider v2
  • Throttle - Universal thumb throttle
  • Sensors - Gear and brake sensors from the motor kit
  • Chain Ring - Stock 44T and 36T from Luna

After receiving the motor and parts, I got to work. When I held the motor up in place, I realized a concentric BB was not going to work with this frame, so I had to make an eccentric BB. I had big dreams for this BB, I was going to work in the stabilizer plate that the kit comes with and everything, turns out the model of the BBSHD I found online must have been an older rev because my part did not fit. Instead of redesigning it and spending another day on it, I just turned the two legs off and kept it round, I will work up another form of a stabilizer when the time comes.

BB CAD 1.jpgBB MFG 1.jpgBB with motor 1.jpgBB with motor 2.jpg

Just need to knock off this little cable guide to tuck the motor up a bit more. This will be a city commuter so I am not too worried about the ground clearance, but would like to make sure its tucked up as high as it can go.
 
As I am waiting for more useable funds to come in, I started messing around with a few of the small issues like the tire fitment. I decided to grab a set of Schwalbe Big Bens since I saw a set near by on Craigslist and wanted to see if the smooth tread would fix the problem. Not sure if it was the smooth tread, or the fact that I went from a 2.25" wide to a 2.00" wide tire, but the problem is no longer a problem.

New tires 1.jpgNew tires 2.jpg

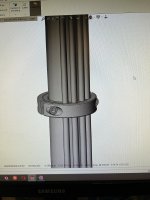
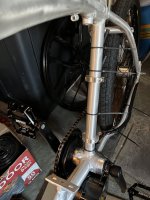
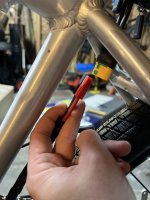
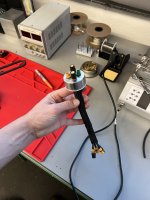
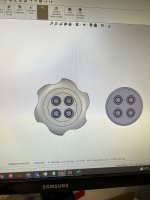
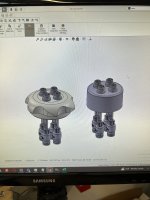
While I'm just sitting around twirling my thumbs, waiting for more money to spend, I started thinking about my wire routing. I want it to be pretty clean and as stealthy as it can be so I thought something like this would be kind of cool to run my wires coming from the motor up the down tube. After making these, I realized I may not even be bringing all 3 wires up. This is what happens when you get bored and just want to do something, you overlook silly things like this when you don't have full, complete information yet. But they turned out alright I think. For the front wiring, I think I am going to source the mating Higo connectors in a panel mount form factor and run them through my gas cap. I was thinking about just using one main connector to plug into the gas cap, but figured the less cutting and soldering on the factory parts, the better. This solution keeps all components uncut, and the stock wiring harness unmodified. Oh ya, and for pedals, I picked up these DMR Vaults the other week.

Wire clamp CAD.jpgWire clamp assem 2.jpgWire clamp assem 1.jpgGas cap CAD.jpgPedals 1.jpg


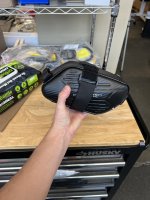
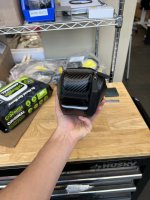
The next thing I will be buying when the money is right will be the battery. I'm going to start off with a 52volt system since once again, I have zero experience with ebikes so I want to see what they're all about before upgrading to something more powerful, I just have no idea what to expect. I am going with a battery from the Electrify Bike Company, called the Mini-Max, it is a 52 volt 10Ah battery and I want to use their saddle bag as well to mount it to the bike. I think it'll keep the clean, somewhat stealthy look going quite well, we will see. I didn't build this bike with the intention of pedaling. I only have about a 3 mile trip to work and I think I can get over 10 miles from this battery and my commute. I can always add another or upgrade to something bigger in the future.

Just the battery, rest of the brake system, and the other small odds and ends I don't know I'll need yet and this should be ready for its first test ride. I will make sure everything works as it should before stripping it down to the frame and painting. I'm getting excited its getting close to done, but I still have a lot of work to do.
 
Mavic rims have lower than average maximum spoke tension ratings. 13ga spokes will tend to loosen at tension levels that the rims are rated for, because they're not elastic enough to follow rim flexing while remaining taut. 14-15ga butted spokes make much lower maintenance wheels.

I'm a very heavy rider, historically 300 to 400 pounds for the last couple decades, but my most reliable and maintenance free wheels during that time have used 15-16ga or 14-17ga butted spokes.

The strength of a wheel is in the rim, not the spokes. Spokes are supportive, and the thinner they are, the more supportive they are under heavy loads.
 
Finishing up my wheels is on my list to do before the first test ride. I got them as true as I can get them but spoke tension is something I need to look into. Is that something I can do without special tools? I was thinking about bringing my wheels to a local bike shop now that I have them laced up and just asking them to finalize them, but I would hate to pay money for something I am one step away from finishing.
I am only about 150 pounds, is this still going to be a reoccurring issue for me if I run these spokes, or is it just one other thing I have to keep in mind during inspections/tune ups?

Just make them nice and tight, check them as often as you think about it. If they keep their tension, they're doing the job fine. If they loosen consistently, you need higher tension (perhaps more than the rim is good for) or thinner spokes.
 
Finally making a little bit of progress again with the bike after receiving some parts.

First up, the battery. As stated before, I went with a 52 volt, 10Ah battery from Electrify Bike Co. It came pretty quick with no issues on shipping or anything. I did ask them a question before purchase about the saddle bag with no answer, but it wasn't critical so decided to go forward with the purchase and wasn't disappointed (so far).

The battery came with an xt90 connector on it for the main connection to the motor and the motor came with Anderson connectors on it. A quick cut and solder is all it takes to get that problem sorted out and the only other issue is the wire length if I want to put the battery behind the seat, again a pretty simple fix, just need the right wire. For the time being, I located the battery inside the triangle so I could get everything hooked up and make sure it all functions properly before doing any finish work.

Battery in Case 1.jpgBattery in Case 2.jpgBattery Option 1.2.jpgBattery Option 2.2.jpgBattery Connector 1.jpg


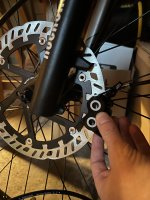
After getting that figured out I got my brakes in the mail and started tackling that. It was pretty easy finding a model online for an adapter/spacer to fit a set of 220mm brakes on a front fork made for a 160mm set up so I trusted the specs online and just wiped one out real quick at work. Seems to work fine, just need to do some alignment tweaking and a lot of brake line shortening to get that system finished up.

Front Brake 1.jpgFront Brake 2.jpg

The rear brake was a little harder to find something that works but there are parts out there. I couldn't find any models online and didn't have time to measure and design one up so I took the easy route on the rear assembly. I ended up getting 2 Magura adapters/spacers to make it work. I got a IS 180mm to 203mm adapter and another 20mm spacer to get out to 223mm. I figured I would have to mill off that extra 3mm from the spacer but after fitting it up, it seems to fit pretty well, we will see how the wear pattern is after a few rides.

Rear Brake 1.jpgRear Brake 3.jpg

After getting it all set up, I just had to take it out on its first test ride to make sure its all working correctly. No real issues so far but still shaking her down to make sure before a full disassembly and the finish work. Lots of finish work.

Still a lot of cable shortening, wire routing, body finishing, paint, and possibly a few more parts to make.

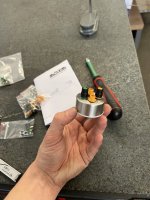
I got my panel mount HIGO connectors in from Germany after only about 2 weeks and started working on the gas cap feed through Idea I had. During the process of drilling, I realized the gas cap that came with he bike was not constructed as well as I hoped so I will end up making a billet aluminum one once I prove this prototype out. Hopefully will be running the cable through the bike in the next week or so after making the pig tail connectors I need to hook the gas cap up.

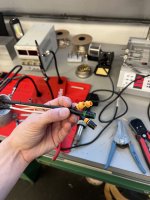
The only other small issue with the wiring is the brakes. I didn't realize it but the Magura MT5e brake levers come with a 2 prong HIGO connector while the BBSHD harness uses a 3 prong HIGO. Simple fix though, just need to cut the 2 prong off and splice on the 3 prong from the brake sensors that came with my BBSHD, just a little bit of a pain in the ass vs plug and play, but hey, that's all part of the fun.

Gas Cap 1.jpg
 
Looks like plenty of braking capacity!

That battery is pretty compact for 52V 10Ah. What are the battery specs?
 
Looks like plenty of braking capacity!

That battery is pretty compact for 52V 10Ah. What are the battery specs?
The size of it was really what convinced me to go this route. I wanted it to be pretty hidden so a rear saddle bag wouldn't look too out of place. The battery has a 50 amp BMS and its made with Samsung 21700 50S cells, although I cannot confirm that considering I did not cut it open and check. I got it from Electrify Bike Co and they have a few others in small compact sizes if you want something with a little more range. I figured my ride to work is about 4 miles one way so I should be able to get too and from work no problem, but have the option to charge at work if my range math turns out to be wrong haha.

I used an online calculator to get a decent idea on the range I'd be able to achieve with this size battery and it came to about 14-18 miles. After the first 2.5 miles of testing, based on the average wh/mile, I'm looking at like 10.7ish miles per charge. Considering the test ride has been a lot of full throttle and not much pedaling at all, I think I'd be able to achieve the desired range under normal circumstances. I also have an option of grabbing another one of these batteries to double the range if I find myself needing more.

I have very little experience on pedal bikes so I wasn't really sure if I was going overkill on brakes or not but I thought it couldn't hurt to be able to stop quickly, traction while stopping is my limiting factor now. I took the bike for its first test run while I was waiting for the rear brackets to come in and just with the front brake, it has no problem stopping from a full throttle dig.
 
Looks like plenty of braking capacity!

Temporarily perhaps. My observed experience with Magura MT whatevers is that they're good at oiling their pads and rotors, using that thing they use instead of a cable.
 
Temporarily perhaps. My observed experience with Magura MT whatevers is that they're good at oiling their pads and rotors, using that thing they use instead of a cable.
I'll be sure to keep an eye on that. Again I dont have much experience in the pedal bike world so I have never used hydraulic disc brakes besides on cars and motorcycles. We will see if these cause any issues as time goes on. Thanks for the heads up though. Do you have any ideas where the leaks come from? Is it the banjo bolt or the piston seals? Or maybe both haha?
 
Just a small update to keep things documented:

Got the pigtails made up for my gas cap feed through and it works great! I must have a wire or two soldered on the wrong pin because my speedo doesn't read anymore but that's an easy fix, I found a wiring diagram and just need to probe the wiring harness and see where I messed up. I got my idea down for a new billet cap and once I confirm everything works well together I can start the manufacturing process of the new cap.
Pigtails 1.jpgPigtails 2.jpgNew gas cap design 2.jpgNew gas cap design 1.jpg

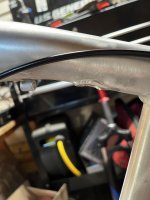
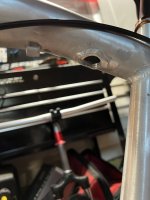
I ran the main wiring harness through the gas tank and cut off the fitting on the back end of the tank where the wire exits so it would come out with minimal bending, right now you can see that it is just taped up with electrical tape, but once I do the paint and the final reassembly, I plan on using some leather tape to mask this area, I think it could look pretty nice on a dark green bike.
Wire exit 1.jpgWire exit 2.jpgWire exit 3.jpg

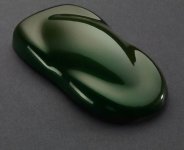
Pretty sure I will be using this handle bar tape to help cover the electrical tape, but this is still up in the air if I find a better solution. I think it'll end up looking much better than just electrical tape covering it up. I think I may bail on my shaft collar idea for running my wires up the back of my downtube, and just wrap it with this stuff as well if it ends up looking good. The paint I'm going with is called House of Kolor "Call of Cthulhu" from a company called 66 auto color. They had a lot of cool looking colors but think this will fit the look I am shooting for.
Color selection.jpgHandle bar tape 1.jpg

I also found a $50 dollar gift card to Amazon when I put my wallet through the wash accidentally so I ended up picking up a battery powered front light and a cell phone mount. Got my Sturmey Archer IGH all hooked up and working, will just need a little adjusting during final assembly to ensure smooth shifting. From the test rides I have been on, it seems to work great. I believe I am in full functioning form now and after a few more miles of testing, I will be comfortable enough to disassemble and start the final body work and paint, I can't wait. I have been staring at this frame for a long time now and its exciting to see it look almost like a completed bike.

(Dont judge my extremely long brake cables, those will be trimmed during final assem)
Front light 1.jpg
 
I've had luck with this stuff


It's waterproof with a couple of wraps and if you look around, comes in a bunch of different colors. I've found it in 1", 2" and 4". I bought the 4" and cut the roll down. Kind of reusable too.
 
Envious of your soldering station. 💟
One of the benefits of working at a prototyping shop is we have most tools needed to make stuff haha. The soldering station is very handy to have for pcb rework and just general soldering needs and its a China special, nothing fancy, think we payed like $200 for it new. Its the Aoyue 866 if you're interested.
 
I've had luck with this stuff


It's waterproof with a couple of wraps and if you look around, comes in a bunch of different colors. I've found it in 1", 2" and 4". I bought the 4" and cut the roll down. Kind of reusable too.
Thanks for the tip, I think I sourced some of that tape in black so if my initial leather wrap doesn't cut it, I'll have to try some of this.
 
I was referring mainly to the soldering bench, the work area, looks so clean, organized, and orderly. (At least from the photos.)
 
Back
Top