GPM's DH Comp Build

GPM

1 mW
Joined
Jan 9, 2013
Messages
14
GPM's E-Bike Project Jan 2013


Hello All,

Having had several e-bikes, modified a couple using off the shelf parts I was delighted to discover the ES forums in November of last year.

After taking inspiration from several of the projects here and having lurked in the background for a few months, Its time for me to unveil “Yet Another DH Comp Build”.

In early January I was able to purchase a medium frame 2003 DHComp in original and very good condition from E-bay for a reasonable price, I think much of my luck achieving a good price was due to the bike being offered as collection only from a fairly remote part of the country, I simply e-mailed the seller asking if arranged courier collection would they be happy to pack the bike.. anyhow to cut a long story short I won the action at a good price and arranged a courier to collect the bike from Wales and have it delivered to me in Cambridge UK the next day for £23 including £500 insurance.

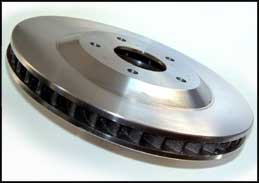
I decided to strip the bike and rebuild replacing anything worn, eg bearings and fixings. At the same time I continued to read the forums here and decided I should uprate the brakes and purchased some Hope 6tis and 203mm saw tooth rotors, again I opted to replace all the seals and pads.
After sending the manitu 6way off to TF and having them service the unit and spec a spring .. I was impressed with the result but felt totally let down with the rockshox spring/oil forks on the bike, a little research suggested that they were a weak point and I resolved to replace them with some more modern Marzocchi 888s, eventually I found a set of 2006 RC2's for a good price … and yes the difference is astounding ..
Around this time I was following a thread here that talked of the differences between the Giant DH Comp and the Later 2005 DH Team rear swingarm, that being the additional 10mm width, this being something useful when fitting torque arms on the inside etc.
So when I stumbled upon a DH Team frame, bundled with a nice crank and a couple of decent shocks + various other parts for 200 odd pounds I could not resist .. in fact I will now end up with a complete second bike which I’m hoping to sell to offset some of the cost of the project so far.

This is what I have managed to pull together so far :-

Frame Giant DH Comp 2003 - Size Medium (18”)
Colour Stealth Black
Swing Arm - DHTeam 2006 version ( 150mm Width )
Rear Shock - Manitou Swinger 6 way
Fork - Marzocchi 888 RC2 (2006) – With FLW Single Piece Top Clamp and Bar Clamp
Handle Bars – Black Short Lift Renthal Motocross – Width Reduced
Brakes –
Front Hope Mono 6 ( Fully Serviced ) + 203mm Sawtooth Floating Rotor + BionX Press Switch
Rear Hope Mono 6ti ( Fully Serviced ) + 203mm Sawtooth Floating Rotor + BionX Press Switch
Headset - Brave Machine “Brave Rokah”
Bottom Bracket – Race Face Diabolus
Crank Set – Race Face Atlas , 44T , 166mm Arms
Pedals – DMR v8
Replaced all Suspension Linkage & Swingarm bearings
Wheels & Motor :-
Front – 24” Halo SAS Rim, Halo Spindoctor Hub, Laced 3 Cross with 13g Saphim Spokes
Rear – 24” Halo SAS Rim , Crystalyte 5304 v2/Phoenix Cruiser II(sensored) Hub Motor, 12g Saphim spokes Laced in Single Cross Pattern.
Tyres - 2 x Maxis Hookworm 24 x 2.5
24 FET 4115 MOSFET 84-132V Freeway Speed LYEN Edition Controller
Throttle - Magura 5k
Three speed switch
DC-DC Multi-Purpose Voltage Converter (lyen) + 15v 5a Toshiba Laptop PSU
Dual 1800 Lumen Cree Mounts / Dimmer
Ordered –
DP460 Black & EPX Mixer Gun Kit
DoctorBass(tm) Dropouts

TBD ..
No of Gears, Gear Selector Type , Battery Voltage / Ah/ Type , Charger / BMS.


I’m comfortable with the mechanical engineering side of things however when it comes to the electronics im less so and would appreciate any advice given ..

I can solder, use a DVM and read resister colour codes and understand the basics but that’s about as far as it goes ..

I'm reasonably confident I can beef up the phase wires running into the hub etc. but could really use some advice / help when it comes to working out what sort of battery to build, and a suitable charger/BMS for it.
Id like to get as much out of the 5304 and the Lyen 24FET as I can, so I guess running it up near its 150v
limit would be preferable?

Something like 36 series
36 * 3.7 =133
Freshly charged
36* 4.15= 149.5


Thanks
G.
 
The Cree's have arrived , and I have spent some mounting the Cycle analyst directly on the handlebar mount as I wasn't happy where it was.
Whilst I wait for the FEP coated ribbon cable for the halls sensors and the Turnigy 10AWG for the phase wires to turn up I decided to spend some time preparing and modifying the rest of the motor, starting with drilling the vent holes.
Ill follow the recommendation to drill holes closer to the axle on the disc side and closer to the outer hub on the freewheel side in the hope that it cause an airflow in that direction .. I'm not entirely convinced its enough and may add some fan blades to help duct air and create a positive pressure from the disc side ... but that's for later..

CA-Mount-o.jpg
CREEs-o.jpg
drill-jig1.jpg
drill-jig2-o.jpg
motor-vents1-o.jpg
 
Its been a while since I last posted an update so here goes :-

After purchasing an 8" 3leg puller I was able to spit the motor and start the process of uprating the phase wires and sensor cable.
my first task was to grind out the wire channel in the axle a little and remove the sharp edges, this was achieved quite easily using a rotary tool and a small burr.

axle-ground_out.jpg

I chose to use 10AWG Turnigy Silicone cable for the phase wires and some FEP coated (withstands 250C) flat ribbon cable for the Hall and Temp sensor wires, as you can see from the picture this fits very neatly in the bottom of the axle channel.

axle-ground_out-cable.jpg

As soon as I had 3 lengths of the Tunigy 10AWG cable together I realised there was no way they were going to fit without removing a considerable amount of material from the axle, this I did not want to do for the obvious reason it would weaken the axle.
After giving it some thought and a couple of searches of the forums here I realised that the insulation on the Turnigy cable was extremely thick due to it being made from very soft silicone, some research turned up "Kynar" heat shrink tubing which is a extremely tough very high temperature (250C) cable sheathing that for this application would only have a .3mm wall thickness.
This I sourced from Cablecraft Ltd in the UK, once it arrived I replaced aprx 200mm of insulation on each of the phase wires.
The Kynar heat shrink tubing really needs a high temperature to shrink, I gave up using my electric heat gun and instead used a small butane torch. This done the cables fit perfectly into the axle recess and I was able to solder them to the windings.

solder-phasewires.jpg

To better seal and protect the motor internals, I gave the stator and windings several very liberal coats of high temperature coil varnish and finally a couple of coats of "non conductive" silver VHT spray paint.

stator-coilvarnished.jpg

At this point I was eager to put the motor back together and run it up for the first time.
I decided that I should run a few basic tests to make sure the halls were all ok and the phase wiring was correct, so I hooked it up to tester I purchased from Edward Lyen.

tester.jpg

After satisfying myself that all was ok I put together a basic test rig, a couple of TV Ariel mounting brackets I had knocking around made for a secure holder for the motor, and as I have a UPS with an external 72v SLA battery pack that is conveniently terminated with 45A Andersons it was relatively easy to hook it all up.

testrig1.jpg

So the moment of truth arrives, I plug in the power and twist the throttle gently ...... and ...... nothing ...
I check all the connections, I can see power getting through on the CA , I run more tests and still nothing .. more head scratching ensues .. I have my doubts about the Magura 5k throttle so I swap it for a standard Chinese hall type from one of my other bikes ... ans still no luck..
so I eventually do what I should have done in the first place and E-Mail Ed Lyen who replied very quickly pointing out that I need to load a test profile for the controller, as soon as I did this the unit sprang into life, and it was obvious that the LVC ( Low Voltage Cut out ) setting was way out for the SLA pack I was using.

ca-test.jpg

Having the test rig up and running one of the first things I noticed was the lack of air movement through the vent holes when the motor is running, I had expected to feel some breeze at least on the side where the larger holes are drilled nearer the outside edge of the plate ,following the theory that centrifugal force will pull the air in from the side with the smaller holes nearer the centre.

View attachment 10
hub-vents2.jpg

I had an idea that I could improve the air-flow by adding some curved fan blades to the disc side cover where the small holes are drilled.
To get some idea if there really is an increase in airflow I needed something to help visualise what is going on when the motor is running.
The solution came in the form of smoke pellets, usually used for testing chimneys or ventilation systems for leaks.
I moved my test rig up into my attic which doubles as a server room and houses a 19" rack, to keep this cool without having to run the A/C all year around I fitted a couple of 6" high capacity fans to draw air through so It makes the ideal place to run the tests ( I chose to run the test at night as I really did not want my neighbours calling the fire brigade out when they saw plumes of red smoke venting from my attic) .

The first test was run with the just the motor with holes drilled.

[youtube]2I0TuSog5c8[/youtube]

I then worked on the motor to add the impeller fan blades to the disc side.
I found a 12v Radiator fan that looked like it could supply the sort of curved blades I wanted and as a bonus it was moulded from foamed polycarbonate and would withstand high temperatures

View attachment 8

After cutting the blades I marked up the hub with arcs where the blades would be affixed, luckily as I had drilled the holes with a jig I could easily add a 3rd ring of holes that would line up with the arcs of the inside of the fan blades, this was done, and the blades were tacked in place with some good quality CynoAcrylate and some spray accelerant I then used some Mili-Put ( An Epoxy Putty ) to smooth the joins and then some high temperature 2part Epoxy glue for the final bond. A lick of paint (Hammerite Smooth Black ) and she's looking good.

fan-mod1.jpg

Again the motor was hooked up to the test rig for another 30 second run next to a smoke pellet

[youtube]WDmOzqOJD68[/youtube]

As you can see the result isn't the dramatic improvement I'd hoped for however it is an improvement, and I can certainly feel more of a breeze from the large holes. The video is a little deceptive as there is a fairly strong draft flowing from left to right in the picture, and I don't really want to turn off the ventilation in the attic during the test.

I want to run another test to see if by placing an outer ring around the blades ( in this case tape will suffice ) to see if blocking a path for air to be spun out via centrifugal force makes any difference.

smoketest-NO3-outer_ring.jpg

Test No 3

[youtube]YegtTrrsjCk[/youtube]

Result .. very little difference to test No 2

Conclusions :- whilst the impeller helps a little the fact remains that air flow through the hub motor remains poor, I think it probable that there is internal resistance to any airflow.

I believe some people in the forums have proposed adding vanes or blades to the inside of the hub side plates, I will probably give this a go at some point and run another test.

..

I have upgraded the hydraulic brake lines to Goodridge braided hose as they were the only manufacturer to support fittings for both Hope and Magura thus allowing me to fit the Magura in-line hydraulic brake sensor switches and still connect to the Hope 6ti brake sets.

View attachment 5

Meanwhile Doc's torque arms have arrived and the DP420 is in so its time to get busy modifying the swingarm.

TAfitting1.jpg
TAfitting2.jpg
TAfitting3.jpg
View attachment 1
swingarm1.jpg
 
There are many different theories as to what sort of cooling holes help. If you look at some of the commercial electric motors (CA120 etc) you see that the cooling vents entend towards the outside circumference of the motor- so in your case you could entend the large outside holes to include some of the outside face of the side cover as well.

John in CR has done a fair bit of work on cooling and has played with internal scoops- check out some of his posts. Justin Le is currently doing some quantified expermients on cooling- he's a smart lad so I'd be checking his post out regularly.

I like the idea of the external fan blades...but.... you're using them at 90 degrees to their designed airflow which may explain the less than anticipated results. I'm certainly not an airflow expert so don't take my word as gospel!

Looking good though, keep us updated! :wink:
 
Looks like it will be a great build. I'm curious about that motor though. I'm wondering who sold that listed as a 5304. it looks pretty clearly like a HS35XX of some kind, and the 12X5 written on the stator in white paint goes against it being a 5304. The "04" is the winding count on a Clyte.
Also the 530X is a 25lbs beast with a cast stator and slanted stator plates, while an HS35XX looks pretty much exactly like that. I don't mean to nit-pick, I'm just curious about that motor and who labeled it that way.
 
@Spicerack :- Many thanks for the heads up on Justin's thread and John in CR's work, so far it is reinforcing my theory that increasing airflow is key to increasing long term cooling and therefore power, rather than relying on the hub-motor's mass to absorb enough thermal energy for short bursts of power.

@Drunkskunk :- I have to say I have had my suspicions regarding the the hub motor and its markings, I purchased it along with the controller and various other parts from Edward Lyen, It was sold as "Crystalyte 5304 v2/Phoenix Cruiser II (sensored rear, black color) $349" .. Time for me to go and check my spoke length calculations again.
 
I have a huge favor to ask. Could you redo the smoke test, but add a flat plastic disc to the outer edge of your fan, and place the smoke origin on the left (FW side)? perhaps tape over all the fan-side holes except the ones that are closest to the axle?

edit: at a minimum, I can send you two highly desireable "endless-sphere" bumper stickers, and a magnetic one too that can be put on your steel tool box or refrigerator.
I have a long-standing theory that the best shape of fan has vanes that copy a cars front brake disc, like this:

fig09.jpg


This calibrated centrifugal lab fan is rated to move 70-liters PER SECOND

fm40detail.jpg


If your laptop fan isn't quite cool enough, the upgrade is a fan that is centrifugal. these are not the factory stock because more flow = more dust, but...some gamers are willing to clean out the dust more often in exchange for a cool enough fan:

31865
 
I have an impeller from a vacuum cleaner that closely resembles a brake disc. I'm going to try to fit it to my 9c which will be seeing a decent power level... No idea if it'll work in this application tho.
 
Very very nice build. I like your way of building skills :D

Question about the phase wiring mod, did you just removed the silicon isolation to bare strands and added heatshrink?

Thanks.
 
@litespeed - As to mounting the battery's I've not entirely made up my mind yet, I'm considering either making a vacuum forming mould and making a 2 part box ( Motorcycle Fuel Tank Style ) within the triangle, this would have to be polycarbonate sheet .. my guess would be about 4mm thick as anything more becomes problematic to form. My other alternative is to fabricate something out of aluminium sheet, I will probably need to find a local sheet metalworking & welding company to help out if I go this route though.
As I learn more about Lipo's and their dangers I'm erring on the sheet Aluminium route here, even though Polycarbonate is incredibly tough I have a suspicion it would be the equivalent of napalm when mixed with a Lithium fire.

@spinningmagnets - Interesting theory, using centrifugal force to create a vacuum and suck air out rather than push it through .. Id be happy to try another test although I'm not sure that my set-up is ideal though as the fan blades I have attached are angled to force air in through the centre on the disc side. If I understand you correctly I would really need to replace the fan blades with straight fins or vanes to achieve the desired effect.
Ill give it some thought though.

@magicpie3focuspower - In answer to your question re the phase wiring mod, yes I did pretty much simply remove the silicone insulation being very careful not to cut into the fine strands, the one trick I did use was to tin or rather melt a small amount of solder into the end before I stripped the insulation, my reasoning being that I could keep the strands neatly together and twisted whilst I fed it into the heatshrink tube.
 
@magicpie3focuspower - I couldn't find I UK supplier of the red Urethane coil varnish/paint that most people seem to be using, I've noticed a lot of the products used are US supplied, and have "ground only" or other special shipping restrictions, for example the Scotchweld DP420 expoy that is used for bonding the torque arms to the aluminium swing arm turns out to be another US only product, ( the DP460 sold in the UK is a totally different formulation ). Anyhow back to the subject at hand, I opted to use high temperature coil varnish ( recommended to be by a friend who builds Tesla coils for a hobby ).
I purchased some from Brocott on the UK
http://www.brocott.co.uk/enamelled-...nsulating-air-drying-varnish-100ml-ad372.html
who supply this in small 300ml jars. I was fairly easy to paint on, although I was very careful not to get too much on the outside edge of the stator laminates as the clearance to the magnets is pretty tight, to get some sort of protection there I simply sprayed the entire assembly with a couple of coats of silver VHT exhaust paint, which is totally non metallic and non conducting.
To get a good seal on the cable I filled the plastic wire egress ring and the exposed section of the axle channel with some high grade clear silicone sealant, I have also packed gaps between wires inside shrinkwrap with silicone dielectric grease where possible in the hope that it stops any capillary action.
If there is anything I've missed please feel free to point out.
 
A couple of updates today :-

One of the things that was puzzling me when I started this project was what to do with the sheer number of extra controls mounted on the handlebars, particularly if your like me and have become used to certain conventions, such as the throttle and front brake on the right hand side.
I quickly became apparent as parts started to arrive that there would have to be some form of compromise, and having read through the forums here to some degree I see many people have opted to place a twist gear shifter either on the right with a thumb throttle or an the left of using a twist throttle. Neither of these two solutions appealed to me.
After a little thought I decided that what I could live with as a compromise was a rapid shift changer on the left, after a quick google I discovered that left handed 7 speed shifters do exist, however I could not locate one, and anyhow I wanted 8-Speed to go with the freewheel I already have. I began to wonder if the pairs of shifters ( front left & rear right ) were manufactured with mirrored or interchangeable parts, so I ordered a cheap set from Amazon :-

LHS-01.jpg

After rather a lot of fiddling with a pair of circlip pliers and some tweezers I was able to strip both shifters down, luckily my assumption that they would mirror the parts, in particular the selector plates was correct, I was simply able to take the 8 way plate from the right hand shifter, turn it over and fit it into the left hand shifter replacing the 3 way plate ..

LHS-02.jpg

A few more minutes of fiddling with springs and circlips and eventually success, I was able to get the left hand shifter back together again, I was also able to cut out the printed window marked up for 8 gears and glue it back in on the left.

LHS-03.jpg

I am cautiously optimistic that this will work, it certainly clicks through all eight positions as it should, but of course the proof of the pudding is in the eating as they say, and that will just have to wait until the rear wheel is laced.
 
While there are quite a few options out there regarding Torque Arms only a couple really stood out to me as options for a high power DH Comp build and I could rule out 1 of the two simply because it altered the axle height leaving me we with "Doctorbass Ultimate Torque Arms V5" as my choice.

Its taken some time to gather all the parts here in the UK, Sourcing the DP420 was an issue, I found UK source of DP490, however it turned out that the formulation sold here in the UK is totally different from that sold in the US, and 420 / 460 isn't sold here at all, so eventually I ordered from the US.
Even sourcing the Scotchweld EPX plungers was an issue here, I now have 3, two of which are the wrong size..

So finally this weekend I had everything I needed together, it was time to embrace the hacksaw and dust off the angle grinder .. or something like that !

My first job was to cut away the excess material from around the dropouts, leaving the sides flat so that I could offer up the torque arms and mark out the retaining plates I intended to fabricate.

TA1-positioning.jpg

Note that I left in the material around the axle for as long as possible, so that I could complete as much marking / drilling etc with the original axle position in place as reference.

TA2-positioning.jpg

View attachment 17

TA4-positioning.jpg

TA5-cutaway.jpg

I wanted to try to complete this conversion without using a machine shop, just using tools available to most people, i.e. a power drill, an angle grinder, a rotary tool ( Dremmel ) and a selection of hand tools, oh yes I did have to buy in a couple of good quality 8.5mm cobalt drill bits, and a good quality M10 x 1.5 Tap to cope with the incredibly hard steel that Doc's TA's are made from, I destroyed a couple of ordinary HSS bits and broke my Tap pretty quickly.

TA6-plates_tools.jpg

The four side plates are straight forward 3mm mild steel plate.

TA7-marking.jpg

TA8-marking.jpg

Doc's Ultimate torque arm V5 dérailleur side with 5 of the 7 new holes drilled out to 8.5mm and Tapped M10 x 1.5

TA9-Docs_TAs_Tapped.jpg

The plates and the swingarm are clamped marked drilled and the remaining material removed once the side plates can be held in with retaining bolts.

TA10-swingarm-cutout-tapped.jpg

Here is the complete set of parts for the dérailleur side including all of the counter sunk allen socket bolts ground down to fit.

View attachment 9

The disc side assembled for final fitting before bonding.

TA12-disc_side_in-place.jpg

Here the 2mm thick aluminium spacer plate can be seen on the inner right hand side plate, this makes up the thickness difference between the swingarm material and the Torque arms.

TA13-disc_side_edge_on.jpg

On the right of the picture you can see the bottle of Isopropyl alcohol I used to clean all of the parts before applying the DP420, As you can see I have managed to fit the DP420 dispenser into a standard decorators gun, It worked surprisingly well, I was quite nervous at first about the 20 minute working time, I didn't think I would be able to apply the epoxy to all of the parts individually and bolt them all together in time, however using the dispenser gun to apply small amounts to each part meant there was no issue at all and I could pretty much work at my leisure.

TA14-DP420_and_Prep.jpg

Knowing that I would have to make a curing oven I kept this handy plywood packing box for the job.

View attachment 5

I wired up the heat gun you can see in the previous photo to a small digital thermostatic controller ( it handles 10A ) which I had in the attic from a previous project, this I set to 75C and popped the swingarm inside for 5 hrs.

TA16-Curing_Oven_Thermostat.jpg

The results are encouraging.

View attachment 3

TA18-DP420-Curedt.jpg

I don't expect to be undoing those bolts again, so the caps were filled with milliput, rubbed down , stoppered primer'd and rubbed down again.

TA19-Primer.jpg

TA20-Primer.jpg
 
Last couple of photos -

The Swingarm with TA's finished and Painted.

TA21-Finished.jpg

TA22-Finished.jpg


Thats all for now but I can tell you that I have my 12 battery packs ordered from HK and Im hoping to do some more work on the motor cooling, i.e fitting some internal fan blades and running another smoke test in the next week or so.

G.
 
Hi All,

Just as promised in my last post, I have finally been able to find time to make the internal fan / centrifugal air flow modifications to my Crystalyte hub motor.

Firstly Id like to say thanks to "spinningmagnets" for the inspiration to look into centrifugal air pumps, and "spicerack's" pointers to look at Justin's and John in CR's threads related to air cooling hub motors, i can honestly say that designing a "proper" centrifugal air pump is incredibly difficult, a say proper in the sense that its easy to create something that will shift a small volume of air relatively inefficiently, other than a few simple pointers I could find on some of the HVAC engineering websites explaining the differences between straight, positive and negative angled blades, there really isn't much to go on without venturing into the realms of advanced fluid dynamics.

From what I can make out though, pretty much every commercial impeller or centrifugal pump design relies on there being a "volute"or simply a casing that either increases in or decreases in volume at either the ingress or egress point, causing a speed up or slow down in air speed. Without the "volute" they are known to be inefficient, so much so that I had serious doubts about the vented disc example posted earlier, until I realized that in that particular example its the dramatic increase in surface area that makes the difference, and simple movement through the air will cause a more than enough air flow most likely much more than the centrifugal effect.

With all this in mind I had to lower my expectations of just how much air i could get flowing, though "any" would be an improvement on the last tests.

My first task after splitting the hub was to look at, adjust and secure all the internal wiring to leave me with as much clearance as possible to fit the fan blades on the derailleur side and the straight centrifugal blades on the disc side :-

adjust-cable-profile_1.jpg

adjust-cable-profile_2.jpg

adjust-cable-profile_3.jpg

This achieved the next thing to do was fold some card and profile it to fit before cutting and folding the 1.5mm aluminum sheet :-

blade-profile-template_1.jpg

The shaped aluminum blades before folding to an angle.

blade-profile-template_and_aluminium-blades.jpg

The blades here on the derailleur side are angled to cut into the air that is hopefully being forced through the holes in the stator and flowing around the outside of the coils, the blades are folded to an angle ate the end to help the air flow out through the large holes in the side plate.

The blades are fixed in place with a little epoxy, and the holes drilled in the side plates to accommodate the cap screws are tapped, each screw was fitted with red "permanent" locktite and a lock-nut fitted to the other side, I really don't want these coming lose.

deraileur_side_blades_1.jpg

View attachment 7

deraileur_side_blades_3.jpg

View attachment 5

On the disc side, where the existing intake fan is already on the outside of the side plate I could only practically fit 3 blades, however I think they will serve their purpose
of moving the air both through the holes in the center of the stator and towards the outside rim and over the coils.

View attachment 4

disc_side_blades_2.jpg

disc_side_blades_3.jpg

disc_side_blades_testing_profile.jpg

Everything was assembled, tested to see if the clearances were ok , adjusted, fettled and tweaked again and again until I felt confident that even with movement or heat expansion nothing was going to catch or rub. The big 8" pullers that I brought for splitting the hub that Id regretted buying at first since Id thought Id only use them a hand full of times have proven invaluable. I lost count a long time ago of how many times Ive split the hub.

So finally its all back together, and Ive re-assembled my test rig, found my last smoke pellet, set the camera on the tripod ----

And here it is " Smoke Test No4 - Final "

[youtube]P0Vx5ZtfXtw[/youtube]

In conclusion I can say that although the air-flow is not dramatic and is hard to see in this video ( its far more visible on the hi-res version I have here ) it is there, it can be felt easily if you place a hand within about 6" of the hub on the derailleur side when its spinning which is a vast improvement on the previous set-up where really nothing could be felt even up close.

st3.jpg

I think there is now enough flow to significantly aid cooling, obviously we will have to see how this works out once my build is complete as the next logical step would be to go for some sort of forced air - electric fan arrangement.

Soon after I started this project I wished I had ordered a CycleAnalyst V3 with its ability to ramp down power based on a thermal sensor ( luckily already one in my hub ) so when I had the excuse to do some work to my existing e-bike ( A little 36v folding E-Cycle fitted with a 36v/750w Goldenmotor ) I took the opportunity to add some more battery's, Now running 67v with a 6 FET 3077 Mark II controller to which I added my exiting CAv2 and purchased a new CAv3 at the same time. Anyway I digress, put simply the CAv3 will I hope save me from overheat whilst allowing me to monitor temperature in the hub.
 
In April I finally made some decisions regarding battery packs and charging arrangements, I did some calculations on a spreadsheet to familiarize myself with the setup

dhcomp-batt-spreadsheet_Page_1-o.jpg

I decided to go with the 36s2p arrangement and ordered myself
12x ZIPPY Compact 5800mAh 6S 25C Lipo Packs from HK, luckily they were in stock at the UK warehouse.
My key motivation for choosing these particular 6s packs is their very compact size L=163mm W=53mm H=46mm.

lipos_1.jpg

lipos_2.jpg

lipos_3.jpg

After many emails to manufacturers much reading of the forum and msgs to members here regarding charging and BMS solutions I decided to go with a simple charging solution consisting of 2 x Turnigy Fatboy 8 Chargers each with a 50A PSU and Revolectrix (FMA) Parallel adapter boards.

I think I would have liked to go with a full BMS system, but it really does seem that there are few tried and tested options for those of us wishing to run higher voltages, from what I gather there is interest and people are working on solutions, so I will keep a close eye on whats going on as its certainly something Id think about upgrading to in the future.

In hind sight I wish I had read the HK feedback posts thoroughly before Id placed the orders for the Fatboy 8 chargers, it appears there is as yet no compatible logging software, had I realized this at the time Id have paid the extra and purchased the Revolectricx PL8's instead.

chargers_1.jpg

chargers_2.jpg

chargers_3.jpg

Ive a lot to think about as regards how to wire up, I want to be able to plug in directly so the cabling will be complex, in the mean time Ive ordered lots of 10AWG silicone cable, as well as some TriCrimps and a box full of Anderson connectors, some nice Military type 50 pin round connectors, 30 meters of 7 way 22awg cable, and some JST crimps and connectors.

I was thinking maybe something along these lines for the main power connectors :-

ppblock1.jpg

A few other parts have arrived, the main contactor and large fuse block from Kelly Controller.

View attachment 2
 
Very cool build! Looking forward to seeing this progress.

The fan blade concept looks great. I always wondered if this concept would work well for those RC motors (https://www.endless-sphere.com/forums/viewtopic.php?f=28&t=31253 . Glad to see that you are testing something like this for the hub motors.

I was wondering, for the next fan test video, could you make a barrier that separates the left side on the hub and the right side of the hub? I think something like a large sheet of white cardboard with a hole cut in it (same diameter as the center of the hub) and loosely fitted around the hubs center may help visualize the suction effect.

Also the temp data sensor would look great when comparing plugged holes on the intake side versus unplugged.

Keep the posts coming! :mrgreen:
 
Back
Top