
2wayspeaker
10 mW
- Joined
- May 24, 2015
- Messages
- 31
Hello everyone and welcome to my build thread.
My build goal: A light short Eboard that's ideal for public transport, carrying and when the batteries die can double as a regular one.
My components and purchasing price.
To this costs for prototyping the board still have to be added.
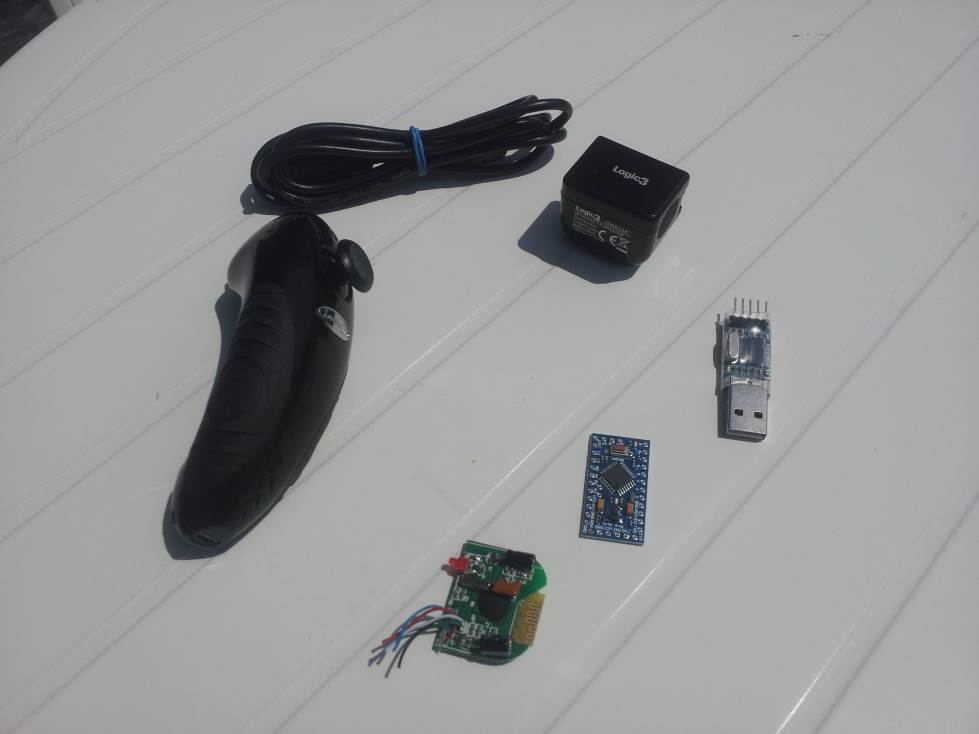
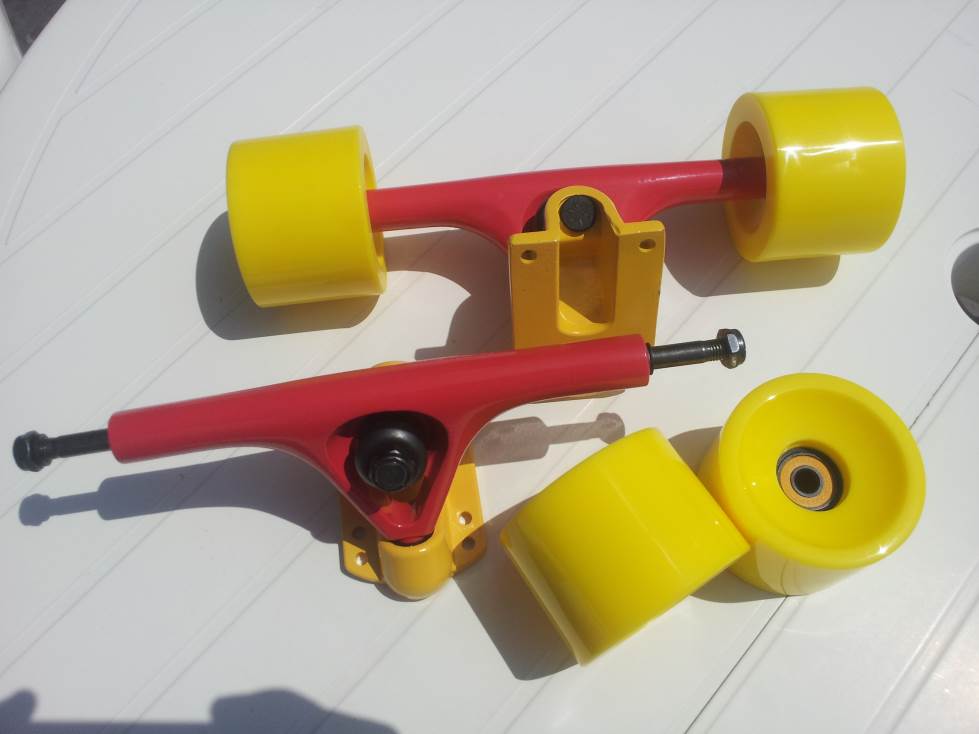
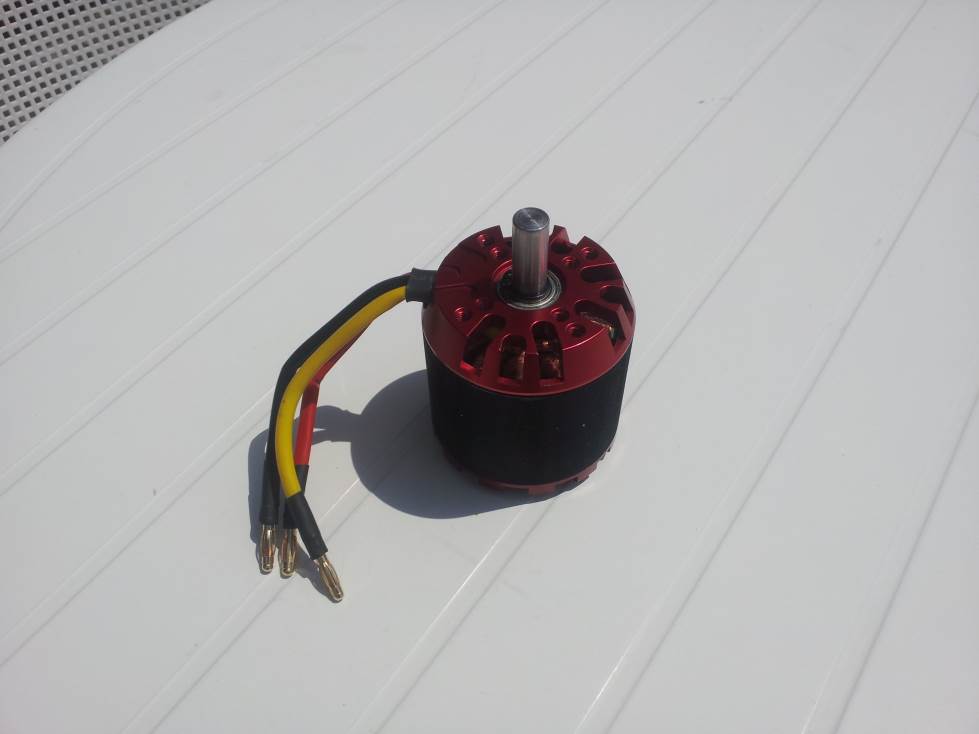
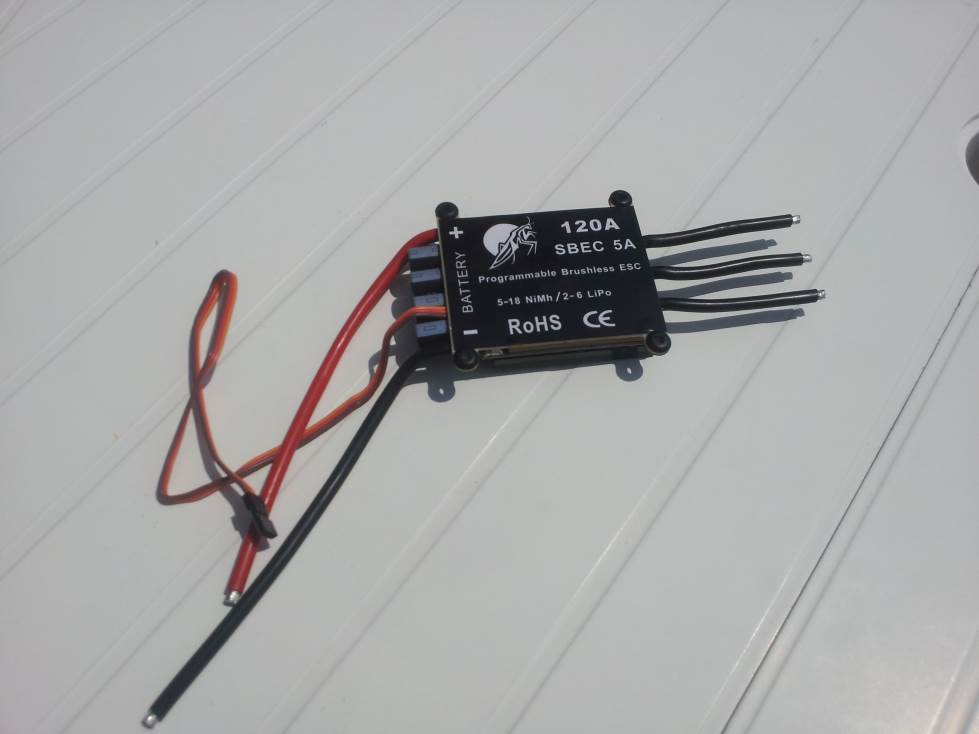
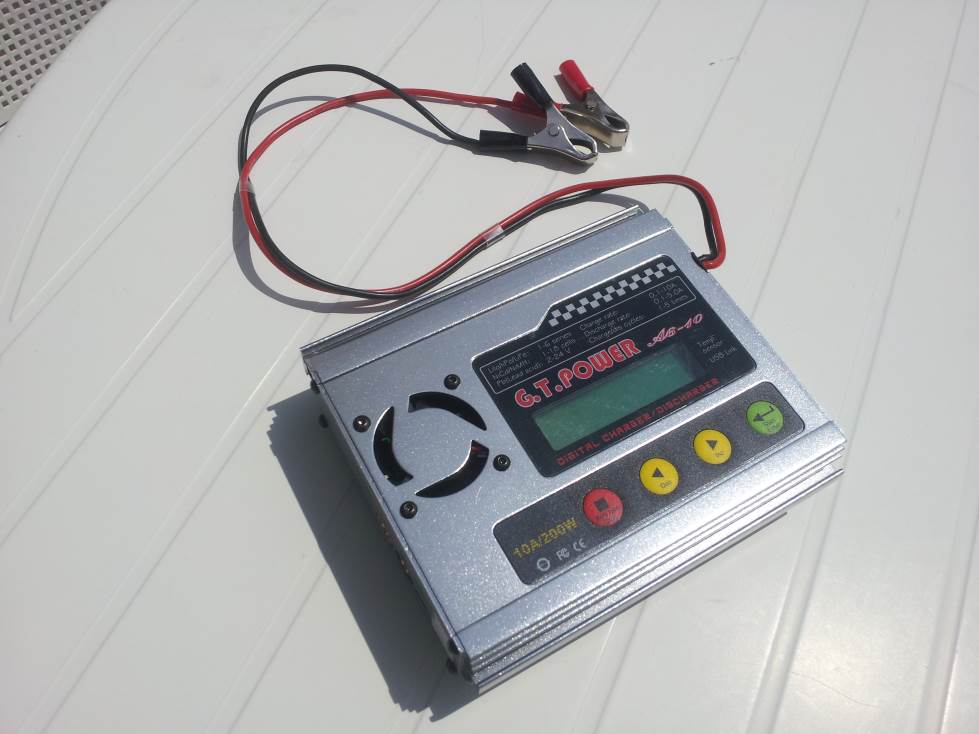
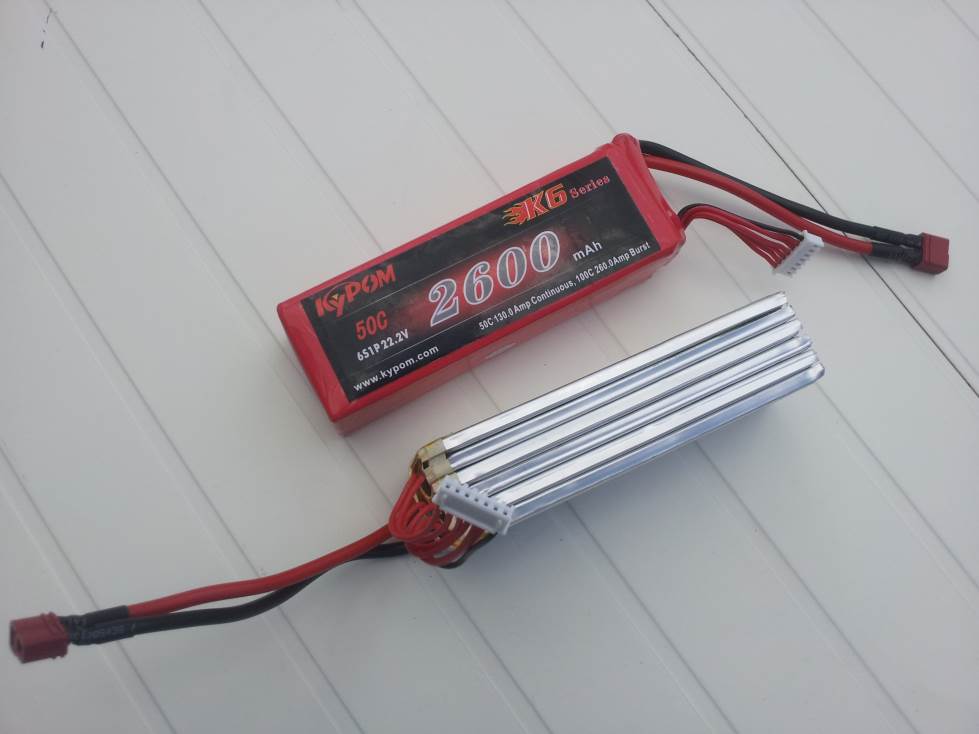
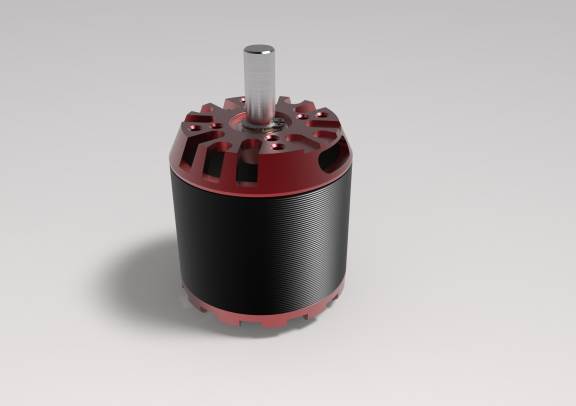
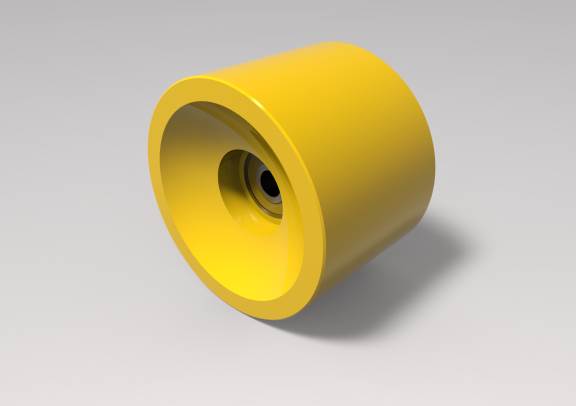
Pictures of my components

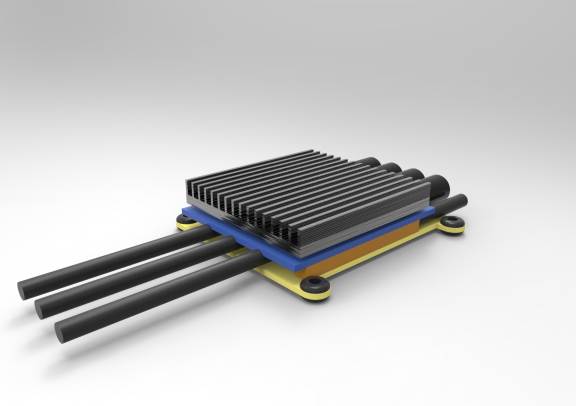
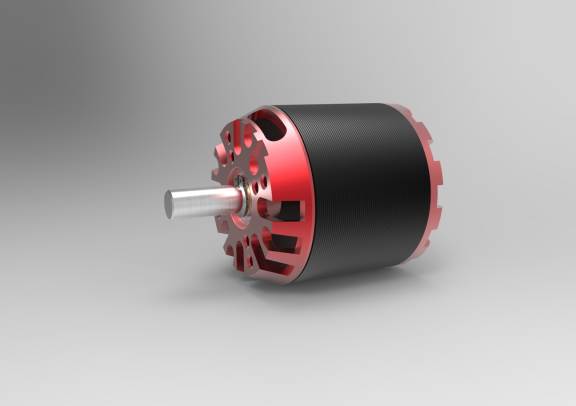
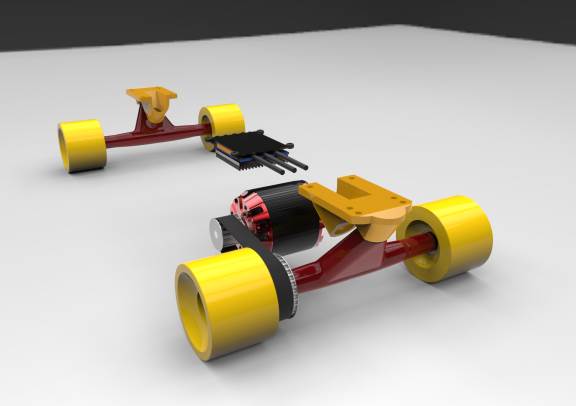
CAD drawings of components
This was drawn in a combination of Siemens NX 9, Autodesk Inventor Pro 2013 and Keyshot 5
Arduino Code
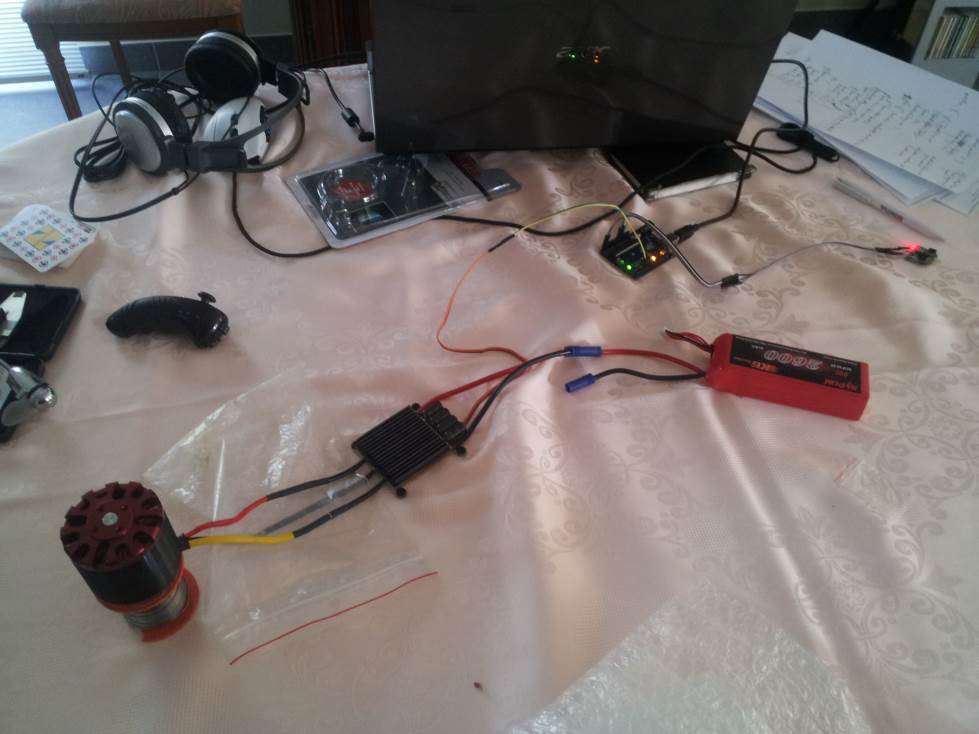
The code is very different from the Manta one. This code, according to me , works much more intuitively.
Download my code here. http://www.mediafire.com/download/lcao6c1wl0m94ux/2wayspeaker_Eboard_Arduino_Code.rar
Explanation of how my code works.
When the joystick is in neutral the engine is stopped.
Pushing the joystick forwards causes the board to accelerate. If you jerk it forward you accelerate faster than when you gradually push it forwards.
Releasing the joystick will slowly brake.
Holding Z will hold the speed.
Holding C will cause you to accelerate as fast as possible.
Pulling the joystick down stops the engine, this can be used as emergency brake.
[youtube]OHoos6uCq7U[/youtube]
Tranmission Design
For transmission design I used this blog https://howtomakeanelectricskateboard.wordpress.com/2013/05/09/calculating-speed/ and the official pulley manual from my manufacturer.
Belt length options can be found using http://www.bbman.com/catalog/belt-length-calculator.html
Make a spreadsheet of the formulas and cycle through pulley/belt combinations until you find one that matches your design specifications.
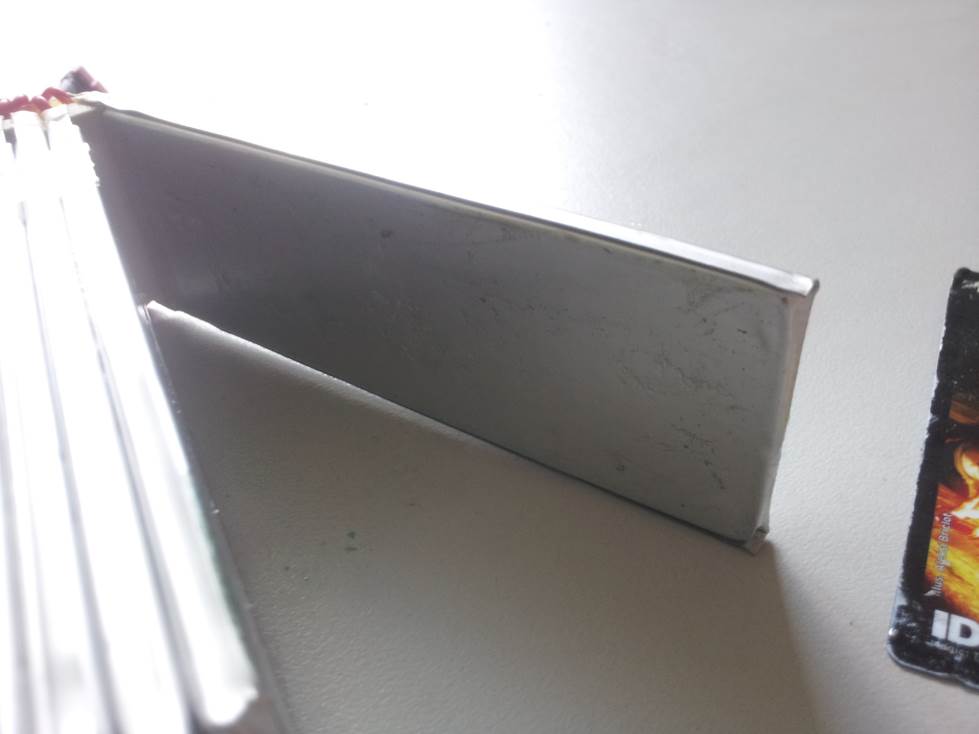
Ungluing the batteries
I want to turn my battery brick into a flat pack that will sit inside the skateboard.
To do this I need to dissassemble my batter packs into their individual cells.
 Lipo batteries are dangerous, they can be used for spot welding
Yadayadayada don't do this when you do not take precautions or are unsure about what you are doing.
Lipo batteries sit in an aluminium wrap. Do not break this wrap. Do not pull or scratch it. When the side of your battery looks not flat the battery is probably dead.
Ref to this video to show you what NOT to do -> https://www.youtube.com/watch?v=SVMuaDnsqiA
Do NOT do it like that.
Between the cells a layer of adhesive is placed. You need to dissolve this adhesive. You should be able to solve the adhesive in acetone or lighter fluid.
Do this in a well vented area. You should not dispose of acetone in the drain of the communal water system as it causes infertility to lifeforms.
Undo the shrinkwrap first.
Get your gear, use a smaller syringe, a card/something very thin you can use to hold a space between the cells while you inject acetone between the cells
When you feel that the solvent has been solved you should angle open the cells and clean the walls of both cells.
When the acetone evaporates the adhesive will work once again. Cleaned walls = No more adhesive.
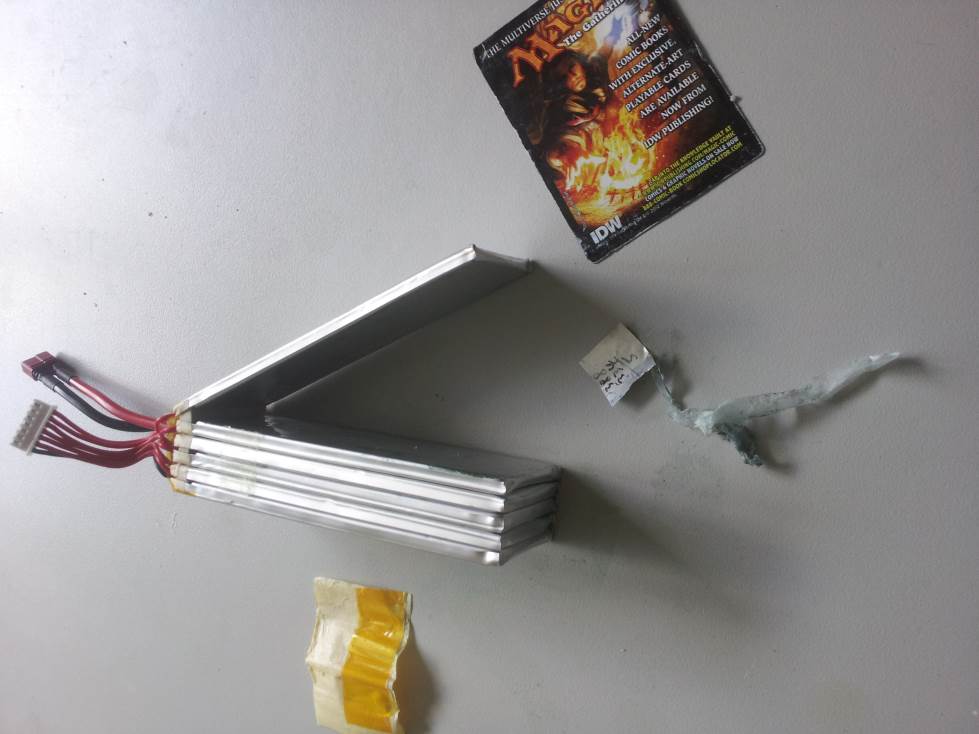
Now you can desolder the cells. I didn't do this yet as I don't have a board to fill the cells with atm.
More updates will be coming to this main post and subsequent posts in the next few days 8)
My build goal: A light short Eboard that's ideal for public transport, carrying and when the batteries die can double as a regular one.
My components and purchasing price.
- 1 X Logic 3 wireless nunchuck - €10,00
1 X Arduino Pro Mini Atmega 328P - €3,47
1 X USB to TLL - €1,90
1 X Black Mantis 120A boat esc - €45,01
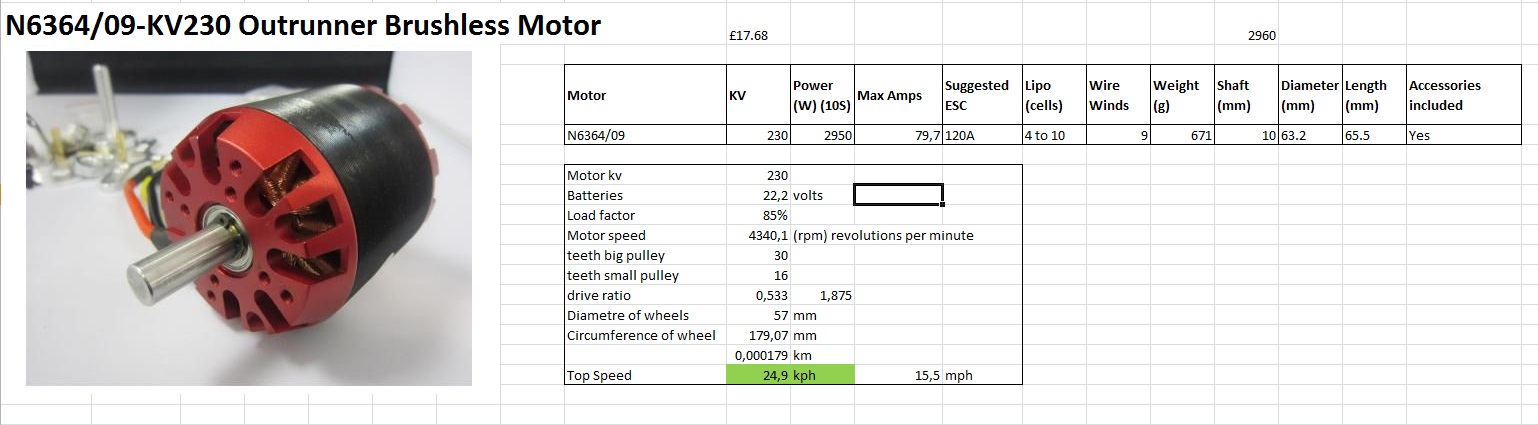
1 X N6364/09-KV230 outrunner - €24,87
1 X G.T.Power A6-10 200W balance Charger - €26,67
1 X Adjustable DC12A Step Down - €6,88
1 X ACER power jack - €1,52
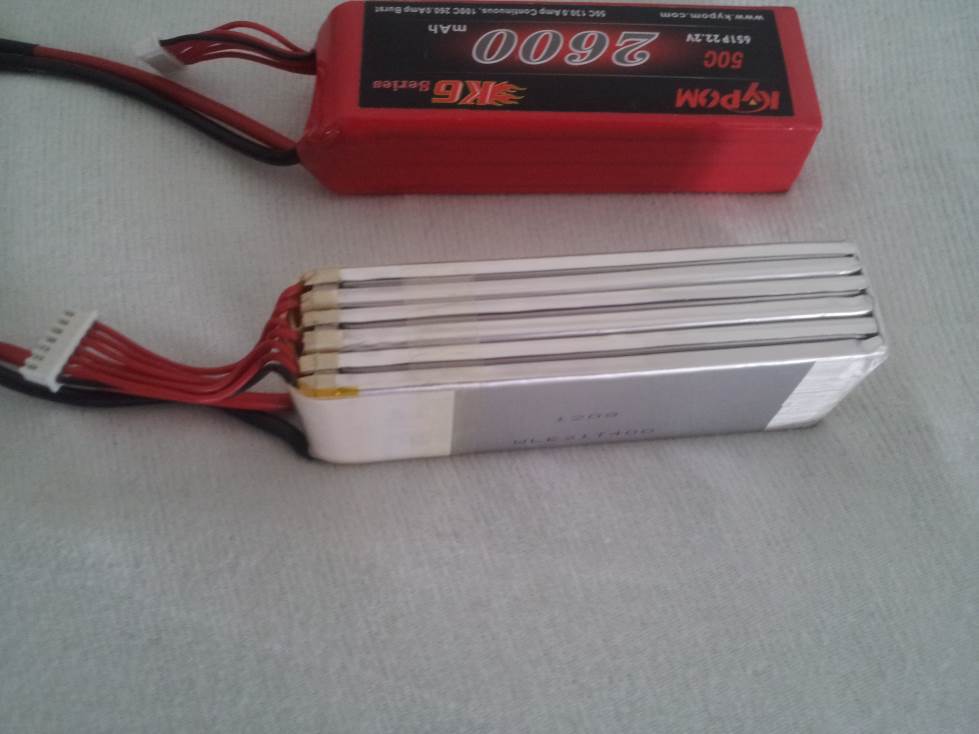
2 X Koyak 6S 2600mAh - €50,00
1 X 70mm 78A longboard wheels - €20,69
2 X 180mm Trucks - €22,41
8 X 8mm ABEC7 bearings - €5,40
1 X Set of plugs and connectors - €22,60
Various shipping total €33,61
To this costs for prototyping the board still have to be added.
Pictures of my components
CAD drawings of components
This was drawn in a combination of Siemens NX 9, Autodesk Inventor Pro 2013 and Keyshot 5
Arduino Code
The code is very different from the Manta one. This code, according to me
, works much more intuitively.Download my code here. http://www.mediafire.com/download/lcao6c1wl0m94ux/2wayspeaker_Eboard_Arduino_Code.rar
Code:
// Arduino Nunchuck Eboard drive code V0.01
// 2wayspeaker
// Open source, do as you wish for non-commercial use.

// Libraries: Unknown if I use all of them, but it doesn't hurt to just include them.
#include <Wire.h>
#include <WiiChuck.h> // Library for Wii Nunchuck
#include <Wii.h>
#include <ArduinoNunchuk.h>
#include <Servo.h> // Library for controlin Servo or ESC

//----------------Declaration of variables--------------------------
WiiChuck chuck = WiiChuck ();
Servo ESCblackmantis; // sets the name of your connected esc

// FILL THIS IN
int Range_Low = 700; //PWM for your neutral/low position. pulses/microsecond. low range for most ESC is 700.
int Range_High = 2000; //PWM signal bound to your max position. pulses/microsecond. low range for most ESC is 2000.
int Joystick_neutral = -4; //Set this to the readout of your joystick in neutral/low position
int Joystick_max = 123; //Set this to the readout of your joystick in max position
int DataPin = 3; //Set your PWM data output pin
int Increment = 10; //Set how much you add/subtract from your speed during each loop of the program.

// Don't touch from here
int Speed = Range_Low; //Speed is tha PWM written to the ESC. Setup sets your speed to 700 so the motor doesnt move.
int Speed_Wished = Range_Low;
int JoystickY = Joystick_neutral;
int AccelerationDelay = 200; //Delay of program loops in microseconds
int Gap = 0;
int Range_Gap = Range_High - Range_Low;

//----------Setup runs once every reset or when prompted--------------------
void setup () {
  Serial.begin(115200); //Sets serial monitor readout speed.
  //comment all SERIAL write outs once the program runs as wanted, this improves the performance of your arduino.
  chuck.begin();
  chuck.update();
  ESCblackmantis.attach(DataPin);
}

//---------------Loop runs continuously--------------
void loop(){
  delay(5);
  chuck.update();
  JoystickY = chuck.readJoyY();

  if (chuck.buttonZ) { //INPUT Z button overrides the main loop and holds the current speed, disregarding all other buttons
    Serial.print (" Z ");
    AccelerationDelay = 200; //Checks 5 times per second if the Z button has been released
  }
  else{
    if (JoystickY < Joystick_neutral) { //INPUT Down. Sets the engine speed to 0 immediatly. Hard brake.
     Speed = Range_Low;
     Speed_Wished = Range_Low;
     AccelerationDelay = 200;
    }
    else{
      Speed_Wished = map(JoystickY, Joystick_neutral, Joystick_max, Range_Low, Range_High);
      if (Speed_Wished > Speed) { //INPUT Up. You will accelerate.
        Speed = Speed + Increment;
        if (chuck.buttonC){ //INPUT C button causes the program to loop faster when accelerating. Boost.
           Serial.print (" C ");
           AccelerationDelay = 5;
        }
        else{
//INPUT Up. Intuitive acceleration.
//If there's a big difference between the current speed and the wanted speed, the program will loop faster and you will accelerate faster.
          Gap = Speed_Wished - Speed;
          AccelerationDelay = map(Gap, 0, Range_Gap, 200, 5); //maps delay according to gap
        }
      }
      if (Speed_Wished < Speed) {//INPUT Up. A lower position than your speed will cause you to slowly decelerate. Coast or brake.
       Speed = Speed - Increment;
       AccelerationDelay = 200; //Fixed deceleration delay to avoid surprises
      }
      else{
       AccelerationDelay = 200; //Coast
      }
    }
  }

  ESCblackmantis.writeMicroseconds(Speed); //Sends new PWM to ESC
  //-------PRINT------
  Serial.print ("Joy = ");
  Serial.print (JoystickY);
  Serial.print (" ");
  Serial.print ("Speed = ");
  Serial.print (Speed);
  Serial.println();

  //Loop time delay
  delay(AccelerationDelay);

}When the joystick is in neutral the engine is stopped.
Pushing the joystick forwards causes the board to accelerate. If you jerk it forward you accelerate faster than when you gradually push it forwards.
Releasing the joystick will slowly brake.
Holding Z will hold the speed.
Holding C will cause you to accelerate as fast as possible.
Pulling the joystick down stops the engine, this can be used as emergency brake.
[youtube]OHoos6uCq7U[/youtube]
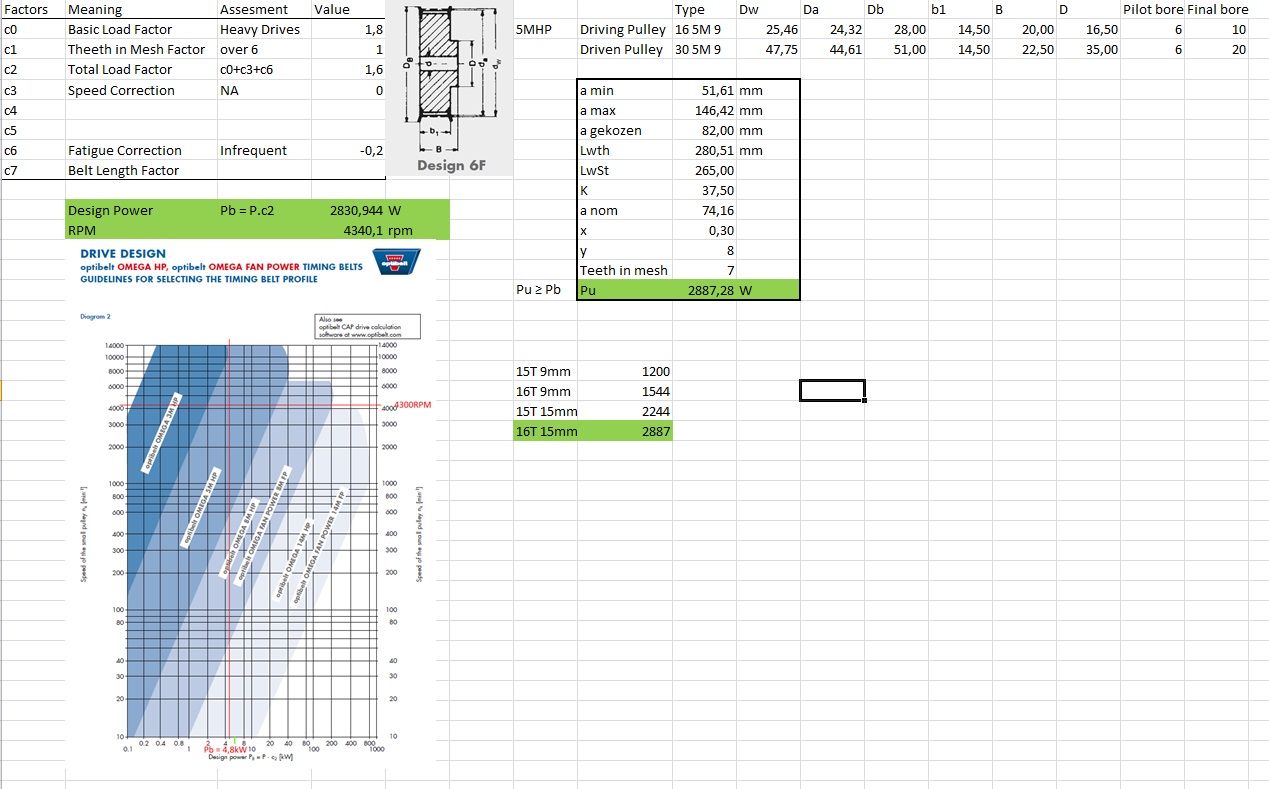
Tranmission Design
For transmission design I used this blog https://howtomakeanelectricskateboard.wordpress.com/2013/05/09/calculating-speed/ and the official pulley manual from my manufacturer.
Belt length options can be found using http://www.bbman.com/catalog/belt-length-calculator.html
Make a spreadsheet of the formulas and cycle through pulley/belt combinations until you find one that matches your design specifications.
Ungluing the batteries
I want to turn my battery brick into a flat pack that will sit inside the skateboard.
To do this I need to dissassemble my batter packs into their individual cells.
Yadayadayada don't do this when you do not take precautions or are unsure about what you are doing.
Lipo batteries sit in an aluminium wrap. Do not break this wrap. Do not pull or scratch it. When the side of your battery looks not flat the battery is probably dead.
Ref to this video to show you what NOT to do -> https://www.youtube.com/watch?v=SVMuaDnsqiA
Do NOT do it like that.
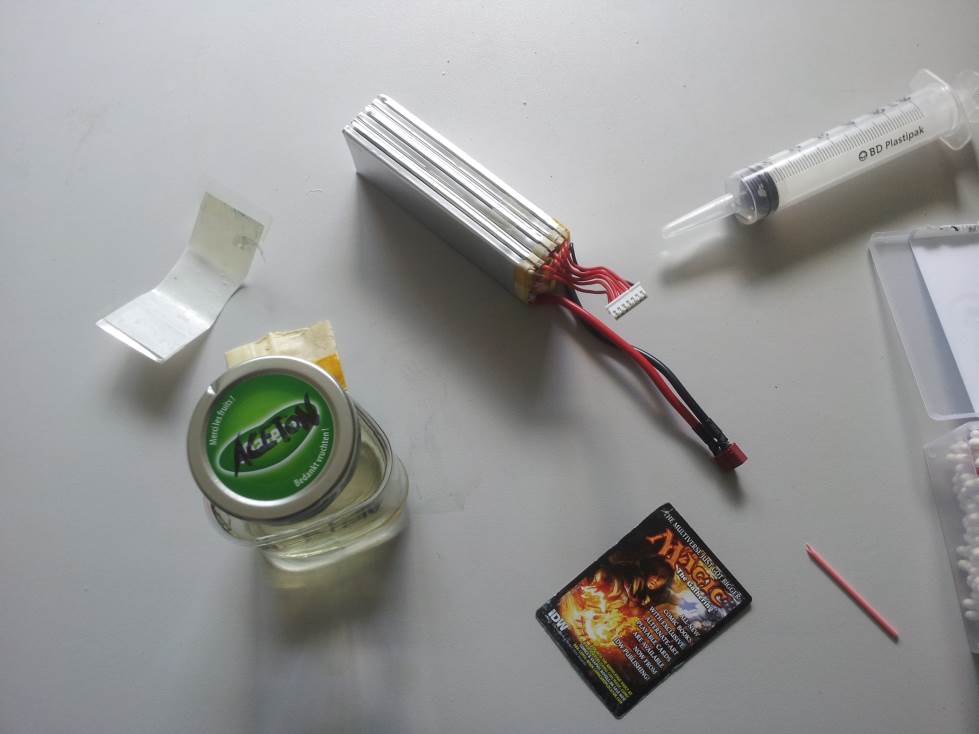
Between the cells a layer of adhesive is placed. You need to dissolve this adhesive. You should be able to solve the adhesive in acetone or lighter fluid.
Do this in a well vented area. You should not dispose of acetone in the drain of the communal water system as it causes infertility to lifeforms.
Undo the shrinkwrap first.
Get your gear, use a smaller syringe, a card/something very thin you can use to hold a space between the cells while you inject acetone between the cells
When you feel that the solvent has been solved you should angle open the cells and clean the walls of both cells.
When the acetone evaporates the adhesive will work once again. Cleaned walls = No more adhesive.
Now you can desolder the cells. I didn't do this yet as I don't have a board to fill the cells with atm.
More updates will be coming to this main post and subsequent posts in the next few days 8)
