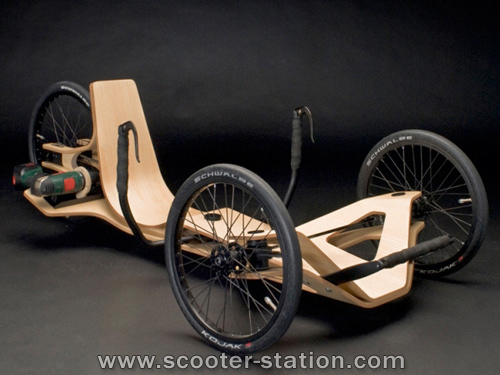
Project: Home made velomobile design with crank or mid motor

Thanks. It's fun to see it starting to take shape. I can probably finish the wood work and start sealing and painting it soon. :)

I changed my mind about the rear wheel fairing to make it easier to build. I'll cut and assemble those parts this week after I get a chance to buy a new sheet of plywood. It will simply be a trailing edge fairing that finishes in a narrow edge in the rear now.

I separated the door from the fuselage today. It went well. Everything still holds its shape. The opening is pretty big, and it's quite easy to enter and exit it.

I hope I can get hold of some 2mm plexiglass for the windows, or I'll have to use readily available 4mm which is around 4 kg heavier in total. I want dark tinted plexiglass for the roof and cargo hatch. I also have plans for a belt drive steering and belt drive between the crank and a intermediate shaft, which will save maybe 1 kg og chain weight.
 
Soon I can take it outside to sand and prime it.

I have produced a lot of parts today. The spike is the support for the fin behaind the rear wheel. The next step is to build the internal wheel bay which separates the dirty bits from the cargo area. After I add the details in the rear and install a roof I can build the aluminum frame and take it for a spin.
 

Attachments

  • Velo99.jpg
    Velo99.jpg
    82.4 KB · Views: 6,075
Its all nice and high tech but why have you done it with sharp, box like edges? Was there no simple way to make it rounded on the sides?
 
For simplicity. The corners will be rounded a little with a hand router after it's built.

I might make a smaller and more aero velo after this one.
 
agniusm said:
Its all nice and high tech but why have you done it with sharp, box like edges? Was there no simple way to make it rounded on the sides?

The kind of contour he'd really want, no, it's not simple. Wood can be warped, but getting it right is quite a job for someone experienced at it.

Foam and fiberglas can actually be much easier.
 
Update. The cabin assembly is almost finished.

Inside the rear.


The rear wheel trailing edge fairing is being glued in place.


The full picture.


I made a new seat as well. 1100 g.
 
I'm liking this build a lot, I've been considering doing a wooden-fairing recumbent trike out of sheet goods since I'm just getting into wood working... I'd likely do my cutouts by hand, but your CNC stuff is turning out remarkably well. Nice job so far!
 
IMHO,
Best build since the days of aussiejesters's projects. I am loving the design & exicution of this project.
Please keep us up to date.
 
Beautiful :D
 
r3volved said:
This is so neat dude!
Are you keeping it wood? Or using the wood frame as a mold for composite material?


I'm going to use the wooden structure. I think mold making is too much work for one off projects. I like working with wood, but should have lightened it more. I will probably make another smaller and faster one later with compound curves.
 
Your work is awesome!

Please keep the wood and paint it with clear paint. I like the natural athmosphere of the wood :)

I was thinking of buying a wood cnc-Maschine like this:
http://www.cnc-holzfraese.de/

It is very big and you could use it for Wood and Aluminium Parts.
 
--freeride-- said:
Please keep the wood and paint it with clear paint. I like the natural athmosphere of the wood :)

^^^^^THIS^^^^^

Stain and lacquer it. :) Different colors of stain for details, borders, even pinstripes or whatever, would really make that look good!
 
while looking at some ideas for a children go kart, I came along this thing and though about yours :
arton211.jpg


congrats for your work, it's awesome
 
Thanks. :)


This one is beautiful in natural wood finish: http://wimschermer.blogspot.de/2014/05/houten-vierwielige-tweezits-velomobiel.html?m=1

I don't think mine will be very nice with the wood visible. The plywood is BB quality on the outside, and I needed filler in some areas around the joints and blemishes. I'll think about incorporating the wood finish somehow.
 
I picked up the motor for the velo today. It's a custom BBS02 adapted to norwegian conditions and rated at 250 W nominal, and way more peak (like Bosch and the others). ;) It's only sold by ebikekit.no

I wnt for Bafang because it's super easy to integrate both in the crank or as a intermediate mid motor under the seat, depending on what I want to try.

 
Wow you do works of art! That seat is amazing. I'm a big guy and the original fiberglas seat that came was my trike was too small. I went with mesh seat and have no regrets. Mush more comfortable than glas fiber.
otherDoc
 
Any plans to use Fiberglass on the outside for strength?
otherDoc
 
Really nice work! Very retro. Reminds me of Bombardier's 1950 snow vehicles. Were there similar vehicles in Norway? Do you plan on having skiis as an option?
I remember in Northern Ontario the rubber on my bike tires would get hard below -20C, so the big floaty low pressure tire idea didn't work. Maybe there's better rubber.


How much does the body weigh so far? You spoke of an "aluminum frame" - The body looks strong enough to not require anything more than local strengthening at the suspension points.
 
The structure is strong enough without fiberglass. It's too strong actually so I should have removed more material during milling.

No plans for skis. I'll probably use studded tires.
 
I molded a set of carbon wheel dishes yesterday, and just removed them from the mould. They turned out pretty good. Smooth, but slightly wavy due to the plywood layering being very difficult to sand out. I just have to make two more sets. I make one that's 25 mm deep and on 10 mm deep. That fits both front and rear wheels. EDIT: I think I will do a little more finishing on the mould before I make more.

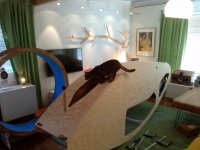
In the background you see the door with the carbon fiber hinge beam and a large mouse-like cat toy.

 
Wow!!! Awesome looking wheels... Im really loving this project sir...keep up the good work...
btw can some one guide me to a tutorial on how to make carbon fiber wheel dishes like these?! :D
 
In this case I made a female mould directly from wood and sanded, painted and polished it until it was smooth. It's easy pretty because the dishes are pretty flat. To mold the dishes I apply PVA release agent and just lay down the darbon fiber and epoxy. Two carbon layers make for stiff dishes. One layer makes floppy dishes. :)

Here's a video from someone who actually knows what he's doing. https://www.youtube.com/watch?v=keBwRhkfuOQ
 
Back
Top