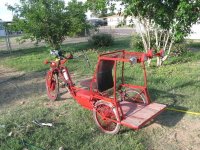
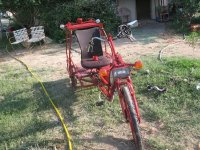
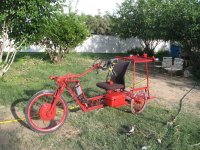
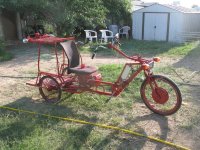
The SB Cruiser : Amberwolf's 2WD Heavy Cargo Trike & Dog Carrier

"really good" also means "out of our price range" especially for multiples. :lol:

I'd've stuck the 40A Grin 12FET (that I actually bought new after the fire) on there if it weren't for the super-annoying surge/rollback throttle issue (thread under that title somewhere about it) that I've never resolved. It's still basically the backup controller/front motor on CB2 for that reason.

I'm hoping ot have some time tomorrow or Monday to fix one of the 18FETs.

Or to at least play with this one some more and figure it out. I've been reading thru that thread about it and there is info, just have to dig it out of all the side discussion....

I played with it a little more today. Nothing engages a regen mode in the wires that are already out there.

First was with an actual 3-speed on-off-on switch hooked to the red 3pin connector, center wire common, and it does indeed do something on one setting--shorting (yellow) to ground forces it into a low-speed/power mode. Haven't tested it on-road yet to see what the max it does would be on that mode. The center-off mode is same as no switch. 3rd position shows no apparent change off-ground, will have to see if it makes a difference on-road.

That green-plug/brown wire turns out to be an analog-output voltage for "speed". Ranging from 0v to about 28V, I think it is coming off a phase; I didn't scope it but the DMM picks up a frequency at less than full throttle of a little more than a dozen khz or more (pwm of the motor), and once ft is reached it changes to about 300-330hz (flickers) which sounds right for the rpm of the wheel (or block commutation?). I'm not sure what possible use this would have to be pinned out to the outside world, unless there are analog speedos that are powered by this sort of thing on Chinese scooters. I have an old boat speedo that's electrically powered, so maybe if I can find that I can test the theory if it's the right voltage range.


The white single wire doesn't seem to do anything. It's 0V by itself, and either groudning or 5V to it doesn't make any apparent change to the behavior.

The yellow single wire has gone missing? I have no idea what could have happened to it but it isn't in the bundles anymore. :? I looked around the areas of the house where I worked on the trike and/or the controller before putting it on there, and didn't find it, nor sticking out of Yogi's poop in the yard. I can't imagine it would have fallen off while riding; I'd fixed the diode solder joint to the PCB, so unless the wire itself wasnt' soldered to the diode inside it's heatshrink, and vibration let it finally work out of hte silicone gasket/holes in teh controller end (whcih sticks up, not down), it ougth to still be there. So to see what that is I'll have to open up the controller again. :(


And that's the total of all the wires already on it. Have to open it to check anything else's functions, adding more jumpers or wires to the outside.
 
I got the rack bolted down isntead of just push-pin-release held-on. Much less rattliness. :)

Moved the mirror out and down a little bit to help clear that turn signal out of the view. Will need to adjust once on the road, in about an hour when I leave for work.
 
Mirror moved helped a lot, but it's pretty low an dI have to look way down out of normal FOV to see it--it was already lower than I like. Gonna haveta work on the extension for the mirror's tube mount.

Also, unlike CB2's handlebars, which don't move around much while riding, and thus give me a great clear view of the mirrors without lots of vibration/shaking of image, the tiller on this thing bounces around quite a bit (at least, as far as using he mirror goes), enough to actually bring a car that's "thumb sized" in the reflection totally in and out of view from the center of the mirror to off the edge, on even the "smooth" roads. Mirror is pretty much unusable on bumpy roads.

Gonna have to either rethink the tiller steering (which I have several times already just cuz I prefer teh other kind) or move th emirror mounts to something else, like a bar extending from behind the seat, or under it.

Potentially I could do ti from a "roof" mount, as I am considering adding a partial top as sunshade. (am waiting first for our windy days coming up soon so I can see what it rides like *without* a giant parachute on top).

Most likley any roof I do would just be a pair of flexible tent poles running from a mount on either side of the headtube up and over the bars and my head to a pair of mounts on the front of the fenders (or the rear corners of the bed, if I wanted to shade the dog kennel / cargo area too). Between them would be some cloth, netting, or other flexible material that snaps over them, or slides onto them, with "stiffener" poles sewn into it "between" the front-to-rear poles. Thus I could take it off if needed or desired, collapse the poles, and stuff it in the cargo area.

But doing it that way means the mirrors definitely couldn't go on it, as they'd shake around much worse than where they are now.


Teh bolted-on rack (vs snaps) works much better, no rattling at all from it. (some rattles inside some tubes I think from welding spatter or whatever, though).


Controller still just does 33A or so peak. No replication of the 40A I got before, or the slightly stronger pull.
 
I definitely agree that eventually the tiller has to go. But it's a great temporary solution. Meanwhile, could mirrors be mounted to the frame? They would stick out a mile, but just a thought.
 
That's teh basic idea behind mounting them from behind or under the seat. I know I could also do it from the frame in front, but they'd be in the way of the tiller if I do them high enough and far enough back to use them. (have to be close or I can't focus on them well enough and/or the reflection isn't big enough).
 
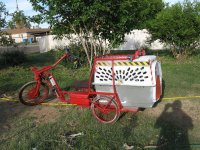
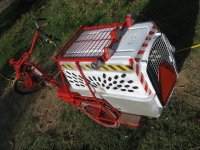
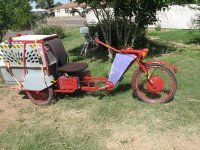
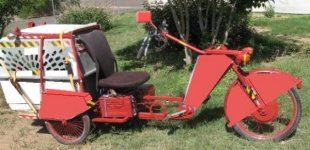
So...there was some noname $1.67 "fire red" red paint and gray primer (wanted white, but at that price vs $5/can for white...) at one of the stores Bill and I stopped at today, so I used that plus the leftover Rustoleum "safety red" that Bill didnt' want (rest of it used on his rack) to go ahead with the red-wagon paintscheme (like CB2 has).
IMG_1578.jpg
IMG_1580.jpg

The "safety red" is much brighter than the more-blood-than-fire "fire red", whcih even over white primer isnt' very bright, and over gray primer is really dark. But at least it's all one color, and it's definitely more visible in red than in white/gray/purple primer.
IMG_1579.jpg
IMG_1581.jpg

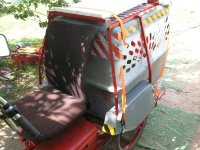
I didn't have enough to do the kennel too, so I decided that I will just do that in white, which will be a little cooler for the dogs, and just as visible in contrast with the red trike.
IMG_1582.jpg
IMG_1585.jpg


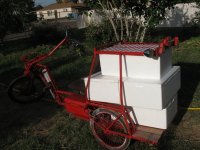
While I had the kennle off I also test fitted coolers in various configurations, and found that I can easily fit four under the rack on the bed, and could also fit more on top (one will fit snugly lengthwise on the rack, and others could stack on that if necessary). Is also possible to stack more on the back edge of the bed and strap across them to the rack. It's unlikley that for normal grocery runs I would need more than two, sometimes three, though.
IMG_1590.jpg


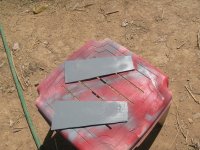
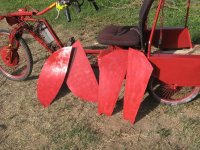
I also didnt' have enough to do the panels and rear fenders, so those will get cut out and primered (cuz I should have enough primer, just not enough red...I would have had enough if I'd thought about it and cut them out first and put them behind frame pieces and spokes while pianting those to get hte overspray, but I forgot about them till too late).
IMG_1608.jpg

I didn't get to any of the handlebar controls and such, as those are not really final anyway, and I dind't wanna undo things to take them off and paint them, or try to figure out how to mask around them to get just the bits i wanted.

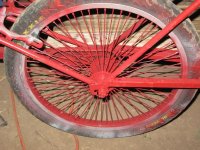
It is a sucky paint job (was too lazy to take tires off so they've all got a lot of overspray on them...maybe I'll mask the rims and paint the tires black :lol:), and the trike still has a number of welds that should get ground down first, but I may never do that anyway.

I do still need to add the gussets/etc on the rear rack supports, but havnet' yet decided exactly what I'll be doing. Once I do Ill have to repaint the weld areas.


I went ahead and removed the black 25A controller, and mvoed the silver 33A controller to it's spot in the frame. I'ts much neater that way (for values of neat).

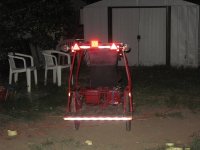
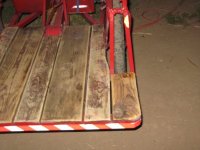
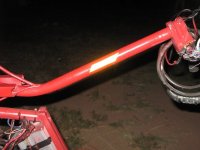
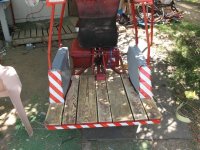
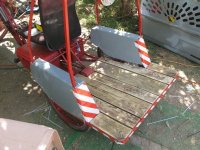
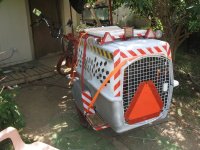
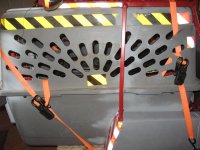
I also put some reflective sticker tape on various frame parts, a little like on CB2 but not nearly as much of it (as there is not as much rear-facing surface to stick it on for the trike frame itself). I'll probably put more of the red/white stuff on more of the rear-facing frame parts, but for the moment, it's just what you see in the pics.
View attachment 12
IMG_1601.jpg
IMG_1609.jpg

There is more (and will be more yet) on the kennel itself for when it is on the trike (probably most of the time).


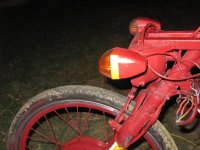
I also added a few little bits along the top of the rack, and as "markers" on the turn signals--red strips on the rear, amber on the front. A pair of white to either side of the headlight. I left the stuff already on the fork, painting around it.
View attachment 10
IMG_1604.jpg
IMG_1605.jpg
IMG_1619.jpg


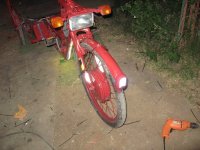
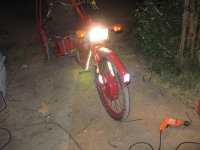
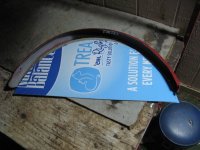
I unmangled an old rear fender, which is missing all it's support struts, and turned it into the front fender, including an LED "headlight" from one of those freebie blue "hanging/magnetic" lights from harborfreight, bolted to a bracket that is then bolted to the front of the fender frame, which is bent inward and down to make it point the right way.
View attachment 5

Until I can find the bits I have to make new struts from, which are somewhere around here, I used some zipties to make tensioners that hold it mostly in place. They are held to the fender with some bits of punched-hole-strip which are held to the fender with some wingnuts/bolts.

The LED light is really only a backup in case of main lighting failure, kinda like those triangle lights on the back of the rack. But it'll also get the aux power I'll wire up for those, once I get around to that. Till then it runs on 3AAA batteries just like they do, and are used for additional lighting at night (just to have more lights).
IMG_1610.jpg
IMG_1613.jpg

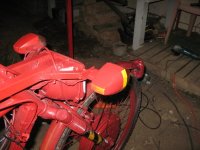
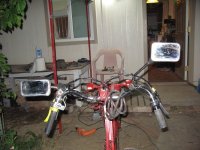
I also ran across another mirror I'd picked up at Goodwill for a couple bucks a while back, but it's a rightside mirror and isn't really adaptable for the left...so I mounted it (using my usual modified seatpost clamp on the bars) on the right, and this shows the approximate position I'd rather have both mirrors in. (vs the really low left side that I don't like).
IMG_1614.jpg


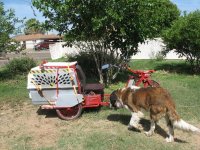
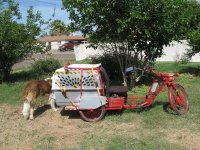
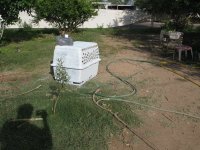
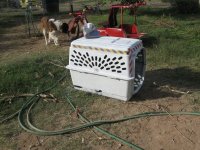
Couple pics of the Tiny and Yogi each trying out the kennel while on the trike. No ride yet, was too hot for them. Considering one tomorrow morning as a test.
IMG_1588.jpg
View attachment 14


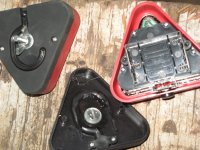
Oh, and I forgot to get a pic before, so here's the install of the bolt inside the lights, using epoxy to secure it in place of the magnet it used to have.
IMG_1620.jpg
 
Wow I am really impressed with that bike. From scraps to that, and I think it looks great in Red and the trailer adds nice contrast. Hope you have a good lock for that rig.
 
Guessing you mean "kennel" rather than "trailer", as I don't yet have the trailer hitch installed on it. ;)

As for locks, nothing fancy, cuz nothing will stop someone that actually wants to steal something. I'd guess it's more likely that it's size and highly custom nature would be a better deterrent than any lock I can put on it.

I have considered several lock options, though, including a few rather unconventional ones (that I may not post here, just because it is possible (unlikely) local thieves could browse forums like this looking for good targets.). But you can PM me and I could talk about it with you, Bikefanatic (and there are some others I'd be willing to discuss it with, as long as the ideas don't get re-posted, to minimize the chances thieves would discover the methods easily that way and defeat them quicker).


One I considered and discarded was to keep certain easy-to-remove/install pieces with me that if not installed would allow rapid self-disassembly if someone tried to ride away with it. :lol: But this could be considered booby-trapping, which AFAICR is illegal here, and could result in serious problems for *me* should the thief be hurt or killed. (which is stupid, but that's how the world works).


I've also considered some "standard" options, like a steering lock, super-loud alarm, etc.


Oh, I meant ot mention before that I've been looking around at my tires/etc to see what I have that would fit inside each other fairly snugly, and give me about the same flat protection and road grip as the maxxis hookworm I've got on the right side, cuz the sidewalls on that that were failing when I took it off CB2 are getting worse, and the tire wobbles and thumps during any ride, and I'm afraid of it herniating the tube out the sidewall if a rupture occurs.

I think I have a couple that will fit one inside the other and still go on the rim easy enough, and fit the tube in there easy. Both are older, and worn, but not damaged like this one is.


I've also dug out the Sachs 3speed hub (with coaster brake built in) and am looking thru my spokes and 20" hubs to see what I could lace it into that would be strong enough for the loads it will see. This would give me 3 pedal speeds, which while unnecessary at present, would help a lot with any emergency situation that requires me to pedal home.

Am alos looking at spokes that would let me lace the Fusin 1000W geared motor inot a 20" rim, but it's more likley that I would get one of teh 9C-clone / actual hubmotors into such a wheel, so I could use a front motor on the right rear, instead of having to modify the dropouts to stick a rear in there (which forces the widening of the rightside fenders, dropouts, etc., and precludes bringing the trike into the house). grnnnnnnnnnnnnnnnnnnnnnnnnnnnnnnnnnnnnnnnnnnnnnnnnnnnnnnnnnnnnnnnnnnnn
 
Looks really nice in red!
 
1.jpgv brake adaptor.jpg
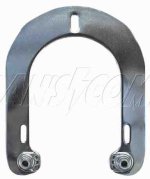
Looking good AW. I wonder if you could scare up some v brake adaptors to fit the tubing on your bike to let you run v brakes on the back wheels. Something like the ones in the photo here may work.
 
waynebergman said:
View attachment 1
Looking good AW. I wonder if you could scare up some v brake adaptors to fit the tubing on your bike to let you run v brakes on the back wheels. Something like the ones in the photo here may work.
That is the plan. I have a couple junk frames to take them from, and at least a couple laying around loose already taken off frames. I found two loose yesterday (from different frames, matching mate not with them for wahtever reason).

The easy way would be to take the U+bosses off of forks, but I am not sure I have any left with them on there except the one off DT's 20" fork. Am leaving it alone presently because I may use that fork on another experiment that's sort of cooking in my head...I don't even know what it is yet but my brain will tell me eventually. :)


Then I just have to scare up all the rest of the vbrake parts. I should have at least two pair around here amongst all teh stuff. Hopefully my cable-splitter thingy will work with the vbrakes better than it did with teh BMX brakes, and then I can just use them as-is. Otherwise I'll wind up most likley having to find a pair of tandem-length cables somewhere, and use that dual-cable handle from AussieJester depending on what problems arise.


dogman dan said:
Looks really nice in red!

Seems that red is a good default color. :)

Might needs some trim color (black probably) here and there. We'll see once I get the panels on there to cover cotnroller/wiring hairball and the rear fenders put on the fender frames. (whcih I guess I didn't really need to paint, and could've saved that red for the fenders themselves. :roll:)

Also thinking that instead of making wire-type fender supports in front, I could make "solid" fender sides out of coroplast, riveted to the aluminum fender itself. Cut them straight from one end of the fender to the other in a chord across the "circle".
 
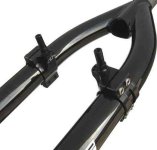
I have an old u brake style of fork stiffener for v brakes that may be able to be converted for a v brake adaptor that you can hang from your side pull brake mounting fastener that I will send you along with the brake levers. I will mail shortly......wayne
 
I appreciate that--it should help. :)

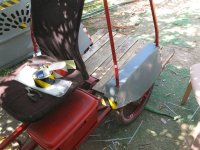
I got the first iteration of rear fenders cut and primered, then ziptie-installed. I don't have the red paint to cover them so they'll have to do as gray for now.
View attachment 10
IMG_1623.jpg

Added the reflective sticker tape to the back of the fenders, and a strip along the front bottom edge.
IMG_1625.jpg
IMG_1626.jpg
IMG_1627.jpg


I also got a version of the front controller/hairball covers cut and started to primer, but then ran out of gray primer. Ended up using the rest of the purple paint (after a decade or two of having it around? :lol:) but didn't get them actually installed yet. Need to do some rewiring first, to fix up the quick-patch splicing job I did "installing" the silver 33A controller.
IMG_1636.jpg


Yogi isnt' camera-shy...but it is sometimes hard to get a clear pic of stuff. :)
IMG_1632.jpg

IMG_1633.jpg


Some more pics with the kennel in place
IMG_1629.jpg
IMG_1630.jpg


I also found the 3-phase 25A switch/breaker I planned to use as the main disconnect on this. AFAICR it's 25A *per breaker* and it has 3 paralleled units in it, with a single rotary (90degree) switch for all of them at once. So I was thinking of using two of them paralleed for the main traction power, then the other one for the lighting power. Cna't install it yet cuz I have to weld on brackets to bolt it to, then gotta wire it in. Not sure where exactly it'll go yet.

It's been really windy today, which TIny doesn't like cuz she is afraid of the moving trees and stuff, so she mostly stayed inside, occasionally coming out to check on me and see if I blew away or not. Usually she had just woke up and came out all sleepy-eyed....
View attachment 2
View attachment 1
and then she would start munching the fallen mulberries around the trees for a while, until the wind got gusty again and then she'd run inside to hide.
Yogi doesn't like the wind either but he wants to hang out with me more than he wants to hide, at least until something bangs ro makes some other loud percussive noise--then he's off to hide with Tiny (who now likes teh bathtub for that if I'm not home or not in the bedroom).
 
This bike is starting to look too good AW, meaning some one may actually want to steal it! This bike would be a real hit at the Burning Man festival if you had some fat tires to get around in the sand.
 
That's always the problem with nice things...someone else always wants it too much. :(

I took Yogi up to work for a walk around the store to meet people and other dogs; he was so excited by all the smells that he really didnt' pay attention to anything for more than a few seconds at best. But he sure enjoyed being there. Was going to take Tiny first but she was stressed out from the windy day and I don't think she'd've liked it much. So next time it'll be her turn--she was sad taht she couldn't go with Yogi; and I still wanna eventually be able to take both at once in teh same vehicle (wihtout a trailer).


The fender was a problem; within half a mile the zipties had snapped in two places, and I'd had to stop to replace them. Then it was ok for the rest of th trip there. On the way home, though, the bolt/nut hooldin the front of the fender to the zipties came off, and the front of the fender with the light on it flopped aorund a lot...but nothing else happened all the way home, so I didn't fix it.

When I got home, and Tiny and Yogi finished chasing each other around the yard and romping in reunion, and I got them dinner, I took the fender off and used it as a template to cut out some 1/16" thick styrene sheet (taht used to be discarded retail signage), since none of the coroplast is large enough to make this. I havent' yet got it mounted to the fender, cuz I havent decided exactly how I'll do that. Most likley I'll drill little holes along edge of fender and side plastic, and to test the idea I'll zip tie them together, and if it works out I'll make some little metal tabs to rivet each part to.
 
HI AMBER, That trike is getting pretty fancy you need to be careful with making it too nice,you know you have your image to keep up with. :lol: :lol: :) :) :wink:
 
Yeah, I know. :p

Don't worry, it'll get hacked up and uglified as I "fix" things and modify it, I'm sure. :) I had something like 6 years or more to get CrazyBike2 to the point it's at...this thing aint' even existed for 6 *weeks* yet, so just give it a little time. :lol:


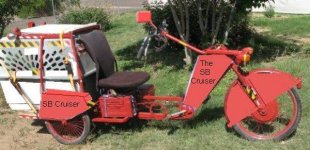
THis is a bad MSPaint hack of the pic to show about what it will look like when the kennel si white, and the front fender with sides and the controller/hairball covers are installed and piante dred, and when the rear fender covers are red.
Copy of IMG_1636.jpg


I'd like to add "The SB Cruiser" somewhere, but not sure where yet, or what style of writing. Don't much like either of these two. Maybe something cursive-ish. And a little silhouette of a St Bernard under the words.
View attachment 4


OH, and I'll have to fit a link to the forum on there someplace, though I don't have any more of those bumper stickers so it'll just be painted on (or written with a marker).


This is the stuff the front fender sides will be made with:
IMG_1637.jpg
View attachment 2


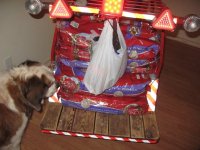
We have some of the spring dogfood reset clearance cheap now, so I bought about 160lbs of it and took it home in the kennel. It was a lot easier than doing the same on CB2, because on CB2 it would've had to be higher up on the back over the pods, mostly, (a couple might've fit in the pods, but most of it would've had to ride on top of them), and that makes balancing it a lot harder, more wiggly, etc. Plus it's a lot harder on a single rear wheel....
View attachment 1
IMG_1641.jpg

On SBC, it was really easy--same as hauling Yogi except the dogfood doesn't move around looking at everything :lol:, except for not having enough power to get started without doing a little pedalling, and taking quite a long ways to get up to speed. Feels like it takes 1/4 mile to get there, though I'm sure it's not even half of that. ;)

And...I've definitely gotta get the brakes installed in back, cuz with a dog or cargo in there, the single front brake is simply not enough. I've found one complete pair of already-detached brake bosses, arms, and pads, and at least 3 pair of bosses on frames/frame parts I can cut up, and several of one side of the arms, and a few worn pads (and old hard ones).

Wayne is kindly sending me some levers and bosses on a U, which will both help.


Also gotta figure out a way to get regen braking, cuz that would help a lot too.
 

Attachments

  • sbcruiser  IMG_1636.JPG
    sbcruiser IMG_1636.JPG
    46.9 KB · Views: 5,578
Yep you gotta be careful with locks 'cause it is starting to look like a professional dog carrier. Nice work!
otherDoc
 
Thanks!

As for locks, the only one I make sure of is a padlock on the kennel door while I'm riding with a dog in there, so that morons walking thru the stopped traffic at a light don't open it (I've had people try in the past, when carrying Hachi or Nana in the old trailers).


No production, though. There will probably be a second version of it someday, with the double wide backend, so I can carry two at once.

Might modify this one instead, but more likley build a second one with what I learn from this one. Then I'll still have one I can take inside a doorway (cuz the other one sure won't fit :lol:)
 
Been riding this for 10 days now. Nothing's actually broken yet. :)

Buuuut: It's developed a "sound" from teh front end, most likley in the wheel but it only happens when I'm side-loading it (like riding on the edge of the crowned roads, or making a hard turn), once-per-revolution. Haven't been able to locate the source, as it doesn't happen off-ground. If it survives tomorrow's commute, I'll probably start taking things apart on Sunday to see if I can find the source that way.

At first I thought it was a broken spoke and the rim being bent outward a little making brake pads/arms move, but I can watch it at night with the headlight glow right there, and it's not moving the arms, and I found no spoke issues.

I considered a magnet loose, but there's no extra drag, and it doesn't matter if i'ts under power or not, etc. And it only happens under a side-load....

Maybe a bearing?


I've been riding without the kennel on there, in "flatbed truck" mode, for the last couple days. The one noticeable difference is it's tippier than with the kennel.

It also feels like it's less stiff, like the backend flexes more both fore/aft and sideways twisting, but I'm not sure if that's much different really.

Without the kennel behind the seat, I *can* say that going over speedbumps and driveway entrances means it's a really good idea to lean forward a little, or else get rammed in teh shoulders with the front edge of the rack as the back wheels force the rear end upward as it goes over the bump, vs the front end.

The reason it doesnt' happen wth the kennel on there is the kennel pushes the seatback forward, so all of me gets a relatively gentle push forward, instead.
Tells me for sure that the frame is flexing a fair bit, but it also means it's absorbing a lot of bumps I hadn't expected it to be able to, as far as the seated rider is concerned. Cargo still gets hit with everything, so adding a rear suspension would be really nice for the dogs.


I meant to test the truck mode with stacked dogfood bags but I was so tired when I got off work a couple hours ago that I went right home without buying the clearance stuff I'd meant to. :/ Hopefuly it's still there tomorrow when I go in (cuz work is closed now, and I didn't remember until I was typing the above).


I also still don't know how fast I'm going; I know I'm going slower than on CB2 (cuz since I don't know the speed I don't wanna get in trouble for exceeding the 20MPH limit on bicycles) but dunno how fast it actually is. I suspect it's 15-18MPH, though it *could* go faster it takes a while to get there.

Gotta get a connector for the CA made so I can swap it between bikes easy, and put it rigth at the base of the CA mounting point on it's back.

However fast it is, I am still having cars roar around me, cutting it really close to my left side, rather than the way they treat me on CB2, where they just take the other lane to go around. Which is strange, cuz on CB2 I'm usually a lot farther to the right, and on this thing I can't ride near the right cuz of holes and stuff I can't quite track where they'd be in relation to the right rear wheel, and I can't risk breaking something in an unrideable way on the work commutes.

With a single-track like CB2, I can easily (usually) avoid the worst spots just by twitching the steering a little to get the rear around it, and let the front take it if I know it can, or twitch both around it if necessary.

With a triple-track like SBC, I can only tell where teh front wheel is, and the rear I am still learning. Sometimes I don't give enough clearance, and I catch the edge of a hole. Some places there IS no clear path for all wheels at the same time, cuz there's holes and wide cracks in such spacing that at least one, often two, of the wheels will hit something and it's a pretty bad WHAM. Just before I get to work there's a spot I have to take the left half of the lane cuz tehre's just no way to get thru the right half or center without hitting at least one such spot (and these are holes 2+ inches deep, with large chunks of pavement just plain missing with "sharp" edges, not gradient-potholes or dips. And the cracks are wider than my 2+ inch tires).


So anyway, it means that with CB2 over in the right edge of a lane, people pass me by clearing that entire lane. But with SBC, taking the middle of a lane, people pass me only just barely with most of their car between lanes and in the left half of my lane. It just doesn't make sense to me.


It does make some sense taht they pass me closer when I don't ahve the kennel on the back of SBC, as it looks smaller, more bicycle-like (which means it triggers their aggressiveness towards "things that don't belong on the road". :roll:


OTOH, I get a lot of "siiiiick bike dude!" and "wow what the heck is that!?" and stuff, moreso than on CB2. :lol: And no one has yelled at me out their car window yet, except for "compliments" like those--no cussing me out for being on a road that they also happen to be on (even when I am not in their lane), which is something that happens every so often even with CB2.
 
Maybe out a sign on it and call it"A&W Canine Transport. Put a fuzzy stuffed dog in the carrier when you don't have one of the real dogs with you. Perhaps that will help the close cutters. Most people like dogs and don't want to hurt them even if these same folks hate people..
otherDoc
 
It's a good thought, but the sun is so bright in daytime that you really can't see well into the kennel unless you are staring into it and are pretty close.

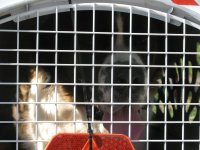
Take a look at the pics of Tiny and Yogi I took thru the kennel door in a prvious post. I'm really close to the kennel to help remove the kennel from the camera's brightness measurements, just so the camera would even pickup the dogs, but even with that it's not a good shot. Eyes can see stuff better than cameras, usually, for light ranges like this, but at a distance, approaching at 10-25MPH, not even really looking at it, it'd be a lot harder to see, if even possible.


Now, at night, with the lighting inside the kennel, it'd be easier, if the lighting were brighter/whiter, but with their headlights shining on the back with the reflective tape and stuff, even without the SMV sign in the way, it'd be almost as hard as in daylight.


If I had the kennel door painted black and the inside of the kennel painted white, it'd make some difference, not sure how much.


Another thing I've considered is building a different style of kennel that is more cage-like, but as it would be of steel it'd be a LOT heavier even if it was a wire-cage type (I have one big enough for either dog, both at once if they stand or lay side by side right up against each other, but it won't fit on here, and it weighs at least twice as much as the plastic kennel, maybe 3x). And it would need an insulated "roof" to help keep the sun off of them, and would need "eaves" or sides that I can fold or roll down on whichever side the sun is on to shade them when not riding at midday. (normally I would not be riding with them at midday, but in morning or evening when it is much cooler, so....).


This style of kennel could be left without the shades for the fake dog and it would be a lot more visible than in the plastic kennel.


However, it'd also be less useful for transporting other things inside of, without carrying individual other containers inside it.


Regarding the issues about the noise, I poked around some today and found nothing; I can't duplicate the noise unless I'm on it and riding. :/

I think I will have to disassemble the motor case to see inside and find if there is a problem in there. At the least, take the wheel off and poke around it without the tire on there, see if I can find a rim or nipple problem.
 
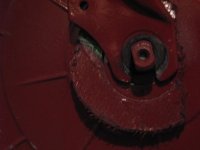
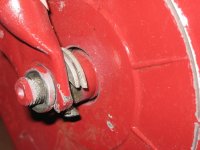
I found the source of the noise, which should have been obvious, given this:
IMG_1650.jpg

IMG_1649.jpg

But I didn't even notice the worn paint till AFTER I figured out where the noise was coming from. :roll: :oops:

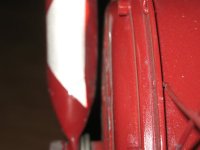
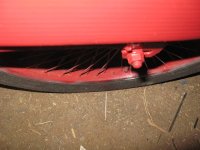
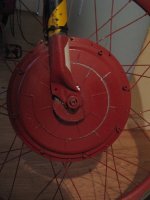
Remember how I "temporarily" used broken grinder wheels as spacers to keep the fork from rubbing the motor cover? Well, they finally began disintegrating where the pressure from the axle nut/dropout pushed on them, and that let the motor axle move a little in the dropout, so that every time I turn left or otherwise put sideloading on the wheel so it pushes it left at the bottom, it'd pull the top edge of the motor cover against the fork. The cover is either not machined well or something, so part of the cover circumference touches the fork but the rest doesn't, as shown by the paint wear.
IMG_1651.jpg


I did what I meant to originally and dug out two almost-large-enough washers, and U-notched them, so they are now "C-washers", and slipped them down over the top of the axle between motor and dropout, then clamped down the nut. Now it works fine.
IMG_1653.jpg

IMG_1654.jpg

Tested ok on a test ride hauling Tiny up to work to socialize and meet people/dogs/etc.

During that trip, I got the 40A again for one acceleration today, with either 33A or less the rest of the time (felt like a LOT less, maybe half).

After it happened (about halfway up there) and then went away, I played iwth the 3speed switch and got no change in any of the three results at first, which is strange. Usually the farthest forward position gives me low power mode, and the middle and back positions give me the same medium power mode.

I have a feeling there is an intermittently broken wire inside the center-ground on that cable, inside the insulation, or a really bad solder joint at the board. Could be the switch itself, too, but that's less likely in my experience with wires vs switches, especially on cheap ebike stuff.

I had planned to also take the controller back apart and experiment with it today, for regen and this current issue, but did not get to. I did post a thread a few days ago asking for help but it has no replies yet, so I bumped it with a partial crosspost of this info to it.
http://www.endless-sphere.com/forums/viewtopic.php?f=2&t=68501&p=1033679#p1033679


Tiny didn't appreciate the trip much; the ride was ok and she liked everything right up to walking in the door at work--then there were noises she didn't like and she was skittish the whole rest of the time we were there. :(
Now it's getting windy outside and she really doesn't like it out there--too many waving tree branches.
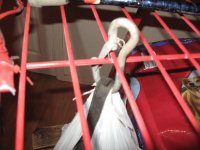
Oh, and the night before, I bought another 155lbs of dogfood (for about $36!) on clearance and hauled it home on the flatbed portion. I'd forgotten my cargo straps, so I had to tape it down with packing tape.
IMG_1644.jpg
View attachment 6
IMG_1646.jpg


I did discover another thing I need to make: A cover for the chain that passes from inside the axle's center cover forward toward the pedals, for the few inches where it is exposed at the level of the cargo bed. Without the cover, I can't put squishy cargo like dog food bags all teh way forward, or they'll get pushed down on it and cut into. Solid boxed cargo isn't an issue there.


Bill and I found more white and red paint cheap (a dollar a can for white, $1.64/can for red), and though it isn't very good paint and doesn't cover well, it does get the trike more or less the colors I'm after, which make it more visible day and night. The kennel is now all white, and the trike red. The parts of the front fender are painted too, htough not assembled yet. So are the controller/hairball covers. It's all out int eh backyard drying in the windy/sunny afternoon, wth Yogi guarding it while he eats his sticks. (and Tiny hides inside away from the wind-blown trees).


.
 

Attachments

  • IMG_1666.jpg
    IMG_1666.jpg
    65.3 KB · Views: 5,484
  • IMG_1667.jpg
    IMG_1667.jpg
    68.7 KB · Views: 5,484
  • IMG_1665.jpg
    IMG_1665.jpg
    76.7 KB · Views: 5,484
EDIT: Oh, I forgot also that on my way to work Saturday, a parked car in a parking lot that didn't appear to have a driver in it when I started my turn into the row it was in, did indeed have one--who was leaning down under the dash doing something, and then accelerated out of the spot rigth towards me without looking at all, and in fact never even looked up until he was exiting the parking lot to get on the street, and screeched toa stop at that point and THEN sat up normally--until that moment some 200+ yards away from where he had been parked, the car looked like it had started on it's own and drove off by itself!

Anyway, I had to swerve hard to avoid him running me over, and I hit the right rear wheel really hard on a 6" curb, knocking that side of the trike up in the air and almost flipping me over (but not quite). There was no way I could actually stop in time, so that was my only maneuver possible while I braked.

If I had had CB2's power, I could've accelerated out of the way instead, but not with this thing. :/


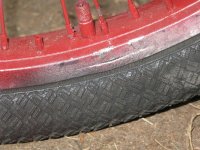
The wheel didn't break, tire wasnt' damaged, tube dind't pop, but it hit right at the valve stem hole, and bent the rim edge in and cracked it slightly, circumferentially along the braking surface, and the whole rim at that point is bent inwards. So no rim brakes on that wheel; I don't think I can bend it back even with all the spokes on that wheel. (without them maybe it would have just folded instead).
IMG_1682.jpg

IMG_1685.jpg


I've got other 20" wheels, including the pair of many-spoke ones on the trailer...but they are steel and these are alloy, better for braking surfaces. I guess I can drill out more nipple holes in one of the alloy rims I do have, if I want to use the spokes on this one to relace it on this hub.

I suppose now is my chance to lace up a hubmotor in a 20" wheel and stick in over on that side, for more power. ;) Just gotta find which one that'll fit on that side (a front type) that still works, then make or find spokes to work with whatever rim I've got there.


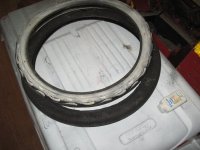
For now, I just went ahead and bent the rim back as much as I could, then swapped out the Maxxis Hookworm that has the detaching sidewall/bead problem for a doubled-up tire, made from the thin-carcass but "fat" BMX tire that came off this rim originally, with the old Kenda Flame tires (taht are smaller but thicker) inside that, bead and all, and then the thick tube bought new that was in the Hookworm. Was easier than expected to get it on the rim, and inflated just fine. Rides harder than teh Maxxis Ringworm on the other side, to be expected.
IMG_1655.jpg


Was gonna put the Hookworm inside the BMX tire but it wouldn't fit and still go on the rim.

Should be good enough for flat protection, at least for now. It's not as good for traction (not as soft a compound) as the Maxxis tires, but this is the one wheel that presently is just a roller, no drive or braking forces on it.
 
Back
Top