Pulled apart a ac breaker with only a 5mm gap between contacts tripped, quite possibly not enough for my 72v setup.

John in CR said:
My approach is to simply avoid high current switches or breakers, and use a fuse as protection with a keyswitch on the low power on/off line of the controller
If the controller has a drain down resistor that gets pulled, so there's negligible drain on the pack even idle for months. As long as you don't need to frequently pull the pack for security reasons, no one has ever explained a good reason to disco battery mains to me on a 3phase motor as long as the controller has low power switch for the MCU.
A question about carbon. I've never worked with it. Are your side panels just 1 layer or more? How rigid is a single layer in epoxy?
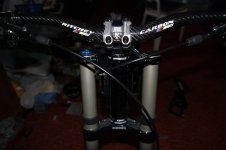
Bike is looking great! It won't be too long before she sees some action.
John
Ok john
Thanks for the input, for now im still going to use one will look for a solar breaker, i still like thought that ive disconnected the battery from controller with the convenience of a switch.
What is the purpose for those drain down resistors, so if ive got my breaker closed and low power on/off line of the controller off. this should avoid this drain down resistor prob yeah.
Right luis john re carbon
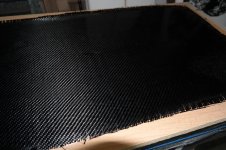
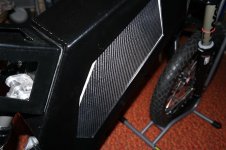
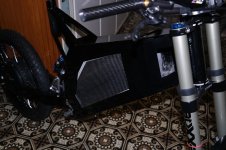
My panels are not just a single lam of carbon, and rigidity depends on weight and weave ..... [ you could easy-ally do a hole thread on that] but in my case i just needed the panel mainly for cosmetic but with the added stiffness a bonus, so i used the divinycell sandwich technique, so from bottom 6ox glass then 3mm divinicell then uni carbon and finally twill on the outside , using this technique you get a unreal weight to stiffness ratio.
But to do it properly you need a vacuum setup or compression i used compression this time with two flat heavy desk panels seen in earlier pics, any one can use the compression technique at home.
Hope your right about me finishing it.

 gloss black automotive 2 pac it is.
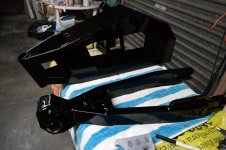
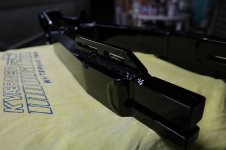


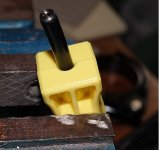

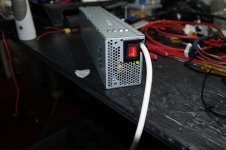
") with a power switch had to remove the female lead socket to find some room for the switch as these things are built tight with nooo nada room inside.
with a power switch had to remove the female lead socket to find some room for the switch as these things are built tight with nooo nada room inside.