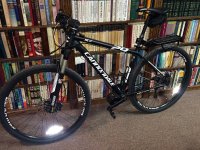
5 Bafang BBS02 Conversions

teslanv said:
Some days my job sucks. But never on the days I can ride my bike in. :wink:

Mongol General: Conan! What is best in life?

Conan: Crush your enemies. See them driven before you. Hear the lamentations of their women.

Mongol General: WRONG!

Mongol General: teslanv! What is best in life?

teslanv: Accelerate your bike past your enemies! See them fall behind in your mirror. Hear their lamentations of inadequacy while you ring an Incredibell!

Mongol General: That is good! That is good.
 
teslanv said:
Great looking bikes, hie2kolob! How do you like the HLG-320H charger?
Got over 1000 miles on my BBS02 and still going strong.

Thank you, teslanv! The HLG-320H charger works great! Thanks again for the recommendation! It seems to uniformly charge all the cells equally so there is little balancing required.

My bike was modified about45 days ago and only has 259 mile thus far. Looking forward to many more miles!
 
Luke (Liveforphysics) claims the HLG series Mean Wells are nearly indestructible. His dad's Zero motorcycle has a pair on board for charging.
 
I don't know if this has been tried before...

IMG_2085c.jpg
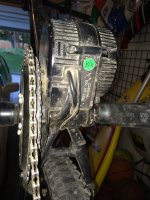
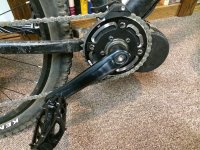
As you can see I have two gear rings installed on my BBS02. The outside is the stock bafang gear ring that is 48T and the inside is the Italian 42T ring. There is no front derailleur so the chain is moved by hand. I use the larger ring for travel on the pavement to the mountains about 2 miles away and shift to the 42T Italian gear ring when I am off road.

The chain-line is not an issue because I only need the higher gears on the rear cassette on the road. That being said I can still use all nine gears on the rear cassette. Mounting both gear rings proved to be quite simple as well. All I did was purchase 5 longer hex headed screws and put a small lock washer for spacing between the rings on each screw. This way I seem to have the best of both worlds on road or off road.
 
Nice job on the two sprocket. I was going to do something similar, but I'm just riding mts. and only need a small front sprocket.

It could be just the pic, but looks like the frame is cracked. Hope not. I ended up with a broken frame on my first BBS setup. It was on its way out before the motor though.
 
dirkdiggler said:
It could be just the pic, but looks like the frame is cracked. Hope not. I ended up with a broken frame on my first BBS setup. It was on its way out before the motor though.

Good eyes! It does look like a frame crack. Fortunately it is only dirt. :wink:
 
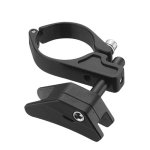
Just recently I installed a chain guide on my bike and now I have no more thrown chains! Here is a picture and the link:

41t9jnXOOnL.jpg
http://www.amazon.com/gp/product/B008ZTLV9W/ref=oh_aui_detailpage_o01_s00?ie=UTF8&psc=1
 
I just bought the N-gear jump stop after reading about going 1x10 on my pedal bike. Similar to what you bought, but cheaper price ($10) and cheaper quality. I haven't lost a chain yet. I'd had a few issues before losing a chain on my granny gear. A must addition if you are losing your chain. The part is pretty flimsy but works well.

http://www.amazon.com/N-Gear-Jump-Chain-Guide-Watcher/dp/B004YJ2ZSI
61mfPyGHMRL._SL1500_.jpg
 
Nice find dirkdiggler! It appears that this is to be used with multiple chain gears. Is that right?
 
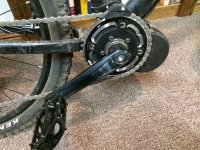
A while back I removed the 42T Italian ring due to severe chain suck. For a week I rode using the stock BBS02 chain ring and noticed a big difference climbing off road hills so I started looking for something different. Here is what I found:

IMG_2196b.jpg

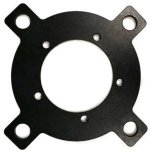
The chain adapter came from eBay: http://www.ebay.com/itm/181480294418?_trksid=p2059210.m2749.l2649&ssPageName=STRK%3AMEBIDX%3AIT

$_35.JPG

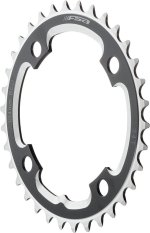
And I purchased a 36T and a 42T FSA chain ring from JensenUSA: http://www.jensonusa.com/Chainrings/FSA-DHSS-MTB-Chainring

G0000FC4.jpg

This 36T chain ring / adapter provides amazing torque climbing hills making off road cycling an sweet experience!
 
I bought a chain adapter from Crossbreak, a forum member here:
http://endless-sphere.com/forums/viewtopic.php?p=877243#p877243
file.php

Pretty similar price. I've been using a 36 tooth sprocket and it gives me plenty of uphill climbing ability. I did some really steep stuff today and it'll climb anything that you can keep the front wheel down on. I'm hoping to try it out on the Snowbird hill climb if I get some time tomorrow. To Strava that or not?!
 
Thanks for the info dirkdiggler! I was looking for a source where I might buy a five hole adapter and you have provided it - that is if Crossbreak is still selling.
 
dirkdiggler said:
I did some really steep stuff today and it'll climb anything that you can keep the front wheel down on.

This is another reason I used a mid-drive for the walgoose. With the right chainring you can create a mountain climbing torque monster; later reconfigure then and zip at 30mph on a flat later that same day.

That's flexibility. With the potential to have two chainrings on at the same time? That's even more amazing.
 
Just recently my second controller went belly up while riding along the Wasatch Mountain range. This controller with the original factory settings had not been reprogramed or modified in any way. I used only the first two preset PAS levels(out of the nine PAS level setting) PAS1 and PAS 2 (current 52% and 56% respectively) with no throttle in the ride. About one hour and twenty minutes and 18 miles into the ride the controller went out in PAS2. The motor enclosure was noticeably hot.

The controller was sent to Paul at EM3ev and he replaced it free of charge under warranty within a week or so. Here is part of the e-mail I sent him:

A couple quick questions: After having this happen twice, we would like to know how we can avoid it from happening again. There does not seem to be any protective fuse or breaker that would normally be found on an electric motor. With my experience as an electrician I have found that almost every motorized electric devise I have encountered has had some kind of protective circuity. Does the manufacturer plan on integrating something like this into their next model?

And Paul’s response:

The reason the latest unit failed was the settings we had used, it should hopefully be much better with the settings closer to standard. There is no protective device that is going to save the controller I’m afraid, it is not as simple as that. Hopefully the new settings will be safe and this problem does not occur again.

Unfortunately this reply did not boost my confidence in the product for after looking at the settings of the new replacement controller we found that there were no changes – everything was programed as the controller before.

Since the controller's malfunction seemed to be temperature related I installed a temperature sensor so that I could monitor how hot the motor was running while riding:
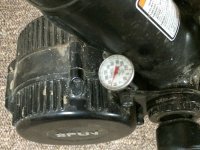
IMG_2194b.jpg My first attempt was made by using this simple meat thermometer.

In order to gain a more precise read as to the actual temperature of the controller I epoxied this sensor to the potting in the controller:

View attachment 3
I then installed the control wire and mounted the digital display that can be conveniently referred to during the ride:
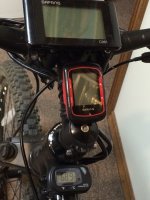
IMG_2193c.jpg This temperature sensor was easy to install with no holes drilled, just by pushing the sensor through the existing rubber grommet where the other three wires exit the motor housing. And the sensor / display is an inexpensive fish tank aquarium thermometer that can be purchased on eBay for a little over $4.00. Here is the link: http://www.ebay.com/itm/LCD-Digital-Fish-Tank-Aquarium-Temperature-Thermometer-Water-Terrarium-BT6U-/121445513132?pt=LH_DefaultDomain_0&hash=item1c46b777ac
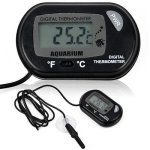
$_1.JPGThe results:

After three rides I have found the average working temperature of the controller to be around 100 degrees F when traveling in PAS on flat terrain. With moderate climbs the temp is around 110F and when riding long sustained climbs I have allowed the temps to reach as high as 120 to 125F. I think that the controller can tolerate temps as high as 140F without blowing the MOSFETs, but thus far I have chosen to error on the side of caution by not exceeding 130F.

Hope this helps...
 
Great write-up, hie2kolob. That was very reassuring yesterday on our 5000-foot climb to be able to keep an eye on the temp. Bravo!
 
So that I do not hijack this thread by adding too much content the results can be found here:

viewtopic.php?f=28&t=62646&start=25

Congrats on a very neat way of doing a temp sensor. Will look into that.

Actually, would also be interested to know what gearing you are using? Just got mine fitted up this week and its going well.

Except that the 46T chain ring gives a bit taller gears than i am used too (had 42T before) and.

I have a chain ring adaptor in the mail and will whack a 42T on mine in a few weeks when SWMBO lets me buy one. :)
 
astmacca said:
So that I do not hijack this thread by adding too much content the results can be found here:

viewtopic.php?f=28&t=62646&start=25

Congrats on a very neat way of doing a temp sensor. Will look into that.

Actually, would also be interested to know what gearing you are using? Just got mine fitted up this week and its going well.

Except that the 46T chain ring gives a bit taller gears than i am used too (had 42T before) and.

I have a chain ring adaptor in the mail and will whack a 42T on mine in a few weeks when SWMBO lets me buy one. :)

astmacca,

If you scroll up a little on this page you will find my latest front gear ring configuration. I am currently using a 36T FSA. Here is the pic:

IMG_2196b.jpg
 
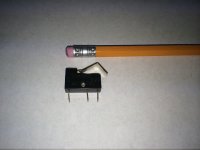
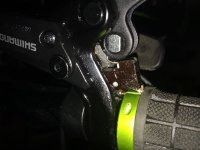
Just recently I upgraded both of my builds with hydraulic brakes. In so doing I gave up the motor kill sensors that come in the stock brake levers. Even though there are venders that sell magnetic solutions I have found that there is so little movement in a hydraulic brake lever that it is difficult for proper placement of the magnet with a reed or a hall effect sensor. For that reason I have been using small micro switches. All you need is a small enough switch that is normally open, eliminate the red 5 volt conductor coming from the harness and solder the other two wires.

IMG_2694c.jpg

IMG_2691c.jpg
 
Beautiful day Bafanging!

 
Great pano!
 
hie2kolob said:
Thanks for the info dirkdiggler! I was looking for a source where I might buy a five hole adapter and you have provided it - that is if Crossbreak is still selling.

Eride has an excellent range of 4 and 5 hole adapters in various BCD sizes. He charges minimal postage and provides good service. Probably cheaper for those outside the USA. Check the 'new mid-drive' thread or the 'For sale' list.

Savvas.
 
samsavvas said:
hie2kolob said:
Thanks for the info dirkdiggler! I was looking for a source where I might buy a five hole adapter and you have provided it - that is if Crossbreak is still selling.

Eride has an excellent range of 4 and 5 hole adapters in various BCD sizes. He charges minimal postage and provides good service. Probably cheaper for those outside the USA. Check the 'new mid-drive' thread or the 'For sale' list.

Savvas.

Thanks Savvas! I have been looking for a 5 hole adapter...
 
IMG_2382b.jpg

Yet another BBS02 Cannondale conversion. This time we used a Cannondale SL2 Trail 29er. We have found the hard tail frame to be a good choice for our off road riding along the Wasatch front.
 
Back
Top