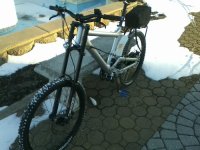
Ch00paKabrA Giant DH Comp - Finally Done!

Samd said:
You seem to be exploring all the options.

Just bought a DH comp frame. Looking forward to making up the torque plates via my laser cutting suppliers. Will keep following your thread..

I wish they were options. It turns out, they were just bad decisions and poor expectation.

It is great that you have laser cutting suppliers. I have to make mine by hand but I kind of like it (this may be a rationalization for the psychologists among us). I still have to work out he Torque arm situation.

After sleeping on it, I believe that this is going to be a dual MAC 6T build like what Ben Chiu did with his folder. I have to Check my weights though since I believe I was getting fairly close to the 100 pound mark. I may have to sacrifice a few batteries to do the second MAC.

In another Thread, I asked about 72 volts on single MAC6T and there was seriously helpful replies. One of them was a link from Spinningmagnets to an article he wrote about Ben Chiu's folding Paratrooper. http://www.electricbike.com/custom-build-gallery-duty-cycle-awd/

have read and re-read it. the only issue it seems like he had was the single throttle and it causing a spin out on a friend. This was the initial reason I scrapped the idea of a dual motor, that and getting this MAC in trade. It seems like adding another MAC 6T will work. Initially, I may just run 2 throttles.
 
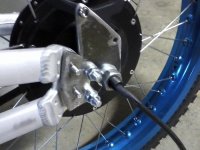
today was a momentous occasion for me. I mounted the dropouts to the frame. It was a royal pain in the ass to get it right. Tire vertical and inline with the frame. This was the really big thing that I had been procrastinating doing since I knew it would be a bear.

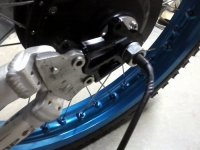
Holes were drilled through the steel adapter and the rear swing arm. The holes in the adapter were tapped with a 6mm x 1 tap. the holes in the rear triangle were then enlarged to accommodate the 6mm bolt and they are bolted together. I intend to get longer bolts and put a nut on the outside. It is probably overkill but I will feel a little safer for about $1.00.

The DP420 has not been applied yet. That will have to wait until I have everything exactly as I want it.

It looks fairly good in my opinion.

0820142142a.jpg
 
Ch00paKabrA said:
... I intend to get longer bolts and put a nut on the outside. It is probably overkill but I will feel a little safer for about $1.00...[/attachment]
no need for a nut. just use loctite to prevent unscrewing. the nut adds no more strenght or safety.
 
izeman said:
Ch00paKabrA said:
... I intend to get longer bolts and put a nut on the outside. It is probably overkill but I will feel a little safer for about $1.00...[/attachment]
no need for a nut. just use loctite to prevent unscrewing. the nut adds no more strenght or safety.

OK, I imagine that some DP 420 will also get in there and it should be almost impossible to unscrew the bolt any way.

By the way izeman, I love the new avatar photo.
 
Just when you think it's safe to go in the water...

I just got stopped and had to do some serious talking to get out of having my HardRock impounded and an expensive ticket.

It really pisses me off that there is probably one cop on each police force that is a total a-hole.

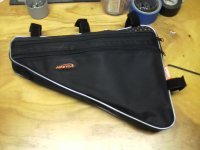
This really has me re-thinking the high speed build. I really don't want to spend loads of money on a bike that will just get impounded. I think I may have to go back to stealthy thinking mode with involves an empty triangle or an off-the-shelf triangle bag.

This really puts a damper on a dual motor build. Probably not my wisest choice but you tend to get caught up in some of the really cool builds on the forum.

I was finally making progress too.

Edited to add some pictures:

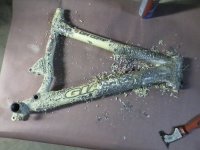
This airplane stripper works great. the little pieces separate from the metal, curl up an pop off like popcorn.

stripper.jpg

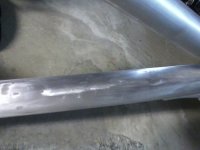
The brake and derailleur cable guides were removed to make room in the triangle.

smoothed triangle.jpg

It is starting to take shape. there is a box full of parts for it. The only things missing are the second motor, the 2 controllers, the 203mm brake rotors and a seat post. All are ordered but just haven't arrived yet.

starting to take shape.jpg

If the bike looks too conspicuous, (maybe bright blue wheels weren't the best choice) then I will either sell it or just ride it at night. Controller box is next on the list and then the battery box. To keep it looking less bulky, I may only do 14s 10p for a 58v 25ah battery. This way all of the batteries can fit in the triangle and the case will only be 3 inches wide. I can always throw another supplemental battery in a back pack or under seat bag or I can sell the extra cells and put the $$ toward some really cool stuff. I'm not sure what Samsung 18650 25R batteries fetch on ebay.

That's all for now.
'Cal
 
It's been a bit since I posted. I've been busy working.

When I first bought the ready made drop outs, Le Gobbi posted this:

Le Gobbi said:
Hi ... nice beginning

Did you check the clearance of the chain regarding the lower part upper surface of the swing arm :?:
It’s difficult to say from the picture but to my point of view the wheel axle is too low regarding the origin position :?

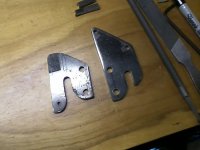
I checked but not good enough. When I finally got everything together for a dry fit, the chain line was too close to bottom chain stay. When I initially measured it, I had a 42 tooth sprocket on the cranks but when I put the cranks that I bought for the bike on, they have a 36 tooth sprocket so Le Gobbi turned out to be correct. It was back to the drawing board and since I had the day off today and it was raining, I spent the day in basement making new drop-outs.

made new drop outs.jpg

It was a complete pain in the butt but they are almost done. I didn't have a 10mm x 1mm tap for the derailleur and neither did home depot or Lowe's so I'll check Sears tomorrow. Otherwise it is ebay. What is not seen in the picture is that I am using 1/8" steel torque arms as spacers on the inside of the drop out to align the wheel with the frame. 3 on the drive side and 1 on the brake side. tomorrow I will drill the hole for the bolt. I am hoping to be able to tap the hole in the drop out.

new drop-out.jpg

I am satisfied with the result. One of the Infineon controllers arrived today along with a 14S charger. Will have to figure out how to program it. For now, I think I'll just hook up one controller and motor to test everything out and get a feel for working with a programmable controller. After I get it working to my satisfaction, I'll go for it and install the second motor and controller.

lookin purty good.jpg

Still waiting on the batteries and rotors. Additionally, I mis-measured my seat post and ordered the wrong size so I am now waiting for the new/correct one to come as well. After that, I want to get everything together so I can paint it. Oh yeah... and ride it too.
 
all expensive parts, using highend dropouts and then place a mac on it?!

yes you can run the mac on 72V no problem, friend of me was running a mac on 72V 30A for half a year

at first the clutch broke -> welded
then the aluminium case came lose near the freewheel/axle (maggot screws = miss construction!)
then he changed to magic pie 4kw and no more problems


on this kind of bike a mac is really a shame :|
 
dr_lulz said:
all expensive parts, using highend dropouts and then place a mac on it?!

yes you can run the mac on 72V no problem, friend of me was running a mac on 72V 30A for half a year

at first the clutch broke -> welded
then the aluminium case came lose near the freewheel/axle (maggot screws = miss construction!)
then he changed to magic pie 4kw and no more problems


on this kind of bike a mac is really a shame :|

Hi Dr.

Actually, I had a lot of problems running 72v on it. Too much heat. That is why I am dropping it to 58.8v. I know that clutches break, this is why I have a spare. It is just part of dealing with a geared motor.

As for the drop-outs. The expensive $26.00 drop outs didn't work out. Unfortunately they moved the rear wheel too low and the chain hit the chain stay in high gear. I mad a new set of drop outs from a $5.00 piece of 1/4 steel that I had in the basement.

I think I understand your opinion and you are certainly welcome to it. I know that most people on this board would go in the direction you suggest. However, I chose this bike for a number of reasons. mainly, the large triangle space for batteries. The reason I chose to use the MAC is that I am going for distance, not really speed or brute strength.

As far as it being a shame to put a MAC on it, I know the picture is deceiving but I am actually putting 2 MACs on. Does that help cheer you up about the build? :D
 
Hello Ch00paKabrA!

Tommy L here..... nice work!

The Heating of the Mac maybe a controller not matched well to the Mac.
This is from EM3EV site:

"The Mac motor uses a 32 magnet, 16 pole motor unlike the vast majority of Geared motors on the Market which use an 8 pole motor. This further improves torque, but does mean that the electrical rpm or commutation frequency is higher than typical geared motors and much higher than Direct-Drive motors , so some care with controller selection is required."

I'm interested in doing a dual Mac build next. :)

Again, nice work here!

Tommy L sends.....
mosh.gif
 
Tommy L said:
Hello Ch00paKabrA!

Tommy L here..... nice work!

The Heating of the Mac maybe a controller not matched well to the Mac.
This is from EM3EV site:

"The Mac motor uses a 32 magnet, 16 pole motor unlike the vast majority of Geared motors on the Market which use an 8 pole motor. This further improves torque, but does mean that the electrical rpm or commutation frequency is higher than typical geared motors and much higher than Direct-Drive motors , so some care with controller selection is required."

I'm interested in doing a dual Mac build next. :)

Again, nice work here!

Tommy L sends.....
mosh.gif

Hi Tommy L thanks for the kind words. If you are going to do a double MAC build then I believe that this article and the corresponding ES Build thread are probably required reading. Spinning Magnets linked them in the past:

http://www.electricbike.com/custom-build-gallery-duty-cycle-awd/

and

http://endless-sphere.com/forums/viewtopic.php?f=3&t=51612

One issue that most dual builds encounter is that there is a tendency for the front end to either tuck or slide. Either way, it ends in the rider going down.I know that Teklektik has done some pretty fancy programming and it works but I will going a much simpler route.

In order to understand why this happens, you must first understand motorcycles ad how they turn. there are two methods from which a motorcycle can turn but in both scenarios the rear wheel is the wheel that turns the bike. In the first, the rider turns the front wheel in the direction that he would like to turn and leans into the turn. the front wheel is steering the bike, but the turning is done by the rear wheel by leaning. this is the least stable way to turn and if done at high speeds will result in the front wheel tucking under the bike and throwing the rider over the handlebars or a "high side".

The second method is counter-steering. this involves turning the front wheel slightly in the opposite direction of where you want to go and leaning into the turn in the direction that you want to go. Hence the term "counter-steering". In this method, the rear wheel is 100% responsible for the actual changing of direction and it is the most stable way to turn.

The problem arises when the front wheel is under power. The front wheel is no longer passive but is taking part in the turning and usually with dire consequences. So, my solution is to use one of the brake cut-offs to disengage the front motor during aggressive turning. I haven't worked out all of the logistics yet but I will be using a manual switch to disengage the front wheel so it will be freewheeling during turns and will eliminate the usual problems with 2wd. The issue that I need help with is that I would like to simultaneously disengage the front motor and double the amps to the rear motor. My battery will have a 40 amp BMS so 20 each to front and rear. Around turns I would like to be able to press a switch that will change that to 0 amps to the front and 40 to the rear.

Still working things out.

I did make a bit of progress though. For better or for worse, the drop outs adapters are now a permanent fixture on the bike. I have 2 stainless steel M6 bolts going into threaded holes in the drop out adapters and Scotchweld DP420 Black to hold it all in place permanently:
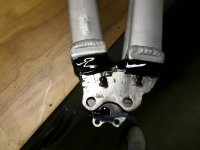
0925141345.jpg

I do need to cut the bolts flush with the bracket though and also to do a little sanding. Then, the frame will be ready for paint. Possibly this weekend.

Edit: Here is a picture of counter-steering in action:
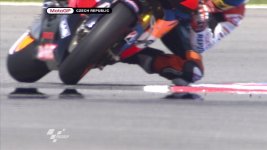
maxresdefault.jpg
 
Ch00paKabrA said:
One issue that most dual builds encounter is that there is a tendency for the front end to either tuck or slide. Either way, it ends in the rider going down.I know that Teklektik has done some pretty fancy programming and it works but I will going a much simpler route.

In order to understand why this happens, you must first understand motorcycles ad how they turn. there are two methods from which a motorcycle can turn but in both scenarios the rear wheel is the wheel that turns the bike. In the first, the rider turns the front wheel in the direction that he would like to turn and leans into the turn. the front wheel is steering the bike, but the turning is done by the rear wheel by leaning. this is the least stable way to turn and if done at high speeds will result in the front wheel tucking under the bike and throwing the rider over the handlebars or a "high side".

The second method is counter-steering. this involves turning the front wheel slightly in the opposite direction of where you want to go and leaning into the turn in the direction that you want to go. Hence the term "counter-steering". In this method, the rear wheel is 100% responsible for the actual changing of direction and it is the most stable way to turn.

The problem arises when the front wheel is under power. The front wheel is no longer passive but is taking part in the turning and usually with dire consequences. So, my solution is to use one of the brake cut-offs to disengage the front motor during aggressive turning. I haven't worked out all of the logistics yet but I will be using a manual switch to disengage the front wheel so it will be freewheeling during turns and will eliminate the usual problems with 2wd. The issue that I need help with is that I would like to simultaneously disengage the front motor and double the amps to the rear motor. My battery will have a 40 amp BMS so 20 each to front and rear. Around turns I would like to be able to press a switch that will change that to 0 amps to the front and 40 to the rear.

This was great info about the turning!

This may help..........
Since you run Dual Controllers, run Dual throttles. Since MAC's free wheel, when throttle is released on the front wheel, More Battery amps are available for the
Rear. :) I'm sure that when you are in a straight line and using both motors the amps shared maybe 40 (20 each motor) Then in a corner using the rear only may draw 30-40amps when the front throttle is released :)

Tommy L sends....
 
Tommy that is a viable solution except for 2 things.

1. I like doing things the hard way :lol:

2. It still does not address increasing the amps from 20 to 40 to the rear wheel while the front is freewheeling. Since I was an avid motorcyclist, remembering to disengage the front brake is no problem for me since I am used to downshifting and other pre-turn preparations.

There has got to be a solution here on the forum and I bet it could be done with a cycle analyst somehow.
 
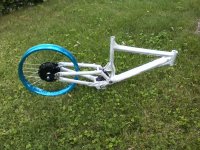
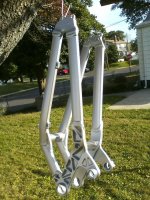
Some work was finally done to the DH Comp. The rear triangle was sprayed in metalic silver so I could judge whether I liked it. Just an aerosol can job but it turned out nice and I like the silver. It covers better than the white did as well:

0928141646.jpg

The heat sleeves for the 18650s finally showed up and it appears like I can fit 140 in the triangle in a staggered formation. My neighbor is a carpenter and he said he will help me with the construction of the battery box. I am using PVC Trim for the perimeter and 1/4" ABS for the side covers. Hopefully it will look like a real professional job with his help.
 
Looking good!

Tommy L sends..... :)
 
I haven't posted here in a while so I figured I give an update.

first the HardRock (spare bike or test bike, however you look at it). I was running the Hardrock in a State park and going uphill under both pedal and electric power, I hit a tree root that was a little over a foot high (its a nice drop going the other way) and the chainstay snapped back by the drop-out. I was able to nurse it back to the parking lot but that was the end of that bike.

While at a Garage sale, the homeowner had a Hardrock frame hanging in the back of the Garage. I really wanted to get a better fram than a Hard Rock but it was right there so on a whim, I asked it it was for sale, he laughed and said if I want it, I can have it for $10. So, unfortunately I have another HardRock. I guess it will do and for $10 I guess I can't complain. I really wanted another full suspension bike so I guess I need to learn to keep my mouth closed. The frame was pretty badly beaten up with a few small dents, a lot of scratches and a gouge or 2. It was stripped down, the dents and gouges and scratches filled with liquid steel, sanded and I painted it flat black. It will do until I find something else. I sold the motor/controller/throttle to my brother so the HardRock is pedal only at the moment.

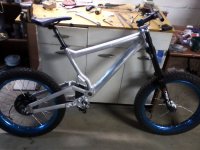
Now for the DH Comp. It is finished to an ugly state. the motor is hooked up, the controller works great and I built a 14s 7p battery using new 98 Samsung 18650 29E. 58v 20ah fresh off the charger and the bike does 36 or 37 mph top speed in speed 1 on the 3 speed switch. 19mph in speed 3 and my ass was sore before the battery ran out of juice so all seems good.

I am going to play around with it for a while today before taking it apart again. I need to figure out a good battery box solution and then paint it and put on some graphics.

The only issue that remains is that I am actually not that fond of the DH Comp frame. I have a Gary Fisher KingFisher1 that is a bit more comfortable and the single pivot is a lot easier to maintain. I also have a size XXL Kona Stinky which is my DH Bike but is also more comfortable. I think I will set everything up on those frames and test it to see which bike works better. Both of them have removable drop-outs so I would not have to do any chopping. We will see I guess.

That's about it. Sorry, no pics (not that anyone cares) next time
 
I still need to modify the drop-out on the brake side. I want to add more steel to both reinforce it like a torque arm and also to move it over so I don't have to dish the wheel so much.

Today, I got the Kona Stinky together and I can fit 70 18650s in the triangle. That is enough for 14s 5p. If I used 25Rs it is a nice 15 ah battery but I think I am going to like the stinky for DH at Mountain Creek Bike park.

I did get the DH Comp Back from paint yesterday so I will take some pictures tomorrow. The only thing I am waiting on is some 12g spokes. The 10g were not happy in the M/C rim.
 
I didn't work on the DH Comp but I did do a little work with the Hard rock. the MAC is on the bike. The Ibera bags were on sale at Amazon for $10 so I picked one up.

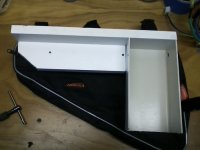
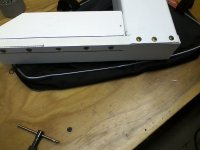
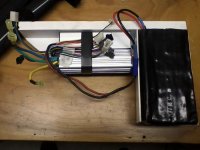
Initially I tried to just stuff it in but it didn't really work so I built a bracket for the Battery and the Controller.

battery controller mount1.jpg

Battery controller bracket2.jpg

Woriking with the PVC Molding panels was a pleasure. It is light, sturdy and durable. It is easy to cut and drill and you can even tap the holes like I did to attach the controller to it.

Battery Controller and bracket.jpg

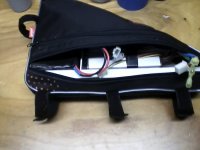
It took a little massaging and cutting, but it finally fit.

all nice and tidy now.jpg

all zipped up.jpg

Now, it is my opinion that if you do something like this, It is mandatory to take it for a Test Ride. The battery is a 36v 14ah battery consisting of 50 Samsung 18650 29E batteries. The compartment that it fits perfectly in is a portion of a PVC fence post casing that I bought at Home Depot.

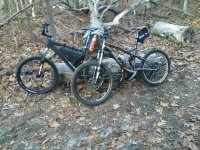
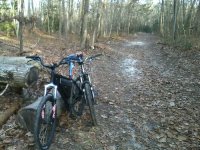
Since it is the off season, My brother and I decided to ride the ebikes to a nearby State Park and do some trail riding.

His is a 2009 Specialized Enduro Expert with a MW Motors 36v 250w rear hub motor with a 40 cell 11.5ah using the same Samsung 29E cells. Mine is the Specialized HardRock of unknown year with a MAC 6t, the 50 cell battery and an infineon 12 fet 4110 programable controller and a 3 speed switch. I have the 3rd speed set at 40% so that the two bike run at the same speed.

We had a blast but it was muddy and there were huge Puddles so it was a very cold ride home.

test ride 1.jpg

test ride 2.jpg

This is much more fun than going to work :D
 
Thanks Magicpie3focuspower.

Yes, that is the size large Ibera bag. The main issue with the bag is that it is too narrow for the 18650 battery. When I made the bracket, I traced around the bag on a large sheet of paper and then came in 3/4" all the way around so it is effectively a triangle that is 1.5" smaller than the bag.

Here is the link but you missed out on the $9.99 deal; it is now $10.99 :lol:

http://www.amazon.com/gp/product/B00H55I8J8/ref=oh_aui_detailpage_o01_s00?ie=UTF8&psc=1

The sticker on the bike said it is a 19 inch frame. Before this, I had another 19 inch hard rock (2002) and it felt a little bigger. I don't know what year this one is. I need to raise the seat and use 5" riser bars to avoid needing a chiropractic adjustment.

The bag fits nice but it does crunch up just a little at the front. Overall, I am very happy with it but I can not speak to its longevity at this point.
 
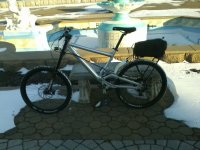
Worked on the DH Comp yesterday. I am still waiting for my 12g spokes so I have the MAC in a 26" rim. Here are a few pictures from my frigid ride. I also used my helmet cam but I need to edit that video down to a manageable length.

Here is the DH Comp so far:

DH Comp Prelim1.jpg

DH Comp Prelim2.jpg

The rear rack is just temporary and I had to figure out a way to brace the front. A piece of PVC molding was used. It is attached through an existing hole in the DH Comp rear swing arm to a hole I drilled and tapped in the molding. It is evident here where I had to get aggressive with the heal gun to make the bend:


The brake hose is too short, the deraileur hose is too long and the throttle cable is short.

On 14S with position 3 on the 3 speed switch programmed to 40%, the bike was doing 19 mph.

On a negative note, the geometry of the DH Comp is horrible. It is the most uncomfortable bike that I have ever ridden. I woke up this morning with a severely stiff neck and I am wondering if the open triangle is worth it. It is not simply because it is a DH Bike. I have 2 other DH Specific bikes. I think it has to do with me being over 6' tall and the bike being a 19" frame. I think it is just too small for me.

It rides great. I had to swap around some rear shocks as the linkage gives it such leverage that I was compressing it way too much and could not make it up. I finally used a Rockshox rear shock with an 800 pound spring. Now, it is still plush but less compressed.

It rides so nice but the neck ache is bothersome. I tried to use some riser bars but the front brake hose is too short. It looks like I am going to be putting new brake hoses on it in any case and then the last thing will be the battery box and graphics if I decide to keep it.

That's it for now.
 
On a negative note, the geometry of the DH Comp is horrible. It is the most uncomfortable bike that I have ever ridden. I woke up this morning with a severely stiff neck and I am wondering if the open triangle is worth it. It is not simply because it is a DH Bike. I have 2 other DH Specific bikes. I think it has to do with me being over 6' tall and the bike being a 19" frame. I think it is just too small for me.


I am just doing a dh comp frame and will be having dropouts that move the wheel downwards by 20mm to try and steepen the head angle a bit for using on the streets as dh bikes have a terrible head angle unless going down a steep hill.
The next problem was i have a 19" frame too so it is getting 75mm in length added to the front triangle.
Maybe a thought if you want to make it more comfy.
Darren
 
Back
Top