GT's Curious Custom build

gtadmin said:
A quick scoot around the backyard confirmed that low speed handling is excellent, flop is minimal and pushing the bike by the seat at around 10kph confirmed it tracked dead straight. SUCCESS :D :D

hehe first thing i do when i get the forks on too ;) good job mate

KiM
 
AJ said:
gtadmin wrote: A quick scoot around the backyard confirmed that low speed handling is excellent, flop is minimal and pushing the bike by the seat at around 10kph confirmed it tracked dead straight. SUCCESS


hehe first thing i do when i get the forks on too

good job mate
KiM
Hi KiM, yes, very satisfying to confirm the handling, that was the bit that had me a little bit worried when building this.

HH said:
Hey gtadmin, looking goodand real compact. how much pedaling are you planning on ? i dont see where you have the bottom bracket located, but it looks like you may need short cranks ?
Hi HH, I am planning to pedal the bike all the time, and to that end I've acquired gearing that's comparable to the Aprilia. For instance, Aprilia 6th is 60/14 = 4.28, 1st is 60/34=1.76 The custom's 7th is 48/11=4.36, 1st is 48/28=1.71 so slightly higher in 7th and slightly lower in 1st. However, the crankset I am using from the junker has 28/38/48 front rings, so I could even go lower if I needed to, and wanted to setup a front derailleur! I've left this option open.

The bottom bracket will be located approximately 50 mm behind the front down tube and 175 mm above the bottom tube (on one of the side views and knowing the front tyre is 500 mm dia, picture the centreline of the bb 50 mm above the front axle) which with 175 mm cranks will put the pedal on par with the bottom tube. With the pedal fully down, this will enable a lean angle of 32° before pedal strike occurs (not heel), but who pedals around corners?

If I went to smaller cranks, I'd have to buy :shock: them, but that would also make use of the 28T chain ring.

Thanks for the support guys.

Cheers,
GT
 
Ah , OK, so the BB will be at a "normal" height above ground (logical !),but more forward , closer to the forks.
Also your seat looks to be much lower than the Aprilia, (below the rear tyre height ?)... so the riding position is "cruiser" style ! ... but wont you need longer bars ?
 
Hillhater said:
Ah , OK, so the BB will be at a "normal" height above ground (logical !),but more forward , closer to the forks.
Also your seat looks to be much lower than the Aprilia, (below the rear tyre height ?)... so the riding position is "cruiser" style ! ... but wont you need longer bars ?
Yes, close to "normal" height above ground, and approx 570mm forward of the seat (as opposed to the Aprilia's 220mm) but these aren't real accurate measurements (dark outside) but about 350mm more forward. Seat height "loaded" should be about 575mm and the riding position is a hybrid between cruiser and recumbent. Originally it was planned to have the handlebars behind the steering head, but I kinda like it like it is. Once it has the drive connected we will see how it goes.

Cheers,
GT
 
Hi guys,

During my reading of Tony Foale's book (titled "Motorcycle Handling and Chassis Design"), the connection between the head tube and the frame was clearly identified as being a weak spot in almost all frame designs, and he overcame this weakness using full triangulation. If you have access to the book, it's chapter 10. I'm not quite sure this applies to bicycles in general, but given I'm using front-wheel drive ....

So when I first pictured :idea: the design of my bike, I envisaged using full triangulation similar in principle to his designs, and allowed for the extra height of the triangulation by raising the top tube of the frame to give it it's unique look. This also allowed quite a large area below it for mounting the batteries. The battery housing would take the form of a big "V", mounted in such a way as to give the appearance of being a structural member à la Ducati.

The triangulation would also appear to be a "tank" as seen on a motorcycle, and I decided I would utilise the space for the controller and other wiring once enclosed.

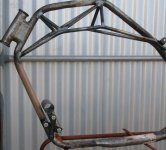
So, once all the work on the front forks had been completed, this remaining weak spot was tackled. I ordered several metres of 14 mm tube from the local steel supplier, and after 17 days, 1/2" tube finally rolled up :evil: . In the overall scheme of things the different diameter was neither here nor there, and so working from the rear of the frame to the front I tack welded, heated and bent this tubing to fit. Where a dramatic change in angle was required, a short piece of 1/2" tube was tacked in position to the top tube before the longer tube was heated and bent. Once the left-hand side had been completed, I started on the right-hand side. That's when I remembered to take a photo :shock:

20100918_t.jpg


After completing this part, I realised I hadn't left enough room to mount the rear brake caliper and to make matters worse, there wasn't enough clearance for the chain to fit on the 11T rear sprocket. Missed by this much : index finger and thumb held slightly apart : Oh well, I'll fix for next discussion :oops: :evil:

Still to do on this is fully welded all joins, attach two crossmembers at the base of the triangulation, and add a tab at each corner of each triangle to attach the bodywork to. Originally, it was going to be either fibreglass or wire meshing, but now it will be very thin sheet aluminium which will either be painted matte black or anodised black (if I can figure out how to do anodising - I know there's a link on AJ's build somewhere).

Cheers,
GT
 
gtadmin said:
Originally, it was going to be either fibreglass or wire meshing, but now it will be very thin sheet aluminium which will either be painted matte black or anodised black (if I can figure out how to do anodising - I know there's a link on AJ's build somewhere).

I may have linked to an online anodizing kit not sure, i did link to motorbicycling about DIY Nickel Plating steel though..

I saved the text for future use, i obtained all i need except the nickel :-S

" part 1 ....... take two parts distillle vinager to 1 part hydrogen peroxide=== example 2 cups vinager to one cup of peroxide mix well <-- thats jkust a guidline to go buy you can mix up as much as you need oh to this one cup mixture ad one table spoon of salt stir well .. if you need more then that mix more up but here is what you do after you mix this solution up use a piece of nickle for plating... now rememember are are not ready to plate just yet.... find a old dc power supply i used a old atx power supply from a computer here is the wireing cod if your gonna use it its 12 volts works great the yellow wires are 12 volt the black are ground wires in order to turn it on snip out a black ground wireany black wire and twist it with a green wire ... now take a piece of nickle and hook it to the yellow wire witch is your + and take like a piece of old metel.. remember we are makin the solution to plate not plating just yet i used just a steel nail as my negative not take the nickle thats on the + now immers the nickle under the solution leaving the conntection to the nickle above the vinager line take the other the nail or what ever your gonna use as a negative electrode its fine if it get submerged fully because the negative draw the metel ions throught the vinager anyways turn your powersupply on let it sit for about 4 hours till the vinager turns a color just a little lighter then coffee this is your solution to plate with
strain it with a coffee filter and your done making the solution

ok part two of nickle plateing take your solution witch is vinager and hyrogen peroxide withy salt and nickle put it in a old glass coffepot put it in the coffeemaker let it warm up this warming helps keep your parts from oxidizing tomuch to plate once its warmed up take your positive and hook it to your nickle metel .. your doner metel and then the negative hook it to the part to be plated make shure your parts are clean no grease oil or dirt rubbin alcohol works great after its degreased to remove the residue once its cleaned let it dry oh by the way the solution is not harmful if it gets on your skin but your hands will smell like burnt metel from the nickle ions in the vinager so you might wanna use rubber gloves andy ways dip your part negative wire and all in your solution on the positive terminal donot submerg the copper or what ever your useing to conduct the nickle with its best to place half above and half below the vinager line so your positive will not go througfh the electrolisis part just the nickle ty any questions just ask sheck your parts about every 20 minutes or so give it time to plate but you wanna keep an eye on it after you feel its plated enough rince the vinager off with good old tap water and your done oh one more thing this does produce hydrogen gas so please do this outside your home not inside and since its hydrogen gas please no smoking .. i do love to hear from you guys so please be safe oh almost forgot never let your parts and the positive plus nickle touch keep them seperated under the solution"


Looking good anywayz GT...lookforward to next installment.

KiM
 
gtadmin said:
Hi AJ, thanks for posting that, it'll come in handy sometime in the future. That was the link I thought was anodising, anyway I found some other sites so am busy reading before I go off to work (again :x )

Cheers mate,
GT


No worries mate, anodizing is something i wnt to be getting into myself, Thudster has inspired me with his home anodizing, it appears to be relatively cheap too which is a bonus! I have also recently found out a mates old man is a full bottle when it comes to anodizing so i am going to have a whisper to him before purchasing, will also check in with our own Thud before any purchases are made ;)

KiM
 
Hi guys,
Picking up where I left off, I had welded the 'seat' stays to the bottom of the rear dropouts, but found that I didn't have enough clearance for the chain to engage the 11T cog. Brain fart I guess :oops: . Anyway, I ground off the tack and realigned the 'seat' stays to the top of the dropouts. I took the opportunity to ensure the 'seat' stays were "matching" as they were about 1.5mm out of alignment. Ok, it was "only" 1.5mm but it wasn't right! Fixed now 8) .

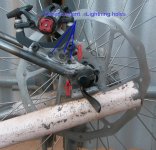
Next job on the list was to make the bracket to mount the brake caliper. This was fabricated out of 3mm plate, drilled, cut and filed to get the shape I wanted, tacked to the frame, alignment and engagement of the pads with the disk checked, and then fully welded.

Before the welds were cleaned up (from the inner side):

20101106_1.jpg

Once the welds were cleaned up, the caliper was mounted and alignment was checked again. Had to elongate the mounting holes about 0.25mm to get perfect alignment. The bit circled in red in the following piccie needs to have a bit more weld added to blend the caliper mount to the rear dropout.

20101106_2.jpg

And assembled:

20101106_a.jpg

Couldn't do anymore today, started raining again :x Hopefully tomorrow I'll blend that bit circled in red, and finish cleaning the welds.

Cheers,
GT
 
Nice job buddy... :) Dunno if your aware or not? you can
us the spray on aerosol can cooking oil you know the stuff like 'Crisco' you spray it on fry pans to stop the meat/food sticking, as anti spatter spray, spray it on the job before you weld, makes it shit load easier to get that spatter off...keep up the good work ;)

KiM
 
AussieJester said:
Nice job buddy... :) Dunno if your aware or not? you can
us the spray on aerosol can cooking oil you know the stuff like 'Crisco' you spray it on fry pans to stop the meat/food sticking, as anti spatter spray, spray it on the job before you weld, makes it shit load easier to get that spatter off...keep up the good work ;)

KiM
Thanks KiM, yep, I've used it since the last time you told me :lol: The spatter you see in the first piccie came off just by sliding a chipping hammer over it. When I say clean up, I mean get it all nice and smooth and blended.

Cheers mate,
GT
 
gtadmin said:
AussieJester said:
Nice job buddy... :) Dunno if your aware or not? you can
us the spray on aerosol can cooking oil you know the stuff like 'Crisco' you spray it on fry pans to stop the meat/food sticking, as anti spatter spray, spray it on the job before you weld, makes it shit load easier to get that spatter off...keep up the good work ;)

KiM
Thanks KiM, yep, I've used it since the last time you told me :lol: The spatter you see in the first piccie came off just by sliding a chipping hammer over it. When I say clean up, I mean get it all nice and smooth and blended.

Cheers mate,
GT


haha sorry mate, im following far too many threads i forget what i have posted where at times :lol:

KiM
 
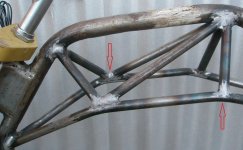
As noted above, the brake caliper mount needed to be blended into the rear dropout. This was done by adding a bit of weld and grinding it down to get a smooth radius. At the same time, I also added some weld at the bottom of the seat stay to the dropout which was also ground down to get a smooth radius. These two points are arrowed in the following piccie

20101117_disk.jpg

The next task undertaken was to add a brake bridge to both the front and rear forks. The front bridge was added so that I could mount a set of caliper brakes which will be used as insurance against regen braking failure. The rear bridge was added as triangulation for the seat stays. Apologies from the blurry picture

20101117_bridge.jpg
 
A bit OT, but the plumbers have finally found time to renovate my bathroom which means that I been able to take a few days off work and while they're rooting around inside I can spend some time in the shed. At the same time I added the brake bridges I also fully welded the tank tubes. Boy, what a lot of work this turned out to be! Each external weld was then ground down and radiused. The only thing left to do on this part of the bike is to weld in the two crossmembers where arrowed.

20101117_smooth.jpg
 
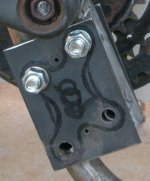
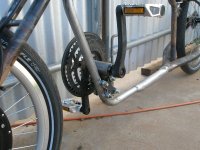
It's my granddaughter's 18th birthday next week so this weekend the CABW and I are going to Adelaide to pick up a pressie. We're going to stay at my mate's place and because he's shown interest in my bike I wanted to be able to show him a photo of it assembled. That means tackling the job I've been putting off for ages, that is attaching the bottom bracket. I've given this a lot of thought and came up with several ways of doing it before finally settling on the following method.

View attachment 2

A closeup shows how the side plates will be trimmed.

20101117_next.jpg

And the bike assembled.

 
By offsetting the mounting holes 15mm in the vertical plane, the height of the bottom bracket can be adjusted by 30mm by flipping the sideplates. I may need to do this if the riding position becomes uncomfortable in the long term, but scooting around the backyard "pedalling" suggests it's OK. Closeup of the trimmed sideplates with the outline centre-popped. These will be cleaned up this arvo.

20101118_bb.jpg
 
Hi guys,

Not quite sure whether it's a subconscious desire to fit in with (mostly) everyone here or that I'm being influenced by the Seppo* laying the tiles in the bathroom :p :p , but this what I've done with my bike . Please note the liberal use of duct tape :wink:

20101125_test_rig.jpg

So what's up? Has GT lost it? No, test ride time! I had ordered a 22A controller to match the motor (from ebike-kit) and it turned up. So, I pinched the 8S LiPo from the Aprilia and after going through the first time start up (3A fuses, one connection at a time etc) and hooking up the rear brake, I took it around "my" test loop after replacing the fuse with a 60A. With only 8S, this proved to be sedate :lol: First test though, no-load WOT draws Edit 0.84A (was 1.25A) or 42W on 50V SLA (28W with 8S LiPo)

Results: 33.40Vs, 32.83Ve, 32.33Vm, 23.19Ap, 761.5Wp, 0.836Ah, 27.4Wh, 3.02km, 471secs, wind speed 26kmh gusting to 39kmh, and an average bike speed of 23.08kmh. Feels a lot slower than that, I'm guessing because it is so low. Handling is great, and very comfy!! Into the wind drew 280W, downwind 110W, neutral 150W. All data with NO pedalling (errr .... as there is no chain connected). Compare this to my Aprilia which with this battery and over the same loop averages 28kmh WITH pedalling and uses 1.379Ah (65% more)

I have a set of crap 150mm long cranks here off a kid's bike that I'm gonna try tomorrow, but everything's going to plan. Back to the grind :x

* Oz slang for a Yank. He's a helluva nice bloke too.

Cheers,
GT
 
Hi guys, a quick update ...

The "X" bb mount was flipped over (lowering the centreline by 30mm) and the small cranks were tried. These felt better, but because the cranks are a POS, I have gone back to the larger ones but left the centreline lowered. I would also have had to increase the gearing by 72% by using a jackshaft or similar if I choose to use smaller cranks with a corresponding smaller chainwheel. I had a bit of a wait until my chain turned up, but once it did, it allowed me to verify the chain alignment before welding the front tube through tubes (only one was tacked in position in the last post). These welds have now been "blended". Next job on the list is adding the derailleur.

20101212.jpg

GT said:
Results: 33.40Vs, 32.83Ve, 32.33Vm, 23.19Ap, 761.5Wp, 0.836Ah, 27.4Wh, 3.02km, 471secs, wind speed 26kmh gusting to 39kmh, and an average bike speed of 23.08kmh. Feels a lot slower than that, I'm guessing because it is so low. Handling is great, and very comfy!! Into the wind drew 280W, downwind 110W, neutral 150W. All data with NO pedalling (errr .... as there is no chain connected). Compare this to my Aprilia which with this battery and over the same loop averages 28kmh WITH pedalling and uses 1.379Ah (65% more)

I have a set of crap 150mm long cranks here off a kid's bike that I'm gonna try tomorrow ....

Extrapolating this data, the range to 80% discharge without pedalling is in the order of 34km. I'm thinking of using a 10S3P LiPo in the future (as in when HobbyKing opens their Oz warranty centre)

And .... I jumped onto the Aprilia after hopping off the cruiser .... and the result is .... anyone want to buy a good Aprilia? Although it is a good bike using quality parts, in comparison it is uncomfortable, heavy and handles like a truck!

Cheers,
GT
 
gtadmin said:
Results: 33.40Vs, 32.83Ve, 32.33Vm, 23.19Ap, 761.5Wp, 0.836Ah, 27.4Wh, 3.02km, 471secs, wind speed 26kmh gusting to 39kmh, and an average bike speed of 23.08kmh. Feels a lot slower than that, I'm guessing because it is so low. Handling is great, and very comfy!! Into the wind drew 280W, downwind 110W, neutral 150W. All data with NO pedalling (errr .... as there is no chain connected). Compare this to my Aprilia which with this battery and over the same loop averages 28kmh WITH pedalling and uses 1.379Ah (65% more)

But remember , the Aprilia is going 18% faster on average, and as you pointed out , the wind direction can make a huge difference too.
But, I suspect the problem with the Aprilia is the brushed motor. With mine running on 40 v (10S) lipo, it certainly goes well pulling 1200w peak up hills, but i notice that after 20 mins or so the motor is too hot to touch ! :shock:
That suggests the inefficiency of the motor design is hurting it bad turning many of those amps into heat rather than power. :cry:

Have you managed to scale the custom yet to see how the weight compares ?
 
Hillhater said:
gtadmin said:
Results: 33.40Vs, 32.83Ve, 32.33Vm, 23.19Ap, 761.5Wp, 0.836Ah, 27.4Wh, 3.02km, 471secs, wind speed 26kmh gusting to 39kmh, and an average bike speed of 23.08kmh. Feels a lot slower than that, I'm guessing because it is so low. Handling is great, and very comfy!! Into the wind drew 280W, downwind 110W, neutral 150W. All data with NO pedalling (errr .... as there is no chain connected). Compare this to my Aprilia which with this battery and over the same loop averages 28kmh WITH pedalling and uses 1.379Ah (65% more)

But remember , the Aprilia is going 18% faster on average, and as you pointed out , the wind direction can make a huge difference too.
But, I suspect the problem with the Aprilia is the brushed motor. With mine running on 40 v (10S) lipo, it certainly goes well pulling 1200w peak up hills, but i notice that after 20 mins or so the motor is too hot to touch ! :shock:
That suggests the inefficiency of the motor design is hurting it bad turning many of those amps into heat rather than power. :cry:

Have you managed to scale the custom yet to see how the weight compares ?

Hi HH, yes the Aprilia was going faster but the wind strength and direction was about the same or less than when I rode the cruiser; I was adding 50W(?) by pedalling; the cruiser figure for Ah used was the worst of two readings whereas the Aprilia's were an average over several readings; if I had the pedals connected and able to input an extra 50W the top speed would've equalled the Aprilia's; the 9C is definately voltage (speed) limited at 8S ...... OTOH, the Aprilia wasn't ridden WOT the whole way as, over this loop, I didn't feel comfortable to do so; I haven't tried the cruiser up a hill ...... but the point is the cruiser is way more "rideable"

The through-the-gears-power of the Aprilia is the way to go for lower powered bikes (in adverse conditions: hills, head winds especially), and my next build will have a 9C mounted amidships (and this one's not finished yet LOL)

I weighed the bike yesterday before posting (brain fade that I didn't list it) - 22kgs without batteries, case, controller and chain (27kg with the 8S LiPo, controller and case as in the previous post), so figure another 6 or 7kgs for that and it would be slightly heavier than the LiPo modified Aprilia (27kg) BUT it doesn't feel it.

Cheers mate,
GT
 
Back
Top