shortcircuit911
1 kW
Well it’s been a while since I’ve posted last. My last project was a razor rx200 that I converted to a brushless/lipo setup. That scooter had great torque but it was small and didn’t have the range I needed. It also ate #25 sprockets like tic tacs.
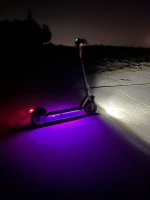
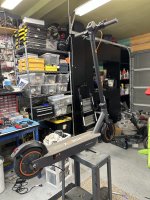
Here’s my new project, the Hiboy s2 Max. I got the scooter because it had enough range to get me to the train station (5 miles) round SF without having to charge. The first few weeks were cool but the scooter got boring very quickly. The goal for this project is the following:
-20ish miles or range @20+mph
-40 + mph top speed
-Excellent acceleration
-Stealth/look like all the other s2 max scooters at first glance
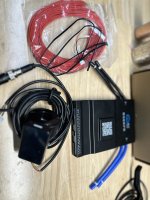
Controller:
The first mod I did to the scooter was the controller. The S2 Max comes with a speed limiter that can’t be disabled. The original top speed was 19mph which is super boring on long stretches of road where the speed limit is 35+. I went with the flipsky 75100 vesc controller for the project. I figured 100A is enough and 75v should be plenty for this project. This was by far one of the best mods I’ve done thus far. It added lots of acceleration (although it still wasn’t great because the motor) and the new top speed was 23 mph (I’m 155lbs). I would recommend getting the Bluetooth module and/or the screen for instrumentation. I commute 10 miles a day so knowing battery health and speed are definitely helpful. I did have a bit of trouble getting the motor tuned properly. The 75100 has auto detect but the motor never ran right. I had to contact flipsky and change some values to get it working 98% properly. Other than that the controller has been very dependable.
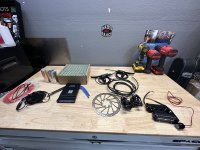
Motor:
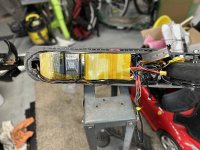
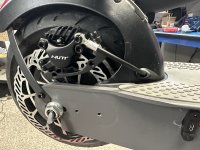
The second mod I did was the motor which was just last week. I wasn’t able to find many high power options for hub motors in a 10” wheel. I settled for the one below from annoybike on ebay. I got the motor mounted, wired, and tuned this past week. First impressions on torque were a letdown. The torque is worse because of the winding in the stator. This motor is wound for top speed and man does it move! The motor starts making good power around 15mph and rips all the way up to 35 mph. I have the controller setup to push 55 phase amps which is as much as I can run before bumping the thermal limit by the time I get home (lots of hills on the way home). I’ve bumped the current up to 85A (phase) and it was better, but the motor will roast if I keep it at that current limit on the daily. The other plus side of the motor is that it has disc brake mounts so I can have disc brakes in the rear (previously only had drum in the front).
Brakes:
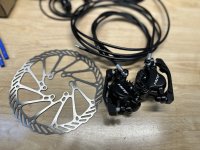
Naturally if you go faster you need to stop faster so brakes have been on my mind. The drum brake in the front is worthless at speeds over 20 so I went with some Nutt hydraulic disc brakes. They have sensors in the handles which is great and the overall quality is pretty good. I do wish they came with rotors for the price but they didn’t. Luckily I had a set of 160mm rotors which is about as much rotor you can fit on this wheel before you start having clearance issues with bumpy streets/rough riding situations. I’m wrapping up the machining on the back mount and plan to powdercoat it when it’s done. The problem with working on your commuter is that it has to be working by the end of the night for work the next day so I don’t bite off too many tasks at a time. When the rear is done I’ll purchase a new front rim and start making the mount for the front fork.
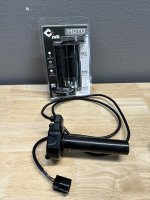
Throttle:
The scooter came with a thumb throttle which is ok but starts to hurt my thumb after a while (probably because the throttle is wide open and my finger is pushing harder for more speed). I grew up on dirtbikes so I’m a big fan of wrist throttle. I purchased a sur ron throttle off Amazon and some ODI grips, much better.
Next mods:
-Front brakes
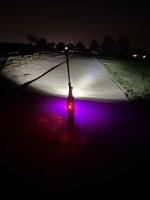
-Lighting
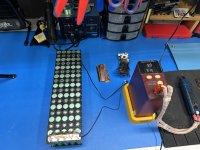
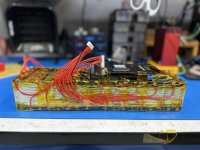
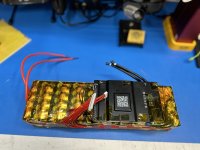
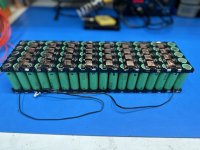
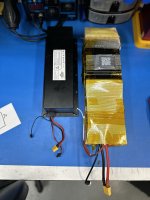
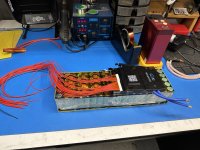
-18s 5p battery made of 25r cells and jk bms
I’ll continue to post more mods and pictures as I make progress.
Here’s my new project, the Hiboy s2 Max. I got the scooter because it had enough range to get me to the train station (5 miles) round SF without having to charge. The first few weeks were cool but the scooter got boring very quickly. The goal for this project is the following:
-20ish miles or range @20+mph
-40 + mph top speed
-Excellent acceleration
-Stealth/look like all the other s2 max scooters at first glance
Controller:
The first mod I did to the scooter was the controller. The S2 Max comes with a speed limiter that can’t be disabled. The original top speed was 19mph which is super boring on long stretches of road where the speed limit is 35+. I went with the flipsky 75100 vesc controller for the project. I figured 100A is enough and 75v should be plenty for this project. This was by far one of the best mods I’ve done thus far. It added lots of acceleration (although it still wasn’t great because the motor) and the new top speed was 23 mph (I’m 155lbs). I would recommend getting the Bluetooth module and/or the screen for instrumentation. I commute 10 miles a day so knowing battery health and speed are definitely helpful. I did have a bit of trouble getting the motor tuned properly. The 75100 has auto detect but the motor never ran right. I had to contact flipsky and change some values to get it working 98% properly. Other than that the controller has been very dependable.
Motor:
The second mod I did was the motor which was just last week. I wasn’t able to find many high power options for hub motors in a 10” wheel. I settled for the one below from annoybike on ebay. I got the motor mounted, wired, and tuned this past week. First impressions on torque were a letdown. The torque is worse because of the winding in the stator. This motor is wound for top speed and man does it move! The motor starts making good power around 15mph and rips all the way up to 35 mph. I have the controller setup to push 55 phase amps which is as much as I can run before bumping the thermal limit by the time I get home (lots of hills on the way home). I’ve bumped the current up to 85A (phase) and it was better, but the motor will roast if I keep it at that current limit on the daily. The other plus side of the motor is that it has disc brake mounts so I can have disc brakes in the rear (previously only had drum in the front).
Brakes:
Naturally if you go faster you need to stop faster so brakes have been on my mind. The drum brake in the front is worthless at speeds over 20 so I went with some Nutt hydraulic disc brakes. They have sensors in the handles which is great and the overall quality is pretty good. I do wish they came with rotors for the price but they didn’t. Luckily I had a set of 160mm rotors which is about as much rotor you can fit on this wheel before you start having clearance issues with bumpy streets/rough riding situations. I’m wrapping up the machining on the back mount and plan to powdercoat it when it’s done. The problem with working on your commuter is that it has to be working by the end of the night for work the next day so I don’t bite off too many tasks at a time. When the rear is done I’ll purchase a new front rim and start making the mount for the front fork.
Throttle:
The scooter came with a thumb throttle which is ok but starts to hurt my thumb after a while (probably because the throttle is wide open and my finger is pushing harder for more speed). I grew up on dirtbikes so I’m a big fan of wrist throttle. I purchased a sur ron throttle off Amazon and some ODI grips, much better.
Next mods:
-Front brakes
-Lighting
-18s 5p battery made of 25r cells and jk bms
I’ll continue to post more mods and pictures as I make progress.
Attachments
-
 MicrosoftTeams-image (49).jpg1.6 MB · Views: 9
 -
 MicrosoftTeams-image (47).jpg1.8 MB · Views: 7
 -
 MicrosoftTeams-image (52).jpg1.1 MB · Views: 7
 -
 MicrosoftTeams-image (54).jpg1.2 MB · Views: 7
 -
 MicrosoftTeams-image (48).jpg1.2 MB · Views: 9
 -
 MicrosoftTeams-image (51).jpg1.6 MB · Views: 10
 -
 MicrosoftTeams-image (55).jpg1.3 MB · Views: 10