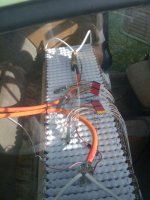
methods 26kwh Emoli bug build

I love it!~

I especially love that in 1974 a camper was getting 20 miles per gallon and. . . . . well we wont get started on THAT.


Update:

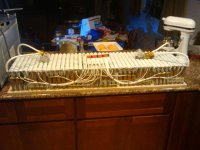
The batter is fully assembled with balance taps, shunt, contactor, and mounting board sitting on my kitchen sink (as it has been for a week). I am waiting on a ratcheting crimper to finish off the balance harness.

-methods
 
methods said:
The only solace is that I suspect the aftermarket for bugs is vibrant and cheap. This is the first Volkswagen I have owned - but I know how to handle a wrench and looking under the car ->

There are lots of cheap aftermarket solutions for trans and axles that you won't be able to break with that little motor. :) If you went with a dog-shift setup, you could actually bang that thing through the gears WOT.

methods said:
Feels like turbo lag.

-methods

Anything that feels like turbo lag = ultra fail. A vehicle needs to explode when you touch the throttle. No exceptions. ;)
 
Very cool, you've been wanting to do a car for ages... This should be good to watch ;)

BTW what weight do you anticipate when completed?
 
patrickza said:
Very cool, you've been wanting to do a car for ages... This should be good to watch ;)

BTW what weight do you anticipate when completed?

I dont have numbers yet - but:

Stock bug:
- Motor, muffler, mounts, and odd bits
- Gas tank
- rear seat & hardware
- 50lbs of sheet-metal that has rusted out of the floor pan :p

+ DC motor
+ controller, contactor, 4/0 wiring, DC-DC, etc.
+ 250lbs of Lithium (for the 20S 48P including hardware)
+ battery rack (Steel reinforcement and 1" plywood)
+ Ceramic heater
+ 200,000W Stereo (not really :mrgreen: I prefer the sound of the motor)

I will weigh it when I get the pack in - hopefully this weekend. I am still building that balance harness.

I got it up to 55mph on the last run - at least the speedo read 60 mph so I am assuming... I need to get the damn CA installed. The wife thinks I need to get the microwave installed in the kitchen :roll:

-methods
 
methods said:
The wife thinks I need to get the microwave installed in the kitchen :roll:

-methods

I swear, women have some really messed up priorities sometimes. My ex got all pissed off just because I had a motorcycle disassembled on the living room carpet one night (she came home early. :oops: ). :lol: :lol:
 
FYI: Just click on pictures to make them expand - no need to scroll

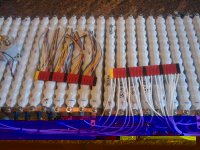
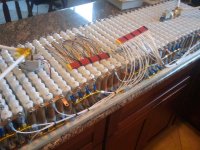
So the pack is officially finished. I used 12awg silver coated Teflon for the balance taps. I wanted to do a 4 wire setup (see 4-wire measurement) but that was too much trouble so I settled for a quasi 4-wire measurement. At 1.2A the 12awg wont drop much - so with this setup I will be able to have multiple monitor systems attached.

045_Battery_Install.jpg

I came off the battery with Anderson connectors after shuffling my feet for a long time. I had maintenance in mind and I think this will be the easiest to change/repair in the future. It also allows me a very easy way to tap in for manual balancing if I need to.

047_Battery_Install.jpg
048_Battery_Install.jpg

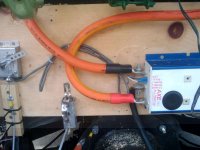
I routed the 4/0 gauge wire to the controller. I still have to do the motor wires, but they are 2/0 so they can wait.

050_Battery_Install.jpg
052_Battery_Install.jpg

The battery platform is finished. The lip leaves clearance for the copper bars and protects them some what. I added some rubber bumpers to help ease the wear and tear. Originally I had planned to put a rubber mat between the platform and the battery but I forgot to account for it when I did a bunch of measurements and I was too lazy to go back and re-work the wood.


Just thought I would rub in the fact that it has been in the 70's for the last few weeks here in sunny California. The wife and I took a hike last week - for those of you that live in a wet area this may not be anything interesting but we live what is usually a very dry area. All summer this area bakes out so to see it this wet and green was unusual.

View attachment 5
017_Battery_Install.jpg

Over a 2 mile area is everything from vast meadows to arid rocky areas to wet ravines.

View attachment 018_Battery_Install.jpg
022_Battery_Install.jpg

You see - taking the wife on walks like this buy me points that can be redeemed for the Electric Revolution -> Things like "Build the battery on the kitchen counter", "borrow your car every day because mine has no batteries", and "I know the seat belts dont work - just hold on real tight".

023_Battery_Install.jpg


-methods
 
I was able to reach an honest 60mph from a standing start on flat land. I hit 55mph going up-hill. :mrgreen:

Obviously - the battery is in the car and it is done. The extra 10V and lack of sag under load made for a considerable performance increase. Other than the lame stepped current limiting on the controller - this thing hauls ass.


FYI: Just click on pictures to make them expand - no need to scroll


View attachment 5
View attachment 003__Battery_Install_Part2.jpg
View attachment 004__Battery_Install_Part2.jpg
View attachment 005__Battery_Install_Part2.jpg
View attachment 006__Battery_Install_Part2.jpg
007__Battery_Install_Part2.jpg


I put 50 hard Ah on the car today - a lot of 350A pulling and a little 450A pulling.
Now I am going to build my charger - I am going to build it in two modular parts. The idea will be to use 110V but to plug in to two separate 20A circuits. This will give me the fast charging time I want with the compatibility to charge anywhere. I dont want to start fooling with 220V yet.

-methods
 
Nice work Methods, what sort of range are you expecting driving
conservatively and is there many hills in your commute to work?

KiM
 
I'm proud of you bro. :) Good work!
 
Stick that pack on a trailer, hook it up to your bike and you could do justins trip with only 2 stops for charging ;)

If you're only going to build the charger now, how have you been charging? Have you thought about chopping the top off the bug... you'd need to cover the pack then of course, but it would be a pretty cool ride then, not that it isn't now...
 
AussieJester said:
Nice work Methods, what sort of range are you expecting driving
conservatively and is there many hills in your commute to work?

KiM

My commute to work is 1.2 miles perfectly flat.
I expect to get around 50 miles with conservative driving. The pack is rated at 140Ah, measures out to about 120Ah, so with margin and bad cells I figure 100Ah 20S. I ran it down to 85Ah last night and one bank of cells was grossly out of balance with regard to the rest. I got a little lazy building the pack :roll:


patrickza said:
Stick that pack on a trailer, hook it up to your bike and you could do justins trip with only 2 stops for charging ;)

If you're only going to build the charger now, how have you been charging? Have you thought about chopping the top off the bug... you'd need to cover the pack then of course, but it would be a pretty cool ride then, not that it isn't now...


You might have noticed a post a while back with 3 power supplies taped together with painters tape :wink:
That one put out 80V 30A but melted plugs.

I finished my new charger. I will post pics later.

* 80V 10A & 80V 15A (To allow me to charge anywhere without blowing breakers)
* 14V 5A output to charge Lead acid primary cell
* 12V 5A to drive insane fan on charger and balance fan
* Ideal diode on output to allow charging with different chargers at different voltages
* 12AWG charge cord to gas tank door

The idea now is that I build a second charger - of whatever voltage / current - and also use another Ideal Diode. This will allow me to charge in all sorts of different situations. I can use a regular 72V Lead Acid charger, or whatever is available.

Right this very second I am charging at only 10A because my new charger triggers the safety ever time I try to run it at 15A. Not quite sure why. . . Oh well, that is why I made it modular.

A guy who sold water once told me: " A lot of a little makes a lot"

-methods
 
That is an absolutely beautifully built pack (not surprised of course). You would get more range if you removed 2 of the wheels :twisted:
 
grindz145 said:
You would get more range if you removed 2 of the wheels :twisted:

You would not believe the difference.... On my trike the wife and I can get "all the way to the creek" (however far that is...) on 1Ah.
In the bug - It takes 1Ah just to get to the end of my street :?

-methods
 
Charger Part 1


Tiberius makes some awesome Ideal Diodes - you should check them out


View attachment _001_Charger.jpg
View attachment 3
_004_Charger.jpg
_006_Charger.jpg
View attachment _013_Charger.jpg


Good thing I made the output variable... Apparently I miscalculated because it blows its gasket when I try to run the full output. Currently I am running this charger at 15A and I center-tapped another 100V charger to put out an additional 30A.

Nice thing about these supplies is that you can build 1 charger that can charge multiple packs - just dont mix up the cables :shock: Wiring 100.8V into 20S would be a very, very, big mistake.

-methods


P.S. The other charger I built which is very similar had the fan sucking... this was a real problem since the charger sat on the ground - and any time a spider ran by (or a stray thread of carbon fiber) a major spark-storm would start up. The probability is less now since it is pulling from the air.
 
So are do these have active current limiting, or are you limiting the current by setting the output voltage low enough and letting the idea diodes take care of the rest?
 
grindz145 said:
So are do these have active current limiting, or are you limiting the current by setting the output voltage low enough and letting the idea diodes take care of the rest?

The diodes are actually completely transparent... They dont affect the voltage or current in any way (other than to block reverse current)

The supplies are very high quality with true fixed CC that will work down to a short circuit, nearly no ripple voltage, 300uA leakage current, super efficient, and finely adjustable.

The reason I have the diodes in there is so that I can leave the charger hooked up without any worry of current flowing backward and draining the pack. They also allow me to hook up chargers in parallel with no worries about the exact voltage.

Though... I think the output stage of this supply has reverse current protection anyway so I may be wasting my money :)


-methods
 
Ahh, that makes sense, yeah doesn't hurt, quiescent current can generate heat and I'm never comfortable with batteries generating heat in my garage in the middle of the night...
 
Hell yeah Methy!

You brought the pain to that motor! Thumbs-up!

Now you can go with a motor design that doesn't involve spinning copper, which is F'in stupid.
 
methods said:

:cry: :shock: :cry:

OMG.... Did it over-rev, or did the banding/comm just come apart?

I guess the good news is that it can be fixed (check with Jim Husted over at DIYEC) but you might get lucky finding a cheap forklift motor to replace it with for not a lot more cost.

Wow. :(


...I don't suppose you can just parallel up a bunch of 9C's... ;)
 
Back
Top