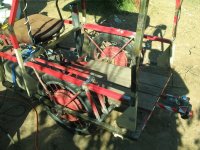
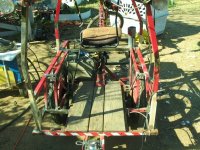
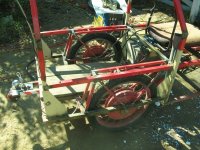
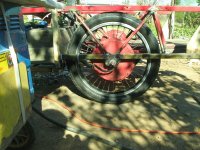
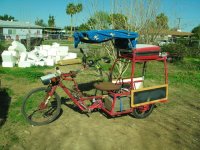
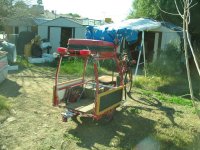
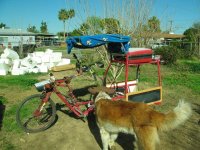
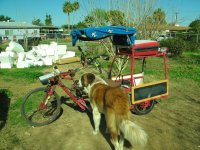
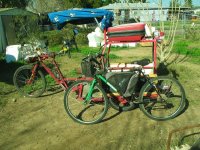
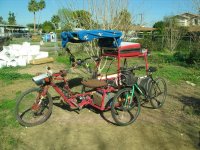
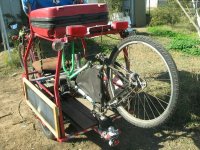
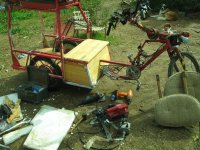
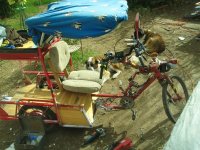
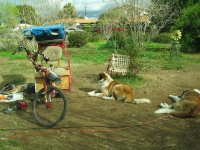
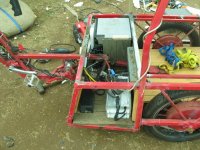
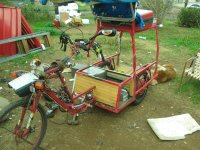
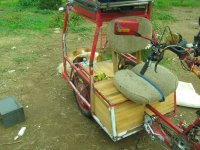
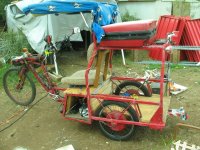
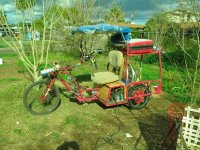
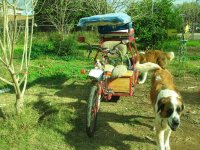
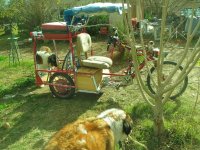
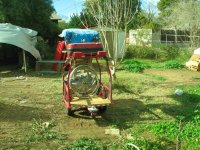
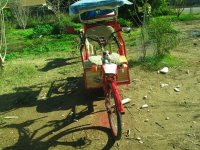
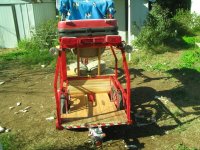
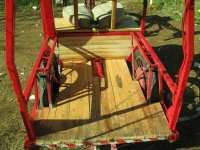
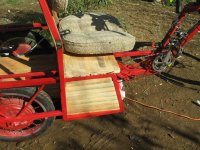
The SB Cruiser : Amberwolf's 2WD Heavy Cargo Trike & Dog Carrier

Performance has been consistent with the last few rides the same as the recent data, so for whatever reason the CA has now decided to operate almsot normally. So around 50Wh/mile for my commute, not unreasonable for something this big and heavy, compared to the CrazyBike2's similar usage.

It still is a little more than half a volt low in readings (regardless of which shunt it's plugged into), so anything with watts in it is off by that amount, and it still occasionally has a spurious speedo reading of 600MPH+, but seems to be always saving the data now. I don't know why it wouldn't save all the data sometimes (while still saving some, but not always the *same* parts of the data), and would others, though, so I also don't know what to look at to see what might be wrong (intermittently) inside.

I haven't yet been able to trace out all the stuff in the other CA's PCB to see where to hand-wire around the problems, to find out if it's really dead-dead (MCU/etc) or if it's just not getting power in there. When I do, if it's fixable, I can put it in parallel with the existing one and compare their operation/readouts.
 
Today I did some testing with a freshly-built (out of old cells but used a lot less than the original pack) 14s2p EIG NMC pack, vs the original 14s1p, and vs the A123 16s1p; just a couple of quick runs from 0-20MPH on each one.

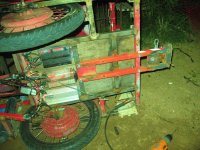
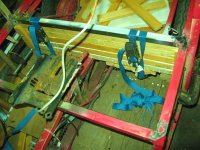
Test done with pack just strapped dangerously onto the frame (long busbars apparently meant to parallel it with two more) along with the other two, and only plugging in one at a time. All started out at 58v.
img_4077.jpg

The 14s2p EIG did a bit better than either of the others alone, but is about the same as both together for this kind of short run at full charge. Took about 7 seconds 0-20MPH; distance in the street from the corner of my front yard to just before the alley at the back. Have to measure that at some point. Run back was the same. No cutouts, several volts less sag than the other two.
57.4 vrest
52.5Vmin
0.240Ah
13.025wh
68.01Amax
0.086mi

The 14s1P EIG took about 8 seconds, going all the way past the alley to just after my back neighbor's yard start. Run back about the the same, maybe a hair more time and distance. Climb back up the gutter-curb into the driveway the rightmotor cut out from voltage sag.
56.7 vrest
48.2Vmin
0.230Ah
11.713wh
70.12Amax
0.085mi


The 16s1p A123 was just about exactly the same, but on the run back the voltage dipped enough to cut out the right motor somewhere along the way.
53.1 vrest
47.0Vmin
0.282Ah
13.907wh
72.29Amax
0.102mi

I also recharged and then tested both the old EIG and the A123 paralleled like I have been using htem on the trike, and they were marginally better than separate (didnt' cut out on return run/going into driveway), but still way more sag than the fresher 14s2p EIG and no better acceleration.
55.9 vrest
50.1Vmin
0.261Ah
13.411wh
72.01Amax
0.088mi
 
Removed the long busbars for the Kirin test trip, and just used the andersons bolted to the terminals.

All the data except the one I really kinda wanted to know is valid: The Vmin is not, because on hte way home the Briggs&Stratton keyswitch I've been using for years (since early in CrazyBike2's development) failed. This happened because I forgot to change it over to power only a relay (that would then handle the actual system current), so since I built SB Cruiser it's basically been having to handle 30A (when I had one motor) and 60-70A since it's had two motors, for peak, and continuous of several amps minimum, which it probably wasn't designed to do.

So it finally failed, just as I was accelerating out of a corner from low speed, and the system just "died", CA voltage slowly ramping down and fading out. Easy enough to wire around it, but that left teh Vmin at 15.6v instead of wahtever it actually was under load. I have replacements but they are all cheap crappy generic plastic Chinese ebike kit keyswitches, and I liked having the B&S normal-type key on my keyring, and couldn't put one of those kit keys on there (wouldn't fit due to the big plastic bit on them). Oh, well, I use what I've got so when time permits I'll figure out how to get the gorilla-glued-in keyswitch out of the toptube end, and replace it with one of the generics, and wire that up to just run a relay for power to the rest of the system (after I find my relays).


So the other stats from the test trip were:
58.0vstart
55.2vrest
4.170miles (I still think the wheel sensor isn't working quite right)
592MPH max speed (definitely not working right)
13.6MPH avg
18m20s triptime
5.418Ah
292.62Wh
70.8Wh/mile
-12Amin
72.67Amax

After getting home, and noting down the stats, I cleared the CA's trip stats and did some around the block riding with Kirin still onboard (about a hundred pounds now), and got a Vmin of only 52.1V, but the Amax was only 67.89A, so there might be more sag at the higher current seen on my actual trip.


Either way it is still significantly better than even with both of the other older packs paralleled, as the righthand motor never cut out on any part of the trip (which it usually does at least once on the way to work and once on the way home; more if I am not paying attention to where I give it throttle on the uphills or bumpy bits.

After parking it in the shed I hooked up the 2p Meanwell HLG-600h-48 PSUs to charge it (directly to the output SB50 connector as I don't have an XLR on the MW yet, and not sure that would handle the almost 25A they put out together). Took very little time to charge at that rate, and the Turnigy Wattmeter I'm using to monitor charging with for now showed almost 6Ah to charge, which lines up with the discharge reading on the CA, close enough.


As a side note, the trike now has 1984 miles on it since building it (assuming I've not forgotten any trips when it didn't have a CA on it).


Kirin didn't like the ride up there (and just about had to be pushed into the crate the rest of the way when getting in), but she loved meeting people and sniffing everything, and seeing the other animals (couldnt' take her near the mice or birds, cuz she thinks she has to attack those). She got lots of attention from everyone, though also had to keep her away from anyone with a small dog, including someone else that had a St Bernard mix puppy that must only be 2-3 months old, at most (couldn't have been more than 10pounds).

The puppy thing would've been ok except Kirin doesn't yet know how to play carefully; she's always sproingy and rough and mouthy, and doesnt' know her own strength. The small dog thing would probably not have gone well; she thinks she has to chase and pick on those. :( I don't know if I'll ever get her past all that.

Yogi was very jealous and sad when we left without him, actually whining and whimpering (which he doesnt' normally do) and super excited when we got back.
 
I had a thought about pack layouts.

So far all of mine are boxes because I had 50cal ammocans that the packs happened to easily fit in, and those cans are tough, water resistant, and portable.

My plan had been to just continue that basic format, though not in the 50cal cans because they're not tall enough for 14s2p, only 1p. While I could always just build multiple packs and parallel them at their outputs, it makes more sense to directly parallel the cells, given the hardware I already have.


So if I do that, but in sections, then string them together with ringterminalled wires, I can actually lay the pack out flat, and put it *under* the cargo box area (the part around the seat), rather than in it. Or I could build it into the fender area, in front of and behind the rear wheels, if I make the sections a few cells thicker and set them up vertically instead of horizontally.

If it's done under the cargo box area, I could use 2s2p sections, basically about an inch thick; a bit more. Seven of those should fit, three to a side, and one in the middle, for the same 14s2p that presently makes a pretty large block. Not sure there's room enough for many more of those secitons like that, unless I also use under the cargo deck area too. I'd like to avoid putting the battery weight that far back, though, as those wheels already have to handle all the cargo weight.

If it's in the fender area, I could get up to 8s2p sections, so I could have two packs, one on each side of the trike (one for each motor, ideally; complete redundancy). But that puts all the battery weigth on the rear wheels (along iwth the cargo), which I'd like to avoid.

If I can keep it as close to the middle as possible, that'd be great.


I could use a few segments in the frame longways/vertically, between the "toptube" and "downtube", which is about 1.5" or so maximum usable width in there. Unfortunately I also have the IGH in the middle of that space, so only one or two sets can go in there, I think.


But anyway, it's an alternate way of thinking about builidng the packs into the trike (rather than having them "portable" between different vehicles, like the older packs are).

Have to play around with fit to see if any of that is actually practical.
 
A few more things finished/fixed today:

--the top rack over the cargo deck has been resting on the dog kennel, cuz I didn't get the front supports built yet. Finished that today, except for finalizing the bolt thru them to hold them in place (probably unnecessary with the weight on them, but...just in case). Without the supports, it just slowly crushes the plastic kennel. :(

--The back vertical supports *do* need a bolt, because they ahave to be held up a bit so ti's easier for me to get the kennel in and out (right now it is quite a chore to do so...while that makes it pretty secure in there it also is way too hard for me to change it out when I need to.

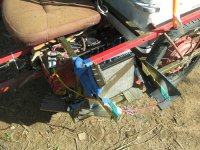
--I removed the other two older packs, and temporarily mounted just the "new" one where the old EIG had been. This takes nearly 50pounds off (though the new one weighs most of that, it performs better than both the others combined).

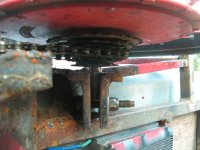
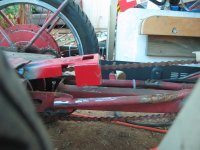
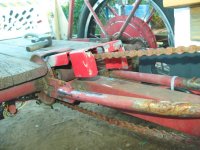
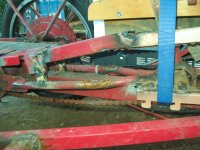
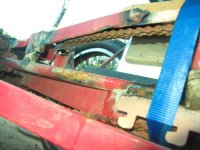
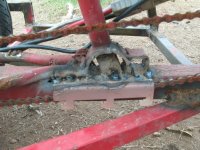
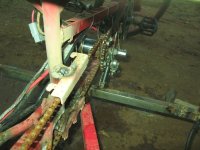
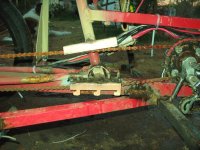
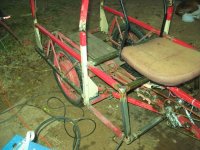
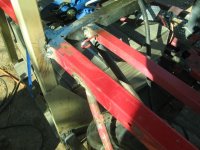
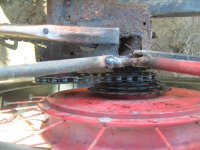
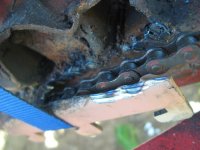
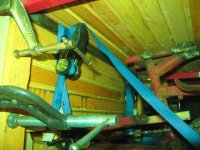
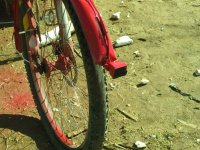
--Since I had two little brackets leftover from adding the front rack supports, I used them as chain guards on the segment of chain under the seat, welded onto the "downtube" and seatpost, so that I can clamp down battery packs or whatever else there without worrying about them pushing against hte chain.

--After I added the front rack supports, and raised up the rack an inch to clear the dog kennel better, the canopy was *just* too tall to clear the shed's doorway. :( So I had to take it off, then drill two new holes for it's support bolts an inch lower on the verticals of the rack. Now it fits fine thru the shed door, and also still sits a bit higher over my head. I'd like to add some sort of shaded sunvisor in front, that I can see thru but that is darkened for the few times I ride with bright sun low in the sky. (letting the canopy cover hang down a bit helps when stopped, but not while moving, and it blocks me from seeing traffic lights when waiting at an intersection (have to lean forward a lot or reach out and move it out of hte way).

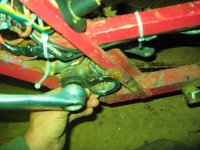
--Had hoped to take the old keyswitch out, but it's going to take some careful work to remove it intact (in hopes of repairing it), rather than just prying it out (which will totally destroy it).

Tomorrow I have a few too many things to get done (groceries, etc) to do much with the trike, so tha'ts probably all for this week.
 
Forgot the pics. :oops:

CHain guards:
img_4133.jpg
View attachment 9
img_4139.jpg
img_4138.jpg


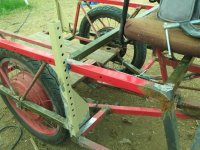
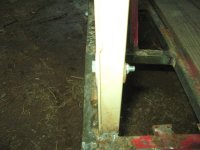
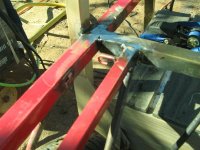
Rightside front rack support, which also acts as the front cargo area's rear support, and the fender's front support.
View attachment 7
img_4137.jpg
img_4140.jpg


Finished rack supports:
img_4141.jpg


bolt thru rear support
img_4142.jpg


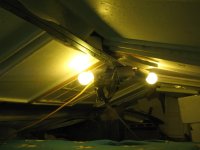
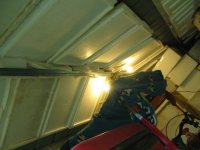
Whole setup, with flash
img_4143.jpg

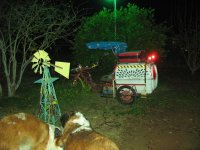
without flash, under the new yard light
img_4146.jpg


Grocery run info from today shows better wh/mile:

58v start
55.2v rest
51.1Vmin
5.257miles
266mph max :roll:
14.2mph avg
22m2s triptime
5.451Ah
295.03Wh
56.2Wh/mile
73.05Amax
1995miles total odo.

Kirin and Yogi were very bored wiating for me to note down the above info before unloading the groceries:


.
 
I've been wanting to build a charger into the trike (and CrazyBike2), and it would seem the Satiator would be perfect for this. I've already had a few concepts sketched up in the back of my mind, including one tha twould wire it up with a switch between the lighting pack and the traction pack, so all I would have to do is change the Satiators' profile and flip the switch to one or the other.

(would be really cool if the Satiator could use it's third wire to detect a resistance on a pack's connector and automatically switch profiles based on that, but it's not a feature).


But...it's such a useful charger for so many packs, and testing things, etc., that I've ended up never tying it down to one spot. As a result of moving it around a lot, and my sometimes-not-working-hands, I've dropped it a lot, and surprisingly the only thing wrong with it at this point is the output connector itself has part of the shell cracked off so that the cable no longer fully secures to the unit, and so I ahve to reseat it sometimes to get it to start charging.

The Satiators really are durable. :) :oops:

If I'd treated any other charger like that it'd probably have bits rattling around inside by now.


However, now I have some of those sealed/potted Meanwell HLG chargers, and they aren't as versatile as the Satiator, so I can mount a pair of them on the bike, and a pair on the trike, wired in parallel for fast cahrging of the traction packs.

I don't have a direct solution for the lighting pack charging, though, other than the satiator; I have an RC charger but it is far from weatherproof, or even resistant, and it "forgets" what it was set to sometimes, so can't be placed out of the way with just a remote "start" button wired to it.


Since the faster one charges a pack, the more it ages it (IIRC, anyway), and I don't always need fast charging, then what I will probaly do is to not directly parallel them, but rather put them on a switch, so only one is connected most of the time (for 0.25c charging) , but both are connected when I need faster (0.5c) charging. If I wind up making one pack for each motor rather than an overall pack (see later in post for reasoning), then I might instead setup one charger for each pack, possibly with a switch for "both on 1, both on 2, independent", so that either pack could be fast-charged, leaving the other as-is, if circumstances ever arose that needed that.


Anyway, I have been testing the chargers in parallel and they seem to work fine for fast charging at up to about 24A; they get pretty warm, but not hot. Should be suitable for the purpose, at least.


Mounting...while it's winter, the best place for them is probably inside the battery compartment, to warm the whole thing up. But that would be problematic the other 3/4 of the year, as teh chargers (and batteries) would probably overheat. Under the compartment, on the bottom of the trike, would probably work; I've had the motor controllers mounted under the cargo deck the whole time, and tehy aren't potted yet have been ok, (still don't know source of issue with the righthand one, but probably is not weather).

If I build a fan into the battery compartment, I could put the chargers in there anyway, and just open the compartment door(s) during charging...but if I forget to open them, or turn on the fan, results could be bad. I could make an interlock so that the chargers cannot be enabled until the doors are open and fan is on, but this adds complication and failure points.

I think for now, mounting under the battery compartment will have to do.
 
Was checking something else, and weighed the 14s2p EIG pack--it's 34lbs, call it 35. The old 14s1p EIG pack in it's 50cal ammocan is about 20lbs, but I didn't think the ammocan weighed all that much. Have to weigh it separately later to see...cuz the 2p pack ought to weigh double the 1p, as they are otherwise the same, right?

The A123 pack in the same kind of ammocan weighs 25lbs.

So all three packs together, as during the Kirin travel test, is 80lbs. Not quite as much as I'd thought.

But it's interesting, that the 2p pack weighs 10lbs less than the pair of other packs yet performs better. So if I use two of these (one for each motor) it's only 70lbs, so still 10lbs less than all three packs, and is 80Ah (about 4.5kWh) of 5c-capable battery.

At even the high usage of around 70wh/mile (lots of starts and stops with a dog in the back), that's still around 65 miles of range. At the usage I got today for work commute, only 49Wh/mile, it's over 90 miles of range. With less starts/stops I'd guess about 40wh/mile or less, and that gives over 110 miles of range, which at a 16-17mph average would be around 6+ hours of riding, more than I'd probably want to do all at once. :)

Even with half that pack, that's still anything from 30+ to 50+ miles of range, depending on what I'm doing/carrying, and where I"m going, and traffic patterns in the area. I think I can probably live with that. :)

And of course, if I need even more range for some reason, I can still put the old packs on there too, for another 35+Ah.


Also, while using the scale, I found the HLGs weigh about 15lbs for a pair.


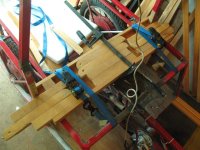
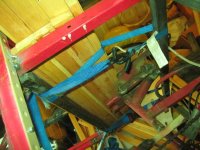
I remounted the pack on the trike today before heading to work; now it' in a styrofoam insulation box for the top of it, and mounted on wooden slats for the bottom, for now. It's actually now on it's side instead of vertical, and has all hte cell tops pointed forward instead of up. I was going to do that anyway just so nothing could be accidentally dropped onto the cells and do a plasmaboy thing, though the styrofoam box will prevent that, too.

The box is really just an experiment to keep the cells at a more constant temperature, and hopefully to keep them dry since it may rain in the next few days, and I do not yet have a waterproof permanent containment for them. Of course I could use one of he other packs, but I'd like to test this one further without swapping stuff out.
 
Last few commutes have been about 50-51Wh/mile, so still about the same as before the new pack, though it feels "better" (stronger acceleration, maybe?). No cutouts now, which does point to all the issues with the righthand controller being due to votlage sag below the controller LVC.


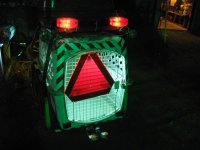
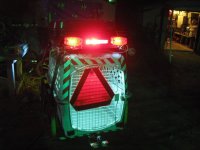
Thinking about sticking the SMV sign on the back of the canopy instead of the kennel door, so it won't have to be moved around whenever I remove the kennel to use it as a flatbed. But I think it's taller than the canopy so it'd stick up, and that's a problem cuz it wont' fit in the shed like that.

Could put it on hte lighting bar, but I'll ahve to put a "stop" on the trunk's lid so it doesn't crush the sign. This is the best option, I think.

If I could figure out a way to do it, I'd stick it at the back edge of the trunk itself, in a way so that it folds up as the trunk opens.
 
Have had a problem with the left wheel (old 9C) the last several commutes; the inboard (hollow) axle is deforming in the clamping dropout, so ti wiggles around in it. As that starts, then the outboard axle gets just enough vertical movement to lever the clamping bolt in the slot out of the way, and after a series of these events (which happen during turns because of sideloads on the wheels), the wheel moves enough for the tire to rub hard on the frame (has already removed the paint and made it very shiny, just from a total of a few seconds of that rubbing over the several commutes).

So I suppose my first goal in the trike stuff this week is to get the new spoke holes drilled in the MXUS 3k 45h flanges, and lace it up in place of the 9c.

I may have to go get a couple new drillbits as I already snapped the one I had that was just right and "new", and the others I have are old and mightnto be sharp enough anymore. Then setup a jig on the drillpress to hold the rotor, or better yet the axle of the whole motor so I can just rotate it and lock it down, drill, unlock, rotate, lockdown, drill, etc. Been pondering that part for the last couple days.

If I can't get that done for whatever reason (or if it turns out to not lace up correctly with the existing spokes), I'll have to pull the rear wheel off CB2 to put on the trike, until I can get it done, because the 9C is becoming unsafe to use on teh trike like this.

It is likely that I will end up just doing this, anyway, so that I can take my time with the 9C->MXUS conversion and ensure getting that done correctly, and still get all teh toher stuff done I would liek to finish on the trike this week. I can put a regular 20" wheel on the back of CB2 (I already have one built up for it, from the previous rim-failure issue), so that I will still have a backup bike.
 
So pretty much right after the above post, I went ahead and did the wheel swapout.

Of course, it wasn't anywhere near that simple, ane every little step took forever cuz there were always a bunch more to do before I could do it. I shouldn't have even started doing it, as tired as I was, but I jus didnt' want to wait and forget the stuff I wanted to do.

Sorry there's no pics at present, it was too dark to get the camera to 'see" anything well enough.

Getting the HSR3548 wheel off CB2 was relatively easy; decided to take the controller with it since the wires were soldered from motor to controller; easier to redo the throttle/brake/power than those.

Pulled the tire/tube off the wheel so it can go onto the regular bike wheel that will replace it for now, but havent' installed the tire on it or the wheel on the bike.


Next up, removing the 9C wheel from the trike; this also came off with the controller as it also has it's wires soldered.

Pulled the tire and tube off an dput it on the HSR3548 wheel.

Started to test fit the HSR on the trike, but it wouldn't quite fit in between the dropotuts. Had do do some adjustment of the dropouts and frame to get another couple of millimeters between them. Didnt' want to mod the motor like I did the MXUS because this motor is going back on CB2 afterward, and while I can re-mod the trike frame anytime, it's hard to unmod a motor axle. ;)

Eventually, after maybe an hour I got it to fit well in there.

Next up was to swap out the freewheel, cuz I'd thought I'd remembered the one on the 9C being an 18t, and the one on the HSR is a 16T. I'd already (thought) I'd had the problem same way with the MXUS, and would need a half-link to be able to install the chain with the wheel all the way into the dropouts, for a 16T.

After something like another hour of working on it I eventually got them swapped, and re-test fit the HSR to check teh chainline.

Which was off by the width of my thumb. :(

Argh.

No way to fix that with spacers, as there's not enough threads on the cover to do that; ther'e be an airgap between freewheel and cover.

Not enough space to use the old threaded-thru freewheel, a BB cup threaded into that, and the new freewheel on the BB cup, either.

This is why I moded the axle on the MXUS to extend the flats on the inboard (freewheel) side, though I didn't remember that till that moment.

Alternatives...modding the axle is out. Major reconstruction of frame to make it fit is out. But maybe using a multispeed freewheel, reconfigured so the 18T lines up with the trike's output sprocket (which cannot be moved). I had a 6speed already off a wheel, so I made a chainwhip witha lenght of chain and my vise-grips, and used a clamp to secure the freewheel body to the worktable, and removed the lockring.

I swapped the 22t and 18t and reassembled the fw, installed it on the HSR, and test fit the wheel again, to find that I'd somehow screwed up and swapped the 22 and 24 instead. :roll:

So I took it all off again, but I can't take the freewheel off now (to use the clamp-body-tobench trick) because I can't find my splined tool for that--I wasted over an hour looking. :roll:

Had to make another chainwhip, but couldn't find another set of visegrips that were strong enough to hodl the chain like that. I ended up figuring out that a set of channel-locks I have ahppened to work, gripping across four teeth on the 14t lockring. Used taht with the first chainwhip and got the lockring off, and reasembled it in teh correct order.

Re-test fit again, and then realized that the line up is still screwed up, so I took it
back off and apart and reassembled it back int he original order, and re test fit it again. This lined up pretty well, but the chain didn't fit aroudn it with the wheel in the dropouts, which confused me.

Taking the wheel off I compared freewheels to each other, and found I'd screwed up, and the freewheels on the HSR and 9C were the same, 16t, not 18. :( The MXUS had 18t, and *that* was the one that was wrong. :(

but then realized i can't just swap the 16t with anything else, because it is a slightly smaller ID than the rest of the FW. Of course. :roll:

I might be able to grind it...but not very precisely so it will be out of round, at best.

So with a big sigh and slumping shoulders I reassembled it and reinstalled the wheel, but it will not go all the way into the dropouts using the 18t, and if i do that anyway, it requires a halflink in teh chain that i dont' have. :(

There's about 10-12mm space...and I expect that no matter how tight I make the axle nuts, even with nordlocks, and the clamping dropout on the inboard side, the wheel will still move at hte axle under side loads like the 9C, making this whole waste of time...a waste of time.

The chain will prevent ti from moving up on the inboard side, at least until it gets so much stress it breaks. Bt doesnt' do anything on the outboard side.

So I'll probably need to fill in the gap with something, probably tackwelded in place.


Anyway, I pedalled it around the yard a bit and it worked fine, was actually a tiny bit easier to do it since the larger final sprocket lowers the gearing a bit.


So....for motor power test....cant' do it yet. I forgot that the HSR wires come out the left side, which is the outboard side of this side of the trike. That means the few-inches-long phase/hall wires on the soldered-on controller force me to put it on the side of teh trike, whcih isn't very safe. I'll have to splice in some wire length between the motor and controller for halls and phase, so that the controller can go safely under the trike. :/


Since i'd already screwed up pretty much every step of the way so far on this, I figured I better wait till tomorrow to do this part, or i'll blow stuff up. Parked trike in shed out of the misty rain (oh, did I forget to mention it kept sprinkling on and off teh whole time I was doing this?).


Bleh. Let's see how things go in a few hours once i've had some sleep.
 
Today's list of stuff that got done:

-- putting the trailer hitch back on
-- adding a chainguard so cargo/etc can't push on the chain (not that I use it much but if I need it I will really need it to be clear)
-- wiring up the temporary left wheel/controller
-- reconnecting the reverse switch on the right motor (doesn't have reverse on the left)
-- swapping out the 3rd brake light from the busted-up old HF LED one to a nicer-looking (but incandescent) one probably from a car
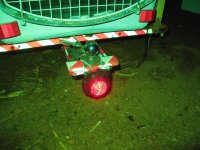
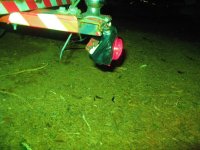
-- putting the HF LED light with a red lens cover to make it "stick out" and be visible from the sides, down on the bottom of the trailer hitch boom.
-- adding a battery cutoff / "keyswitch" that can actually handle the current of the whole system

Some pics of the chainline/axle stuff from yesterday:
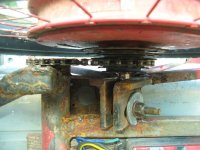
img_4152.jpg

img_4154.jpg


I wired up the controller to the trike's power and throttle/brake, and rewired to the motor itself to get longer wires, so I wouldn't have to mount the controller on the side of the trike like this
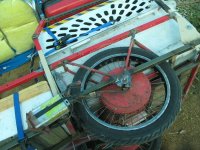
img_4150.jpg

img_4151.jpg


First were the halls, using part of an old cable from the original Fusin kit I bought from Dogman years ago, since it had six wires in it (originally for throttle plus 3speed switch). This gave me a few feet of wire to work with, enough to get around the wheel and have some slack to position controller in center of cargo deck between the other two. I left the original left motor's controller in place, in case it is needed as a spare for either of the others, for now).

Since the phases actually had andersons under the wrappings (I'd forgotten this, and thought they were soldered cuz I *had* done that on the front wheel), I pulled the phase wires plus andersons off an old Crystalyte 20A controller and spliced them onto this controller's output wires, in place of the last inch or so of existing wires plus andersons; this is about the same length as the halls now.
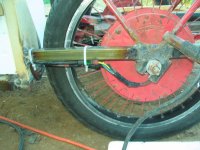
img_4155.jpg


Bolted the controller to the deck underside between the other two, and wired it up to the ebrake/throttle connections the old one used to be hooked up to.
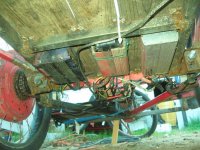
img_4156.jpg


First test did not work, acted like I had a wrong combo, which wasn't possbile because I verified via camera that the wire colors are the same at each end of the splices. Well, the only connectors are the andersons on the phases, and I found that the green phase wire's contact was not fully clipped into the housing on the controller side. Fixed that and no more problems.

Spun up the motor, and works fine off ground, but the chain between mtoor and IGH also spun up :( meaning the freewheel isn't freewheeling. It should, because I made sure to put a spacer in there (made of wire) and it did work last night when I pedalled around, and hand-rolled it while off the trike. So I figured some of the wire must've come loose and gotten between the back of the sprockets/body and the motor cover. Since it's just wire, it should be easy to remove, but there's no tools I have to get in there, other than maybe a hacksaw blade, and rather than risk damaging something I figured a better way. Or at least, easier.

I used the makeshift chainwhip to hold the largest sprocket of the freewheel in place, and then engaged the motor, slowly at first, then when it freed up I did full throttle until the resistance went away, as it had worn thru the wire. :) One more problem fixed by brute force. ;)

Test rode it around the block a bunch of times, no problems. Current draw is up to about 85A, with the HSR / 40A controller pulling about 50A peak on it's own, and since the halls are acutally used by this controller (unlike either of the orignals on SBC), it starts smoothly from a complete stop, no jerking, etc. Accleration is a bit quicker, but not a lot; gonna need more torque than this motor/controller can provide. :)

I did watch the current while accelerating with just this motor, and interestingly it peaks about halfway to 20MPH, then falls off. It takes over 20 seconds to get there with just this motor, though. (similar to the X5304; both better than the 9C, at least).


WHen I got back to the house, I had some trouble with the gate again; it really needs fixing...so I got the trike in the yard, and spent an hour or so fixing up the gate; tha'ts over in the housefire/blog thread in today's post there.

Oh, and while I was doing the motor/controller wiring, I added some wires to carry the reverse-signal for the rightside controller, so I can now backup under power again.

And I used an old (US General?) battery cutoff, which I think AussieJester sent me years ago, and has only been used as temporary experimental stuff until now. I think Im going to keep it on the trike permanently, though it will probably not stay where it is (my toes will hit it getting on and off sometimes; that's how I broke my first headlight switch).
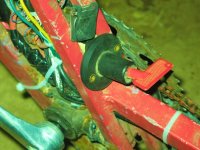
img_4184.jpg
img_4185.jpg

Then I built a chainguard for the top of hte chainline, to prevent cargo (or the dog crate) from rubbing on the chain, cuasing it to be harder to pedal if I do need to do that. It's made first of a thick hard steel T-plate used to connect endcaps to aisles in retail; happened to fit perfectly to cover the shaft/inputsprocket area of the axle, and will not bend from anything I'll carry there. Then a 1" square tube with relatively thin walls, and one side cut away, with that side pointed down and welded at it's ends to the Tplate and to the other guard at the seatpost.
View attachment 33
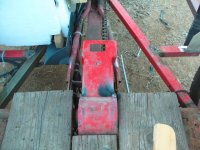
img_4158.jpg
img_4159.jpg
img_4160.jpg
img_4161.jpg
img_4162.jpg


Kirin stayed out there with me even when it got cold (<50F) after sunset, but Yogi got bored and went in except for when other dogs would bark, or loud cars/trucsk would zoom by (cuz he HAS to chase them or explode :lol:).
View attachment 27
img_4164.jpg


At one point Yogi decided to get in the trike's kennel, and Kirin thought it'd be a great time to corner him to play
img_4174.jpg
img_4175.jpg
img_4176.jpg
img_4177.jpg
img_4178.jpg
img_4179.jpg


Removed the HF LED brake light, and replaced it with an incandescent automotive 3rd-brake-light, whiclh looks a lot better and is about as bright, but mroe surface area. It's still just ziptied on, till it's tested thoroughly, then I'll bolt it on.
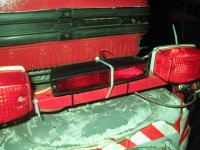
img_4171.jpg
img_4172.jpg
img_4173.jpg


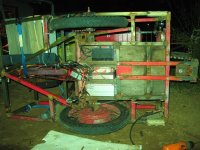
Trailer hitch was easy; I just had to trim off the front edge (so it wouldn't overlap the center controller (which is for the temporary left motor)), and drill a new set of rear holes in it for the existing bolts in the rear frame edge, then drill new holes in the cargo deck/frame up at the front edge of the hitch bar for bolts to go thru it's existing holes there.
img_4167.jpg
img_4165.jpg

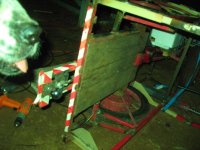
I used carriage bolts, since the deck is wood they'll hold them in place, and have rounded tops that will let the cargo slide over them without catching on them, wihtout having to be recessed.
img_4168.jpg

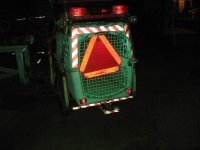
It's still got the reflective tape on it
img_4169.jpg
img_4170.jpg


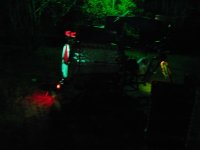
The HF LED light is just ziptied to the bottom/back edge of the hitch bar, and has a lens from a "first alert" LED flasher beacon taped over it. It was used because it is meant to spread the light in the beacon to as wide an area as possible, and that's what I want on there, so it's visible from the sides as well as behind, and will kinda light up the area under hte trailer itself, too, when it's attached.
img_4186.jpg
img_4187.jpg
img_4188.jpg
img_4189.jpg
img_4190.jpg
img_4191.jpg
img_4192.jpg

It was too cold (about 48F, it's 45F now, about 3 hours later) at that point to do anything else; my hands hurt too much to hold tools anymore. But I pondered and took some pics for ideas on where to put the AC-input plug for the future onboard chargers. First candidate is right under the seat, and second is just under teh cranks.
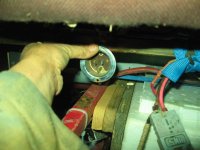
img_4181.jpg
View attachment 10
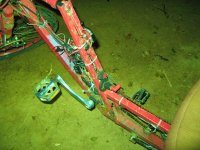
img_4183.jpg
 
The freewheel-not-freewheeling problem came back today, and while it did "fix" for a minute with teh chainwhip stuff, it came right back and didnt' fix after that.

Since I don't know where the fw removal tool is (wasted another hour looking for it again, eliminated a bunch more places it could be), the best option I have to deal with it and still have a pedal drivetrain is to tension up the chain from the IGH output to the trike's transfer axle, so it doesn't bounce around while riding at cruising speed and derail, or jam and break.

Tensioning it up was easy, by loosening the IGH nuts and pulling it forward and retightening the nuts. However, doing this caused the bottom of the chainline (the part that is under tension when backdriven by the motor in this failure mode) is riding up on the bottom of the chainguard I made. :( I cut away over half of the guard's top section, and *still* had the chain rubbing hard on it. I cant' see the full chainline so I can't tell how far back I'd have to go. I guess I'll have to cut the guard off and reweld it a bit higher. I'd rather find the FW tool and fix the problem at it's root though.

While dealing with this, I decided to undo my raising of the left side outer rail, originally to clear the top of the tire. This is no longer needed if I use the 18T sprocket or freewheel, because the wheel itself ends up enough lower that it easily clears the rail anyway, due ot the "shorter" chain (shorter distance between centers of axles), pulling down the wheel in the diagonal dropout. (this also pulls the wheel *forward* by that amount, which misaligns the other wheel's axle to it, but if I have to I can fix that by moving that wheel forward (cutting dropouts off and rewelding them)).

Putting the rail back down makes the trike's cargo bed symmetrical again, so I can put stuff across the rails if I have to and still have it be level. That's the main reason for doing this.

Secondarily it looks better and is easier to cover up with the wood deck/etc.

I've also decided that rather than cutting, drilling and welding on bunches of new tabs to screw the boards to from underneath (like i did with the orignal deck), I'm just going to screw down thru the boards into the deck frame itself with self-tapping machine screws. The screws themselves actually came out of the signs these baords are from, and were used to screw them into thick metal shelving frames, so I know they can drill into the thinner tubing. This takes two screws per board, and I have about 20 pairs of these screws, so I have enough for the deck and a few others, but not for everything. So some of the stuff will need a different method of securing it.


Next up, finishing the fender frames so I can re-deck the cargo area. I did it a bit differnetly than previously, putting the triangulation bar on the inboard side from the crossbar behind the seat down to the dropout tops. On the outboard side I left it as is, where the top end is a few inches to the rear of that crossbar. Added a 1/2" square tube (as before) for the inboard top rail but it runs from that crosbar back to the rear of the fender, rather than just at the top of the wheel area. This makes more sense structurally, and doesn't really lose me much cargo area, and not in a really usable shape/area anyway. Makes it a lot easier to cover over, too, and I can put other stuff in that area (maybe the chargers?).

It's all just tackwelded together, in case I need to change something. Before I actually install the deck/coverings, I'll need to fully weld it all together, and grind/clean up the welds on the deckside faces of the tubes so the baords all sit flat.


The styrofoam battery box didn't hold up; I could see places where it was cracking from the stress of the strap on it, so that means it is not going to keep rain out. (might actually funnel it into it).

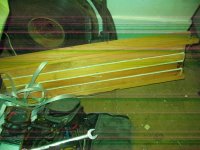
So I took a couple of the wooden "trays" and verified that A) they'll stack up one over the other to make a box, and still fit into the frame under the seat, and B) the battery will fit in them. This isnt' waterproof either, or evne resistant, but I can wrap the battery in some plastic bags before packing it in there. (I could've done that with the styrofoam box, too, but that is just going to keep breaking further until pieces come off, so no point...and it looks really crappy while the wooden box doesn't).

I wont' need this permanently, but until I can build the box around the cargo pod / battery compartment area and waterproof that, it should keep it secure and dry.

Didn't get anything else done, hopeing tomorrow goes better.


Today's weather was mostly a replay of yestrday, except they said it was going to be mostly sunny today, yet we didnt' get ot see the sun at all for most of the day, other than around an hour or so after 3pm. Before and after that it was heavy to moderate clouds over teh whole sky. Once it got dark it cleared up and got cold real fast (faster than yesterday) so I had to come in even sooner. :(

Suposed to be sunny tomororw too; we'll see about that. :/

After that we're up for rain at least the next three days (40-100-40, thu-fri-sat). Not gonna get much done on the trike outside that way, so may ahve to spend part of tomorrow clearing out enough space in the shed to work on it in there.

Unfortunatley the 220VAC for the welder won't reach the trike shed even with the extension; might barely reach the shed under the big mulberry, have to check. If so I guess I'm clearing that one out (all I can do is just pile the stuff outside of it, as there wont' be enough time or energy to move it to a different one).

Alternately I can save the time I'd waste doing that and just use the 115VAC welder, which works but isn't as good as the other one (and my welds tend to suck more with it). It's probably a better use of my time. ;)

Still ahve to cleear out a fair bit of stuff from the trike shed, that cant' just sit outside, but I can toss it into the other shed that has the broken roof, into the corners away from the ex-skylight panels (which are now holes), as it will be ok with that.
 
First, pics from yesterday that I was too exhausted to sort thru and post last night.

(I didn't get in from working outside until after midnight, IIRC, other than feeding the dogs; it's all kind of a blur, clearing out space in the shed to work and not just park the trike, and while I was at it doing the insulation of the shed a bit better, and making a trike-sized pile of stuff in the yard of things I saved from the house after the fire but haven't touched since getting back to the house after the rebuild, so I can get it tossed, recycled, or given away).


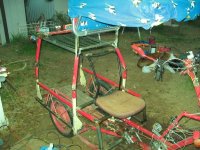
The new fender frames, from a few angles
img_4193.jpg
img_4194.jpg
img_4195.jpg
img_4196.jpg


Some detail shots, showing the different angles/lengths of the "stays" on inbaord and outboard sides of the fenders:
img_4197.jpg
img_4198.jpg

I forget what I was showing with this. Chainline?
img_4199.jpg


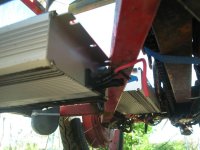
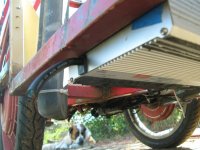
These show a couple of possible charger placements. There isnt' enough room in front of the wheel inside the fender frame, so that's out. But there *is* space forward of the transfer axle, under the battery/tool/cargo/etc compartment(s), in two possible spots. The first would use some of the space that is actually "inside" the compartment area, above the frame, but this probably won't work to make an easy-to-build compartment box that's weather resistant.
View attachment 16
View attachment 15


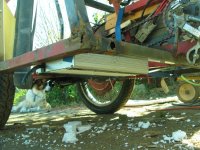
But this spot, under the compartment floor, would work fine, and put the 7lbs-each charger weight even with mine on the seat, and farthest outboard which can help a bit as anti-tipping mass. One would go in teh ssame spot on each side. Since they are heavy, I will not only bolt them thru their flanges to the compartment floor, but also bolt a strap across the center of them to the floor, so that there is not as much stress on the aluminum flanges when I hit potholes.
img_4203.jpg
img_4204.jpg
img_4205.jpg
img_4206.jpg


This is the chainguard modification I tried to clear the rubbing when backdriven by the stuck freewheel
img_4207.jpg
View attachment 9


I had a "brilliant" idea when taking a picture of something else. In htis pic, where the cable lock is wrapped around the bend in the tiller tube, I could put a hinge in the tube, so I can fold it up and forward out of my way both when getting on and off the trike, and when working on stuff where it's in just the right spot to bash my head on repeatedly. :/
img_4209.jpg
At some point I'll be replacing the tiller tube and headlight/etc assembly anyway, (cuz it's all fugly with the repairs from when it broke and I was in a hurry to fix it) so when I do that I can test this idea.


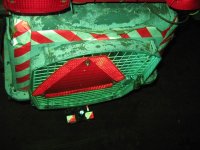
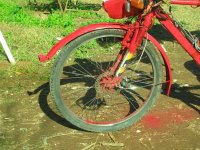
A shot of the trike with some crappy red and white paint over the new welded up areas and old worn spots, etc. Not a final paint job as I only had part of a can of each, but it's a start to show the colors, and partly protect the bare metal from rusting.
img_4210.jpg
img_4213.jpg
Kirin had to come investigate, of course
img_4211.jpg
Then was distracted by Yogi barking at some people in the alley doing stuff they shouldn't be
img_4212.jpg


A comparison shot for size, with my 26" Nishiki bike, first beside it and then with the front wheel off in the cargo area
img_4214.jpg
img_4215.jpg
View attachment 1
img_4217.jpg

Then it was time to meet up with Cvin for some stuff on her fatbike.
.
 
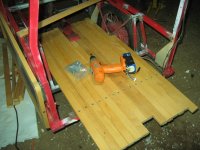
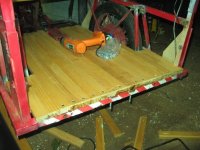
A few hours later, it was time to start the new deck. This meant taking off the hitch and the controllers from the old deck boards, and mounting new boards (thicker, but narrower, and this time with very little gap between them; just enough to let water run between, since the gaps I'd left before were too small for running straps thru and big enough for stuff to fall thru or get stuck in (like doggie toes :( ).

I just screwed the boards right to the rear frame tube, all the way thru both top and bottom walls, because that's the screws I have available that are self-tapping thru metal; just long enough to reach thru and leave the self-tapping part sticking out the bottom and catch a couple threads in the tubing wall. I'll grind those off later to prevent accidents since I'd eventually forget they're there. ;)
img_4218.jpg
img_4219.jpg
View attachment 1
img_4221.jpg

Since I can't seem to measure and cut things and have them line up when done, I just left them all long and then took the saw (hand saw, cuz power saw won't fit due to the uprigths) and cut them off even with the frame.

The end pieces at the sides, short leftovers, are actually press-fit between frame and the other boards so tightly that they dont' need screws. If I ahve troulbe with them later I'll fix that.


At that point I was too cold and my hands hurt too much to do any detail work, so I went in to feed the dogs and then came back out and started clearing out the shed so I'd have a place to work when the rain started the next day (today). By the time I was done with that I was wiped out.
.
 
Today's work was all done in the shed, which was at least 10F warmer than the outside thanks to the insulation and the heat from the lights, myself, and tools, even with the door partway open so teh dogs could come see me whenever they felt like it (whcih was a lot more often thna I'd expected; Kirin kept coming inside to sleep, even thru powertool usage).


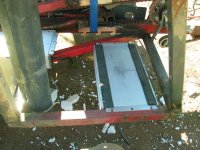
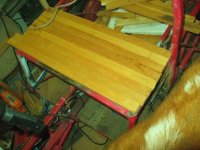
First up was to make floors for the compartments. I didn't have enough of any one material to make them both the same, so the righthand one is a bit of 1/2" plywood, and the lefthand one is the old 1/2" boards from the old cargo deck.
img_4223.jpg
View attachment 16

The wood is screwed down from underneath, thru holes pre-drilled in the frame, because A) I didn't have enough of the long self-tapping screws, and B) I coudln't get the powerdriver in the space of the frame to hold them straight down while screwing them in. Doing it from underneath was "easy" (though I had to tilt the trike and lean it against stuff in the shed, and work under it, as I couldn't roll it on it's side like I would if it were in the yard, due to the rain).

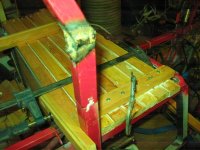
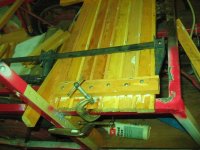
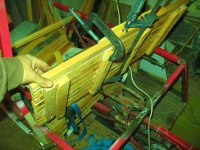
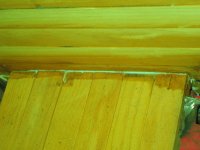
The top of the compartment area would be a fair bit of trouble to build; originally it was going to be two independently covered boxes, but this wastes some space I might be able to use later on, and makes it much harder to build the top and seal it up against weather. I started to build it this way, though, and clamped toghether the rear part of it that is still long continuous boards from one side to the other. They are glued together, then clamped.
img_4227.jpg
img_4228.jpg
As before, they are fit to the frame and secured to it so they dry in the shape the frame is, as the frame itself is not perfectly straight anywhere. :/


While that was drying (moved elsewhere after dried enough to remove some of the clamps)
img_4233.jpg
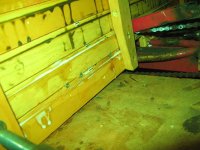
I started on the rear of the comparments, which is all just long boards down to just above the deck level itself, the bottom one notched to clear the chainguard. The ones below that will get added after that part is dried (also is glued together and clamped). But this is also not screwed down anywhere, it is simply pressfit into the frame; it should be fine this way. If not, I'll add screws later.
img_4231.jpg
img_4232.jpg
img_4238.jpg


At this point I decided to remove the whole seat mount and just do the compartment deck as a single piece, and hinge it (at the back probably), and bolt a seat to the deck. This simplifies a whole bunch of things about the compartment. It also adds some more work on removing the rest of the seat support frame and then determining if I need a brace from the former seatpost area to the crossbar at the front of the compartment (which the seat used to provide). Probably not, but we'll see.
img_4234.jpg
At first I was just removing the seat mount bracket,
View attachment 8
but then decided I won't ened the othe rtubng under it so it will go away later. All that will stay is the stuff for the chainguard to mount to (or I'll make a different guard).
img_4236.jpg

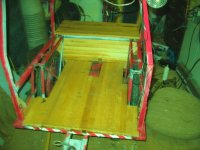
So now the deck will be about like this, with whatever seat on it
img_4237.jpg
I havent' decided on the seat yet, becuse the old one was worn out anyway, and needs new padding and covering. Easier to just replace it as it was only temporary anyway (couple years out of it, though, plus time on Delta Tripper before that). Several ideas, including just making this a bench seat, so that if a passenger is comfortable with my arm in front of them I can sit to one side and control the trike, while they ride "shotgun" to my left or right. (probably right, as then I can still easily see the cars passing me on the left).

Not that I'll probalby have many passengers, but hey, why not have the ability? ;)


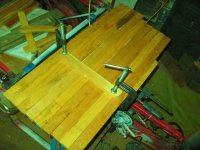
Added the rest of the boards to the seat deck, now it is clamped and drying over night:
img_4247.jpg
img_4248.jpg
img_4249.jpg


So at this point I have part of a box made; here it is from the inside, to the left of the trike. img_4246.jpg
and it'd be hinged to open like this:
img_4250.jpg


Some of the doggie pics, and the "doggie door", and the cieling/etc insluation, and the lights (with a small circulation fan to get the warmth thru the whole shed):
img_4229.jpg
img_4230.jpg


img_4243.jpg
img_4242.jpg

img_4244.jpg
img_4241.jpg

Rest of the time they did the usual--tugowar with sticks, or roughhousing, or chasing each other, and then having naps...even when it was raining they'd just lay there, until it got too heavy and they'd get up and come in the shed with me.
img_4224.jpg
img_4225.jpg
View attachment 21
View attachment 20
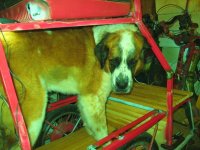
View attachment 19


.
 
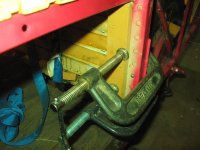
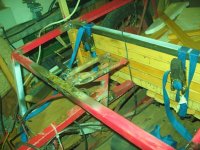
THe clamped stuff dried ok; surprisingly the cargo straps used as clamps worked pretty well. THey actually give more clamping force than the regular clamps, because they have ratchets I can lever against something to force engagement, while there's only so much radial force I can apply to the threaded clamps without stripping the threads. I can actually crush the wood with the cargo strap clamps. :oops:

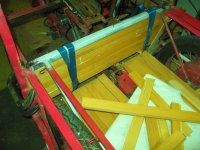
First up was cutting off the old seat mount, just cutting the seatpost off at the top of the "toptube". This makes the space inside larger and much easier to access and use.
img_4252.jpg
View attachment 7

Next up was finishing the rear wall of the compartment, basically like laying a brick wall but upside down, gluing and clamping each board to the next one up, compressing against the top rail (because it is easier to do that than any other way I could come up with).

I set the top cover on the area, and got some pics of the setup as it is now, gives a better idea of what it will look like when done. Kirin helped with the pics by playing cargo while investigating the new stuff. :)
img_4254.jpg
img_4255.jpg
img_4256.jpg
img_4257.jpg


I also fixed the otherwise-unsecured front ends of the deck boards to the back of the compartment rear wall, gluing it and screwing from the inside of the compartment into the ends of the boards. It's not the best way to do it, but was easy to do, and if I need to I'll add further support later.
img_4258.jpg
img_4259.jpg


Then I started adding the boards for the front wall, done the same way as the rear. I got four boards before the rain and wind just made it too cold even in the heated shed.
img_4260.jpg


Actual rain today, sometime after midday; just drizzle before that like yesterday. Yogi didn't appreciate the noise on the shed roof so he preferred to stay in the rain itself and not visit me during the more-than-drizzle times.
img_4251.jpg

Kirin kept coming in to say hi,
img_4265.jpg
but mostly she prowled around in the rain or just laid in it (like Yogi), even when the rain was very heavy. Yogi didnt' like the really heavy rain so he'd go inside for that, and come out when it was over.
img_4262.jpg

img_4267.jpg

So now they're drippy dogs,
img_4271.jpg
laying with me on the bed as i eat hot soup, cuz it got too cold out there from that heavy rain and the breeze and wind, even in the heated shed (I even had to put a small space heater out there just to keep it closer to 55F, but even that wasnt' enough after the big rain). Hands hurt too much and culdn't hold onto powertools safely and had to come in. (gloves all get in the way or risk catching them in the tools).


/
 
Front, back, top bottom, and right side are built (not totally finished). Just one more side to make for the cargo compartment, though I still have to finish the bottom edges of each wall to prevent ingress there, as a whole board won't fit in that gap, so I have to cut something that will fill it (preferably that I have to tap into place with a rubber mallet, so it seals better and also compresses the boards above more, ensuring a better fit all around).
img_4275.jpg

Added a temporary seat from a disassembled desk chair; it's seat is just strapped to the deck with a cargo strap, and the back's supports are screwed to the deck to keep it from falling off but it is really held in place by me resting against it, pinning it to the rack behind it. I ddint' try strapping it to the rack because in it's present mode it can simply all be lifted off the cargo compartment / seat box, to allow access to the inside of that.
img_4278.jpg
img_4279.jpg


Unfortunatley I didn't get enough stuff done soon enough to make it over to Jabotical's to deliver a new (used) front wheel to replace his bent-from-a-crash one, but he'd already ordered a new one anyway, due within a week, so he'll probably get that one before I could get over there (since my next days off don't coincide with his).


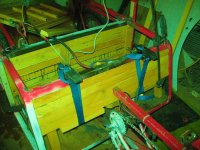
So I continued working on the trike, and got the chargers (2 HLGs plus the Satiator) bolted to the cargo/seat box floor on the left side, and two of the batteries (14s2p x 2, for 80Ah total, or about 4kwh+) stacked on their sides in the righthand box area.
View attachment 11
img_4281.jpg
img_4282.jpg


I tested the whole thing for a couple miles ride around the neighborhood, at 15-18MPH, with one short run at 20MPH...but the noise at 20 from the chain being backdriven is abominable, and sounds like a small gas engine underneath me. :( It's pretty bad even at 18, but much worse at 20 for some reason. At 15 it's almost tolerable, but wouldn't be for long. To actually use the trike with the FW problem I'd have to take the chain from the motor to the trike's output sprocket off, and only put it on if I couldn't use the motors for some reason and had to pedal home.

It takes over 80Wh/mile for this ride, probalby partly due to the many stops and starts, because of the heavier weight with the extra pack on there plus the chargers (total of probably 35-40lbs more).
img_4283.jpg
View attachment 7
img_4286.jpg
img_4287.jpg
View attachment 3
img_4289.jpg
img_4290.jpg
img_4291.jpg


Then I broke the main chain, between the IGH and the trike's transfer axle, because of the nonfreewheeling freewheel. I was running the motor off ground so that I could test to see if there'd be any problems just running it for a good while, when after a few minutes I began to hear a noise I didn't like, and before I could reach the throttle to turn it off, the chain snapped. Not surprised, as I was running it like this to ensure if it did fail it'd do it at home and not on a ride.
img_4292.jpg


So I will definitely have to find that stupid splined freewheel removal tool. After it got dark out there I spent almost a couple of hours more searching for it. Found some other stuff including the hinges I want to use on the compartment cover, but not the tool. I still have a few places to look, but I think it's a better bet to just go get a new one.


Before I do that, I'm going to get the drill press setup and drill out the new smaller spoke holes on the MXUS, and get it laced up using the old 9C wheel parts. Then I won't need the freewheel tool to use the trike, at least, though I'll still need it to fix the FW problem on the HSR3548 before I put it back on CB2. (though it matters less on CB2 as I can't really pedal it anyway, as I ahve to pedal so slowly taht I can't really balance it at that speed).

And Yogi said it was boring.
img_4285.jpg
 
Got the left side cover almost done, ran out of wood glue and the sanding belt broke again (I've been just regluing it but without glue I can't; wood glue is the only stuff that holds it for any length of time; need the glue for the wood itself too).

So it was time for a trip to a store to go get some glue, and while there I also got a pack of new belts in a finer grade (120 vs 50) so I dont' take off several millimeters at a stroke :lol:

Figured I'd get more red paint while there so I could finish up the paintjob, but there wasnt' any of the cheap stuff in red anymore at any place I went. They all now only carry white and black, no colors. Had to get the more expensive stuff, which I've found generally isn't that much better than the cheapest, but costs four times as much. :(

Since it was on the way home anyway, I also stopped at Gordy's Bicycles to see if they had the freewheel tool (no but they'll be getting some eventually), a half-link (no), and a master link for BMX (no). But they did have a heavy-duty BMX type chain that didnt' cost a fortune (though $13 is a lot to me), and it does have a master link in it, *and* though they didn't know this and I didn't notice till I got home and unpacked the stuff from the trike, it also has a half-link. :) They also took the master link out of another box for me, too, since I needed two and they didnt' have any others.

The chain itself is not long enough by far to make the whole chain for the trike, but it is enough to make a new one for the last stage, and have plenty left over for adding to a second such chain I'll get later on to replace the worn old stuff I have from the IGH to the rest of the trike (since this is the part that bears the most torque load, other than the one from trike to wheel). For now I'm just going to repair the existing chain with some new links in the damaged area, and make the new last-stage chain. Both of these will get master links, and the halflink will be used on the last-stage chain if I need to for the smaller freewheel I think I have on the MXUS.


I didn't get all the trip data, becuase the CA "forgot" some of it (after having saved it correctly before, then about halfway thru at one of the stops I powered it off for, it didn't remember any of the previous stats). So I only have data for about the last half of the trip, though the data is pretty much the same as what I'd seen up to that point.

57.7vstart
54.4vrest
50.8vmin
11.14miles (around 20miles actual total trip distance)
14mph avg
47m33s (closer to 1.5 hours actual triptime)
11.58Ah
56.7wh/mile
631.89wh
-21.9amin
83.27amax

Total odo now 2036 miles on the trike. About 30 miles total on the new configuration.

It was cold and windy for teh whole trip, though it had been sunny before that and it is getting clear out there right now (but is almost sunset so is not "sunny" and is getting even colder), so I had to come in and warm up and rest my hands before I try to tackle anything else (probably starting iwth the MXUS drilling/lacing since I can't take the FW off the other motor to fix it's problem).
 
Recharging was 16.98Ah, 1057Wh, according to the Turnigy Watt Meter (didn't charge thru the CA due to the XLR charging plug on the trike for that; forgot I could've used the SB50 that the controllers are powered from. ).


Not sure if the TWM is not fully accurate vs the CA, as it should've taken closer to 20Ah+ to recharge, based on the part of the data I do have, or if I am misremembering how far I had already gone when the CA forgot the data before that point. I'll have to compare the CA to teh TWM by putting them in series for a discharge or charge test and see.
 
Lots of rain yesterday, and cold, so didn't get as much work done as I wanted to, but I reconfigured the battery back to two independent 14s2p packs, so the weight can be distributed equally on both sides.

I found while on my long trip the other day that with the giant pack in the right side all the way out to the edge of the box, righthand turns were very stable, even at nearly 20MPH, but lefthand turns were quite difficult to not tip even at 15MPH.

Splitting it evenly between the two sides should balance the turn response.


While reconfiguring it, I also added some 1/8" clear lexan over the top (so I can see the cell connections but not short them with tools/etc ;) ) and before I gorilla-glued and taped it on, I went thru all the screws and verified they were tight. But they weren't--I found anywhere from 1/4 to almost 3/4 turn of looseness. I suspect this was from trepidation of dropping the all-metal allen-wrench on the pack and shorting it out (no desire to become a new plasmaboy), a problem I did not have this time since I had found my torx driver set that has a size that fits this allen-head screw set. (I could not insulate the allen to prevent possible shorts cuz when I did I couldnt' grip it properly, and had to remove the insulation after testing a few different ways).

Anyway, this will probably help the overall pack resistance, and may make some difference to voltage sag under load.


For the moment, I only have one pack in there (on the right side still), mounted vertically against the back wall, clamped n place with heavy guage wire around it to screws with washers on the back wall itself, and side to side by wooden plates. I am making a bracket to clamp it in place but need to find some bits and bobs in my junkpile to complete it, and since my vacation is over this will take a lot more time between workdays, needed a solution for now.

The lighting pack is on it's side edge at the right edge of the box, fitting perfectly in the space between the traciton pack and the box wall. A bit of styrofoam temporarily holds it from shifting around vertically or longitudinally. No more carrying it in the trunk on the rack with wires hanging down from there. :)

The other side of the seatbox is balanced with assorted stuff I was carrying in the trunk, which is now mostly empty. It all weighs about as much as the traction pack, so it will help tippiness a fair bit by not being up high.


My last step before calling it quits for the night at about 8pm was to add two flexibile water-resistant white-LED strips I ran across in my stuff and had forgotten about before, to the bottom of the handlebars for more forward downlighting. I'm still thinking about moving them up to the front edge of the canopy where I cant' see them when riding but where they light up the road around and in front of me, as well as the front of the trike.

I spliced them into the power for the old Grin LED headlight (not a lumenator, the multi-LED type), and was just wrapping that with electrical tape when there was a spark from a single strand of wire that I couldn't see with my bad eyes and poor light at that spot, and the lights blinked off and stayed off. I started to undo the tape to pull it apart but the very thin wiring sourcing this power at the turn signal stuff, whcih is all part of a bundle that includes control signals and whatnot that all go thru the tiller tube in an old parallel printer cable, began to smoke.

This would not have been a problem if I had simply reached down and turned off the power switch to the lights. Or if I had turned them off before, because when I tried to turn them on again after the splice-in, they would not have turned on and I could've turned them back off to find out what was wrong.

It also wouldnt' have been a problem if I had installed the fuse I had thought about doing a couple hours before, at the battery itself. But it was raining heavily at that time and I'd've had to go thru the rain into the house to get stuff, and then go back out in it...even though I had a rainparka with me out there in case of needing to do so, I chose not to, thinking I'd do it later, it'd be fine....


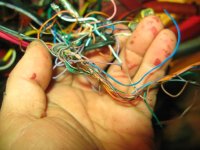
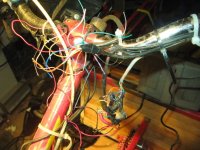
So I got the wires apart very quickly but it was too late, the bundle at the signals was already melted together and smoking, and now more things were shorted, and before I could do anything else the main bundle down in the "front triangle" above the cranks was smoking.

At this point even the switch wouldn't necessarily do anything, but I still hadn't rememebered to try it, and was going for the battery disconnect in the seat box.

But I had been finishing the woodwork on the left side of the box, and so had a bar clamp holding the seat top down to the frame. No time to be nice, I grabbed the handle of the clamp and with main strength (and probably adrenaline) I pulled the clamp off with one hand (I could never normally do anything nearly like that), and lifted the seat/cover off (more like tossed it without knowing) and yanked the andersons loose.

None of the supply wires from battery to front end were damaged because they are thick enough gauge compared to the rest...but in the "rats nest" up front, there goes several hours of work rewiring things from a few weeks back. :(


And I would have to use the trike to go to work today, so I could not just walk away from it and do it later.


So after going inside to eat something and feed the dogs, I went back out and after almost four hours rewired the whole mess from cranks to bars. I had to replace the whole multi-wire cable because I have no idea if anything inside is melted, and it could be partly melted and not having cross-conduction *now* (if I were to continuity test it all), but still fail later from damaged insulation. Can't risk it, so I used another much bigger (more than twice the diameter) multiwire cable with more wires and much larger gauge conductors with much thicker insulation.

It's too large to run thru the holes in the tiller so it runs externally, which is fine cuz I am planning on replacing the tiller tube anyway, and wouldnt' wnt to have to rewire it all just for that. Half the wires are unused, so I can use those for other features later (I still have a lot of things I'd like to add toa "dashboard").

While I was at it, I put all of the downlighting on the "headlight" switch on the old Fusin control (presently being used only for it's turn signal switch), so that just like CB2 I can turn all the "big light" off and have only the common road lighting in place (turn signals, tail/brake light, headlight), for whatever reason. (like demonstrating to people how much more visible a vehicle is when lit this way, from much farther away).

I also moved the Grin LED headlight to the front tip of the front fender, whcih is installed but not finished (still needs it's sides, but undecided as to red plastic or wood; probably will go with wood). Will be adding amber side markers to it later once I find the LEDs meant for that, and the amber reflectors.
 
The wiring fire destruction is actually pretty hard to see, but here's the best pics I could get of it (the others were so blurry you can't even tell they are wires).
img_4305.jpg
View attachment 23
img_4303.jpg


This is the new wiring harness, with the main cable sheath stripped off a few inches at the ends. You can see how much larger the cable and wires are than the above. (the orignal stuff was so thin I couldn't evne use my wire strippers on it, and had to carefully use an old notched-from-misuse dull knife; it was thinner than the wire-wrap wire I've used before).
img_4306.jpg
img_4307.jpg


Some pics of the trike as it is at the moment, with some of the red paint touched up with the new (much brighter red) paint, and the wood on the seatbox almost completed. All that's left on the seatbox is to shape and add the last board at the bottom of the left side. That is filled with styrofoam for now, even though the weather is supposed to be good the next sveral days, so that I can use the comparment on that side to carry all the heavy stuff I'd usually have in the trunk to see how it rides with no real weight up there.
img_4298.jpg
img_4308.jpg
img_4309.jpg
View attachment 14
img_4313.jpg
img_4314.jpg
img_4315.jpg


The "new" front fender with Grin light on the front. It's actually the same fender I started out with, though mounted slightly differently. I have some plastic sheets cut to shape to fit in it and cover the top of the wheel on the sides, but I think I am going to use wood instead, if I can cut these boards to about 1/3 of their present thickness so they'll fit between the wheel and the fork.
img_4310.jpg
img_4311.jpg


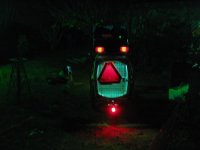
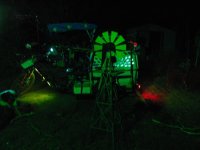
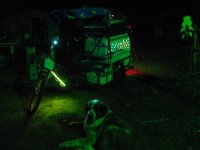
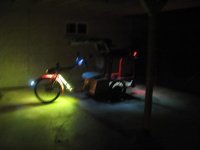
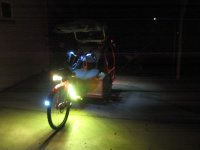
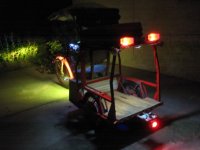
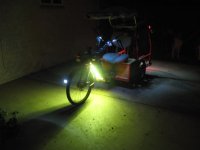
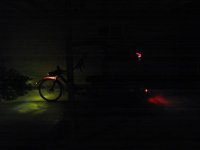
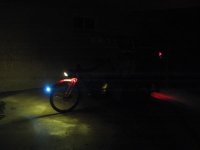
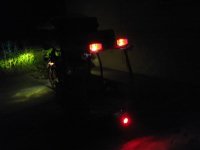
SOme night pics of the lighting, first with all the lights on, then with the headlight off, then with that and downlighting off, then with headlight and just regular lighting, no downlighting. Lets you see just how much difference the downlighting makes in visibility. Need to take the same pics on a typical street I ride on sometime but would have to do it really late at night when there's zero traffic.
img_4317.jpg
img_4319.jpg
img_4320.jpg
img_4321.jpg


Headlight off, all other lights on
img_4322.jpg


Headlight and downlighting off, main lights on
img_4323.jpg
img_4324.jpg
img_4325.jpg


Headlight and main lights on, downlighting off
img_4327.jpg

img_4329.jpg
img_4330.jpg


Another thing done the night of the wiring fire I'd forgotten to post about was reinstalling the repaired main chain from IGH to trike's transfer axle input sprocket. Because the freewheel issue still is not fixed I did not reinstall the chain from the output sprocket to the FW, so there is a lot less load on the motor wheel (no chain to backdrive).

Something else I hadn't even noticed before when putting that wheel on after "lowering" the dropout end stop is that that short chain is under extreme tension, because I did not make the end dropout shallow enough on the inboard side (the outboard side is fine), so the chain was acutally holding the wheel while I tightned the clamping dropout to secure the axle...leaving the chain so tight that it probably took significant power to drive it. (and would cause a lot of rapid wear on it).

To fix this I might need to fix the inboard dropout, but without the chain it sits very close to where it was with the chain, might be less than a millimeter. Using hte halflink in this chain would also fix the issue, but it might be too loose that way. I'll have to figure that out after I get the MXUS 3K wheel in there (once that's built).

For now, it's running with no pedal chain to the wheel itself, so there is no motor loading other than driving the trike.

Apparently it makes quite a difference in power usage:

Some ride data with the smaller pack (saving a little more than 20lbs) with tightened intercell connections, for my work commute yesterday. It's a lot less than a simlar test the other day, and leads me to believe long-trip (less stops per mile) usage would also be a lot less.

57.7vstart
50.5Vmin
55.8Vrest
4.444miles
20.2MPH max
14.4MPH avg
18m28s triptime
2040miles total odo
4.477Ah
243.3Wh
55.3Wh/mile
-19.1Amin
79.98Amax

It was also pretty cold the night before (below 40F for a few hours), so even with the trike in the shed, the pack was pretty cold, likely making voltage sag worse than normal. At a guess the pack might have been 50F at best when I started out. On the way home it might've been warmer, having sat inside at work for a few hours, where it was about 60F or so in the breakroom.
 
I had an idea I want to post up so even if I forget it later, I'll see this here. ;)

Rather than re-adding the plastic dog crate, which while it's obviously an animal carrier, and does work well enough, is a little small for either of the two present dogs (Yogi and Kirin), having originally been sized to carry Tiny who was a fair bit shorter than either of them, I think I have enough of these wooden slats to make side covers that would bolt or pin onto the rack supports, and a rear "tailgate/door" that would fill up the open areas that dogs might jump or fall out of, so that the whole cargo area would become the dog crate.

The front would not need a full cover, just enough to keep anything bigger than a head from poking out around the seat back.

The sides would not need to be solid, just slatted, so it has plenty of airflow, and they can have a good view, too (and people can see them).

The back I'd probably make more solid so it can be made hinged to use as a ramp, but even at that it doesn't have to be completely solid; maybe just the lower half solid and the top half slatted.

Done this way, either of them would have a bit more room when riding on the trike, but still be secure.
 
Commute today was very similar to yesterday's, almost exactly 58Wh/mile, pretty much the same statistics for everything else, too.


BTW, with the wood now filling hte framespaces of the seatbox, the whole trike is MUCH stiffer, and no longer feels like it's wiggling around under me.

(despite the fact that since the seat has a bottom that's curved upward from side to side, and is strapped down only in the center, so it actually does wiggle around under me!)
 
Last two days' commutes same stats, except for on the way to work it was so windy it took almost 90Wh/mile.

Surprisingly, even with some of the really big gusts, I didn't get pushed around the road, or any tippiness, etc., even with the canopy on top.


I finally got the jig setup with the drill press, so that I can drill the new holes for the MXUS wheel spokes in it's flange. I've made a separate thread about that in case the method is useful to others:
https://endless-sphere.com/forums/viewtopic.php?f=2&t=86180

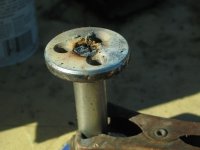
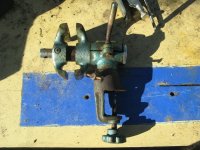
But in the process of trying to do it, I had to first fix my old vise.
View attachment 7
The clamping rod (threaded outisde solid rod from clamping end, and hollow tube threaded on the inside from pivot end) has been broken for quite a while now, and I hadn't bothered to try to fix it because I assumed it was stripped threads, and had been waiting till I had a bolt and nuts I could replace it with somehow. I got one off something a while back that would work for it, and had put it in the same place so eventually I could deal with it.

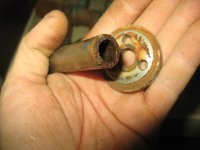
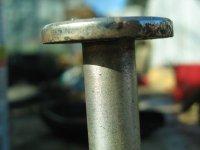
But it turned out to be a different problem--the threads were fine, but the entire end cap on the tube had completely separated from the tube itself. It had cracked all the way around and just broken right off. Looks like the tube was cast and then machined, and there were defects in the casting. (but this thing is about as old as I am; used to be my dad's; we used it to hold cable connectors while wiring htem up when I was a little kid).
img_4343.jpg

Wel, then, that's an easy fix--just weld it up and be back in business, right?
img_4344.jpg
img_4345.jpg
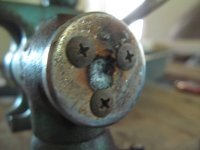
Should've been...but the first weld didn't get enough penetration. I welded from the inside of the tube, at the endcap, so I wouldn't have to grind the weld mostly away so that ti would fit back in the hole in the vise. Looked like it worked, but only a small area of each weld actually penetrated more than a bit. So when I then attempted to clamp the MXUS axle in the vise, it just popped the endcap right off and the clamp would freely turn instead of clamping. :(
img_4350.jpg

View attachment 2

So, then I redid the weld but from the outside, with teh welder set one higher (3/4 full power). This then required that I grind away most of the weld bead to fit it back in the vise...which showed still that there was plenty of penetration.

Retest...and fail again--but this time it snapped the tube about 1/8" above the cap. Must just have gone brittle for some reason there. Maybe rust in microcracks I can't see, coming off the original ring crack.

So I ground away 1/4" of the tube, and flattened the back fo the endcap, clamped them back together, and rewelded from the outisde of the tube, reground the welds, and THIS time it worked fine.
img_4347.jpg

Of course, once that all worked, the screw taht clamps it to a table/etc turned out to have a handle/knob that turned without turning the screw, so had to weld that, too

Used up almost two hours messing with this over all, so I only had enough time today before work to set it up, and drill one of hte 36 new spoke holes in the MXUS flange.
 
Back
Top