VPower / CammyCC 48V20Ah LiFePO4 Repair by Amberwolf

Well, it got another 0.036Ah in there before the current dropped to zero.

I setup the little ones in series for 61.0V, and max current limit. Even though it's nice and cold in there, at 54F, I decided to put a desk fan on low across the setup, to keep air moving (since nothing on this setup has fans, unlike the big one).

Charging is proceeding at 0.91A right now, battery voltage at 56.7V.
 

Attachments

  • DSC03771.JPG
    46.1 KB · Views: 944
Added another 0.27Ah by above before current dropped to zero. Waitied a while to see if it would restart, didn't. Checked cell voltages and they vary a bit: 3.42V for most of them, and 3.7V for a few. Total pack voltage of 59.5 at battery connector to BMS.

Disconnected from charger and connected to bike, ran full throttle off-ground no-load, 1.2A, for a bit more than an hour until 1.37Ah was used. Now is back on small charger (2x series sorensons), charging at around 0.91A and 61.0V. Pack voltage currently at 54.3V.

See what happens by morning, if I can get to sleep and stay there this time. :(
 
I could unsolder the string I fixed to check cell voltages, I suppose. I'd have to cut the other strings apart to do that; want to test as a pack on the bike, riding, for a bit first.

Would that be in the fully charged or in the discharged state, or both?

This is a red PCB BMS, as shown in the first pic inside it's hole-punched ESD bag "cover". I've seen pics of this one before but forgot where, haven't gone looking for it yet.
 
amberwolf said:
but I can imagine my crazy sister would pick it up to throw it out if it looked like trash, or play with it, or some crazy thing I can't even imagine. :(

Check the patent office for recently filed applications related to improvements to the designs of tin-foil hats... :wink:

I had a friend that was repairing and old HP-67 calculator when one of the keys dropped onto the floor. His dog grabbed the tasty treat and was off and running. He checked the "output queue" for several days and never found the key. A friend of mine had a spare key and the machine was fixed. A couple months later, he found the original key in the dog bed.
 
texaspyro said:
I had a friend that was repairing and old HP-67 calculator when one of the keys dropped onto the floor. His dog grabbed the tasty treat and was off and running. He checked the "output queue" for several days and never found the key. A friend of mine had a spare key and the machine was fixed. A couple months later, he found the original key in the dog bed.
That's not surprising; I have had dogs that would just snatch stuff up, and Hachi would have when she was younger but at just over a year old she's learned better. If I leave the wrong stuff around too long unattended, it's a different story. :(

dnmun said:
you can measure the cell voltages on the BMS. i wondered what the spread looks like with that BMS. i woulda sent you the extra cell i have to replace your missing one.
Well, I'm nowhere near done with the pack yet, as I still have to physically tear it down and rebuild it into a sturdier pair of 24V blocks (or maybe 4x 12V blocks) for easier placement on a bike than the giant cube it is right now, probably based around the method Ypedal used on his (coroplast). If it's cheap enough I'll buy that cell from you to replace the dead one, and a couple extras if you have them (all I have in this form factor is LiCo and NiMH and NiCd laptop pack cells, mostly of unknown status).

The cell (well, 18p group) voltages at the BMS (at the balancing connectors input to the PCB) are what I'd measured in this section:
Using some rubber bands to hold full throttle and to hold the brake at various levels of load, I then measured as quickly as possible the voltages at the BMS end of the balancing wires, at the PCB. They varied from 3.30 to 3.32V, most of them at 3.30 or 3.31V, including the repaired string, for currents below 4-5A. Up around 10A they were still all the same, from 3.19V-3.21V.

Up at 30-40A they dropped to 3.02-3.04V, except for that repaired string around 2.97V. I expected more voltage drop from it, but am glad it's not that bad. Might be a lot worse later, and I have no idea what capacity it'll have. We'll see.
I did not write them down on paper though, just mentally noted the voltages since they were similar enough to remember. Next test I do (possibly tomorrow night after work or the next day before work) I'll note down each group's voltage individually, under load and no load and at light loads, though I want to find a better way to load the wheel than wearing my brake pads and heating the rim. ;)

Maybe I can setup the 9C/GM hub on a triangle in front of this wheel, short it's phase wires together, and have the 9C wheel drive the 9C/GM wheel via the tire? Dunno if that'll work, and I can only vary it from no shorted phases to two to three for load variation. Might not be enough load.

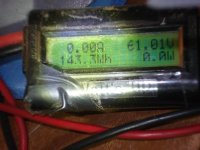
In the meantime, I left it charging as a pack since my last post, and it had charged up 1.92Ah by this morning, and apparently stopped (presumably to bleed off excess voltage on some cell groups, since a couple were at 3.74V and some still at 3.4xV (including the repaired group). By tonite, just before this post, it was at 2.543Ah, 143.3Wh, 59.7V battery (61.01V BMS input), and had *just* stopped another 0.91A charging cycle before I snapped the pics.
DSC03783.JPG
DSC03785.JPG


I'll be leaving it charging overnight again to see where it goes from here.

.
 
HI AMBERWOLF: Looks like you have revived this pack and you have done us all a favor by posting all this good info on ES. I will try to send out the charger that came with pack sometime this week,its still a good charger. If the charger that you are using doesen't go high enough the BMS may not go into balanceing mode. have a good day FRIEND. :mrgreen: :mrgreen:
 
if it is already at 59.7 then you should figure out where all the voltage is if you have a buncha cells around 3.4V. don't leave it charging if it is pushing them over 4V. all imho
 
You're awesome Amberwolf. :)

I would trust your careful work and attention to detail anytime.
 
BLUESTREAK said:
HI AMBERWOLF: Looks like you have revived this pack and you have done us all a favor by posting all this good info on ES.
Hopefully it will help others either fix their own packs when they have problems, and/or help people who would never want to deal with this kind of problem set steer away from this type of pack. ;)
I will try to send out the charger that came with pack sometime this week,its still a good charger. If the charger that you are using doesen't go high enough the BMS may not go into balanceing mode.
You don't have to worry about it; these small Sorensons will go higher in voltage (just not in current), if 61.0V is not high enough I just need to know what voltage they should be set to and do that, up to 80V. ;) I suppose the original charger would be easier for connect-and-forget, after I go thru it and check it for potential issues (somehow I just don't trust any of the stuff I get these days, wherever it might be from. :lol: Can't figure out what could have caused that! ;))


liveforphysics said:
You're awesome Amberwolf. :)
I would trust your careful work and attention to detail anytime.
Thanks...I am not sure that I am really anywhere near as careful or attentive as I ought to be, though. I mean, just ripping the tab strip off the cells was *really stupid*. :( Especially after having read about a zillion posts telling people NOT to do that, but to cut the tabs instead. :lol: I'm sure I've made other dumb mistakes so far, too, that I havent' even realized yet.

dnmun said:
if it is already at 59.7 then you should figure out where all the voltage is if you have a buncha cells around 3.4V. don't leave it charging if it is pushing them over 4V. all imho
That's a good point. I last checked it before replying last night and all were either at 3.4xV or at 3.7xV. Nothing in between, under, or over; just past another short charging cycle (0A charge current). I assume the ones at 3.7xV are full, and shunting, and the ones at 3.4xV are still being topped off periodically when the BMS is done shunting the others.

At the moment it is at 2.93Ah, so it's put another ~400mAh into it. I don't know how long the charging periods are; if I can handle sitting there long enough I should monitor that and note all cell group voltages during and after a cycle.

I gotta go to work shortly, so I'll disconnect the pack from the power supplies and WU but not the BMS until I get back. Then I can check all the cells and note them as above once I'm home and done with the dogs and stuff.
 
maybe the voltage measurements are off since it doesn't add up.

check the voltage on each group before you start the charger again, then measure the voltage immediately after you start charging again to see if you can identify which group is either charged to the highest capacity already or is showing resistance to charging. then you can keep bleeding off the high cells with a load resistor across them with a jumper while the laggards try to catch up.
 
After I got home tonite and got done with the dogs and dinner, but before my involuntary nap I just awoke from, I sat down and measured all teh cell group voltages on the pack as it was after having sat for around 10 hours with no charge input. It was at pack voltage at battery of 55.6V.

Voltages starting from most negative group, * is the repaired group.
3.48
3.49
3.48
3.35*
3.49
3.48
3.49
3.48
3.50
3.46
3.50
3.50
3.50
3.50
3.50
3.50

Then I plugged the charger back into it and rechecked voltages right then; keep in mind the voltages are rising a bit throughout the measurements, which took maybe 1.5 minutes to do. Charge state at this point was the 3.09Ah it had been when I unplugged it this morning:
3.50
3.50
3.50
3.36*
3.51
3.51
3.52
3.53
3.54
3.60
3.60
3.60
3.50
3.50
3.60
3.50


After about 8 minutes or so at 0.91A charging rate, I saw the current begin to rapidly drop (took nearly 3 minutes to drop to zero), so as soon as the current began dropping I started measuring. Pack voltage was at 59.5V at this point, and was at 60.91V by the time I wrote down the last group measurement, so voltages are still rising on this last bit.
3.75
3.76
3.74
3.36*
3.77
3.78
3.76
3.77
3.80
3.82
3.87
3.77
3.79
3.81
3.84
3.82

So even at peak voltages on the cells they aren't going too high, AFAICT.

Since I don't work till 4pm Tues I'm going to see about tidying up the pack enough to put in the cargo pod on CB2 and test it with a ride, while keeping the NiMH on there in case I need it to get home. ;)

The Cycle Analyst from here:
http://www.endless-sphere.com/forums/viewtopic.php?f=3&t=21397&start=0
arrived today, but apparently they left it at the neighbor's, and it was too late to go over by the time I got home tonight. Will have to go by in the morning. Then I can use it to monitor this pack in use, too.
 
that looks good, the repaired section is missing the cell? otherwise looks well balanced doesn't it? that one may take some time and you can use a resistor to drag the others down to it's level too. put your power resistor across the section above all the way to the top, and do the same below to the bottom, then charge more, by pulling the high ones down then they all go up together when you charge and they are balanced so less time at the end balancing on low shunt current at the end.
 
dnmun said:
that looks good, the repaired section is missing the cell?
Yes, so it's only 17p, where all the others are 18p. So the total capacity of the pack will be limited by that, minus whatever capacity loss in that group there is from the low-voltage damage.

otherwise looks well balanced doesn't it?
Seems to be, though this is my first experience with a functioning lithium pack with BMS beyond fixing laptop batteries for people. There are a couple groups that are a little out of whack from the others, but not by much. I suspect there are good reasons for each one's differences, but I don't yet know what they are, if it's bad tab welds or bad cells, etc. Possibly even poor connections on the JST connectors at the BMS, or problems in the balance wires.


that one may take some time and you can use a resistor to drag the others down to it's level too. put your power resistor across the section above all the way to the top, and do the same below to the bottom, then charge more, by pulling the high ones down then they all go up together when you charge and they are balanced so less time at the end balancing on low shunt current at the end.
That makes sense. I can also of course simply continue charging the repaired group by itself, but I suppose it's safer to let the BMS help me do it isntead. :)

It is also possible taht it is damaged enough (or one or more cells is) that it will not ever charge above that voltage. If I figured correclty before, it ought to already be at full charge or beyond, but I am not totally certain about everything I did the last week or so.

At the moment the pack is disconnected form the charger again, and packed into the CB2 cargo pod with BMS still connnected, ready to go for a ride tomorrow daytime when it's not 45F outside so I can actually move my hands without gloves to move wires around if something goes wrong. :)
 
amberwolf said:
It is also possible taht it is damaged enough (or one or more cells is) that it will not ever charge above that voltage. If I figured correclty before, it ought to already be at full charge or beyond, but I am not totally certain about everything I did the last week or so.

At the moment the pack is disconnected form the charger again, and packed into the CB2 cargo pod with BMS still connnected, ready to go for a ride tomorrow daytime when it's not 45F outside so I can actually move my hands without gloves to move wires around if something goes wrong. :)

Hi Amber,

i had similar issue with vpower battery,
want to aware you about one thing:
check the bms resistance with your meter at the channel with crapped cell (in my case there was shorted small fet that allows the current go through balance resistor and this cells string was permanently discharging with balance current)
normally the resistance should be like infinite in direct and measure reverse diode of the fet+balance resistor Ohm in backwards

also if you have only one single string not topped, as you actually currently have, just put there some 3.6-3.7v power supply with current less 1-2amps directly through the balance leads(i usually put 3.8v to increase the current and to make it faster because even at 2amps you already have some mV V-drop on tiny balance wires and the current drops even if the cell have not reached 3.6v)
this is really faster and more convenient than discharging other cells to the lower one`s voltage
also this cells are very easy to check if they are full or not - you can see it from your measurements:
when apply small charge current the full ones should rise very fast to 3.7, 3.8 and so on
and the partially charged one will sit within some mV of it`s open circuit state.

hope it helps,
Andrey.
 
i agree, single cell charger would make it easier. i know you don't have one but the 4-5V cell phone chargers would help too since you can watch it closely. don't leave it charging without monitoring.
 
That's useful info--I don't have to use a celphone charger as I can just use my Sorenson supplies adjusted down to limit voltage and current (that's what I did to first charge up the cells in the damaged group, but I did it much slower than that). :)

About to head out to test this pack now. Might not be any new posts till tomorrow afternoon/eve though as I close tonight at work and open tomorrow morning. :(
 
All I did for the testing to secure it was to tape across the open end of the "clamshell", then wrap the whole thing in the original largest cardstock piece and tape that along it's seam and once across each end. Just enough to ensure nothing could touch and short cells, basically. Then packed it into the cargo pod, which is styrofoam lined, along with that big piece of blue closed-cell foam in the pics above, stuffed beside it to keep it from being able to vibrate around (it's a really tight fit).

Some info crossposted from the CA review thread, as these readings are while using this pack:

The CA is definitely reading differently than the TWM or WU, particularly at higher currents. I took too long riding around and having fun on my way to work, so I only got there with just enough time to get ready and clock in, so I don't have trip info for the test ride/commute portions. :( I recall seeing that they were almost the same between the WU and CA for Ah, and a little bit low on the TWM, but not by much. On the way home, that didn't hold true and I don't know why.

On the trip home, I got the following:
Code:
      WU1   TWM2   CA
Ah  1.663   1.602   1.587
Wh  84      74      72
Wp  2056    2027    2844**
Ap  41.9     47.7     61.3
Vm  48.8    47.28   46.4
Vr  52.83   52.97   52.9
**Wp on CA is calculated by me using Ap x Vm, isn't displayed anywhere that I can find)

On the way riding to work and the test ride around, I figure I used about 3-4Ah, and probably had higher peak power levels, or at least longer peaks. I pushed it pretty hard after the first couple of miles, just to see if I could cause it to fail or to cut out (like LVC on the repaired string, for instance), which it didn't.

I didn't do any pedalling, so all the data is from the motor/controller/battery.

The BMS heatsinks for the discharge fets never got warm enough to notice, so I guess I probably won't need to put any heatsinks on them. Just ensure they're not packed in an unventilated box, and they'll be fine, I think.

Battery didn't feel warm at any point, even after I was done and had stopped at work, with it inside my styrofoam-lined cargo pod. I didn't have the top closed all the way, just an inch or so to let air in in case the BMS (sitting on top of the pack) needed ventilation, but I don't think it would ahve mattered if I'd closed it up, at least for this run.

After I go eat something I'll go measure cell group voltages, then start the charging process and note what they are at the end of it if I can (I might be asleep since I have to get up early).


Only real problem I had at all is that with this pack in the side pod, it's so heavy that I cannot just use the kickstand, I have to stick a rock or something under the cargo pod corner to hold up the bike or it'll fall over. :lol: Optionally I can set the parking brake and set the cargo pod over one of those cement end-pieces they put on parking spaces to let you know when you've pulled too far in. ;) That'll just about keep the bike perfectly straight, with most of them being just a hair shorter in height than the cargo pod's distance from the ground with the bike level.

But this pack will not go in the pod (or at least not in just one) once I am confident enough in it to have it as the only pack on the bike--it'll go in the frame like the NiMH does now. In place of the NiMH, probably.
 
Cell group voltages measured with Fluke DMM, prior to charging last night, same order as before, cell group 4 is the repaired (missing cell) group. Total pack voltage just before measuring was 53.0V, measured with same Fluke DMM:
3.31
3.30
3.31
3.30*
3.30
3.31
3.31
3.30
3.31
3.31
3.31
3.31
3.30
3.31
3.31
3.31

I fell asleep in the time it took to charge, and did not have time before leaving for work this morning to measure the groups after charge. Hopefully will be able to do so tonite.


Today I had time to write down all the data for both to work and to home legs of the commute; they're the same 2.2mi and 2.9mi that I typically have for those, and I rode at the usual 20mph wherever possible. Since I am trying to break this pack now if it is going to :twisted: then I am not pedalling at all, and starting as hard as I can (full throttle from a stop until I am reaching cruising speed of wherever I am).

To work:
Code:
      WU1   TWM2   CA
Ah  1.441   1.435   1.410
Wh  75      73.8    72.7
Wp  2026    1970    2743**
Ap  39.69     39.74     58.11
Vm  49.4    48.03   47.2
Vr  53.28   53.42   53.3
V[size=2]start[/size]  60     60.2     60.1
**Wp on CA is calculated by me using Ap x Vm, isn't displayed anywhere that I can find)

On the way home:
Code:
      WU1   TWM2   CA
Ah  1.599   1.563   1.566
Wh  81.4      78.4    78.2
Wp  2052    2014    2833**
Ap  41.8      42.32     60.54
Vm  49.0    47.5   46.8
Vr  52.94   53.1   53.0
**Wp on CA is calculated by me using Ap x Vm, isn't displayed anywhere that I can find)


Today, just prior to starting charge, I measured almost exactly the same as last night. Pack at 53.0V (which matches CA reading):
3.31
3.30
3.31
3.30*
3.30
3.30
3.31
3.31
3.30
3.31
3.31
3.31
3.31
3.31
3.31
3.31
 
Looks good AMBERWOLF you have proved again that you can fix almost anything where others like me would have to throw it away. :mrgreen: :mrgreen:
 
Thanks! :oops:

Oh, and I totally forgot to note that when I recharged it last night, this mornign I did catch that it took 3.26Ah per WU1 by the time I unplugged it just before leaving for work. 60.0V per WU1, 60.2V per TWM2, and 60.1V per CA2 (the large screen CA).

EDIT: Tonite it has reached about 3.02Ah so far, and still charging at about 0.62A. Don't know if that is the first charge cycle or if it's already paused and restarted. I guess I could put a pulse counter on there to determine how many charge/bleed cycles it's gone thru during a charge. Trying to remember if one of my meters has that built in, but I think it's just dutycycle and frequency. A 555 (to shape the slow cycle pulse to create a quick trigger) and a 4017 with LEDs on it would count to ten cycles; chain another 4017 on the end would do 100. Hmm.

A lot of wiring for that; gonna see if I have some piece of test equipment that has this first. But not tonight; I keep dozing off every time i sit down, and it hurts too much to keep walking around. I dont' go in quite as early tomorrow but only a couple hours later. Might not have time to do this stuff and then sleep right too.
 
Back
Top