2017 Honda CRF250R to Electric

The chain is a 428VX by DID. It is rated at a higher strength than a normal 520. So far it is good. I like that the 428 - 63 tooth rear fits in the stock chain guide which was for a 520 - 49 tooth. The sprockets are about the same diameter an the chains are about the same width.
 
cheapcookie said:
Hi any chance you run another set of motor mounts ? Or share the stl?

I would be interested in a set of mounts too Chris! I can attest this bike is fast :flame: :flame:
 
I have a DXF file that I gave to the waterjet guys. The brackets still required some more parts and some machining afterwards.
 

Attachments

  • 20210330_170920[1].jpg
    20210330_170920[1].jpg
    442.7 KB · Views: 2,549
chrisflysit said:
I have a DXF file that I gave to the waterjet guys. The brackets still required some more parts and some machining afterwards.

Hey Chris, it would be really cool if you posted the dxf and/or stls online with some instructions. Some of us have limited fabrication tools and just want to motorize the bikes quickly. Thanks!
 
What’s your ride time like with the 8P? I currently am debating squeezing 7P in my conversion where 6 is more of a natural fit.
 
8p gets me 2 plus loops at Emma Long motorcycle park in Austin TX. It is 5.5 miles of hard technical riding. Laps are 30 to 45 minutes each. The average speed is low but the difficulty is high. I am beat by the end of an extended second lap. On a different faster enduro loop the battery was still able to out last me. I would bet that on an open and even faster trail 8p will be inadequate. I have a10p planned but it is not going to fit as easy.
 
chrisflysit said:
The chain is a 428VX by DID. It is rated at a higher strength than a normal 520. So far it is good. I like that the 428 - 63 tooth rear fits in the stock chain guide which was for a 520 - 49 tooth. The sprockets are about the same diameter an the chains are about the same width.

Good to know the chain is holding up, I'm using 428vx on a street build that should be finished within a couple months. Do you know what the peak chain pull force is when riding?
 
Really nice build! Some really nice examples of practical 3d printed parts it there too, those battery boxes look very professional and well up to the job. Surprised the temporary motor mounts worked out so durable too, any more details on how well they held up? I know it's a triviality compared with the rest of the work done but in the first pic I'd have expected them to distort a little just with the weight of the motor, I'd never have expected them to stand up to driving forces.
Thanks for taking the time to write up the build and share it :bigthumb:
 
Hey, this is a great build.
I'm mounting a BAC8000 in a similar spot on my build. I was curious how you mounted the fabricated aluminum angle to the controller. Did you use longer M4 bots that are used to secure the blue end covers? I was going to drill into the thick parts of the stock heatsink and tap them out with M5. Also do you notice any thermal rollback with the controller?
 
Routybouty I used the Maletrics welder. https://malectrics.eu/ it works well. Kweld is also good.

stan.distortion those 3D mounts were great for low power testing but would flex a bit. It was just my impatience that forced me to ride them around the hood. They are not practical for very much power.

chofmeister I did use longer M4 bolts and the controller fits snug in the frame I made. The controller has not heated much during my rides. It gets plenty of air flow.
 
Any update on how this bike is running and how the battery is holding up? Did you end up building a larger battery?

Also, can you give the overall dimensions and weight of your battery?

Thanks
 
The bike and battery are doing great. We are in the process of building an other CR250R and two more battery packs. Also in the works is a smaller 40 cell parallel pack that fits in the Air Cleaner area. The main pack is approximately 15x6.5x5.5 inches and 35 lbs.
 
Hi There. First of all congats on your build, looks very professional, been following your build. I am thinking of using this motor in my next build and was wondering what is your motor sprocket size ( number of teeth ) and where did you get the sprocket from as have heard that the sprocket that comes with the motor can be a bit loose on the spline.
Cheers
 
Will be starting a very similar build in the near future.
Did Chris pm the dxf or stl files to to anyone?
Looks like he is to busy out riding.
 
The rear sprocket is from http://www.rebelgears.com/customsprockets.html
It is a custom 428 63 tooth. Great company BTW!
The front is a 12 tooth from Amazon. It's nothing special. The bolts have to be ground down to clear the chain.
https://www.amazon.com/gp/product/B07MXXVLD1/ref=ppx_yo_dt_b_search_asin_title?ie=UTF8&psc=1
 
chrisflysit said:
It is a custom 428 63 tooth. Great company BTW!
The front is a 12 tooth from Amazon.

So you have 5,25:1 gearing on the chain drive, and something like 2,3:1 in the primary gears?
That would make about 12:1 :eek:

I guess it has to be very peppy on the throttle :wink:
But how is the power at higher speed?
 
Looks brill that :thumb: Can i ask what gauge the copper sheets are you welded on the cells? Im in the middle of the same conversion with 22s 14p molicel setup :D
 
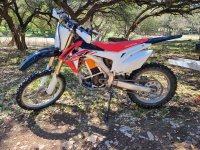
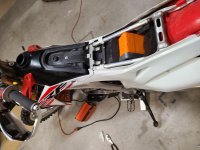
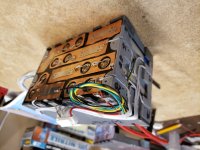
Update - Recent additions. Added a 40 cell pack in the air cleaner space. That makes 200 cells in 20s10p. Swapped out the air forks for spring type, put on some Fasst Flexx bars, new 90/90 front tire and fenders. The weight is up 14 lbs to 234 lbs now with all that added. The motor current now set 200 amps higher at 800 amps. I have the quick map switch at 12,000 and 20,000 watts. I ride it most of the time at 12,000 watts. At lower speeds, 20,000 watts the bike has too much wheel spin and makes the handling difficult. It will reach its top speed of 53 mph on either setting. At 12,000 watts the controller will give all 800 amps at lower speeds. This makes clutchless blips easy and predicable. It's not all perfect yet. I'm still working on settings to remove some stopped and reverse start stalls. This bike is too much fun on single track. It is always in the right gear and ready to pull hard. It also climbs hills very well and has been getting 15 to 20 miles on a charge. That's enough for where I'm riding but I would like to explore fast charging.
 

Attachments

  • CRF250R.jpg
    CRF250R.jpg
    1 MB · Views: 851
  • 20220326_222114.jpg
    20220326_222114.jpg
    3.1 MB · Views: 851
  • 20220110_212330.jpg
    20220110_212330.jpg
    1.8 MB · Views: 851
Hello chrisflysit, nice piece!
Would you share the data for the motor holders? I am currently building a crf250.
 
Awesome build Chris, very inspiring! Did you touch the original fuel tank at all? Did the bottom need to be cut out to fit the battery pack?
 
Here are the drawings and dxf file for the motor brackets. They will still need some work once cut out. Taping (two holes) and drilling mostly. The left bracket need a bit of material removed (2mm) at the lower frame mount to get them motor square on a 2017. We had to add 1/4 spacer here on the 2006. I used scrap tubing between the mounts at the swingarm and a smaller tube at the front. We have them on a 2006 and 2017.
 

Attachments

  • CRF250R3.pdf
    19.9 KB · Views: 64
  • CRF250R3.dxf
    90 KB · Views: 48
Back
Top