Squilt
100 mW
I interrupted my recumbent trike build-in-progress to make an e-bike for my roommate to get to work. The two goals were maximum power to cost, and ease of operation and maintenance. I don't remember how I settled on each component. There was a lot of guessing around the power figure but I'm very happy with how it turned out. I managed to complete it with ~$700 including the bike. The result is a 62lb 4kw e-bike with a 750wh battery. It has a range of 20-25 miles w/o pedaling and a top speed of 35mph.
I started by searching for the cheapest bike I could get with full suspension. I got an Ironhorse MTB on Craigslist for $75. It was very lightly used and then kept in a garage for years. Starting weight ~40 lbs. It had a crappy front shock and dangerously weak brakes. I upgraded to a 180mm front rotor ($18) and replaced the caliper and plastic lever with ones I had lying around. I was going to replace the shock but it seems to be getting better with use.

Next to buy were the cells I found on batteryhookup.com for a good price. I ordered 100 Samsung ICR18650-22p cells for $93. That's $120/Kwh or 8Wh/$. With that and a $62 Daly BMS, $42 of nickel, and $12 of tape, I made a 14s7p pack.


Next on the purchase list was the ESC and Motor. I went with the Spintend 100v 100a Ubox based on Vesc($147), and the Freerchobby 63100 Sensored outrunner($140). I could have gone with a hub motor for a much simpler setup, but as I have access to shop tools and free aluminum, an RC drive is much cheaper for the same power output. I also anticipated this being more reliable and easier to service than a hub motor that's on the cheap side. Not to mention the efficiency and weight savings.
Sprockets, chains, and bearings: $93
I mounted a sprocket where the rear brake rotor used to be and mounted the drive unit where the rear disc brake caliper used to be. It is held on by the M6 caliper bolts, 3/8 bolts through holes in the dropouts, and the quick-release axle. It is extremely rigid and hardly flexes at full throttle. The drive unit is a 16:1 two-stage chain drive. With a #25 chain in the first stage and a #35 chain in the second stage. I could have gotten away with smaller sprockets but for the sake of reliability, I followed the standard recommendation of no less than 17-18 teeth on the smaller sprocket.


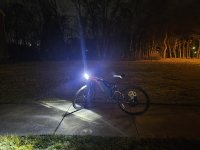
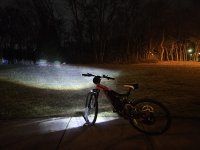
Adding the cost of an XT-90 splitter, barrel jack charge port, and the headlight I'm putting on brings us to a total of $713. The rest of the foam, coroplast, connectors, heat shrink, hardware, and the charger, were things I had on hand or acquired for free.
The result here is a competent commuter that's a blast to ride. I told my roommate the build wouldn't take much more than a month. That was four months ago. What took the longest was the battery. I'll admit that's because I was afraid to work on it. More afraid to find out this pack wouldn't work for this bike than afraid that it'd blow up. But it just barely fits and it's holding up well after a handful of cycles.
The deal was that I get compensated for the parts but not my work, but since I like this stuff it doesn't feel like work. I'm happy with this arrangement since I got to take on a design challenge and make something new for free, and when he no longer needs it, I get a kick-ass e-bike for free.


I started by searching for the cheapest bike I could get with full suspension. I got an Ironhorse MTB on Craigslist for $75. It was very lightly used and then kept in a garage for years. Starting weight ~40 lbs. It had a crappy front shock and dangerously weak brakes. I upgraded to a 180mm front rotor ($18) and replaced the caliper and plastic lever with ones I had lying around. I was going to replace the shock but it seems to be getting better with use.
Next to buy were the cells I found on batteryhookup.com for a good price. I ordered 100 Samsung ICR18650-22p cells for $93. That's $120/Kwh or 8Wh/$. With that and a $62 Daly BMS, $42 of nickel, and $12 of tape, I made a 14s7p pack.
Next on the purchase list was the ESC and Motor. I went with the Spintend 100v 100a Ubox based on Vesc($147), and the Freerchobby 63100 Sensored outrunner($140). I could have gone with a hub motor for a much simpler setup, but as I have access to shop tools and free aluminum, an RC drive is much cheaper for the same power output. I also anticipated this being more reliable and easier to service than a hub motor that's on the cheap side. Not to mention the efficiency and weight savings.
Sprockets, chains, and bearings: $93
I mounted a sprocket where the rear brake rotor used to be and mounted the drive unit where the rear disc brake caliper used to be. It is held on by the M6 caliper bolts, 3/8 bolts through holes in the dropouts, and the quick-release axle. It is extremely rigid and hardly flexes at full throttle. The drive unit is a 16:1 two-stage chain drive. With a #25 chain in the first stage and a #35 chain in the second stage. I could have gotten away with smaller sprockets but for the sake of reliability, I followed the standard recommendation of no less than 17-18 teeth on the smaller sprocket.
Adding the cost of an XT-90 splitter, barrel jack charge port, and the headlight I'm putting on brings us to a total of $713. The rest of the foam, coroplast, connectors, heat shrink, hardware, and the charger, were things I had on hand or acquired for free.
The result here is a competent commuter that's a blast to ride. I told my roommate the build wouldn't take much more than a month. That was four months ago. What took the longest was the battery. I'll admit that's because I was afraid to work on it. More afraid to find out this pack wouldn't work for this bike than afraid that it'd blow up. But it just barely fits and it's holding up well after a handful of cycles.
The deal was that I get compensated for the parts but not my work, but since I like this stuff it doesn't feel like work. I'm happy with this arrangement since I got to take on a design challenge and make something new for free, and when he no longer needs it, I get a kick-ass e-bike for free.
Last edited: