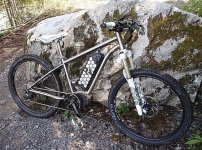
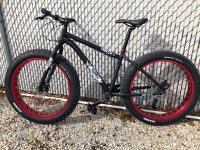
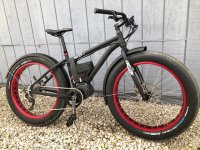
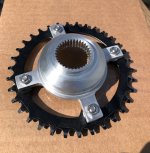
Bafang Ultra, Minnesota 1.2, Fatbike

Tpesl said:
Thanks for the instructions very informative , i’ll be doing the same thing shortly , my question is do you find that it’s absolutely crucial to have the Bottom bracket at exactly the same position as it was before I can’t see that it would make such a big difference if it was slightly forward or backwards or higher or lower as long as it’s lined up.
Also do you think that if you didn’t do all that support around it before cutting it you would never be able to line it up again? I don’t have an access to a welder so I will have to figure something else.
Thank you
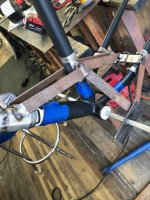
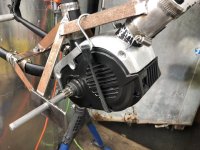
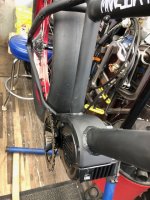
As far as the question regarding the BB in the same exact location, probably not. I thought about that too. lowering helps in stability. But after pedaling the "stock" bike around and trying to imagine where a change would be an improvement, I left it alone (same location). With the "fixture", I could always cut the motor bracket off and make a change. The way it turned out though, I'm going to leave it as is an run it. When you cut the frame tubes,(without support) I'm sure that they will flopping around a bit. That will just create more frustration when trying to get it assembled. It's best to have the tubes somewhat stable. The way the chain line offset is with the stock Bafang spider and chainring, It's kinda set up for a fatbike (the chain just clears the tire like it did stock when in 1st gear). I think having a good chain line is the most important thing. The motor is pretty strong in the stock configuration, you want things aligned and secure.
Doing this project without a welder?? Hmmm... I'm sure it can be done, not a easy task. If you have a steel frame you'll need to make a adapter(s) so the motor mount can be bolted on. If your frame is aluminum just have someone weld it for you. Also, make a dummy axle spacer to help with keeping the stays where they need to be when doing the "surgery". You can measure the gear cluster (hi-middle-low) and transfer that over to the dummy for test alignments, as the rear wheel will probably not fit when doing this mod.
 
Thank you for the clear answers.
My bike is aluminum and yes I will have a local shop do the welding. Also question about the “tilt” of the motor,
Should the motor be somewhat level or the front tilted up more for clearance?
Also do you think I would be able to cut the chainstay just in front of the short tube that holds them together?
Assuming that the motor would then be slightly forward
Thank you Tomas
 
Tpesl said:
Thank you for the clear answers.
My bike is aluminum and yes I will have a local shop do the welding. Also question about the “tilt” of the motor,
Should the motor be somewhat level or the front tilted up more for clearance?
Also do you think I would be able to cut the chainstay just in front of the short tube that holds them together?
Assuming that the motor would then be slightly forward
Thank you Tomas
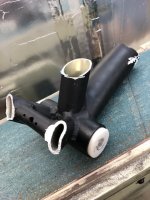
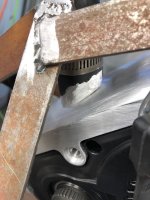
The motor tilt probably doesn't matter where it ends up. Mine ended up so that the tubes are somewhat adjacent to the mounting bolts. I wanted that extra ground clearance too. Remember that there will be a lot of heat when it is welded and there will be some distortion. Final filing/reaming will be necessary so the 3 bolts line up.
I wanted that little tube to remain, (to mount the rear fender) but it would have required me to re-locate the crank axis centerline forward (like in your thoughts). For me, It was easier to adapt the chainstay directly to the Bafang mount (acting as the tube). The fender lower is attached to the mount. All in all, you probably won't notice the motor moved forward that little bit. Adjust the seat & bars to compensate.
 
Wow!! Great Job! Thanks for sharing. I wish that I saw this before I bought my TSDZ2. I have a tig welding machine at home and know how to tig aluminum well. Maybe I can return my TSDZ2 (It was shipped but hasn't arrived yet).
Can you upload YouTube video that shows this bike?
Why did you decide to make a steel jig instead of welding aluminum flat bar directly to the bike frame and cutting and grinding them later?
How did everything work with everything that came with the Bafang Ultra? Is it necessary to continue making changes?
Thanks
 
Grantmac said:
Any heat treatment after welding?

I wouldn't have thought that not heat treating afterwards would be a big deal. Here is a link about Heat Treating an Aluminum Bicycle after repair. https://app.aws.org/forum/topic_show.pl?tid=7392
 
KQP said:
Wow!! Great Job! Thanks for sharing. I wish that I saw this before I bought my TSDZ2. I have a tig welding machine at home and know how to tig aluminum well. Maybe I can return my TSDZ2 (It was shipped but hasn't arrived yet).
Can you upload YouTube video that shows this bike?
Why did you decide to make a steel jig instead of welding aluminum flat bar directly to the bike frame and cutting and grinding them later?
How did everything work with everything that came with the Bafang Ultra? Is it necessary to continue making changes?
Thanks
Hey, some answers
-Sorry no video as of yet...
-Welding the dissimilar thickness aluminum can be tricky, pre-heat the thick piece first. I have a Miller Dynasty 350 that welds that thick stuff pretty easy.
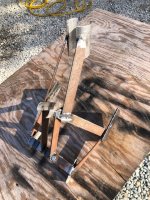
-The "Trex" fixture can be moved to another frame if I want to build another. It just clamps on. Welding a aluminum fixture to the frame might end up making a mess of things. Plus the steel welds quick with the MIG welder & makes cool sparks
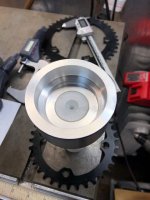
- The Ultra kit from Luna comes basically complete. I did swap out some stuff (because I already had lying around) to lighten things up. The Ultra motor has lots of power as compared to most other drives in the stock configuration. So far, no problems. The tall gearing is good for the street. I ride off road and needed some lower gearing, that's why I made the 104 adapter. You could always swap out the cassette for like the 1 X 11 for lower gearing if need be.
-Good luck & have fun!!
 
Great job, I have also been looking for an Ultra Spider Chain Ring not a deep as stock. No luck so far, Running 27.5 x 2.4 tires. I can only use 5 of the 10 gears I have. 1 right.JPG
 
Check out Karls post. https://electricbike-blog.com/2019/09/02/christini-bcd-104-ultra-max-adapter-unleashes-the-torque-monster-on-your-trail-snow-ebike/#more-7556
 
Superb build thread, and I especially like the frame jig.

I might try a similar build myself, as I can't find a decent hard tail 29er frame for the Bafang mid drive.
 
Flash-FX said:
Some primer and flat black to match the original finish. Then check fit and chain line.

Hello! remarkable job!want to do the same with surly ICT / its a huge frame and bafang m620 seems to be narrow for a frame like this...have to bend crank arms somehow later....

https://photos.google.com/share/AF1QipM4ogLgImBGYjI1hFEEARc4fRP3JXRKctnPLG_lbTkcMVsRZd5WQfhBafvb59Wh7Q?key=ZF9RZnJkQ0FILVZycFpjcF81TkR2dDZTVmc3MjRB
 
2 years on from this thread and still no luck in finding a 34T spider ring for the bafang m620!!..

Anyone else managed to find a 34T spider available?...

Unfortunately I do not have the skills to make one..

Any help our advice would be greatly appreciated 👍..

Thanks in advance, members..
 
mxer said:
2 years on from this thread and still no luck in finding a 34T spider ring for the bafang m620!!..

Anyone else managed to find a 34T spider available?...

BCD104-Angle-1.jpg

https://christinibicycles.com/buy/buy-parts/
 
Unfortunately standard is out of stock, pic above is fatbike unsure if the offset would be too much.

Thank you for your input tho
 
Christini offerers a "Boost" offset for 104BCD. Get a straighter chainline. Ultra road guys might need this... https://www.ebay.com/itm/194665934711?_trkparms=amclksrc%3DITM%26aid%3D1110006%26algo%3DHOMESPLICE.SIM%26ao%3D1%26asc%3D20200818142055%26meid%3D93bde0444860441db96a611a4b748e2e%26pid%3D101113%26rk%3D1%26rkt%3D12%26sd%3D194641901325%26itm%3D194665934711%26pmt%3D0%26noa%3D1%26pg%3D2563228%26algv%3DDefaultOrganicWeb&_trksid=p2563228.c101113.m2108
 
Back
Top