Battery Connection + On/Off Switch

andipowa

100 µW
Joined
May 5, 2011
Messages
8
I'm just coming to the end of my first ebike build and have a couple of battery connection/power questions: -

1. I am connecting 4 SLA's to give me 48v, when I make the final connection I get a reasonable arc over from battery terminal to connector. Is there a way of preventing this as I'm concerned about controller/me damage :shock:

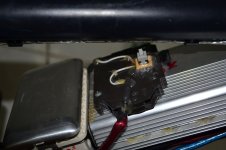
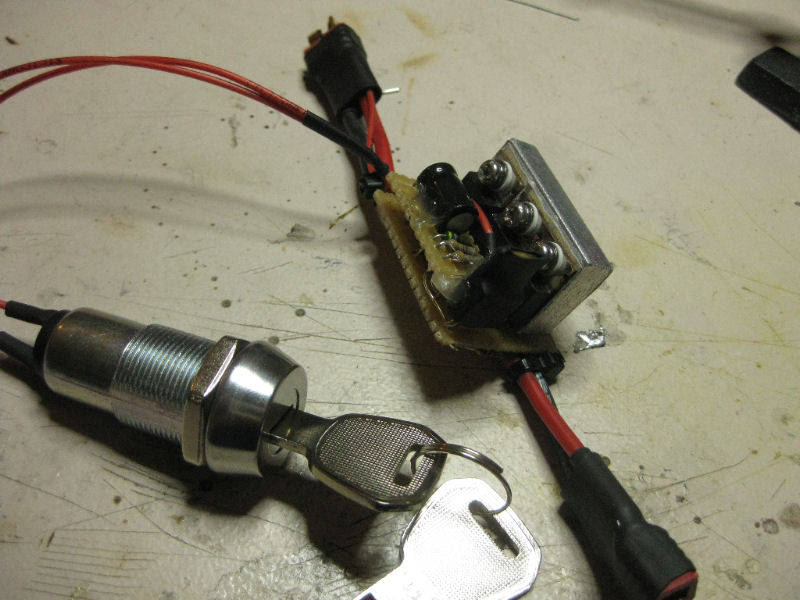
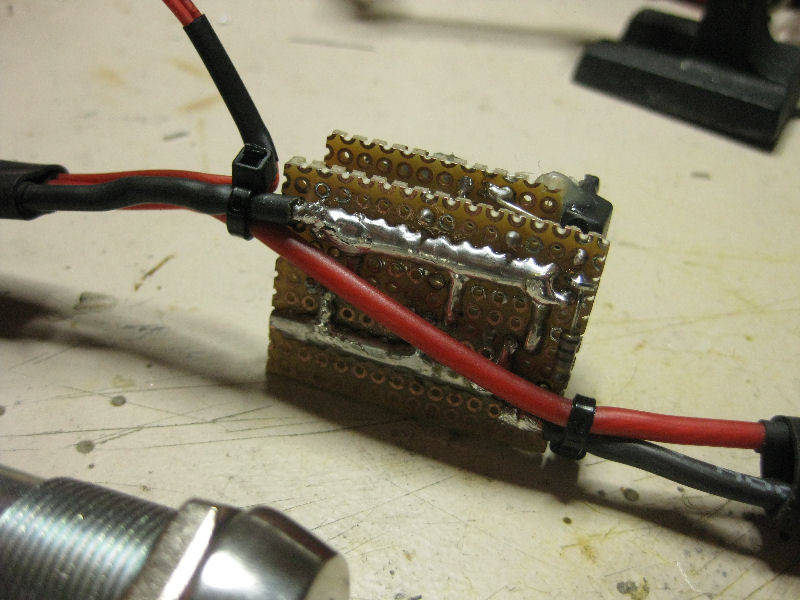
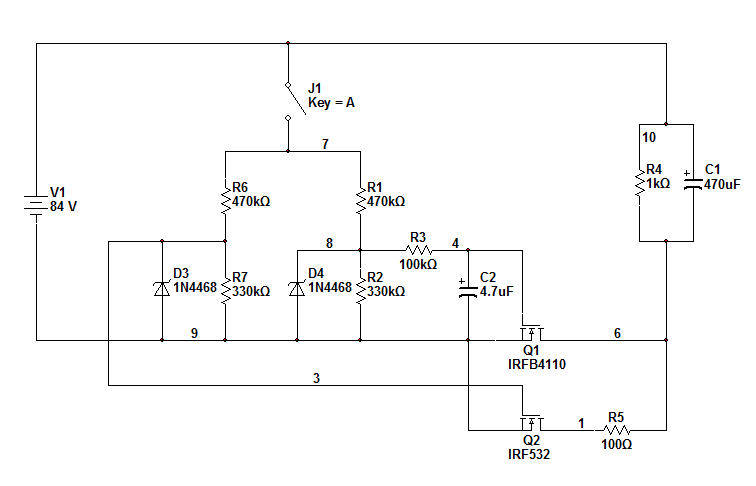
2. I don't have an on/off switch in the curcuit so the system is permanently live (controlled by throttle), I appreciate that the system won't draw power when idle but wonder if this is good practice? I have considered installing a battery cutout switch similar to the ones that competition cars have to cut power but don't know if this is required/reasonable. I don't have a huge amount of space for relays and switches.

Any help much appreciated.
 
In answer to 1), you can either install a precharge resistor (search on the forum for "precharge resistor" you will get a bunch of threads explaining this), or you can simply leave the power connections hooked up, but have a small switch on the "ignition wire" (the thin red wire that couples with the main power red wire).

Re 2) if you leave it hooked up and on, you will flatten your battery pretty quick. You want to at least have a small switch on the ignition wire (if your controller has this, being the thin red wire that goes with the bigger main red wire). But be aware that even if you put a small switch on the ignition wire, by having the power lines connceted and the caps charged up, you will use a small amount of power even then (my understanding is it is about 50 mah a day). But if you ride the bike every few days and have at least 10ah, it is no problem.

You have the right idea (if you want to put in a switch) of using a race car battery isolation switch, these are some of the only switches that are amp rated high enough (most switches are rated only up to 20amps max), but battery isolation switches (which often have a key with them as well), are rated up to over 100amps.

Hope that is of some help.
 
The spark is normal. Simple minded guys like me just use anderson connectors for the switch. Andersons have a design that minimizes the damage to the connector when that spark happens.

There is a method to eliminate it. A pre charge resistor. you'll have to ask another about how to do that. That method is more desirable when using much higher voltages where connector and controller damage is more likely.

On a 48v bike, the spark is generally harmless to the controller. It's the capacitors in the controller filling up. Big caps on big controllers make bigger sparks, but your's are not that bad really.
 
At 48V, I wouldnt bother with a pre-charge resistor. I used the same 45A Anderson Power Poles for hundreds of connections and they handled it fairly well. Now, at 100V with BIG caps in the controller... The arcing is bad enough so that you can barely insert the Power Poles after only one or two connections.
 
After looking forever I finally found a switch that is relatively small and will do what us ebikers need. It's rated for 30a@30vdc and 15a@125vdc (mine is marked 20a@125vdc). It is a DPST switch so we can double up on the contacts and double the current capacity. I'd still use a pre-charge resistor and add a switch to the ignition wire for theft purposes.

http://www.mouser.com/Search/ProductDetail.aspx?qs=KFo7JewZbUH%2F9qrM6y7oVQ%3D%3D
 
What Nicobie says, except I got a 4PST switch with each contact rated for 20A at 30VDC from McMaster-Carr (cat number 8001K24) for under $15. I been using it for about 1000 miles now in conjunction with a 3K, 5W charging resistor with no problems whatever. Having the switch really cuts down the non-use discharge. I also have the "ignition" switch using a cheap key switch for when I want to make some quick stop. The battery is a 48V 10aH LiFePO4 from Ping.

blues
 
1)50 amp circuit breaker
2)momentary switch
3)400Ohm precharge resistor

Just hold momentary switch for few secs and switch breaker on (it will also act as crude fuse)
 

Attachments

  • Picture 005.jpg
    Picture 005.jpg
    232.7 KB · Views: 3,774
I build a 100V/100A switch with a precharger:

qzjler6h.jpg

m8ouzmwr.jpg

ubdlajye.jpg


The FETs are IRFB4110 from an old controller, 3 in parallel and the forth one to precharge the controller over a 100 ohm resistor.

edit:
This is the final result. It charges the controller with 1A for half a second. That should be enough time to connect the battery.
For 48V I would replace the 4.7u capacitor with 2.2u.
The z-diodes protect the FETs from blowing and the voltage range is 29-100V now.
 
Heres a 4 page discussion on pre-charge resistors (also search no spark resistor)
http://endless-sphere.com/forums/viewtopic.php?f=2&t=18572

One of the threads also suggested it may be useful to use a tiny filament bulb as the resistor, or inline with a resistor. It adds the feature of letting you know when the pre-charge is complete by the glow of the bulb ending. A tiny spark during a fast connection may be as useful as no spark after waiting a while (*crosses arms,...taps foot*).

edit: acid, thank you very much for posting those pics and schematic. Are you happy with the current results? or is there something you would change on the next one?
 
I was using it on a 48V system and will test the new 100V circuit without a precharger tomorrow.
When I connected it to my 93V battery one FET and the fuse blew cause I forgot to change the voltage divider. If you have different batteries you probably would like something that works from 30-100V.

I think I will add a 7812 to provide 12V for the FETs that I can use it with both of my batteries.
 
I gave it a thought and a 12V z-diode should do the trick.
This should work from 27V to whatever the FETs can take, having ~12V at Vgs. I will try it soon.

edit: I modified my initial post.
Works like a charm and it does not trigger the overcurrent protection of my BMS anymore.
If you do not have such a protection or your controller does not trigger it, then the precharge fet is unnecessary.
 
acid said:
I build a 100V/100A switch with a precharger:

qzjler6h.jpg

m8ouzmwr.jpg

ubdlajye.jpg


The FETs are IRFB4110 from an old controller, 3 in parallel and the forth one to precharge the controller over a 100 ohm resistor.

edit:
This is the final result. It charges the controller with 1A for half a second. That should be enough time to connect the battery.
For 48V I would replace the 4.7u capacitor with 2.2u.
The z-diodes protect the FETs from blowing and the voltage range is 29-100V now.


I'm building an e-bike and I'd like to put a precharger circuit. Your circuit is very good and I'm triyng to make one alike but in your diagram I can't see where is the way out of the B-.
You have a way in where is V1 84V but then the circuit closes around only interrupted in the key switch (j1 Key=A), but I can't see the way out. Can you indicate where it is? I guess it could be near the 6 but I'm not sure.
Thank you
 
Thanks,

I don´t know anithing about electronics.

I have a 48v 10ah Ping battery, a KU 123 controller and a 48v 500w Bafang BPM hub motor to make an e-bike.

When I plug the battery it flashes inside the controller. Then I saw acid diagram and I´m triyng to make one.

I missunderstood the question, it is where is the way in and out of the pecharger itself?
The positive (red)passes directly out of the precharger, so It has the negative (black) in D3 and out in Q1, Q2 or R5?

I just miss the way out of the negative from the precharger circuit in direction of the controller.

Thanks in advance
 
Richard:

If I understand, the R4 and C1 components are already installed inside the controller? If yes, this parts are "stock" in controllers?


lc_60: in the oposite side, you have the battery symbol (big and small traces alternate)... the big trace is the positive side of the battery, and the small trace is the negative side...


Battery in schematic:


Helps to clarify??

F
 
fabiograssi said:
Richard:

If I understand, the R4 and C1 components are already installed inside the controller? If yes, this parts are "stock" in controllers?

Yes, all controllers will have some large capacitor across the power input and will have some kind of drain that tends to discharge the capacitors when power is removed. I think it is just something to model the controller's behavior to the rest of the circuit, not something that needs to be added.

12W is quite a bit of heat. A larger heat sink may be needed for sustained high current operation (or FETs with lower on resistance). If the FETs are mounted to a chunk of aluminum bar like shown, and this bar is bolted to the inside of a small aluminum box, the heat dissipation will be much better.

I've been working on a similar circuit that includes a fast turn-off that can interface to a BMS and maybe some kind of safety feature that prevents the main FETs from turning on in the event the controller is shorted. I like this one for it's simplicity though.
 
Back
Top