You are using an out of date browser. It may not display this or other websites correctly.
You should upgrade or use an alternative browser.
You should upgrade or use an alternative browser.
Bayliner Conversion
- Thread starter goatman
- Start date
goatman
10 MW
ZeroEm
1 MW
by goatman » Sep 05 2021 12:16am
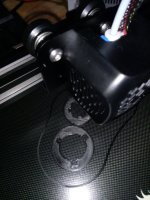
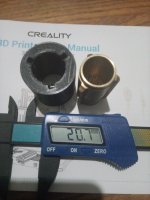
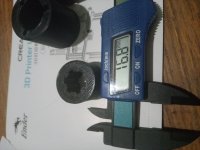
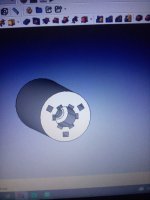
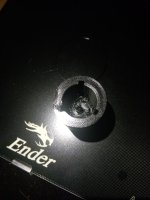
all the parts are 0.2mm-0.3mm smaller than designed
make the changes tomorrow and try again
Welcome to prototyping. Keep that smile. :thumb:
goatman
10 MW
Looking good!
You're further along with CAD than I am. Other that the stuff on thingiverse I'm only doing brackets and boxes so far.
What kind of filament are you going to use for that coupling? I just ordered a filament dryer but haven't decided on which CF/nylon filament to buy. It'll probably be Nylon X from Matterhackers @$58/½kilo.
You're aluminum works good and strong.
goatman
10 MW
earlier in this thread theres a youtube video of a guy printing carbon fiber on his ender, probably that filament.
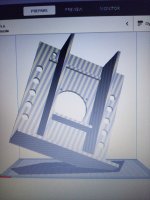
having issues with cura, have to uninstall and install to open it then it wont upload this new file to print, it did yesterday but not today :? trying to figure out what the heck is going on might try a different company. its another snoopy company that wants all your info and access to everything in your computer
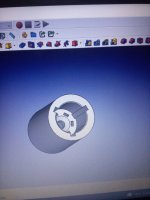
these are FC std files
***figured it out, had to mesh it, if you dont mesh it doesnt convert, i didnt mesh/convert yesterday, i dont know whats going on there but from their wiki, if you dont mesh, holes print smaller
i just made them bigger
Quoted from FreeCAD
"
Which Method to choose ?
Method 2 is to be preferred. Among the reasons:
When you have more than one Body to convert you can use Tools from Workbench Mesh.svg Mesh Workbench. For example, you can fuse meshes before exporting.
Curved surfaces are represented in STL as a series of straight-line segments, generated via tessellation. This results in slightly under-sized inside dimensions for curved surfaces. If you are exporting to use in 3D-printing, this may result in an under-sized hole, for example. In such cases you may need a finer tessellation value. When exporting from another workbench using File → Export..., the tessellation is controlled by the overall display tessellation set in Edit → Preferences... → Part Design → Shape view. However, because those parameters control the tessellation used to render shapes on the display, decreasing them will slow down display rendering, often significantly. In addition, exporting immediately after changing the display tessellation preference value will not have the desired effect because display tessellation is not updated immediately. One must force a change in the underlying model to cause the tessellation to be recomputed -- for example, by editing a sketch parameter (Setting it to its original value will suffice).
""
itll suck if my bigger holes get small again. find out in 4.5hrs
goatman said:earlier in this thread theres a youtube video
I couldn't find it, but then I miss stuff.
It might work OK out of ABS but I hear it's about as hard to print as CF or fiberglass nylon.
I'm new at this but I think I'd print that coupling laying down (with supports enabled) to take advantage of layer adhesion. Pretty sure it would snap in half if printed standing up. Kind of like paying atension to the grain when working with wood. Probably have to clean some strings out of the hole too.
goatman
10 MW
was thinking about that if i was to stack print 3 files there would be 2 weak spots
then thought the infill pattern might take care of that if its all a 1 piece design
sain smart carbon fiber
https://www.youtube.com/watch?v=LqhcmCrlx8o
then thought the infill pattern might take care of that if its all a 1 piece design
sain smart carbon fiber
https://www.youtube.com/watch?v=LqhcmCrlx8o
Thanks, that's pretty much what I read every where else. I'll check out Sain Smart, hadn't heard of them. 
Set infill to 100% for that coupling. Or increase wall count until there's no space left. Couldn't tell you which way is stronger.
Set infill to 100% for that coupling. Or increase wall count until there's no space left. Couldn't tell you which way is stronger.
goatman
10 MW
goatman
10 MW
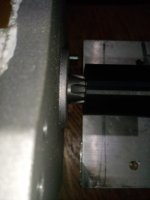
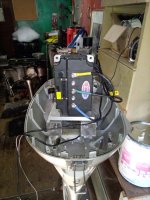
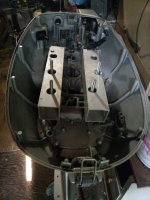
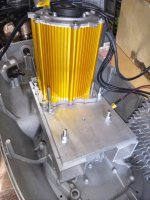
drilled out the upper 2x2s in order to get a socket on the pan bolts
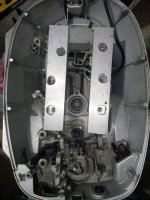
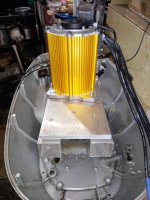
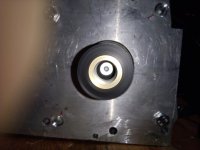
the motor is sitting 1/4 inch too high
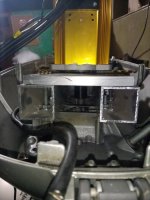
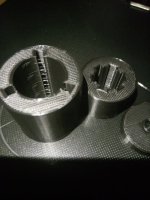
while printing the coupling theres a middle section for the set screw that fastens the coupling to the motor shaft, its supposed to be 5mm thick
for some reason its 10mm thick
only need 3.3mm for the countersink screw head
designed the new V3 coupling but i cant attach the file to this post
take 5 hrs to print and cant fabricate til its done
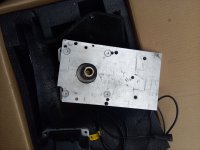
time to design the motor adapter plate, i still have a couple photocopies from earlier
ender3 has a 220mm build plate
problem,
im 222mm on the motor plate
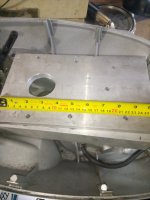
solution
the da85 has another set of motor mount holes slightly inward :thumb:
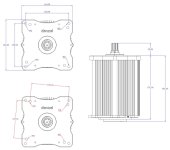

the motor is sitting 1/4 inch too high

while printing the coupling theres a middle section for the set screw that fastens the coupling to the motor shaft, its supposed to be 5mm thick
for some reason its 10mm thick
only need 3.3mm for the countersink screw head
designed the new V3 coupling but i cant attach the file to this post
take 5 hrs to print and cant fabricate til its done
time to design the motor adapter plate, i still have a couple photocopies from earlier
ender3 has a 220mm build plate
problem,
im 222mm on the motor plate

solution
the da85 has another set of motor mount holes slightly inward :thumb:

Looks good!
I've got the parameters in Cura set at 230x230 for my E3.
If it breaks, try printing it laying down. However It might be just fine as it is as you made it nice and fat.
That Sainsmart CF filament gets pretty good reviews and has an attractive price (½ of NylonX). Ordered a roll today. Thanx for the tip.
goatman
10 MW
cura wouldnt slice the adapter plate for me, ill try upping it to 230x230. thanks
goatman
10 MW
had 2 failed prints, first came unstuck after 2 hours
tried hairspray, 2 hrs later it came unstuck
then tried gluestick and a raft
3rd came out perfect :thumb:
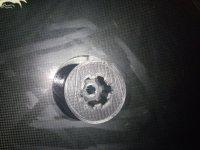
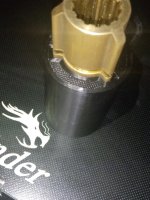
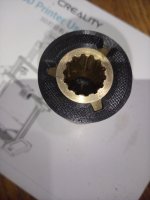
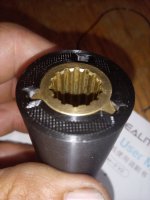
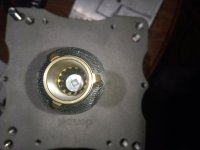
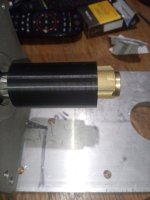
it spins dead nutz true on the shaft :thumb:
now i can mount the motor
lots of room
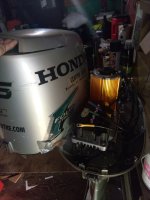
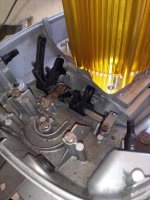
shifting linkage is hitting the 2x2
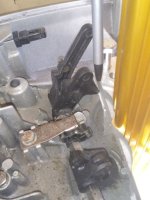
will be using these other bolt holes for 3d printed adapter plate
so if you spin the motor a few degrees clockwise itll square off the bolt pattern to center and give the shifting linkage clearance required
tried hairspray, 2 hrs later it came unstuck
then tried gluestick and a raft
3rd came out perfect :thumb:


it spins dead nutz true on the shaft :thumb:
now i can mount the motor
lots of room

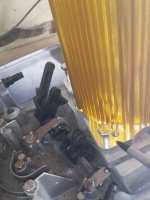
shifting linkage is hitting the 2x2

will be using these other bolt holes for 3d printed adapter plate
so if you spin the motor a few degrees clockwise itll square off the bolt pattern to center and give the shifting linkage clearance required

goatman
10 MW
Almost time to stick it in the water and test. :thumb:
Did you make that coupling out of that SainSmart cf filament?
Did you make that coupling out of that SainSmart cf filament?
goatman
10 MW
PLA
cant find countersunk m8 1.25 25mm bolts anywhere local
ordered them from amazon, get them tomorrow but theyre too long, 55mm
the 25mm had to wait til sunday for delivery
cant find countersunk m8 1.25 25mm bolts anywhere local
ordered them from amazon, get them tomorrow but theyre too long, 55mm
the 25mm had to wait til sunday for delivery
goatman
10 MW
pulled the impeller
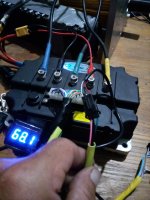
controller has 12v 10a or 15a coming out of it.
those impellers arent very efficient
either use a fan or electric pump
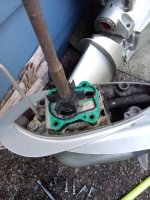
time to try and get the electrical figured out and find out where to get the app from
bought jumper cables from amazon with andersons on them, theyre not tinned copper but itll get it going
https://www.amazon.ca/Booster-Jumper-Cables-Connect-Travel/dp/B08GK7YBMS/ref=sr_1_11?dchild=1&keywords=anderson+jumper+cables&qid=1631064353&sr=8-11
Denzel has a youtube for the da90, my phase arent labelled like that one but ill connect it in the same order
https://www.youtube.com/watch?v=AbbhCIfkSOQ
controller has 12v 10a or 15a coming out of it.
those impellers arent very efficient
either use a fan or electric pump

time to try and get the electrical figured out and find out where to get the app from
bought jumper cables from amazon with andersons on them, theyre not tinned copper but itll get it going
https://www.amazon.ca/Booster-Jumper-Cables-Connect-Travel/dp/B08GK7YBMS/ref=sr_1_11?dchild=1&keywords=anderson+jumper+cables&qid=1631064353&sr=8-11
Denzel has a youtube for the da90, my phase arent labelled like that one but ill connect it in the same order
https://www.youtube.com/watch?v=AbbhCIfkSOQ
goatman
10 MW
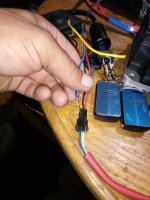
connected Blue to U
Green to V
Yellow to W
time stamped
https://youtu.be/AbbhCIfkSOQ?t=206
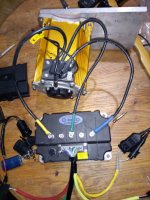
that didnt work, try throttle, on/off, forward/rev, nothing but a
loooooooooooooooooong steady beep from controller
going to swap B and Y
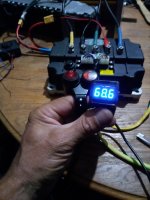
still beeeeeep
disconnect throttle jst
beeeeeeeeeeeep stopped
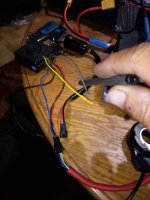
the red and white wires from throttle were hanging out loose when it arrived so i just put them where i thought they should be
put phases back and will swap throttle wires
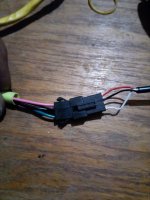
Green to V
Yellow to W
time stamped
https://youtu.be/AbbhCIfkSOQ?t=206

that didnt work, try throttle, on/off, forward/rev, nothing but a
loooooooooooooooooong steady beep from controller
going to swap B and Y

still beeeeeep
disconnect throttle jst
beeeeeeeeeeeep stopped
the red and white wires from throttle were hanging out loose when it arrived so i just put them where i thought they should be
put phases back and will swap throttle wires

goatman
10 MW
goatman
10 MW
goatman
10 MW
goatman
10 MW
goatman
10 MW
Alex sent me the files for the driver
theyre RAR files
used the windows app store to get their RAR opener
it doesnt work :?
anyone know a good RAR opener so i dont have to keep downloading RAR openers?
theyre RAR files
used the windows app store to get their RAR opener
it doesnt work :?
anyone know a good RAR opener so i dont have to keep downloading RAR openers?


