Firstly I have small 36v 250w motor with a 17amp controller and 48v battery. The most I have seen it push is around 700-800 watts on the display.
I have a new frame I would like to convert using the setup above taken off my previous bike.
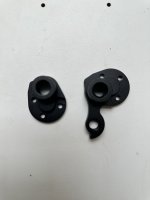
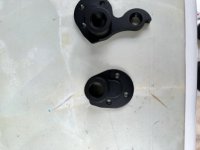
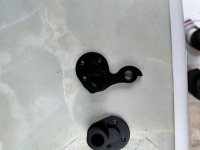
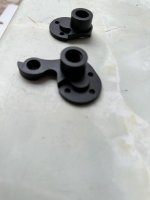
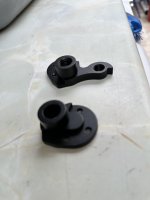
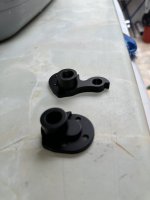
I have removable thru axles on my new frame.
Pictures attached.
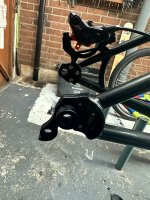
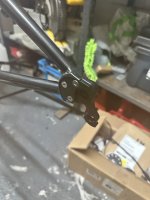
What would be the best way to cut the dropouts to fit a 12mm axles hub motor?
My only thought and the easiest way according to me is to cut a bit of the axle on the non wire side. Slide in the other side and that should leave enough space to slot in the cut side. The frame is steel so I can flex it a few mm to make it work. Well that’s the idea.
My only concern is because the dropouts are round. Will the axles spin even I don’t use torque arms?
Can you think of a better way to cut the dropouts instead of the axle to get it to fit?
The drop outs attach to the frame using three screws.
I have a new frame I would like to convert using the setup above taken off my previous bike.
I have removable thru axles on my new frame.
Pictures attached.
What would be the best way to cut the dropouts to fit a 12mm axles hub motor?
My only thought and the easiest way according to me is to cut a bit of the axle on the non wire side. Slide in the other side and that should leave enough space to slot in the cut side. The frame is steel so I can flex it a few mm to make it work. Well that’s the idea.
My only concern is because the dropouts are round. Will the axles spin even I don’t use torque arms?
Can you think of a better way to cut the dropouts instead of the axle to get it to fit?
The drop outs attach to the frame using three screws.