DIY surron 72V battery build (my first battery build)

TerrySavace

100 mW
Joined
Feb 4, 2021
Messages
41
Hi all,

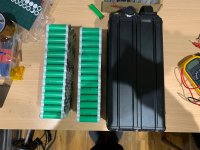
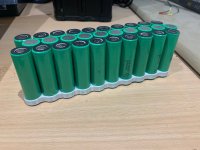
I managed to obtain 200 unused "new" cells quite cheap (£1.20 each) so I have decided to undertake a battery build for my surron. They are Samsung 25r 20A 2500AH cells. They had been previously spot welded but all previous nickel removed. They were originally purchased from fogstar in the UK so are genuine.
I have tested each battery with a volt meter and they are all 3.50 volts bang on. If I manage to build this battery, I will prob go ahead and build a 42AH battery with 21700's. Thought id document it on here for others as i couldnt find anything on the net dedicated to building surron batteries DIY style! I also have a few questions for the community on here! Please dont judge me too much, my experience before under taking this has been limited to FPV drones :D

I also will be using an ANT BMS 20s 300A.

Batteries:
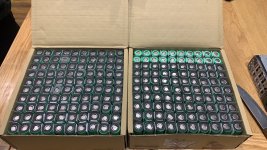
EFBE2166-258F-4E97-8F0B-F20FB3CC16A9.JPG

Building these into a 20s10p configuration, battery should give 200AMPs - around 2.1KW of power (very close to the stock surron battery KW)

Comparison of stock battery and my 72v battery stats:
STOCK BATTERY STATS:
stock surron battery stats.PNG
MY BATTERY STATS:
MyBattery.PNG

I am attempting to make a battery like this : https://litespeedbikes.mybigcommerce.com/72v30ah-surron-drop-in/ I have basically read the description and trying to mirror that. I have also ordered a bac8000 from them and the egg rider and awaiting that to arrive.

Parts list so far:
Purchased these pure nickel strips 0.15x8x100mm
https://amzn.to/31kKpkS

61gyKBP9HOL._AC_SL1500_.jpg

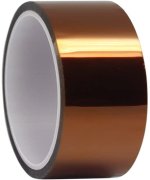
This Tape - Accessotech 100ft Heat Resistant High Temperature Polyimide Tape Hot for Masking Soldering
https://amzn.to/3rrnazT
518lKmBm4fL._AC_SL1000_.jpg

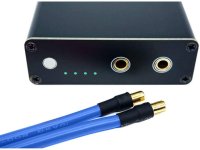
This spot welder
https://amzn.to/3rn5ZQ3
51IJnTrIIOL._AC_SL1001_.jpg

These Battery Insulator Rings:
https://amzn.to/2NSoNZP
rings71VMGRLFhYL._SL1500_.jpg

These Foam sheets for eventually padding the battery out
https://amzn.to/2PrgKUr

Also ordered some of this to insulate the batter after build: "120mm 18650 Battery Insulation Gasket Paper Li-ion Cell Insulating Patch Pad"

s-l1600 (1).jpg

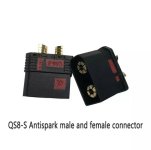
I intend to create two external cables - one for powering the surron and one xt60 type of connection. I have ordered these connectors for powering the surron (will build another power cable for the surron) "Black Anti Spark Connector Male And Female QS8 High Current"
s-l1600.jpg

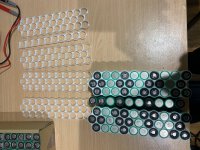
I have 3d printed the 18650 cell holders on a small printer - hence they are made up of multiple parts
The spot welder from amazon, seems to be doing the job and making decent welds
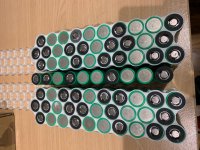
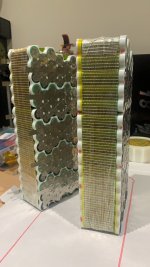
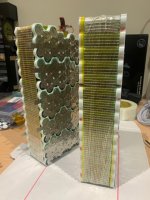
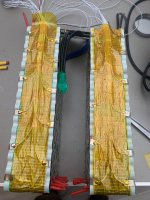
I have triple stacked the nickel in some places as per the photos

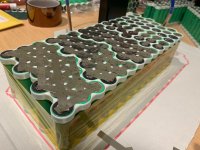
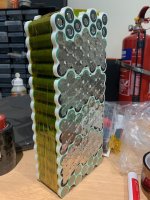
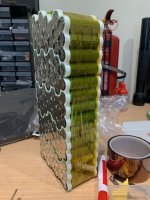
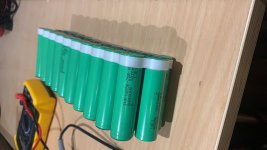
Current Build status:
D3F9F719-217A-4CF8-8D60-3AECC4FD1B15.JPG

IMG_2040.jpg

IMG_2115.jpg

IMG_2114.jpg

IMG_2121.jpg

IMG_2122.jpg

IMG_2179.jpg

thumbnail_IMG_2185.jpg

thumbnail_IMG_2186.jpg

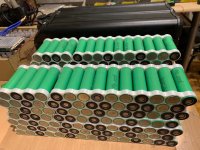
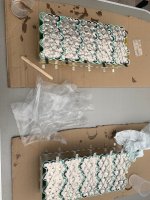
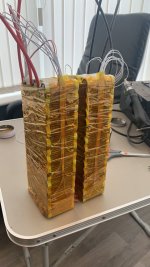
So - as you can see, I have one half almost fully spot welded. I'm leaving each end off as I intend to solder the cables for -/+ and connecting the two halves to the nickel before spot welding it to the batteries.

My cable plan taken directly from the lite speed website on their battery https://litespeedbikes.mybigcommerce.com/72v30ah-surron-drop-in/ - if any experts can suggest any different let me know!!

I will be buying 12 AWG wire, and using 6 of them to connect each 1/2 of the battery.

I will be buying 10 AWG wire and running 3 of them off of the main positive side battery and splicing into 8 AWG wire for the surron positive load connection load - which will connect via the QS8 plug (AKA OSE-8)

I will use 3x10 AWG wires on the negative side to connect to the BMS, then from the BMS to the 8 AWG wire to the QS8 plug.

I will also connect some 10 AWG wires with an XT60 to the positive and negatives for charging. I am awaiting a 10A 72V charger purchased from www.electroncycles.co.uk in the UK.

Question i have is could i use copper butt connectors to "splice" the 3 10AWG into the 8AWG Main Load wires & charger cables? If so what ones shall i use? I have done some digging and i cant see any are rated for high enough AMPs. Or shall i just solder the cables together? Or shall i crimp them together? I will obviously be soldering the XT60 & OS8 onto the ends of each cable, just wondering the best way to connect / splice the actual wires together.

After this, I still need to figure out a way to build a case and fit the BAC8000 & egg rider!!

If you have read this far your a king, if you help me out - your a god!

have a good day people, hopefully I dont blow myself up!
 
I have the same spot welder and it works fine for spot welding strips on the cells but i've noticed the welds are weak when 2 strips are stacked (even on full power). I've put a layer of epoxy to ensure it will be vibration-proof (+ electric insulation)
 
Hmm, Mine seem to be stuck down quite well - I'm only using it to 1/2 charge then re-charging it (i know the power prob comes from capacitors not direct from the bat but thought id charge it anyway)- but think ill do what you have suggested also as it will be getting chucked about abit inside the surron

What epoxy have you used? did you just layer it ontop of the strips (any pictures? )When you say + electric insulation - what do you mean, electrical tape or kapton tape?

Thanks for the reply!
 
Sorry I have no pictures as it is already mounted on the bike.

I have spread out epoxy on the nickel trips, 1 or 2mm thick, make sure you dont have any holes near the cells so it doesn't flow everywhere or wait like 30mins so the epoxy has more viscosity.

Basically some epoxy you can find on amazon (1:1 ratio, 500ml), It acts like an insulator and prevents strips to unweld and short your battery... that's the worst scenario I guess ! You have to test your cells before doing that because once you did that you won't be able to replace bad cells afterward.
 
just use plexi or acetal sheets and use the good hot glue stuff to glue them to the battery. that gives it strength and protects it very well.
 
Well - heres an update. used epoxy on the nickle strips to secure them down. BMS installed and working. Next steps - connect main B negative to ant BMS - connect QS8 connector to main positive and the other side of BMS. Connect XT60 charge wire. Create a case. Fit BAC8000 and connect battery :D

spot welded BMS strips:
thumbnail_955D05F7-6A81-4565-8BD6-C334FD3B9811.jpg

thumbnail_IMG_2258.jpg

Epoxy strips for less chance of failed welds

Did one side first
thumbnail_IMG_2312.jpg

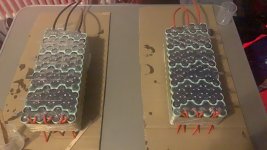
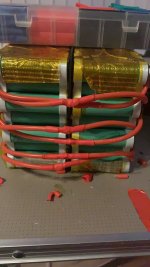
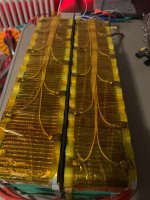
Then attached the 6 cables to connect the two halves together, will solder these after connect BMS wires and wrapping each side. Then Expoxy the other side of each battery half

thumbnail_095C8F59-B37A-4325-AF17-04522CB8EDBE.jpg

Soldered BMS on
thumbnail_IMG_2351.jpg

Then wrapped each half completely
thumbnail_F9A0A42B-14D2-41AC-B5EB-A315F09C16E3.jpg


Connected the two halves, had to cut some of the main tape - will re tape this soon
thumbnail_E649ADE7-81E6-4DEF-A4D1-6AD473D35678.jpg


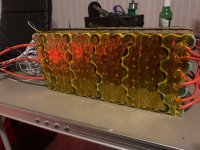
Places fish paper and foam between the halves and switched on BMS
thumbnail_IMG_2362.jpg

thumbnail_IMG_2363.jpg

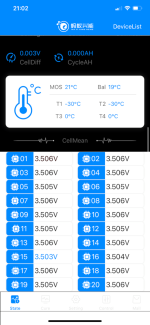
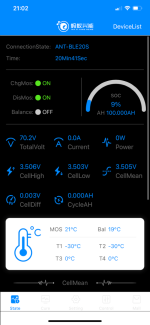
BMS reading good :)
thumbnail_IMG_2359.png

thumbnail_IMG_2360.png

Over the moon so far, tell you what building batteries is not an easy task - i can see why they are so expensive to buy custom batteries now! There is a real art to it, and its not something you can rush!!! This is my first battery build, will I build another???? Keep saying no way, but the gratification I have from building this is making me think I could build another. Prob wont take as long 2nd time round. So far the cost is about £600 i think, and thats including all tools and materials, some of which I prob wont have to buy second time round as have ample left over and dont need another spot welder etc.... but i did get the cells cheap for this one so who knows, prob would be around £750 if i didn't get the cells cheap. Probably around 40 hours (guesstimate) I have put into it though, at least - but that was designing it and learning how to build one along the way, wouldn't have taken as long if I didnt have to fit it into a surron battery compartment thats for sure!
 
Pretty good...but you didnt have to do so much work...on connecting the batteries in parallel you only need ONE strip...it is the series connection that takes full power...also didnt need the epoxy unless the surron is going into battle...lol...Curious as to why the cells were so cheap?...were they used?
 
dont use epoxy. it blocks the venting capabillity of the PTC wich prevents a cell from going "ppppht" instead of "boom".
 
Some things I spotted which you may well be already aware of:

The welder is rated for 0.1 to 0.12 thick nickel strip on the amazon website but you're using 0.15. Often they rate for plated
Did you try sanding some of the strip and leaving it in salty water to check it really is pure nickel?
If the strip is genuine then your welder is working better than it's designed for.

You noted "power" and "Kw" whereas I think you meant capacity which is is 2.1 KWh on each (equating to range)
The power output of the batteries are:
200A x 84V = 16.8 Kw new battery power output fully charged - that gives you potentially double the oomph, though depends on the motor
110A x 67V = 7.370 Kw - old battery power output

BAC 8000 is rated 36-72V and 840A. I assume the 72V nominal running at 84 fully charged is OK including any voltage allowance for inductive spikes on switching?
It would be worse at higher currents and you won't be approaching the 840A limit
https://www.acceleratedsystems.com/products/electric-motor-controllers/bac8000

I might have suggested a 4 probe resistance meter check of cells https://www.ebay.co.uk/itm/154050275981 or similar but if they really are new you should be fine

When you splice multistrand using soldering there is a weak point where the solder meets the wire. This is worse in fine high flex multistrand cable or if the soldered part is held rigidly and the cable moves relative to it. The heatshrink around the splice will help a lot, just be aware that it's a potential failure point due to movement when you fit the battery and possibly take a measurement of resistance between the packs (I use a 1A CC PSU as a source and mV meter) for reference and check occasionally

I always suggest modelling your system on the grin simulator to get a feel of how your mods will affect your bike https://ebikes.ca/tools/simulator.html

Do the cells stay that well balanced when the whole battery is charged - if they stay at the same voltage you're in luck again

Looks good - where did you get those cells and are there any more going (I'm also in the UK)
 
Thanks for the reply. I did not test the nickle strips, the comments on the amazon seller were all good, saying people had tested them and they were 99% pure nickle... I have some left i did not use and will test those tonight. Fingers crossed it works!!!

The welder did seem to do a good job. I coated the strips on each end of the batteries with epoxy so they are on there now and not getting them off.

This battery is for a Surron , and will be using a pre-configured bac8000 for the motor on the surron. I know there are risks with doing it but willing to take those risks.

Regarding the cells staying well balanced - i have not yet charged this battery, its sitting there all together and connect to the ANT BMS but i have yet to charge it, just checked the ANT BMS and it seems cell bank 1 has dropped considerably when compared to the rest... no idea why - check my post here https://endless-sphere.com/forums/viewtopic.php?f=14&t=111758&p=1655657#p1655657 - no idea whats happening... maybe i need to charge it.

I spliced the wires together, it went quite well.... I have yet to test this.

The cells were originally purchased from https://www.fogstar-wholesale.co.uk/
 
great built quality and very safe design. SurRon will climb all stuff!!

Why did U did not used Sony VTC5 ?
those samsung 25R are high current cells, but Sony VTC5 still have less internal resistor and more current delivery.

Someone built a SurRon artesanal battery and some went wrong, battery goes fire on charge. and fire all battery & bike. great to be outside house

When built batteries allways be on safe build isolating cell blocks with isolator or some cells distance separators . ebikes and electric vehicles do vibration and impacts to battery cells. maybe also including some type of liquid solid foam between cells
 
Hello everyone
My name is Beat. I am a passionate Sur ron tuner and driver.
I also dare to build my own battery by myself.
I'm using 21700 Molicel P42A, 20s 10p.
When checking the batteries, i noticed that the resistance fluctuates between about 8.8 mOhm and 11.7 mOhm. The average is between 9.00 and 10.00 mOhm for about 98% of the batteries. What resistance difference is tolerable?
Thanks for your advice.
Kind regards Beat
 
flippy said:
dont use epoxy. it blocks the venting capabillity of the PTC wich prevents a cell from going "ppppht" instead of "boom".

In measuring the CID activation pressures and vent pressures, its several hundred PSI, and encapsulating the tops in various materials makes so minimal effect on CID and vent threshold its difficult to repeatably measure any increase in pressure, though I agree with you it has to offer at least a few psi extra resistance.
 
Hello,

I am French and congratulations for this topic and this really exciting post!
Your project and the information you put here are impressive and what a work!
Congratulations !

I would like to do the same thing as you, and I'm just starting to do some tests with old laptop batteries that I recover.

My ultimate goal would be to make this type of battery :

https://fr.aliexpress.com/item/1005001896483750.html?src=google&src=google&albch=shopping&acnt=248-630-5778&isdl=y&slnk=&plac=&mtctp=&albbt=Google_7_shopping&aff_platform=google&aff_short_key=UneMJZVf&albagn=888888&isSmbAutoCall=false&needSmbHouyi=false&albcp=11232029028&albag=118613065348&trgt=1288957802336&crea=fr1005001896483750&netw=u&device=c&albpg=1288957802336&albpd=fr1005001896483750&gclid=Cj0KCQjw5JSLBhCxARIsAHgO2SesJy6b_fqAGheHuEwzyWYa4Mj4AU7w1CqJd1ecuFyZTul07VFm9HoaApO8EALw_wcB&gclsrc=aw.ds

60V 58 Ah, 16s 12p is assembled on 21700 Panasonic cells and eventually to buy a BAc 8000 ASI.

Today I have a lot of questions that you may be able to answer:

You who designed a battery of this type:

- Do you advise to use 21700 rather than 18650 ?
- Where did you find the container for the batteries, to put in the bike?
- Did you design the box yourself in plastic (3d printer) or in DIY metal?
- Do you think that if you put aside the time spent, is it really profitable financially?
- What material would you recommend for this project if you had to do it again? Spotwelder?
- What are the pitfalls to avoid for a beginner like me?
- How many batteries type 21700 can we put in an original box without having to modify it?
- Should we wait for the new tesla 4680 batteries or the solid state ones?
- Will a battery of this style really double the autonomy? I have difficulty to exceed the 40 km
- Do you have a diagram of the organization, the structure of the battery, once all the material in place in the box?
- Can you explain which reference to buy for the BMS?
16s 12P for 60V 58ah but how to calculate the max and crete power of the BMS to buy ? one or two separate outputs for charge and discharge ?

https://fastride.fr/fr/bms/1746-bms-ant-300a-bluetooth-8s-a-20s-300a.html

https://fr.aliexpress.com/item/1005003251091995.html?gatewayAdapt=glo2fra&spm=a2g0o.ppclist.product.2.2a9cVjkoVjko3X&_t=pvid:ff262c9d-43ab-4731-b362-3d7ae6f05120&afTraceInfo=1005003251091995__-911__pcBridgePPC__VBCbrlN__1650060617985


I see a lot of BMs at 300A but no idea of the compatibility with the battery and what the motor can pull:

https://www.sur-ron.bike/document/EVE%20-%20Fiche%20technique%20Light%20Bee%20FR.pdf


With programmable Bluettooth, with/without display...

I hear about BAC8000 that pull 15KW !! while the technical specifications say 5K MAx :


I confess that I am really lost and I will really need your help before buying the material, the calculations, the assembly, the software used for the calculations...

I thank you in advance for the answers you could give me.

Good day to you

cordially

Jean
 
Hi all,

I managed to obtain 200 unused "new" cells quite cheap (£1.20 each) so I have decided to undertake a battery build for my surron. They are Samsung 25r 20A 2500AH cells. They had been previously spot welded but all previous nickel removed. They were originally purchased from fogstar in the UK so are genuine.
I have tested each battery with a volt meter and they are all 3.50 volts bang on. If I manage to build this battery, I will prob go ahead and build a 42AH battery with 21700's. Thought id document it on here for others as i couldnt find anything on the net dedicated to building surron batteries DIY style! I also have a few questions for the community on here! Please dont judge me too much, my experience before under taking this has been limited to FPV drones :D

I also will be using an ANT BMS 20s 300A.

Batteries:
View attachment 290634

Building these into a 20s10p configuration, battery should give 200AMPs - around 2.1KW of power (very close to the stock surron battery KW)

Comparison of stock battery and my 72v battery stats:
STOCK BATTERY STATS:
View attachment 290629
MY BATTERY STATS:
View attachment 290628

I am attempting to make a battery like this : https://litespeedbikes.mybigcommerce.com/72v30ah-surron-drop-in/ I have basically read the description and trying to mirror that. I have also ordered a bac8000 from them and the egg rider and awaiting that to arrive.

Parts list so far:
Purchased these pure nickel strips 0.15x8x100mm
View attachment 290630

This Tape - Accessotech 100ft Heat Resistant High Temperature Polyimide Tape Hot for Masking Soldering
View attachment 290633

This spot welder
View attachment 290631

These Battery Insulator Rings:
View attachment 290632

These Foam sheets for eventually padding the battery out

Also ordered some of this to insulate the batter after build: "120mm 18650 Battery Insulation Gasket Paper Li-ion Cell Insulating Patch Pad"

View attachment 290642

I intend to create two external cables - one for powering the surron and one xt60 type of connection. I have ordered these connectors for powering the surron (will build another power cable for the surron) "Black Anti Spark Connector Male And Female QS8 High Current"
View attachment 290627

I have 3d printed the 18650 cell holders on a small printer - hence they are made up of multiple parts
The spot welder from amazon, seems to be doing the job and making decent welds
I have triple stacked the nickel in some places as per the photos

Current Build status:
View attachment 290638

View attachment 290635

View attachment 290636

View attachment 290637

View attachment 290639

View attachment 290640

View attachment 290641

View attachment 290644

View attachment 290645

So - as you can see, I have one half almost fully spot welded. I'm leaving each end off as I intend to solder the cables for -/+ and connecting the two halves to the nickel before spot welding it to the batteries.

My cable plan taken directly from the lite speed website on their battery https://litespeedbikes.mybigcommerce.com/72v30ah-surron-drop-in/ - if any experts can suggest any different let me know!!

I will be buying 12 AWG wire, and using 6 of them to connect each 1/2 of the battery.

I will be buying 10 AWG wire and running 3 of them off of the main positive side battery and splicing into 8 AWG wire for the surron positive load connection load - which will connect via the QS8 plug (AKA OSE-8)

I will use 3x10 AWG wires on the negative side to connect to the BMS, then from the BMS to the 8 AWG wire to the QS8 plug.

I will also connect some 10 AWG wires with an XT60 to the positive and negatives for charging. I am awaiting a 10A 72V charger purchased from www.electroncycles.co.uk in the UK.

Question i have is could i use copper butt connectors to "splice" the 3 10AWG into the 8AWG Main Load wires & charger cables? If so what ones shall i use? I have done some digging and i cant see any are rated for high enough AMPs. Or shall i just solder the cables together? Or shall i crimp them together? I will obviously be soldering the XT60 & OS8 onto the ends of each cable, just wondering the best way to connect / splice the actual wires together.

After this, I still need to figure out a way to build a case and fit the BAC8000 & egg rider!!

If you have read this far your a king, if you help me out - your a god!

have a good day people, hopefully I dont blow myself up!
Where can I purchase all the stuff?
 
Back
Top