torqueboards
1 MW
Interesting Reads
Frequently Asked Questions
This guide is made for a single or dual 63mm motor setup using a 6S lipo battery. The reason why I choose 6S as it is much cheaper and can effectively ride up around 20-23mph easily. Single motor works well and is much cheaper than going dual motors. The best part of this setup is you can always upgrade later to dual motors if you wanted too as the parts will all be compatible for a dual motor. Benefits of dual motor are less stress on one motor and a bit faster, more torque more power and better stopping/braking power IMO.
Step 1 - Welded Longboard Motor Mount
Step 2 - Building The Drive Hubs
Step 3 - Choosing The Electronics
Step 4 - Choosing The Board
Step 5 - Putting It All Together
Step 6 - Building An Electronics Enclosure
TorqueBoard's Welded Motor Mount Single/Dual Motor Pricing
http://endless-sphere.com/forums/viewtopic.php?f=35&t=54963&p=831538#p831538.
If you are looking for a faster electric longboard, your equipment will be different as well as voltage. I hope this guide helps most people. If you have any questions, please post and I or anyone else can help answer any specific questions. This guide is based on my own experience and results can vary.
Step 2 - Building The Drive Hubs
This is the second most important part of building an electric longboard. To build the drive hub, you simply need to attach a pulley wheel to the longboard wheel. The easiest way to do this is to use a plastic wheel and you can drill through it yourself.
Choosing Your Longboard Wheels
(1) 83mm, 90mm, 97mm ABEC 11 Flywheels or eBay Blank Pro Flywheels *I prefer the eBay Blank Pro Wheels. You can use M6 bolts that fit and hold onto the Blank Pro Flywheels (ABEC Clones). M6 bolts hold it pretty well and is better with the torque that you put behind it. For ABEC 11's something would need to be used to drive the torque from the wheels through similar to the inside retainers that lpbug uses here - http://endless-sphere.com/forums/viewtopic.php?f=35&t=54938.
(2) 75mm Orangatang In Heat Longboard Wheels *These work but you would have to drill through the wheel itself to mount them.
83mm, 90mm, 97mm eBay Blank Pro Wheels are recommended for an easy setup. 83mm's work well but if you want to ride over bigger side curbs and run over potholes 90mm/97mm wheels are better.

These wheels are the 97mm Blank Pro Flywheels above.
Gearing Ratio
Depending on the wheel that you use, you may need a diff gearing ratio. The gearing ratio that works for more torque would be 1:3 to 1:4 which is the ratio between the motor pulley wheel and the longboard wheel pulley. For a more top end, more speed you would want to reach more along the lines of 1:2 ratio.
More Top End Speed - The reason why this works like this is because for top end you want less drag so a motor pulley of 15T and 30T going at higher speeds there is less drag when the 15T pulley pulls the 30T pulley.
More Starting Torque - For more torque you want a smaller motor pulley and a bigger drive wheel. What this will do is when the motor pulley pulls, you want it to pull a bigger drive wheel as it will pull harder from the start.
This is the reason why multiple gearing bikes (ex. 5/6 speed mountain bikes) have multiple gears. You use the lower gears which will switch to the bigger chain pulley and will help you climb hills better. When you switch to the 5 or 6th gear (higher gears) it will allow you to peddle faster with less drag.
Unfortunately, for a electric longboard we do not have the option of being able to fit multiple gears so we are stuck with choosing only one gearing ratio to help us along the way for both starting and top end speeds. We must find a medium that gives us enough torque on start and our own personal required top end. This means 15mph, 20mph, 40mph etc. Although, with a single motor on a 6S voltage battery we are limited to about 20-23mph due to the lower voltage. Higher voltage would give us more power to reach higher top speeds although this will cost more in the long run.
My medium gearing ratio is a 14T motor pulley and a 40T drive wheel pulley. This gives us a gearing ratio of 1:2.85 which is meant for more torque than top speed/top end. Doesn't matter too much since we are limited to about 20-23mph with a 6S voltage battery. Partly, the reason why I use this ratio is that there are plastic 40T drive wheels that make it easy.


Gearing Belt & Pulley Type - The most common pulley pitch that is used for electric longboards DIY and manufactured boards is HTD 5mm pitch belts and pulleys. The manufactured boards use 15mm width pulleys which I would recommend but currently I am using 9mm width. 15mm pulleys are more durable and longer lasting because of the extra width which is why production typed boards would use them IMO although they would also cause more drag. 9mm width works well for a dual motor rear wheel as there isn't much space to use 15mm. If you are using a dual motor or single motor diagonal setup 15mm width would be nice. 15mm works well for 20-23mph but if you are trying to reach speeds that are 30mph or higher a 9mm width belt would be better because of less drag.
What does more torque do for us? More torque allows us to be able to not kick push to help the motor go, less stress for the motor on start. Although, it does help to kick to push it's not needed. It also allows us to reach 10-20mph much faster with more torque and allows us to climb hills with more ease.
My Standard Drive Train Setup using HTD 5mm Belts and Pulleys.
These parts are standard and work with my own motor mount. If you have a different motor mount, you may have to double check to see what your motor mount will allow/fit.
Motor Pulley - SDP-SI.com - Part Number: A 6A25-014DF0908
* This is a 14T HTD 5mm pitch and 9mm width aluminum pulley with 2 flanges, 2 set screws M3. This comes in a standard 6mm center which will need to be 8mm to fit through the 63mm SK3 motor shaft. I use 14T as this allows more room for a threaded M3 set screw since the hub itself is a bit thicker so it can get more threads through. I use actual M3 socket cap screws instead of set screws as I find them a lot durable and stronger than a regular M3 set screw. They have quite a bit of force on them as well. I also get this with 2 flanges so the belt stays on the motor pulley. I make sure the drive wheel pulley only has 1 flange so I can easily get the belt over the motor pulley + drive wheel pulley.
Tip for the motor shaft would be to use a dremmel and create a flat on the motor shaft. You can do this by sanding a part of the motor shaft with the dremmel so it's a flat. The reason why you want to create a flat on the motor shaft is the set screw will sit on top of this flat and it will give it a better position to hold that set screw in that spot rather than the set screw trying to hold the pulley in that position on a circle shaft. I would highly recommend this be done and not to pass this part up.
You can do one better and either make the motor shaft and motor pulley a D shape and/or a keyway. If you can make it a D shape or Keyway the motor pulley will never spin around the motor shaft as it will be keyed in a way where it won't spin. The idea is you want the motor shaft to move the pulley and not have it spin around each other because nothing is holding it in.
Drive Wheel Pulley - SDP-SI.com - Part Number: A 6L25-040SF0910
* 40T HTD 5mm pitch 9mm width pulley available from SDP-SI.com - Part Number: A 6L25-040SF0910. This needs modifications to get it to fit properly. You will need to widen the center hole and either use (3) or (6) M6 bolts that go through the Blank Pro Flywheel and the 40T HTD pulley. This means drill in 3 or 6 holes to fit the bolts through. You can then have M6 lock nuts on the other end. Make sure to get it as centered as possible as this can cause issues when riding.
Pulley Belt - SDP-SI.com - 57T HTD 5mm pitch 9mm width
*A 57T Pulley Belt should be good for a 14T and 40T HTD 5mm pulley. Last time I checked I think it works well. 56T might work as it seems at this moment that's all that SDP-SI has available.
Step 3 - Choosing The Electronics
Things you need to complete your build would be the following:
(1) ESC - Electronic Speed Controller
(2) Lipo Batteries
(3) RC Electrical Connectors
(4) RC Transmitter & Receiver
(1) ESC - Electronic Speed Controller
For a 6S setup, I would highly recommend purchasing the Hobbywing EZRUN-150A-Pro from ValueHobby.com which is about $85. Also purchase the programming card to make life easier. This ESC works better than the HobbyKing 150A or Trackstar 150A from HobbyKing.com.

I would use (2) 3S Lipo Batteries as they are cheaper and much easier to charge. If one battery breaks you can simply purchase another and they are fairly cheap. They are also thinner/smaller than a regular 6S as a 6S is 6x 1 cell batteries versus 3x 1 cell batteries. The 6S 5000mah setup should give you about 6 to 10 miles and I normally carry 2 or 3 sets of these batteries as they are light. I just simply swap them on the board with a new pair which takes about 2-4 minutes.
[*]ZIPPY Flightmax 5000mAh 3S1P 20C (USA Warehouse) - http://www.hobbyking.com/hobbyking/store/__16786__ZIPPY_Flightmax_5000mAh_3S1P_20C_USA_Warehouse_.html - $22.07/each.
(3) RC Electrical Connectors
For connectors, you can use whichever that you like best. The cheapest way would be to use 5.5mm gold bullet connectors if you want it nicer looking EC5 or XT90 plugs are real nice and make things more neater. I would go with 5.5mm or EC5. XT90 seem a bit harder to take apart versus the EC5's.
(4) RC Transmitter & Receiver
The GT2B transmitter and receiver combo is cheap and pretty easy to use. The rechargeable battery lasts long and is simple to recharge with a USB cord. I still wish this controller was much smaller so it can fit in my back pocket but that would take some modification which I may do later on. I tried getting this one here working Quanum 2.4Ghz 3ch Pistol Grip Tx & Rx System - http://www.hobbyking.com/hobbyking/store/__44693__Quanum_2_4Ghz_3ch_Pistol_Grip_Tx_Rx_System.html as it is a smaller controller but was not able to get it to work. It's a bit smaller but not small enough. If it worked I would switch over. If anyone got this to work let me know as I would like to use it too.
*HobbyKing HK-GT2B 3CH 2.4GHz Transmitter and Receiver w/Rechargable Li-ion Battery ( US Warehouse) - http://www.hobbyking.com/hobbyking/store/__45311__HobbyKing_HK_GT2B_3CH_2_4GHz_Transmitter_and_Receiver_w_Rechargable_Li_ion_Battery_US_Warehouse_.html - $25.31
Step 4 - Choosing The Board
Choosing a longboard depends on what type of setup that you personally want. I wouldn't use a dropthrough at least if you purchase the pre-welded ones from me since the angle they are welded isn't meant for a drop through setup. If you are welding the motor mounts yourself it will work fine just make sure you account for the drop through. I purchase my longboard decks from MuirSkate.com and/or ebay. I'll also include a link to a few cheap boards if it doesn't matter to you. I would pick a board without a deep concave underneath the board as it will be harder to mount the electronics underneath the board. I personally like 33-36" longboards as they are easier to carry around and more portable since they aren't so long. A board with some good foot pockets help for going uphill and downhill it helps you stay on the board better.
Step 5 - Putting It All Together
1. Setting up the Motor Mounts, Drive Train and Paris Trucks.
2. Setting up the Electronics
1. Setting up the Motor Mounts, Drive Train and Paris Trucks.
The easiest way is to purchase the pre-welded motor mounts on Paris Trucks and simply bolt them onto your board. If you didn't you will need to weld the motor mounts to the Paris Trucks or any longboard trucks of your choice. When welding the motor mount to the trucks. Make sure you have a raw pair of trucks and there is no color coating on the trucks or you can't weld it. You will need to sand it down and then weld it so might as well just get the trucks raw. If you wanted too you can use any type of trucks the hole on the motor mount will just need to be widened to fit through.

1. Bolt the trucks with the motor mount to your longboard.
2. Bolt the motor to the motor mount.
3. Bolt the motor pulley to the motor shaft and use the set screw.
4. Bolt the drive wheel pulley onto the wheel and attach the wheel to the truck axle.
5. Slip the belt onto the motor pulley first and then slip it onto the drive wheel as well. You may need to simply put the belt on the drive wheel pulley and turn the wheel to pull the belt over the entire pulley. This makes sure that the belt is snug and won't cog. Cog meaning it won't skip any teeth because the belt is too loose.
6. Now you are done with the motor mount + drive train. You simply need to connect all the electrical parts and mount your electrical parts underneath the board.
2. Setting up the Electronics
The basics for electronics should be the batteries are connected to the speed controller positive and negative wires. The speed controller has a built in BEC which converts the 6S voltage to 3v to power the RC Receiver. The speed controller ESC should have a positive and negative wire that will power the RC receiver. There should then be another wire coming out of the ESC which will send the commands from the RC handheld transmitter to the RC receiver. This wire should come out of the ESC and plug into the RC receiver. In the RC Receiver, you should have a power and another one coming in from the ESC, usually on channel 2. The top plug on the RC receiver should be the power.
1. Connect the (3) motor wires to the ESC.
You will have to make an adapter which is 4mm female gold bullet connectors to 6mm male connectors that connect to the ESC. 3 adapters which are the same, you can use 10AWG. Each will be 4mm female bullet connectors to 6mm male bullet connectors to fit into the ESC. This means that you will have to purchase 6mm gold connectors.
The (3) 4mm female connectors will be plugged into the motor wires and the (3) 6mm male connectors will plug into the ESC.
2. (2) 3S batteries connected in series.
You will need to connect the (2) 3S batteries that you bought in series. To connect batteries in series, battery 1 needs positive to be plugged into battery 2 negative which will then give you a negative and positive connectors left over which will be plugged into the pos/neg into the ESC pos/neg. I will try and include pictures in the future once I take some from my new build. The best and easiest way to set this up would be to use EC5 connectors for all batteries and creating a series adapter for (2) batteries in series to go to the ESC.
3. Connect batteries to ESC positive and negative wires.
Connect the battery pos/neg to the ESC pos/neg to give power to the ESC.
4. Connect ESC BEC wires to RC Receiver.
Connect ESC brain wires and ESC power wires to the RC Receiver. There should be a plug for the power and Channel 1 to 3 for the RC Receiver. You can put the ESC brain wires to Channel 2.
Conclusion
That's pretty much it to complete the electrical connection for the board. The best way to turn on your electric longboard would be to turn on the RC Transmitter Controller first and then plug in the power from the ESC to the Batteries to give the Eboard it's power. The RC Receiver will then beep to say it has been successfully connected. You can then hold the throttle on your RC transmitter and the motor should then pull the wheels.
On/Off EC5 Adapter - What you can do to make life easier is create a connector for the positive from the ESC and positive to the battery. Simply, create an adapter with the EC5 plugs where one side goes to the ESC and one side goes to the battery. You then have the other connector of the EC5 which just loops around to complete the full connection. You can then remove the EC5 plug with the loop and it will act as a connector to finish the final connection for the battery to the ESC. I will post pictures when I set up my new board.
That about sums up the complete build of an electric longboard skateboard. The final piece is how to mount all the electronics underneath the board without getting dirty and so you can easily swap the batteries.
Step 6 - Building An Electronics Enclosure
You could setup your own electronics enclosure from heated ABS sheets, heated kydex sheets, plexiglass, thin aluminum and many more materials. Although, I want something that's easy and simple. In my opinion and the countless hours that I've spent searching for the best electronics enclosure. I ended up finding this company Polycase to have the best stuff, almost - http://www.polycase.com/. To make your setup as neat as possible, you want to make all the connectors and wires as small/short as possible to avoid having a big bunch of wires all over the place. You will have to drill holes into these enclosures to fit the wires through. To make them neater, you can use 1" rubber grommets which you can find on ebay and use a 1" drill bit and/or 1" hole saw to make the holes into the enclosures. You can also use a stuby philips screwdriver to undo the enclosure covers and/or a small electric screwdriver to make it faster. I usually keep a bag of extra parts just in-case things fall apart or I end up needing them.
1. Enclosure for EZRun 150A ESC + RC Receiver + Wires
2. Enclosure for (2) 3S Batteries
1. Enclosure for EZRun 150A ESC + RC Receiver + Wires
The size requirements for an EZRUN are the following: 2.55 inches Length x 2.16 inches Width x 1.77 inches height. Although, you need some space to also add the wires and receiver. I would use something like this here from PolyCase - XR-34F and/or XR-44F - http://www.polycase.com/surface-mount-xr-series. These are plastic so once you can find the proper placement inside the enclosure, you can cut through the top if you wanted to to give room for the ESC. With the XR-34F, there should be enough space to include the On/Off EC5 Adapter as well as the wires.

2. Enclosure for (2) 3S Batteries
For the (2) 3S batteries they are about 6" length x 4.5" width x 1" height you still need some room for wires as well. Unfortunately because of the big length and width there are no enclosures with a 1" height. The best I was able to find was 2.22" in height. I found the XR-57F was the best option http://www.polycase.com/xr-57f it has a max inside space of 6.957" x 4.650" which is enough room for my 6" x 4.5" almost barely. There are also a few other options listed below as well. I bought a few of each to report in the future how well they work.
XR-57F - http://www.polycase.com/xr-57f - Outside - 7.25 x 5.00 x 2.22 in. Inside - 4.650 x 6.957 - $8.72
JB-65 - http://www.polycase.com/jb-65 - Outside - 6.75 x 6.25 x 1.63 in. Inside - 6.496 x 5.941 - $9.85
DC-47F - http://www.polycase.com/dc-47f - Outside - 7.62 x 4.62 x 2.25 in. Inside - 7.323 x 4.318 - $9.18
Conclusion
Hope this helps you build your electric longboard. If you have any questions please let me know and I'd be happy to help. If anyone has any comments and/or suggestions they are all welcome.
Great Electric Longboard Build Threads
FAQ - Frequently Asked Questions!!!
How much will I spend?
It's not going to be cheap") . Especially if you have a lot of requirements and you want the best parts. I would say it would cost you about $600-$800 if not a bit more. That's about what everyone else around here spends.
. Especially if you have a lot of requirements and you want the best parts. I would say it would cost you about $600-$800 if not a bit more. That's about what everyone else around here spends.
Regardless, spend the money and/or save up. You will enjoy it as pretty much everyone on here does.
What kind of range in miles can I get?
ELECTRIC SKATEBOARD RANGE ON 6S 5000mah
If you want 10 mile range on 6S with hills. You would need about 5,000mah 6S in batteries total but it would be close to pushing it depending on your terrain. I personally would keep another 5,000mah as a spare as I do in a backpack.
I'm averaging about 6-10 miles on 6S 5000mah. I get about 6-9miles at 3.70-3.80v left. 4.2v - 3.7 = .5volts. This means .5 volts gets me 7 miles to be on the safe side. 3.7v to 3.3v is .4v difference so .4 left to get to 3.3v means about another 4-5 miles or so. You cannot go lower than 3v per cell but best to stop at about 3.3v if not higher. I stop at about 3.7 - 3.6v not sure if its better or not. That means a 6S 5000mah battery will get me about 10-12 miles with pretty much empty batteries. I personally run each of my (2) 3S 5000mah batteries to about 3.7 or 3.6 and I swap batteries with another set I usually care in my backpack. Not sure if this is better or not but I would assume so since the batteries are never fully discharged it means longer life.
With that said, 6S 10,000mah should get about 18-24+ miles in range. That's with batteries fully depleted almost. With my current route which is a combination of hills and flat ground about 60/40. 6S 10,000 mah would be (4) 3S 5000mah batteries and 2 Series and 2 Parallel aka 2S2P. The problem is this would add to the weight of your board.
BATTERY SETUP for 6S Setup
Things To Know About LiPo Batteries
- LiPo batteries can be dangerous and fires can happen without proper care.
- 4.2v per cell is max. 3v is the lowest a cell can go. Do not discharge or use LiPo batteries under 3v per cell. 3.3v is a decent low voltage cut off meaning stop using batteries after 3v.
- Do not connect the red/black wires on a battery to each other. It can start a fire!
- LiPo batteries can become unbalanced naturally. No two batteries are alike. If you want your batteries to last longer you will have to keep them balanced before you charge. LiPo chargers can balance batteries but to a certain extent. If they are .2-3v from the other cells in the pack they should be fine. Personally, I would balance them so they are equal and then charge at all times. Do not charge your LiPo's if the cells have a .5-.10v difference as if you do. They will be so far off that it won't balance completely. I would run the "standalone battery balancer" to get them the same cells. I personally would not risk trying as I have already ruined 3 sets of batteries which probably cost about $200-300 total and only had less than 10 runs on them which cost me too much!
LIPO BATTERY ACCESSORIES - Must Have!
- Standalone Battery Balancer - $13.00 - http://www.hobbyking.com/hobbyking/store/__10328__Hobby_King_Battery_Medic_System_6S.html
- Low Voltage Alarm w/ LED & Alarm - I would get one of these for each batteries. At all times you will know exactly how many volts are on each cell.
OPTION 1 - CHEAPEST OPTION
The cheap option for a 6S Battery Setup would be a simple 6S charger and power supply. The negative is that this charger setup would only charge at about 2 Amps or 2C max.
LiPo Chargers for 6S
- IMAX B6 Charger/Discharger 1-6 Cells (GENUINE) - $24.99 - http://www.hobbyking.com/hobbyking/store/__5548__IMAX_B6_Charger_Discharger_1_6_Cells_GENUINE_.html
- Turnigy Accucel-6 50W 6A Balancer/Charger w/ accessories - $22.99 - http://www.hobbyking.com/hobbyking/store/__7028__Turnigy_Accucel_6_50W_6A_Balancer_Charger_w_accessories.html
Charger Power Supply for 6S LiPo Charger
- Hobbyking 105W 15V/7A Switching DC Power Supply - $13.99 - http://www.hobbyking.com/hobbyking/store/__20971__Hobbyking_105W_15V_7A_Switching_DC_Power_Supply.html
OPTION 2 - SEMI-CHEAP OPTION
Buy 1 or 2 of the IMAX B6 or Turnigy Accucel-6 chargers and they can charge at 5-6 Amps which is quite fast. The faster you charge the worse cells can become unbalanced. This setup is perfectly fine for me and I don't think I will need the more expensive options.
- BATTERY CHARGER - I would get (2) of the IMAX B6 and/or TURNIGY ACCUCEL.
- POWER SUPPLY - HobbyKing 350w 25A Power Supply (100v~120v) - $41.99 - http://www.hobbyking.com/hobbyking/store/__17423__HobbyKing_350w_25A_Power_Supply_100v_120v_.html - This power supply I use currently it allows both of the chargers to charge at about 4-5 Amps with both chargers connected and/or 6 AMPS max with 1 of them being charged.
OPTION 3 - SEMI-RICH OPTION
Any of the iChargers are great. Make sure to get an equal power - power supply. They are in the medium price range as far as LiPo batteries go and are great for the price.
- CHARGER - iCharger 1010Bplus 300W 10s Balance/Charger - $118.99 - http://www.hobbyking.com/hobbyking/store/__6609__iCharger_1010Bplus_300W_10s_Balance_Charger.html
- CHARGER -
iCharger 106B-plus 250W 6s Balance/Charger - $79.99 - http://www.hobbyking.com/hobbyking/store/__6792__iCharger_106B_plus_250W_6s_Balance_Charger.html
- POWER SUPPLY - HobbyKing 350w 25A Power Supply (100v~120v) - $41.99 - http://www.hobbyking.com/hobbyking/store/__17423__HobbyKing_350w_25A_Power_Supply_100v_120v_.html
OPTION 4 - FILTHY RICH OPTION
If you are filthy rich. The CellPro PowerLab 6 and 8 v2 are one of the best if not the best battery chargers. It's not needed but if you want the best.
- CHARGER - FMA POWERLAB 8 V2 - $239.99 - http://www.progressiverc.com/fma-powerlab-8.html
- POWER SUPPLY - Turnigy 1200W 100~120V Power Supply (24VDC - 50amp) - $142.35 - http://www.hobbyking.com/hobbyking/store/__22820__Turnigy_1200W_100_120V_Power_Supply_24VDC_50amp_.html. This one is a good one but you can get better ones from ProgressiveRC which are 1500watts to 2000watts.
BRUSHLESS MOTOR OPTIONS
By far the brushless motors from HobbyKing are the most affordable and pretty durable and reliable as far as I have experienced. Specifically, the Turnigy SK3 motors. You can use 42mm, 50mm, 63mm motors.
NTM 50mm motors work but there have been known issues of people having problems. There have been no issues for SK3 motors as far as I have heard/read.
ESC OPTIONS
Most of the ESCs that will work for an Electric Skateboard will be specifically the CAR ESCs. Car ESCs have brakes and Airplane/Helicopter ESCs don't have the same brake features. Unless you don't want brakes then try an airplane/heli ESC. However, the actual dollar amount will only be about $30-50 which means you might as well save and/or spend the required amount to do it right the first time around.
Why do I not want more torque?
I would go with higher KV rating. The KV rating for a 168kv and 1:2.25 would be a bit slow.
IMO more torque does absolutely nothing except lower top speed and no power.
I would like others to try it themselves as I and a few others whom tested it have come to the same conclusion.
Low KV and High Gearing + any battery pack does no good and no benefit even on 12s. If motors can't spin with the current load = heat.
You'll end up noticing your setup running harder because it has no momentum or RPMs to push you quicker.
IMO for any setup. 230-260KV a little lower, higher isn't too bad either 200-280KV. I wouldn't go higher than 280KV. Then adjust as needed through your gearing ratio.
It's much more effective to adjust higher gearing through your gearing ratio versus changing to a lower KV motor. Lower KV motor will add to drag and RPMs will be much lower for the exchange of what people say "more torque" but in actuality you don't get any benefit from it.
Your motors will struggle to make a revolution/rotation due to "torque" and very low RPMs.
We are better off aiming for a decent 25-30mph range even if you only go 15mph. IMO since higher torque + higher gearing = no benefit.
- Post Your Electric Longboard or Electric Mountainboard Build
- Wiiceiver - Wireless Wii Nunchuck *Open-Source
- Vedder ESC (VESC)- Open Source 10S custom skate ESC: testers wanted!
- 8/22/15 - Great tips here for Trying to understand this basic power calculation https://endless-sphere.com/forums/viewtopic.php?f=35&t=72095
Frequently Asked Questions
- General eBoard Frequently Asked Questions
- Should I buy a Production eBoard and/or a DIY eBoard?
- Standard Wiring Sequence
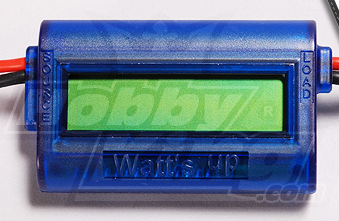
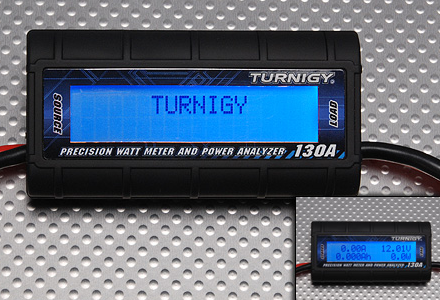
- What is a Watts Up Meter / Turnigy 130A Watt Meter?
This guide is made for a single or dual 63mm motor setup using a 6S lipo battery. The reason why I choose 6S as it is much cheaper and can effectively ride up around 20-23mph easily. Single motor works well and is much cheaper than going dual motors. The best part of this setup is you can always upgrade later to dual motors if you wanted too as the parts will all be compatible for a dual motor. Benefits of dual motor are less stress on one motor and a bit faster, more torque more power and better stopping/braking power IMO.
Step 1 - Welded Longboard Motor Mount
Step 2 - Building The Drive Hubs
Step 3 - Choosing The Electronics
Step 4 - Choosing The Board
Step 5 - Putting It All Together
Step 6 - Building An Electronics Enclosure
TorqueBoard's Welded Motor Mount Single/Dual Motor Pricing
http://endless-sphere.com/forums/viewtopic.php?f=35&t=54963&p=831538#p831538.
If you are looking for a faster electric longboard, your equipment will be different as well as voltage. I hope this guide helps most people. If you have any questions, please post and I or anyone else can help answer any specific questions. This guide is based on my own experience and results can vary.
Step 2 - Building The Drive Hubs
This is the second most important part of building an electric longboard. To build the drive hub, you simply need to attach a pulley wheel to the longboard wheel. The easiest way to do this is to use a plastic wheel and you can drill through it yourself.
Choosing Your Longboard Wheels
(1) 83mm, 90mm, 97mm ABEC 11 Flywheels or eBay Blank Pro Flywheels *I prefer the eBay Blank Pro Wheels. You can use M6 bolts that fit and hold onto the Blank Pro Flywheels (ABEC Clones). M6 bolts hold it pretty well and is better with the torque that you put behind it. For ABEC 11's something would need to be used to drive the torque from the wheels through similar to the inside retainers that lpbug uses here - http://endless-sphere.com/forums/viewtopic.php?f=35&t=54938.
(2) 75mm Orangatang In Heat Longboard Wheels *These work but you would have to drill through the wheel itself to mount them.
83mm, 90mm, 97mm eBay Blank Pro Wheels are recommended for an easy setup. 83mm's work well but if you want to ride over bigger side curbs and run over potholes 90mm/97mm wheels are better.
These wheels are the 97mm Blank Pro Flywheels above.
Gearing Ratio
Depending on the wheel that you use, you may need a diff gearing ratio. The gearing ratio that works for more torque would be 1:3 to 1:4 which is the ratio between the motor pulley wheel and the longboard wheel pulley. For a more top end, more speed you would want to reach more along the lines of 1:2 ratio.
More Top End Speed - The reason why this works like this is because for top end you want less drag so a motor pulley of 15T and 30T going at higher speeds there is less drag when the 15T pulley pulls the 30T pulley.
More Starting Torque - For more torque you want a smaller motor pulley and a bigger drive wheel. What this will do is when the motor pulley pulls, you want it to pull a bigger drive wheel as it will pull harder from the start.
This is the reason why multiple gearing bikes (ex. 5/6 speed mountain bikes) have multiple gears. You use the lower gears which will switch to the bigger chain pulley and will help you climb hills better. When you switch to the 5 or 6th gear (higher gears) it will allow you to peddle faster with less drag.
Unfortunately, for a electric longboard we do not have the option of being able to fit multiple gears so we are stuck with choosing only one gearing ratio to help us along the way for both starting and top end speeds. We must find a medium that gives us enough torque on start and our own personal required top end. This means 15mph, 20mph, 40mph etc. Although, with a single motor on a 6S voltage battery we are limited to about 20-23mph due to the lower voltage. Higher voltage would give us more power to reach higher top speeds although this will cost more in the long run.
My medium gearing ratio is a 14T motor pulley and a 40T drive wheel pulley. This gives us a gearing ratio of 1:2.85 which is meant for more torque than top speed/top end. Doesn't matter too much since we are limited to about 20-23mph with a 6S voltage battery. Partly, the reason why I use this ratio is that there are plastic 40T drive wheels that make it easy.
Gearing Belt & Pulley Type - The most common pulley pitch that is used for electric longboards DIY and manufactured boards is HTD 5mm pitch belts and pulleys. The manufactured boards use 15mm width pulleys which I would recommend but currently I am using 9mm width. 15mm pulleys are more durable and longer lasting because of the extra width which is why production typed boards would use them IMO although they would also cause more drag. 9mm width works well for a dual motor rear wheel as there isn't much space to use 15mm. If you are using a dual motor or single motor diagonal setup 15mm width would be nice. 15mm works well for 20-23mph but if you are trying to reach speeds that are 30mph or higher a 9mm width belt would be better because of less drag.
What does more torque do for us? More torque allows us to be able to not kick push to help the motor go, less stress for the motor on start. Although, it does help to kick to push it's not needed. It also allows us to reach 10-20mph much faster with more torque and allows us to climb hills with more ease.
My Standard Drive Train Setup using HTD 5mm Belts and Pulleys.
These parts are standard and work with my own motor mount. If you have a different motor mount, you may have to double check to see what your motor mount will allow/fit.
Motor Pulley - SDP-SI.com - Part Number: A 6A25-014DF0908
* This is a 14T HTD 5mm pitch and 9mm width aluminum pulley with 2 flanges, 2 set screws M3. This comes in a standard 6mm center which will need to be 8mm to fit through the 63mm SK3 motor shaft. I use 14T as this allows more room for a threaded M3 set screw since the hub itself is a bit thicker so it can get more threads through. I use actual M3 socket cap screws instead of set screws as I find them a lot durable and stronger than a regular M3 set screw. They have quite a bit of force on them as well. I also get this with 2 flanges so the belt stays on the motor pulley. I make sure the drive wheel pulley only has 1 flange so I can easily get the belt over the motor pulley + drive wheel pulley.
Tip for the motor shaft would be to use a dremmel and create a flat on the motor shaft. You can do this by sanding a part of the motor shaft with the dremmel so it's a flat. The reason why you want to create a flat on the motor shaft is the set screw will sit on top of this flat and it will give it a better position to hold that set screw in that spot rather than the set screw trying to hold the pulley in that position on a circle shaft. I would highly recommend this be done and not to pass this part up.
You can do one better and either make the motor shaft and motor pulley a D shape and/or a keyway. If you can make it a D shape or Keyway the motor pulley will never spin around the motor shaft as it will be keyed in a way where it won't spin. The idea is you want the motor shaft to move the pulley and not have it spin around each other because nothing is holding it in.
Drive Wheel Pulley - SDP-SI.com - Part Number: A 6L25-040SF0910
* 40T HTD 5mm pitch 9mm width pulley available from SDP-SI.com - Part Number: A 6L25-040SF0910. This needs modifications to get it to fit properly. You will need to widen the center hole and either use (3) or (6) M6 bolts that go through the Blank Pro Flywheel and the 40T HTD pulley. This means drill in 3 or 6 holes to fit the bolts through. You can then have M6 lock nuts on the other end. Make sure to get it as centered as possible as this can cause issues when riding.
Pulley Belt - SDP-SI.com - 57T HTD 5mm pitch 9mm width
*A 57T Pulley Belt should be good for a 14T and 40T HTD 5mm pulley. Last time I checked I think it works well. 56T might work as it seems at this moment that's all that SDP-SI has available.
Step 3 - Choosing The Electronics
Things you need to complete your build would be the following:
(1) ESC - Electronic Speed Controller
(2) Lipo Batteries
(3) RC Electrical Connectors
(4) RC Transmitter & Receiver
(1) ESC - Electronic Speed Controller
For a 6S setup, I would highly recommend purchasing the Hobbywing EZRUN-150A-Pro from ValueHobby.com which is about $85. Also purchase the programming card to make life easier. This ESC works better than the HobbyKing 150A or Trackstar 150A from HobbyKing.com.
- Hobbywing EZRUN-150A-PRO Brushless ESC for 1/8 or 1/5 Vehicles - http://www.valuehobby.com/power-systems/speed-controller/electric-car-esc/hobbywing-ezrun-150a-pro.html - $85.00
- LED Program Card For Hobbywing eZRun/XERun Brushless ESC - http://www.valuehobby.com/led-program-card-for-hobbying-ezrun-xerun.html - $8.99
I would use (2) 3S Lipo Batteries as they are cheaper and much easier to charge. If one battery breaks you can simply purchase another and they are fairly cheap. They are also thinner/smaller than a regular 6S as a 6S is 6x 1 cell batteries versus 3x 1 cell batteries. The 6S 5000mah setup should give you about 6 to 10 miles and I normally carry 2 or 3 sets of these batteries as they are light. I just simply swap them on the board with a new pair which takes about 2-4 minutes.
[*]ZIPPY Flightmax 5000mAh 3S1P 20C (USA Warehouse) - http://www.hobbyking.com/hobbyking/store/__16786__ZIPPY_Flightmax_5000mAh_3S1P_20C_USA_Warehouse_.html - $22.07/each.
(3) RC Electrical Connectors
For connectors, you can use whichever that you like best. The cheapest way would be to use 5.5mm gold bullet connectors if you want it nicer looking EC5 or XT90 plugs are real nice and make things more neater. I would go with 5.5mm or EC5. XT90 seem a bit harder to take apart versus the EC5's.
- HXT 6mm Sprung Gold Connectors (10pair/20pc) (USA warehouse) - http://www.hobbyking.com/hobbyking/store/__43704__HXT_6mm_Sprung_Gold_Connectors_10pair_20pc_USA_warehouse_.html - $5.79 *These are specifically used for the EZRun 150A ESCs for the power and motor connectors.
- EC5 5mm Connector (Pair) (US Warehouse) - http://www.hobbyking.com/hobbyking/store/__42748__EC5_5mm_Connector_Pair_US_Warehouse_.html - $1.56/ea
- HXT 4mm Gold Connector w/ Protector (10pcs/set) (US Warehouse) - http://www.hobbyking.com/hobbyking/store/__30921__HXT_4mm_Gold_Connector_w_Protector_10pcs_set_US_Warehouse_.html - $4.46
- Nylon XT90 Connectors Male/Female (5 pairs) (USA warehouse) - http://www.hobbyking.com/hobbyking/store/__42616__Nylon_XT90_Connectors_Male_Female_5_pairs_USA_warehouse_.html - $9.46
- Polymax 5.5mm Gold Connectors 10 pairs (20pc) (USA warehouse) - http://www.hobbyking.com/hobbyking/store/__39465__Polymax_5_5mm_Gold_Connectors_10_pairs_20pc_USA_warehouse_.html - $5.47 *I normally use these but these aren't needed for the EZRun 150A ESC.
(4) RC Transmitter & Receiver
The GT2B transmitter and receiver combo is cheap and pretty easy to use. The rechargeable battery lasts long and is simple to recharge with a USB cord. I still wish this controller was much smaller so it can fit in my back pocket but that would take some modification which I may do later on. I tried getting this one here working Quanum 2.4Ghz 3ch Pistol Grip Tx & Rx System - http://www.hobbyking.com/hobbyking/store/__44693__Quanum_2_4Ghz_3ch_Pistol_Grip_Tx_Rx_System.html as it is a smaller controller but was not able to get it to work. It's a bit smaller but not small enough. If it worked I would switch over. If anyone got this to work let me know as I would like to use it too.
*HobbyKing HK-GT2B 3CH 2.4GHz Transmitter and Receiver w/Rechargable Li-ion Battery ( US Warehouse) - http://www.hobbyking.com/hobbyking/store/__45311__HobbyKing_HK_GT2B_3CH_2_4GHz_Transmitter_and_Receiver_w_Rechargable_Li_ion_Battery_US_Warehouse_.html - $25.31
Step 4 - Choosing The Board
Choosing a longboard depends on what type of setup that you personally want. I wouldn't use a dropthrough at least if you purchase the pre-welded ones from me since the angle they are welded isn't meant for a drop through setup. If you are welding the motor mounts yourself it will work fine just make sure you account for the drop through. I purchase my longboard decks from MuirSkate.com and/or ebay. I'll also include a link to a few cheap boards if it doesn't matter to you. I would pick a board without a deep concave underneath the board as it will be harder to mount the electronics underneath the board. I personally like 33-36" longboards as they are easier to carry around and more portable since they aren't so long. A board with some good foot pockets help for going uphill and downhill it helps you stay on the board better.
- 36.5" Longboard - 9.75 x 36.5" NATURAL LONGBOARD SKATEBOARD Deck KICKTAIL - http://www.ebay.com/itm/9-75-x-36-5-NATURAL-LONGBOARD-SKATEBOARD-Deck-KICKTAIL-/131084671139?pt=LH_DefaultDomain_0&hash=item1e854158a3 - $33.99
*This setup works well for a single motor mount a dual diagonal setup and there might not be enough room for all the electronics underneath the board. - 34" Longboard - Landyachtz 2013 Ripple Ridge Longboard Skateboard Deck w/ Grip - https://www.muirskate.com/longboard/decks/30401/Landyachtz-2013-Ripple-Ridge-Longboard-Skateboard-Deck-w-Grip.html - $78.00
*This board was purchased for a single motor and/or dual rear wheel setup as the wheelbase is shorter there isn't as much space to mount the electronics. It might fit though with a diagonal setup. - 34" Earthwing Hoopty 34 Fiber Weave Longboard Skateboard Deck w/ Grip - https://www.muirskate.com/longboard/decks/33361/Earthwing-Hoopty-34-Fiber-Weave-Longboard-Skateboard-Deck-w-Grip.html - $85.00
*This board was purchased for a dual diagonal motor setup as the wheelbase is bigger to fit the electronics.
Step 5 - Putting It All Together
1. Setting up the Motor Mounts, Drive Train and Paris Trucks.
2. Setting up the Electronics
1. Setting up the Motor Mounts, Drive Train and Paris Trucks.
The easiest way is to purchase the pre-welded motor mounts on Paris Trucks and simply bolt them onto your board. If you didn't you will need to weld the motor mounts to the Paris Trucks or any longboard trucks of your choice. When welding the motor mount to the trucks. Make sure you have a raw pair of trucks and there is no color coating on the trucks or you can't weld it. You will need to sand it down and then weld it so might as well just get the trucks raw. If you wanted too you can use any type of trucks the hole on the motor mount will just need to be widened to fit through.
1. Bolt the trucks with the motor mount to your longboard.
2. Bolt the motor to the motor mount.
3. Bolt the motor pulley to the motor shaft and use the set screw.
4. Bolt the drive wheel pulley onto the wheel and attach the wheel to the truck axle.
5. Slip the belt onto the motor pulley first and then slip it onto the drive wheel as well. You may need to simply put the belt on the drive wheel pulley and turn the wheel to pull the belt over the entire pulley. This makes sure that the belt is snug and won't cog. Cog meaning it won't skip any teeth because the belt is too loose.
6. Now you are done with the motor mount + drive train. You simply need to connect all the electrical parts and mount your electrical parts underneath the board.
2. Setting up the Electronics
The basics for electronics should be the batteries are connected to the speed controller positive and negative wires. The speed controller has a built in BEC which converts the 6S voltage to 3v to power the RC Receiver. The speed controller ESC should have a positive and negative wire that will power the RC receiver. There should then be another wire coming out of the ESC which will send the commands from the RC handheld transmitter to the RC receiver. This wire should come out of the ESC and plug into the RC receiver. In the RC Receiver, you should have a power and another one coming in from the ESC, usually on channel 2. The top plug on the RC receiver should be the power.
1. Connect the (3) motor wires to the ESC.
You will have to make an adapter which is 4mm female gold bullet connectors to 6mm male connectors that connect to the ESC. 3 adapters which are the same, you can use 10AWG. Each will be 4mm female bullet connectors to 6mm male bullet connectors to fit into the ESC. This means that you will have to purchase 6mm gold connectors.
The (3) 4mm female connectors will be plugged into the motor wires and the (3) 6mm male connectors will plug into the ESC.
2. (2) 3S batteries connected in series.
You will need to connect the (2) 3S batteries that you bought in series. To connect batteries in series, battery 1 needs positive to be plugged into battery 2 negative which will then give you a negative and positive connectors left over which will be plugged into the pos/neg into the ESC pos/neg. I will try and include pictures in the future once I take some from my new build. The best and easiest way to set this up would be to use EC5 connectors for all batteries and creating a series adapter for (2) batteries in series to go to the ESC.
3. Connect batteries to ESC positive and negative wires.
Connect the battery pos/neg to the ESC pos/neg to give power to the ESC.
4. Connect ESC BEC wires to RC Receiver.
Connect ESC brain wires and ESC power wires to the RC Receiver. There should be a plug for the power and Channel 1 to 3 for the RC Receiver. You can put the ESC brain wires to Channel 2.
Conclusion
That's pretty much it to complete the electrical connection for the board. The best way to turn on your electric longboard would be to turn on the RC Transmitter Controller first and then plug in the power from the ESC to the Batteries to give the Eboard it's power. The RC Receiver will then beep to say it has been successfully connected. You can then hold the throttle on your RC transmitter and the motor should then pull the wheels.
On/Off EC5 Adapter - What you can do to make life easier is create a connector for the positive from the ESC and positive to the battery. Simply, create an adapter with the EC5 plugs where one side goes to the ESC and one side goes to the battery. You then have the other connector of the EC5 which just loops around to complete the full connection. You can then remove the EC5 plug with the loop and it will act as a connector to finish the final connection for the battery to the ESC. I will post pictures when I set up my new board.
That about sums up the complete build of an electric longboard skateboard. The final piece is how to mount all the electronics underneath the board without getting dirty and so you can easily swap the batteries.
Step 6 - Building An Electronics Enclosure
You could setup your own electronics enclosure from heated ABS sheets, heated kydex sheets, plexiglass, thin aluminum and many more materials. Although, I want something that's easy and simple. In my opinion and the countless hours that I've spent searching for the best electronics enclosure. I ended up finding this company Polycase to have the best stuff, almost - http://www.polycase.com/. To make your setup as neat as possible, you want to make all the connectors and wires as small/short as possible to avoid having a big bunch of wires all over the place. You will have to drill holes into these enclosures to fit the wires through. To make them neater, you can use 1" rubber grommets which you can find on ebay and use a 1" drill bit and/or 1" hole saw to make the holes into the enclosures. You can also use a stuby philips screwdriver to undo the enclosure covers and/or a small electric screwdriver to make it faster. I usually keep a bag of extra parts just in-case things fall apart or I end up needing them.
1. Enclosure for EZRun 150A ESC + RC Receiver + Wires
2. Enclosure for (2) 3S Batteries
1. Enclosure for EZRun 150A ESC + RC Receiver + Wires
The size requirements for an EZRUN are the following: 2.55 inches Length x 2.16 inches Width x 1.77 inches height. Although, you need some space to also add the wires and receiver. I would use something like this here from PolyCase - XR-34F and/or XR-44F - http://www.polycase.com/surface-mount-xr-series. These are plastic so once you can find the proper placement inside the enclosure, you can cut through the top if you wanted to to give room for the ESC. With the XR-34F, there should be enough space to include the On/Off EC5 Adapter as well as the wires.
2. Enclosure for (2) 3S Batteries
For the (2) 3S batteries they are about 6" length x 4.5" width x 1" height you still need some room for wires as well. Unfortunately because of the big length and width there are no enclosures with a 1" height. The best I was able to find was 2.22" in height. I found the XR-57F was the best option http://www.polycase.com/xr-57f it has a max inside space of 6.957" x 4.650" which is enough room for my 6" x 4.5" almost barely. There are also a few other options listed below as well. I bought a few of each to report in the future how well they work.
XR-57F - http://www.polycase.com/xr-57f - Outside - 7.25 x 5.00 x 2.22 in. Inside - 4.650 x 6.957 - $8.72
JB-65 - http://www.polycase.com/jb-65 - Outside - 6.75 x 6.25 x 1.63 in. Inside - 6.496 x 5.941 - $9.85
DC-47F - http://www.polycase.com/dc-47f - Outside - 7.62 x 4.62 x 2.25 in. Inside - 7.323 x 4.318 - $9.18
Conclusion
Hope this helps you build your electric longboard. If you have any questions please let me know and I'd be happy to help. If anyone has any comments and/or suggestions they are all welcome.
Great Electric Longboard Build Threads
- Completed Build and Homemade Motor Bracket - By LostMD - http://endless-sphere.com/forums/viewtopic.php?f=35&t=56584
- Campus Rider: DIY welding-free electric long board MK I - By lpbug - http://endless-sphere.com/forums/viewtopic.php?f=35&t=54938 *Waterjet motor mount and pulley wheels.
- Electric Loaded Longoard - By Matthias_S - http://endless-sphere.com/forums/viewtopic.php?f=35&t=46683
- My e-longboard design - By Mantas - http://endless-sphere.com/forums/viewtopic.php?f=35&t=50166
- My diy electric longboard so far, parts list sk3 213kv - By PracticalProjects - http://endless-sphere.com/forums/viewtopic.php?f=35&t=52408
FAQ - Frequently Asked Questions!!!
How much will I spend?
It's not going to be cheap
. Especially if you have a lot of requirements and you want the best parts. I would say it would cost you about $600-$800 if not a bit more. That's about what everyone else around here spends.Regardless, spend the money and/or save up. You will enjoy it as pretty much everyone on here does.
What kind of range in miles can I get?
ELECTRIC SKATEBOARD RANGE ON 6S 5000mah
If you want 10 mile range on 6S with hills. You would need about 5,000mah 6S in batteries total but it would be close to pushing it depending on your terrain. I personally would keep another 5,000mah as a spare as I do in a backpack.
I'm averaging about 6-10 miles on 6S 5000mah. I get about 6-9miles at 3.70-3.80v left. 4.2v - 3.7 = .5volts. This means .5 volts gets me 7 miles to be on the safe side. 3.7v to 3.3v is .4v difference so .4 left to get to 3.3v means about another 4-5 miles or so. You cannot go lower than 3v per cell but best to stop at about 3.3v if not higher. I stop at about 3.7 - 3.6v not sure if its better or not. That means a 6S 5000mah battery will get me about 10-12 miles with pretty much empty batteries. I personally run each of my (2) 3S 5000mah batteries to about 3.7 or 3.6 and I swap batteries with another set I usually care in my backpack. Not sure if this is better or not but I would assume so since the batteries are never fully discharged it means longer life.
With that said, 6S 10,000mah should get about 18-24+ miles in range. That's with batteries fully depleted almost. With my current route which is a combination of hills and flat ground about 60/40. 6S 10,000 mah would be (4) 3S 5000mah batteries and 2 Series and 2 Parallel aka 2S2P. The problem is this would add to the weight of your board.
BATTERY SETUP for 6S Setup
Things To Know About LiPo Batteries
- LiPo batteries can be dangerous and fires can happen without proper care.
- 4.2v per cell is max. 3v is the lowest a cell can go. Do not discharge or use LiPo batteries under 3v per cell. 3.3v is a decent low voltage cut off meaning stop using batteries after 3v.
- Do not connect the red/black wires on a battery to each other. It can start a fire!
- LiPo batteries can become unbalanced naturally. No two batteries are alike. If you want your batteries to last longer you will have to keep them balanced before you charge. LiPo chargers can balance batteries but to a certain extent. If they are .2-3v from the other cells in the pack they should be fine. Personally, I would balance them so they are equal and then charge at all times. Do not charge your LiPo's if the cells have a .5-.10v difference as if you do. They will be so far off that it won't balance completely. I would run the "standalone battery balancer" to get them the same cells. I personally would not risk trying as I have already ruined 3 sets of batteries which probably cost about $200-300 total and only had less than 10 runs on them which cost me too much!
LIPO BATTERY ACCESSORIES - Must Have!
- Standalone Battery Balancer - $13.00 - http://www.hobbyking.com/hobbyking/store/__10328__Hobby_King_Battery_Medic_System_6S.html
- Low Voltage Alarm w/ LED & Alarm - I would get one of these for each batteries. At all times you will know exactly how many volts are on each cell.
OPTION 1 - CHEAPEST OPTION
The cheap option for a 6S Battery Setup would be a simple 6S charger and power supply. The negative is that this charger setup would only charge at about 2 Amps or 2C max.
LiPo Chargers for 6S
- IMAX B6 Charger/Discharger 1-6 Cells (GENUINE) - $24.99 - http://www.hobbyking.com/hobbyking/store/__5548__IMAX_B6_Charger_Discharger_1_6_Cells_GENUINE_.html
- Turnigy Accucel-6 50W 6A Balancer/Charger w/ accessories - $22.99 - http://www.hobbyking.com/hobbyking/store/__7028__Turnigy_Accucel_6_50W_6A_Balancer_Charger_w_accessories.html
Charger Power Supply for 6S LiPo Charger
- Hobbyking 105W 15V/7A Switching DC Power Supply - $13.99 - http://www.hobbyking.com/hobbyking/store/__20971__Hobbyking_105W_15V_7A_Switching_DC_Power_Supply.html
OPTION 2 - SEMI-CHEAP OPTION
Buy 1 or 2 of the IMAX B6 or Turnigy Accucel-6 chargers and they can charge at 5-6 Amps which is quite fast. The faster you charge the worse cells can become unbalanced. This setup is perfectly fine for me and I don't think I will need the more expensive options.
- BATTERY CHARGER - I would get (2) of the IMAX B6 and/or TURNIGY ACCUCEL.
- POWER SUPPLY - HobbyKing 350w 25A Power Supply (100v~120v) - $41.99 - http://www.hobbyking.com/hobbyking/store/__17423__HobbyKing_350w_25A_Power_Supply_100v_120v_.html - This power supply I use currently it allows both of the chargers to charge at about 4-5 Amps with both chargers connected and/or 6 AMPS max with 1 of them being charged.
OPTION 3 - SEMI-RICH OPTION
Any of the iChargers are great. Make sure to get an equal power - power supply. They are in the medium price range as far as LiPo batteries go and are great for the price.
- CHARGER - iCharger 1010Bplus 300W 10s Balance/Charger - $118.99 - http://www.hobbyking.com/hobbyking/store/__6609__iCharger_1010Bplus_300W_10s_Balance_Charger.html
- CHARGER -
iCharger 106B-plus 250W 6s Balance/Charger - $79.99 - http://www.hobbyking.com/hobbyking/store/__6792__iCharger_106B_plus_250W_6s_Balance_Charger.html
- POWER SUPPLY - HobbyKing 350w 25A Power Supply (100v~120v) - $41.99 - http://www.hobbyking.com/hobbyking/store/__17423__HobbyKing_350w_25A_Power_Supply_100v_120v_.html
OPTION 4 - FILTHY RICH OPTION
If you are filthy rich. The CellPro PowerLab 6 and 8 v2 are one of the best if not the best battery chargers. It's not needed but if you want the best.
- CHARGER - FMA POWERLAB 8 V2 - $239.99 - http://www.progressiverc.com/fma-powerlab-8.html
- POWER SUPPLY - Turnigy 1200W 100~120V Power Supply (24VDC - 50amp) - $142.35 - http://www.hobbyking.com/hobbyking/store/__22820__Turnigy_1200W_100_120V_Power_Supply_24VDC_50amp_.html. This one is a good one but you can get better ones from ProgressiveRC which are 1500watts to 2000watts.
BRUSHLESS MOTOR OPTIONS
By far the brushless motors from HobbyKing are the most affordable and pretty durable and reliable as far as I have experienced. Specifically, the Turnigy SK3 motors. You can use 42mm, 50mm, 63mm motors.
NTM 50mm motors work but there have been known issues of people having problems. There have been no issues for SK3 motors as far as I have heard/read.
ESC OPTIONS
Most of the ESCs that will work for an Electric Skateboard will be specifically the CAR ESCs. Car ESCs have brakes and Airplane/Helicopter ESCs don't have the same brake features. Unless you don't want brakes then try an airplane/heli ESC. However, the actual dollar amount will only be about $30-50 which means you might as well save and/or spend the required amount to do it right the first time around.
Why do I not want more torque?
I would go with higher KV rating. The KV rating for a 168kv and 1:2.25 would be a bit slow.
IMO more torque does absolutely nothing except lower top speed and no power.
I would like others to try it themselves as I and a few others whom tested it have come to the same conclusion.
Low KV and High Gearing + any battery pack does no good and no benefit even on 12s. If motors can't spin with the current load = heat.
You'll end up noticing your setup running harder because it has no momentum or RPMs to push you quicker.
IMO for any setup. 230-260KV a little lower, higher isn't too bad either 200-280KV. I wouldn't go higher than 280KV. Then adjust as needed through your gearing ratio.
It's much more effective to adjust higher gearing through your gearing ratio versus changing to a lower KV motor. Lower KV motor will add to drag and RPMs will be much lower for the exchange of what people say "more torque" but in actuality you don't get any benefit from it.
Your motors will struggle to make a revolution/rotation due to "torque" and very low RPMs.
We are better off aiming for a decent 25-30mph range even if you only go 15mph. IMO since higher torque + higher gearing = no benefit.