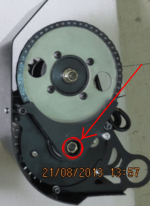
GNG, 1000W 48V BB-drive, $400

LightningRods said:
I made a video showing how to disassemble the GNG. It's not Spielberg, but it does show the basics of how to strip the stock kit down to the motor and jackshaft. Part 2 will show how to build the GNG with my upgraded parts.

https://www.youtube.com/watch?v=mCuwmoT1skE&feature=youtu.be

I dont now how spielberg would do it but your video is perfect for the purpose. Now anyone can open the motor with no surprises :wink:

Thank you very much for sharing!!

Friendly greeting.
 
LightningRods said:
I just heard from Fat Tire Farm and they said that the 100mm Giga Pipe should fit the Salsa Mukluk. They offered to pre fit the BB to the fat bike before I purchase it to make sure it fits.

I don't think I can resist this beast with a big block in it. Staying under the police radar with it is going to be my main problem.
I have a deposit down on a Mukluk myself, after checking out a lot of fat bike frames, I decided the Mukluk would have the best clearance for a left hand drive chain setup.
 
The Mukluk has so much room on either side of the BB that you can go back to the rear wheel from either side.

FatBike3.jpg


Here's a right side "Crossbreak" layout that Spinningmagnets sent me:

file.php


Since the big block motor makes it's power at about half the rpm of the Astro Flight shown in the picture you can probably skip the primary reduction if you're going to a big rear wheel sprocket.

We're working on the motor shafts right now Bee. We've built the furnace to anneal the spindles.
 
Started to install my GNG kit today but for some reason I just couldn't get the drive (L) side thread of the bb to catch. Hmmm....

vgxu.jpg


Opposite side works great!
zova.jpg
 
AZPaul said:
Started to install my GNG kit today but for some reason I just couldn't get the drive (L) side thread of the bb to catch. Hmmm....

Yeah, those threads are cut a bit shallow. Must have been made right before or right after Chinese Spring Vacation. :roll:

Also, don't fall for the classic GNG BB sticker subterfuge. The side marked "L" goes on the right side of the bike. The "L" stands for "left hand thread". The cup and retaining ring go on the left side of the bike as you're seated on it.
 
Well I emailed Jon and he says the threads are correct. Maybe my picture doesn't do it justice but these aren't even threads. Am I missing something here?
 
AZPaul said:
Well I emailed Jon and he says the threads are correct. Maybe my picture doesn't do it justice but these aren't even threads. Am I missing something here?

We have an expression for that here in the US. It's called "bullshit".

GNGBBthreads.jpg


These threads are lathe cut. The operator didn't set the cut depth deep enough to cut threads into your BB cup. All it did was to make a spiral scratch on the surface. Write Jon back, tell him that and send him both pictures, and tell him that you want a replacement BB cartridge. He knows better than to try to lie his way out of a legit customer complaint.
 
I'm very pleased to announce that I'm going to be working with long time E-S member Edward Lyen to provide a plug and play controller solution for my kits (and a great upgrade for any GNG). Edward is well known here as the 'go-to guy' for quality high performance controllers at a very reasonable price. Here is a description of what we're putting together:

"For the GNG or equivalent motor with voltage range between 48-72V and up to 40 amps would be the 12 FET 4110 Mark II Extreme Modder LYEN Edition Controller ($139). This controller utilizes switching voltage regulation circuitry for better efficiency, less heat than the power resistor, and wider range of voltages without making change on the resistor network. It can actually operate from 36V to 84V without any changes. Therefore, your request to operate it from 48V to 72V is absolutely perfect.

Yes, I can add the Cycle Analyst version 2 & 3 compatible connection to the controller ($4)."

This covers everything that I want in a controller. I'm going to ship a motor down to Edward so that we can sort out the details. He will ship directly to customers who contact him and ask for the "LightningRods Special" controller. For international customers I can take delivery of the controller and include it in your package to save international shipping.

And of course for you hard core power freaks, Edward has even more powerful controllers. We'll come up with some sort of electric sub station for the big block. Start saving for batteries. :twisted:
 
i'm going to upgrade my gng-kit and was just wondering if I can just plug-in that controller:
http://www.ebay.com/itm/72V-1500W-brushless-controller-for-E-bike-scooter-/300813212040?pt=LH_DefaultDomain_0&hash=item4609dd5988
connectors seems to match up, but is this a right combination?
 
-larva said:
i'm going to upgrade my gng-kit and was just wondering if I can just plug-in that controller:
http://www.ebay.com/itm/72V-1500W-brushless-controller-for-E-bike-scooter-/300813212040?pt=LH_DefaultDomain_0&hash=item4609dd5988
connectors seems to match up, but is this a right combination?

In theory yes. But that 45 amp limit is really pushing the stock Phase wires of the motor to their limit. I would not sustain those kinds of amps for any prolonged period of time.

No replacement controller is completely plug and play. Because there is no standard on the color code of the 3 HAL sensor wires and the 3 Phase wires to the motor. Just because the colors match, will not mean it is the right connections. There is a thread somewhere on the forum that provides with a nice step by step process to figuring out the hal and phase color combinations.

Wishes

Edit** Here is the post http://endless-sphere.com/forums/viewtopic.php?f=16&t=3484
 
Wishes said:
-larva said:
i'm going to upgrade my gng-kit and was just wondering if I can just plug-in that controller:
http://www.ebay.com/itm/72V-1500W-brushless-controller-for-E-bike-scooter-/300813212040?pt=LH_DefaultDomain_0&hash=item4609dd5988
connectors seems to match up, but is this a right combination?

In theory yes. But that 45 amp limit is really pushing the stock Phase wires of the motor to their limit. I would not sustain those kinds of amps for any prolonged period of time.

No replacement controller is completely plug and play. Because there is no standard on the color code of the 3 HAL sensor wires and the 3 Phase wires to the motor. Just because the colors match, will not mean it is the right connections. There is a thread somewhere on the forum that provides with a nice step by step process to figuring out the hal and phase color combinations.

Wishes

Edit** Here is the post http://endless-sphere.com/forums/viewtopic.php?f=16&t=3484

Thanks for fast reply,
Yes I have been reading this forum for many years and already know this :) I was just hoping that someone is already using that same controller and could give me some advice? What do you think should I change the phase wires, I'm going to push 45 amp there for very short time?
 
Just an FYI that Jon Chan @ GNG would not replace the bottom bracket with the defective thread. Very strange guy. At some point during the 25 emails back and forth he agreed to replace it and even sent me a picture of it boxed up to confirm the address. Then he threatened to dock his worker a day's wages if I really wanted him to send it and finally he now says that there's nothing wrong with the one he sent and that I can order a second one for $46 + shipping if I like.

I recommend that you save yourself the frustration (and eventual upgrade cycle) and just get LRod's kit like I should have!
 
AZPaul said:
Just an FYI that Jon Chan @ GNG would not replace the bottom bracket with the defective thread. Very strange guy. At some point during the 25 emails back and forth he agreed to replace it and even sent me a picture of it boxed up to confirm the address. Then he threatened to dock his worker a day's wages if I really wanted him to send it and finally he now says that there's nothing wrong with the one he sent and that I can order a second one for $46 + shipping if I like.

I recommend that you save yourself the frustration (and eventual upgrade cycle) and just get LRod's kit like I should have!

LR has the 148mm ISIS BB and ISIS freewheel cranks too. :wink:
 
I have complete assemblies with Dicta freewheel and (3) 1/2" chainwheels included or you can also buy 148mm ISIS BB, ISIS crank arms and ACS freewheel separately and build up your own freewheeling BB. None of these parts are compatible with any part of the GNG BB. The GNG is all oddball junk.

I also personally guarantee that all of my BB cups are fully threaded or your money back. :lol:
 
Don't be too sad about your GNG bottom bracket. You would probably end up replacing it sooner than later. I don't do jumps or crazy stuff but my spindle bent pretty quickly. Furthermore, I highly recommend the White Ind flanged freewheel I got from Sick Bike Parts to go with it.
http://www.sickbikeparts.com/catalog/product_info.php?cPath=21&products_id=62
Many have done this. These guys are tops when it comes to customer service. Too bad the GNG folks let you down.
 
Yeah, I don't expect anything in the kit to last beyond the stock power levels. This whole ebike conversion is really just a spur of the moment experiment for me to see if I like it. I'm looking for a more convenient (and quieter!) alternative to trail riding a motorcycle. I went with the stock GNG kit because I thought it would be the cheapest and quickest way to get something up and running. I don't mind breaking stuff (as long as it's not my ankle) and upgrading as I go. That's part of the fun of hot rodding.

Mike, I ended up just dropping off the BB at a machine shop to cut the thread this afternoon. Don't worry, you'll still get all of my upgrade dollars :D If I don't have to do the BB first then it will certainly be the belt drive. I too am a big fan of properly engineered belt drives.
 
Even though the GNG BB is pretty flimsy and cheap, it's one of the last things I recommend changing on the GNG kit. The primary belt drive is worst, followed by (really along with) the upper sheets. If you baby the GNG BB it will last for a while. I've read that users have bent them just by pedaling too hard.
 
Hi guys I purchased the stock gng kit and retrofitted it with lightning rods belt conversion. I'm having a problem with the stock gng bottom bracket. As others have noted the threads are terrible and in my case they seem to of been labeled incorrectly the left side was going to right. And aside from being warped my other problem is that there seems to be a space are required in order for the whole chain ring set up not to be sucked into close to the bike causing interference with the bolts on the adjustable sheets and the chain ring hitting the frame.

It's like a spacer is needed.. Did the stock kit come with one? Something is not right here

Attached some pics.
 
Saamilapp said:
Hi guys I purchased the stock gng kit and retrofitted it with lightning rods belt conversion. I'm having a problem with the stock gng bottom bracket. As others have noted the threads are terrible and in my case they seem to of been labeled incorrectly the left side was going to right. And aside from being warped my other problem is that there seems to be a space are required in order for the whole chain ring set up not to be sucked into close to the bike causing interference with the bolts on the adjustable sheets and the chain ring hitting the frame.
It's like a spacer is needed.. Did the stock kit come with one? Something is not right here

Turn the BB around. "L" means "left hand thread". The "L" side actually goes on the right side of the bike as you're seated on it. The silver lock ring should be on the left side of the bike, the side without chain rings.
 
Hello guys.
I lost the nut that holds the sprocket on the motor shaft, but the GNG doesn't know what type it is. Can anyone of you tell me how can I find this nut?
I tried about all hardware stores, but no luck at all. It seems that this type of nut is not used in Italy..
I also happen to have a mac hub motor with a missing nut, and again, no luck finding a replacement. Are these an imperial standard? Is there any chart where I could look them up, and maybe order them off aliex?
 

Attachments

  • IMG_1258-2.PNG
    IMG_1258-2.PNG
    95.9 KB · Views: 2,340
LightningRods said:
I have complete assemblies with Dicta freewheel and (3) 1/2" chainwheels included or you can also buy 148mm ISIS BB, ISIS crank arms and ACS freewheel separately and build up your own freewheeling BB. None of these parts are compatible with any part of the GNG BB. The GNG is all oddball junk.

I also personally guarantee that all of my BB cups are fully threaded or your money back. :lol:

Hi LR, you mentioned in that post that none of these parts are compatible with the GNG BB. However, are the parts compatible if purchased and used with your BB?

Thanks! :D
 
Hi guys, plan on pulling the trigger soon and was wondering, if the front derallieur is to be removed in order to install the mid drive, where does the shift cable that is on the deralliur go to??
Thanks!
 
emilx said:
Hello guys.
I lost the nut that holds the sprocket on the motor shaft, but the GNG doesn't know what type it is. Can anyone of you tell me how can I find this nut?
I tried about all hardware stores, but no luck at all. It seems that this type of nut is not used in Italy..
I also happen to have a mac hub motor with a missing nut, and again, no luck finding a replacement. Are these an imperial standard? Is there any chart where I could look them up, and maybe order them off aliex?

Fastenal would be a good source,


www.fastenal.com/web/en/1136/italy
 
Back
Top