B1078 said:
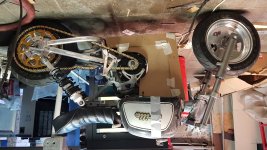
The upper box will hold the controller, contactor, fusing, circuitry. Controller is bolted to a large heatsink, with larger fins sticking out of the box in the 3 cm gap. If I decide on how to make my box (sheet metal/alu/cnc/printed) I want to integrate some sort of airscoop that pulls in air from between the front wheel and headlight while driving,
This is also likely to scoop in water and debris kicked up by the front wheel or by traffic in front of you (if there is any), depending on road and weather conditions. If you use this type of vent, I'd make sure it leads only to waterproofed areas and cannot enter the general upper box area.
Or you could instead create a vent input that doesn't face forward, or has a "U" bend (like a greasetrap in piping) that can settle out debris/water/etc for later cleanout (perhaps a "dump door" in the bottom of the U).
forcing it between this 3 cm gap, over the controller heatsink. I'll than reroute the air via a duct to pass over the motor.
You're probably going to need a fan to do that effectively--it's likely the controller/etc will see more heating at start/stop traffic or other potentially slow-moving times than at high enough speeds to be able to force air over things. Squirrelcage, basically like this random google find:
https://www.amazon.com/12VDC-Squirrel-Cage-Brushless-Blower/dp/B00HWZ5XGC
31-0bajydeL._QL70_ML2_[1].jpg
will probably work best in limited space. They take air input from the round side opening(s) and force it out the slim rectangular one, so are good for forcing air thru heatsink fins, for example. But you can also set them up to exhaust the air from the space, forcing input from the intake vent.
If you're definitely going high enough speeds to scoop air in, I'd reocmmend using NACA ducts on the sides if they're practical, to let airflow past the sides pull air thru the system. Don't know if it's more effective than the scoop, but it could take a big scoop to move enough air to be useful, bigger than you can effectively fit.
I just need to figure out how I'm making the box/housing. I want it to be servicable, water resistant (puddles on the road, light rain), and also esthetically pleasing (not just a folded and welded up square box).
You might end up with sculpted-form covers that just "decorate" the square box, as a practical solution to aesthetics.
")
For lightness, you could use vacuforming of thick ABS or similar thermoplastics; the molds can be as simple as wooden forms with sufficient holes drilled in them and a large air tank evacuated to vacuum as the pull-down source; space heaters can be used to heat the ABS sheet prior to molding.
Serviceably-water-resistant isn't all that difficult; waterproof is another thing entirely. For water resistant, then if you install drain holes at the lowest corners of the box any stuff that does get in can at least get out.
If the service access panels and the panels they attach to are stiff enough, then simple gaskets on the access panel edges should be sufficient to reduce intrusion acceptably. If you have the thickness / width available, you can use panels that don't just sit outside the openings, but have "bubbles" that intrude tightly into the openings, with a second gasket that it pushes out of the way a bit to create a second layer of seal, in addition to the one on the outside lip. The bubbles would also stiffen the panels. Somewhere around here there is a design like this that's actually been built, and has CAD images (not sure if the files are there) showing how it fits together, but I can't find it ATM. I think it's from 2-3 years back.

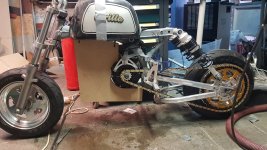
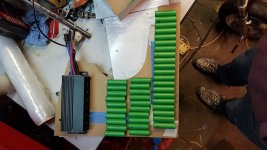
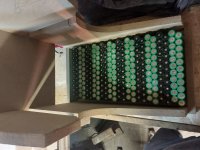
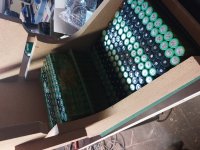
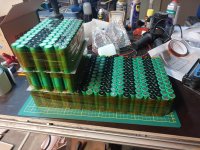
 I already have the single batch batteries, I won't add other batch batteries, so 20s22p it is.
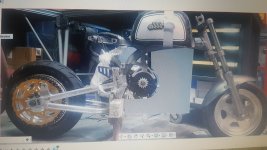


![31-0bajydeL._QL70_ML2_[1].jpg](https://endless-sphere.com/sphere/data/attachments/181/181645-1f4cc017ffdd32598c127bf9e00307a9.jpg "31-0bajydeL._QL70_ML2_[1].jpg")
 .
.