How To, 50A BBSHD Controller Mod

tomjasz said:
I've seen a few pinched harnesses that have created an error 30. Zip ties were so tight the really thin inner wire (wires) got damaged. Not real common but it happens.

You may be right. New display still gives me 30h with the second controller. Speedometer doesn't work either. New controller should arrive after easter. If that doesn't work, it's the harness.
 
Can someone help me confirm the resistor I need to purchase. I was planning on just ordering a few 5mohm ones. I found these:
https://www.mouser.com/ProductDetail/Ohmite/PCS2512FR0050ET?qs=%2Fha2pyFadugPk6gW6%252BdK6D2FK1q4IHDs6ciPRkWWrNZDuBqP8DKxF%2FTVRcVaGdje

And

https://www.mouser.com/ProductDetail/IRC-TT-Electronics/ULRG252512R005FLFSLT?qs=sGAEpiMZZMvdGkrng054t4PceZtIQCwR0QGzX0x2KDo%3D

Would these work?

Edit: I only plan on using 1 and doing the 45A mod, but I did wonder if it would be possible to put a 3mohm there or would that cause an imbalance and heatings issues or who knows what?

Thanks
 
Smaller than I thought they would be. I'll get around to giving it a shot soon. Probably just going to add 1 5mohm and be at 45A.
20210509_113221.jpg
 
E-mil said:
BBSHD Voltage mod evaluation of options
file.php

Hi all,

I already have a light "stealth" eBike with a small hub motor and I am running it with 2x 18V Makita drill batteries in series (2x 5s = 10s). That works pretty well.

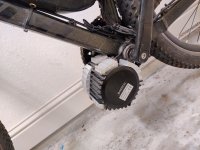
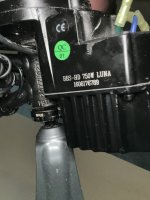
Now I am thinking of upgrading my downhill MTB with a BBSHD with a similar tactic. It must be a BBSHD since my bottom bracket is about 93mm wide.
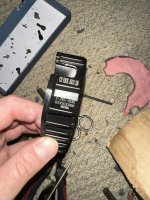
I further like the 500C display that seems to be able to handle 24V/36V/48V/60V nominal voltage?!

The question is with which battery configuration I should go:
1.) 36V = 2x 18V (10s), (~42V max), as in my other bike but maybe too weak for the BBSHD?
2.) 46.8V = 2x 18V + 1x 10.8V (13s), (~54.6V max), needs 2 different types of batteries that I both already own, but it's a kind of battery mix then
3.) 50.8V = 2x 18V + 1x 14.4V (14s), (~58.8V max), needs 2 different types of batteries and I would need to buy the 14.4V batteries
4.) 54V = 3x 18V (15S), (~63V max), pushes to the limit of the stock BBSHD?

I would use batteries from the same manufacturer with the same cell capacities (3Ah 2p = 6Ah) and connect two serial lines in parallel with ideal PV diodes to prevent back currents. The result would be a 10s4p, 13s4p, 14s4p or 15s4p pack.

I personal would prefer the 54V (15s4p) solution since I would get the maximum performance and I already have many of these 18V batteries. But I am still not sure if it is worth to potentially run into troubles with the display and/or the controller.
I read that the resistor/diode display mod may or may not be needed.
The question is if this is still the case for the 500C display that should support 15s out of the box? Or is it an overvoltage protection inside the controller that must be manipulated over the display line?
I measured the max voltage of the drill batteries and I measured 20.7V. So for 15s I would get about 62.1V max instead of 63V. The ideal diodes (MOS circuits) may also have a very low voltage drop that may come handy. In my calculation the diodes should correspond to a resistance of 1.2mOhm and the voltage drop would be then something between 10mV and 20mV and that's to low to give a margin to the overvoltage. However, could this still work without modifying the display line of the 500C and without changing any capacitors of the controller? How good are my chances that this will work out of the box?

Performance of the motor is not so important for me as long as I always can climb every hill by selecting a lower gear. The bike currently has a SRAM eagle group on it. So I personally think that 750W could be powerfull enough for me but I am still not sure if a 10s is good enough in combination with the heavy BBSHD. And I don't like the higher currents.

Thank you for your work and I hope you could give me your opinions which way I should go.
 
To follow up, if anyone cares: it turns out that I screwed up both controllers, which were both giving me 30h errors. Don't know why. Guess I was too rough.

Anyway, I got a new controller last week from bafangusadirect. It was a blast, better than any other bafang controller I've had. It doesn't quite have the pickup that the shunt modded controller had, especially when accelerating into corners, but it has more top end, reaching speeds of up to 36-37 mph, whereas the other controllers could only do 33-34. The throttle is also less jerky and the PAS is more sensitive (had to tone it down quite a bit). Although is says 48v, it works with 52v and 30 amps, giving me over 1700 watts. Works fine. Don't think I need any more.
 
Did this mod and I'm happy with how it turned out. Power down low is definitely improved when in gears 1~3 (finally seeing some power wheelies while not trying to in 1~2 :twisted: 46 to 12 8 speed cassette) but it seems to have diminishing returns after (at least from what I remember), I would love to pin it against a stock bbshd in person to compare side by side. I'm currently running a 46t front chain ring so I'm thinking I should look at 42t to keep a good top speed while gaining more torque. Overall it took me around 4 hours from start to completely finished. Nothing overly hard just consuming, oh and the nice nasty shock when trying to remove the potting around the shunts with a X-Acto knife :oops: . I thought leaving the motor unplugged for a day was enough but I guess not, learned in another thread to turn on the display without the battery connected and then a resistor on the battery leads. That definitely shook me up and I wasn't taking another chance so went to a plastic tool to finish removing the potting as well. Oh and I replaced the dried up thermal paste that wasn't even touching metal but potting compound (made sure to shave that off so it was exposed metal) with some decent cpu stuff I had to help with temps.

I was going to take more photos but that shock completely made that idea leave my mind, I used the drill a hole and use screws to pull it up technique which worked wonderfully, highly recommend this! What I forgot to document was placing a thermistor in one of the holes with some thermal glue to hold it in and give me some temp readings on the controller side which seems to be very close to the motor every time I check with the temp gun. For anyone interested I used a aquarium temp sensor and replaced that with a 10k thermistor, works great I will link these parts at the bottom. I do need to extend the wire though so I can get it under my handlebars instead of under the seat.

I also placed heatsinks all over the motor and controller. I tested these before the mod and while they seemed to only improve the temps by a few c's after a 2 mile torture test loop I did. They seem to greatly help with the cool down time while not pulling the full 30a (or now 45a) though. I needed everything I can get with the 100+f temps I'm seeing in Texas and I actually plan to change the amps in software back down to the original till summer is over cause even with the heatsinks on 30a it was getting quiet hot. We got some rain today so it was around 85f and the controller was peeking in the 130's for a few seconds and being in the mid 110's for most of the ride, still running the stock plastic gear so don't want to push it too hard. Link to these at the bottom too.

(Edit for anyone curious, I ran this for a year and around 1500 miles with no issues. I then managed to get my hands on a lunacycles ludi v2 so this controller went to the shelf. My issues with pas actually did end up being the pas sensor as they followed with the new controller so I fixed that. And for anyone interested running 45a on the ludi v2 made the bbshd feel like a whole new motor, the 45a shunt mod just felt like a decent increase in power. Don't even get me started on the now 65a I run)

Aquarium Thermomter: Aquarium Thermometer Water Temperature Sensor with Digital LCD Display & Battery | eBay
10k Ntc Thermistor 5pcs: 5 pcs 10k Precision NTC Thermistor, High temp wires - USA SELLER | eBay
4x shunt resistors (I used 1 R005 5mΩ on top of the two): 4x Shunt Measuring Resistance Resistor 2W 1% SMD2512 R001-R500 INA Resistance 1-500mΩ | eBay
10*35*10mm heatsink 50pcs (50 should be enough for one motor I bought 100 for extras): 50pcs Silver 10*35*10mm Aluminum Heatsink Cooler With Thermal Tape | eBay
 

Attachments

  • IMG_20220627_112810.jpg
    IMG_20220627_112810.jpg
    1.4 MB · Views: 547
  • IMG_20220627_125707.jpg
    IMG_20220627_125707.jpg
    612.2 KB · Views: 553
  • IMG_20220627_185147.jpg
    IMG_20220627_185147.jpg
    1.4 MB · Views: 553
  • IMG_20220627_185246.jpg
    IMG_20220627_185246.jpg
    1.2 MB · Views: 551
Last edited:
Well, shoot. Took controller apart today and discovered I have the old P75NF mosfets (not the IRFB3077’s). Was planning to up amps to 50A with shunt mod, but is this still realistic? I saw where someone said the replacement controllers from Luna now come with 3077’s. Can anyone confirm? I might go that route and try. Or may have to go that route if this thing never fires up again after I’m done with pulling its guts out.
 
I don’t know exactly. I purchased it from Luna Cycles in July 2016 w/ “Hot Rod” programming.
Thanks. They claimed 3077 then, but the proof is in the de potting. I did support then and was always suspicious of the claims and bailed a month later. @neptronix had a brief role but also bailed after the BS was revealed. Remember that early version had a bad rotor shaft and was upgraded. Doug, founder of California eBikes found an upgrade path for the newer and stouter rotor shaft.
 
Ugh…well, tried hooking up controlled to display to test prior to soldering the resistors and I got the Error 30 failure to communicate message on display. Is it game over, I must have broken something removing the controller from case, just buy a new one now?
 
Ugh…well, tried hooking up controlled to display to test prior to soldering the resistors and I got the Error 30 failure to communicate message on display. Is it game over, I must have broken something removing the controller from case, just buy a new one now?
There was also a big spark when I was looking at where I needed to solder the resistors. Is there a way to safely drain the capacitors so it is safe to work with (realize that spark could have fried one of those tiny components too)?
 
Thanks. They claimed 3077 then, but the proof is in the de potting. I did support then and was always suspicious of the claims and bailed a month later. @neptronix had a brief role but also bailed after the BS was revealed. Remember that early version had a bad rotor shaft and was upgraded. Doug, founder of California eBikes found an upgrade path for the newer and stouter rotor shaft.
Is there a way to know if I have the version with the old/bad rotor shaft?
 
There was also a big spark when I was looking at where I needed to solder the resistors. Is there a way to safely drain the capacitors so it is safe to work with (realize that spark could have fried one of those tiny components too)?
When you unplug the motor from the battery hold down the power on your display, it will turn on for a second or two and then back off, should be drained enough after.
 
Just for information, I purchased an early version of the BBS02 (not from Luna, before they opened) seven or eight years ago and it's worked fine off road on trails with pretty severe inclines since then with neither service nor maintenance.
 
Before I throw this whole thing off of my balcony, fix would be to upgrade main rotor? At this point, should I just go for a whole new kit?
California eBike had the new rotor with proper bearings to upgrade the rotor.
 
California eBike had the new rotor with proper bearings to upgrade the rotor.
Thanks. Do all new BBSHD motors now come standard with the improved rotor?
 
Luna just got another batch of controllers in. Luna has enough buying power to get Bafang to do what they want. Luna also programs their controllers for throttle in 0 assist level so you can moto around.

Thanks. Do all new BBSHD motors now come standard with the improved rotor?
It depends on what you mean by new. NOS ( New Old Stock) is "new" also. The lowest prices may happen there. I would always ask.

BTW I did the rotor/ bearing upgrade and it works great.
 
Back
Top